February Reflections

For being the shortest month, I got a lot of millinery sewing done. Okay, for being any month, I got a lot of millinery sewing done. I made a total of 12 straw millinery pieces this month. Six of those pieces were hats for the Etsy shop. The other six pieces were a special set of three hats and three bonnets for the Victoria’s Closet exhibit at the Wehle Gallery at the Genesee Country Village and Museum. This year the exhibit focuses on the 1850s

This month I was determined to make a dent in the sewing/millinery room, which was still almost entirely in boxes. I unpacked almost all of the millinery blocks. The wooden blocks live in the former fabric cabinet. The plaster blocks moved out to the hallway bookshelf. While I am still not in love with the bookshelf being in the hallway, I do really like seeing the plaster bonnet blocks lined up on one of the shelves.

February recess allowed for a day designated to a great purge of sewing materials. I emptiedeach box and tote, sorting and separating. Paper bags now line the dresser, each with people’s
names on them. Several empty boxes went to recycling, along with two bags for the garbage. I have two boxes, two bags, and some miscellaneous stuff packed up for donation. Some of the
sorting got emotional because there are a couple boxes I hadn’t opened since New Mexico.There was ugly crying there.

For my birthday, I allowed myself to buy one doll. At first glance, she is a rather odd-ball doll with proportions that just seem off. On closer look, she is a much repaired doll. Her upper torso appears to be the oldest and maybe, possibly original to her pretty head. From her waist down, she was repaired in a sorta added onto way once or twice. At some point she go bulky legs that are what really throw her scale off. Her stockings are hand made. Somewhere in the whole process, she got new arms as well. Since it looks like her head was glued on after her arms, I am not even sure if her head belonged to this pieced body. So, I keep changing my mind on whether to leave her head on this body or make her a new one that will let her sit with the other dolls. (she can’t sit right now.)

I am working on figuring out how to make my own plaster blocks. I thought this would be a sensible replacement for the carved foam blocks that just don’t hold up. Not so much. This process I thought would not take long has become a month long process that still is not done. “Dries in 24 hours” is far from an accurate statement. I’ll get into the details in a seperate post….When they are finished.

I did do a quick modern project. A year or two ago, I discovered I like pillows made fromsweaters. So, I picked up two springy sweaters from Goodwill to make pillows out of. The white
one is ridiculously soft. Love it.

Published in: on February 27, 2019 at 8:39 am  Leave a Comment  

Refinements Challenge

Research evolves as more resources become available. Sometimes, it is “Wow research really evolves.”

This is great. How it should be.

But … there are those favorite things that we put so much time into researching, years ago; checking and double checking the details, making sure it is as correct as possible. We have used them for years. We absolutely love them … Yet, with all that new research…. they’re just not as good, as correct, as they once were.

These are old research items living in a new research world.

Take a Deep Breath….

….. It is Time….

It is time to let it go. You learned so much researching it and making or choosing it. It has served you well.

It is time for a personal Refinements Challenge

The Refinements Challenge:

  1. Select 1 material culture item or clothing accessory you currently use that is based on old research.
  2. Make a plan to replace this item, including how you will use newer research to determine what is correct and a timeline with replacement goal.
  3. Replace your retired old research item with an improved new research item.

I invite you to share the item you chose to retire in the comments below. When you do step 2 and develop your plan, please share that as well. Of course, as you accomplish your goal and complete the challenge, share your new item as well.

Local folks are invited to share their Refinements Challenge on the GVHI Facebook group.


My Refinements Challenge Choice:

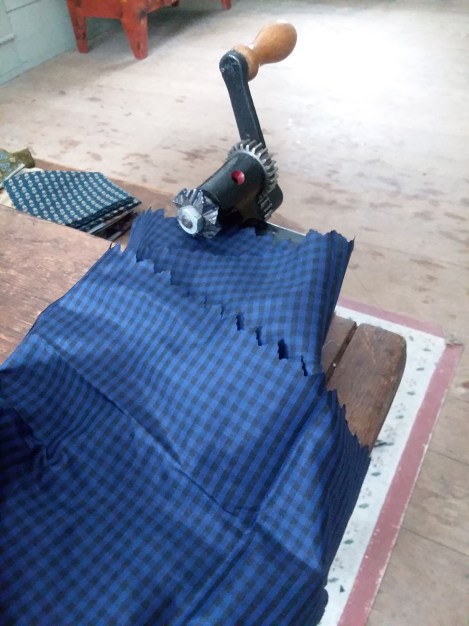
1. The Item: The item I’ve selected to retire is my much loved carpet bag. I love this bag for many reasons. It was much loved by my dear Cleo. The frame was hand bent by my Dad. The plush deep red upholstery is the remnant of the chair I reupholstered for him. It is just the right size to fill and still be able to carry.

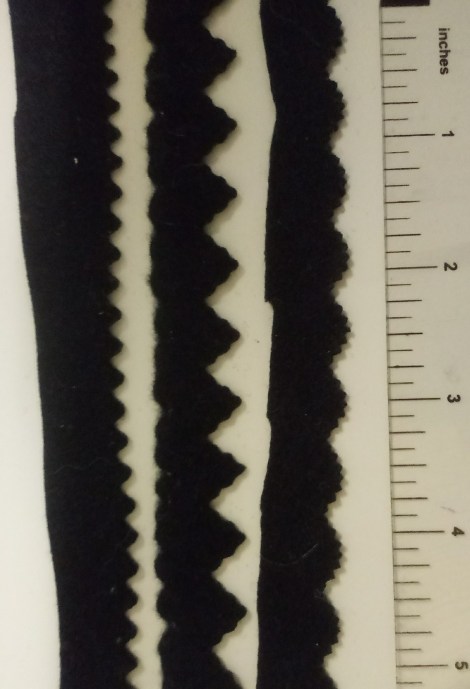
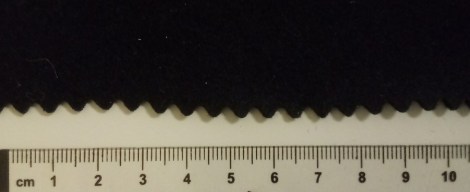
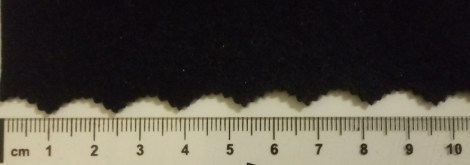
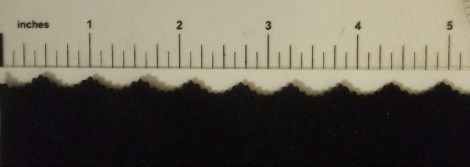
The bag was acceptible when it was made 15 years ago. It is still better than many bags curently in use. I just want a bag that is exceptional for reviving my traveling impression. Correct ingrain carpet. Correct construction.

This bag will be retiring to home use.

2. The Plan: I prefer to purchase a well and correctly made carpet bag made from real reproduction carpet. If purchasing proves to not be an option, I will acquire reproduction carpet and make my own with the remaining frame I have. (While I do have 2 original ingrain carpets, I prefer not to make a bag of those because original carpet is extremely dirty.) My timeline is comfortably a year because I do not anticipate reviving my travel impression for quite some time. In the meantime, I also want to do an indepth visual survey of travel related paintings to see what domestically made baggage was used, beyond what is currently commonly used.

3. The Replacement: tbd….

Published in: on February 12, 2019 at 7:07 pm  Leave a Comment  

Almost Unpacked

I know. It has been months. I am still unpacking. This post’s title doesn’t even mean all the stuff.

What is unpacked? Well, almost all unpacked?

The plaster blocks!

Because of how delicate these are, I needed to be sure I had a safe shelf for these to live on before unpacking them. After some rearranging, there was finally a shelf

Don’t the bonnet blocks look happy all lined up in a row?

Of the bonnets, Serenity is not yet unpacked. She won’t fit on this shelf.

In fact, although I had pictured the smaller bonnet blocks and the hat blocks fitting on this set of shelves…. I was wrong. As you can see this block definitely does not fit. I am just not comfortable with a 150+ year old piece over hanging like that.

While we are looking at this block…. Does this shape look familiar to anyone? If you’ve been watch PBS’s Victoria, you will have seen a similar shape worn by several women in episode 3.

Hanging out, and fitting, on the shelf is the mystery hat block. This nifty shape is one I have yet to connect with examples of what it made. The waves brim is quite unique.

I will be writing posts soonish about each block and what shape bonnet or hat it makes. I thought people would like that.

Published in: on February 9, 2019 at 5:25 pm  Comments (2)  

The Pinking Machines

Not really a post. Just putting the pinking machine photos together for someone. I really should make this into a post about each machine at some point.

The Gems and Gem styles start in the 1860s. The Columbus come after. (I have a stack of their patents if needed.)

Published in: on January 29, 2019 at 7:58 am  Comments (1)  

January Reflections

This year, I want to do end of the month reflections. This is an entirely selfish endeavour to keep track of what I do each month and have a little “feel good” over what I have accomplished.

This month, I finally made Mi a dress, made 7 hats that went up on Etsy, and worked on a coat that now has 1 arm. I had friends over, for the first time in a long time, for an informal “sip ‘n sew”. I hoppednover to the museum for a corset workshop, part 1. Part 2 tbd.

Here is Mi. The fabric for Mi’s dress was the perfect little scale. Her dress had to be sewn on to her tiny self. For more on Mi, be sure to check out my other blog Don’t Paint the Cat.

7 hats for January… These were each fashionable hats, one being a “fancy hat”. The decorated one is still available as I hit post.

The one sleeve coat was originally meant to be worn to Seneca Falls. But single degeee temps and a coming storm kept me home. Oh, it would have had the second sleeve for the event if I went. When it is finished, it will have both sleeves and a quilted blue silk edging. This coat will replace 10 and 15 year old coats, one disintegrating from over wear and loose weave, the other having the plague.

I had a new original plaster bonnet block arrive. A friend found it for me. I will be posting about that soon-ish.

For home, I started my portrait wall. The symmetry rebellion is pleasing. Who knew.

Looking forward to February… February will focus on the 1850s for a special grouping….I unpacked Serenity, the big wood block … I made two softly curved crowns that will be my first attempts at casting in plaster. I am finding the foam blocks just don’t hold up to the blocking long-term. Fingers crossed this works….I decided one day of February recess will be dedicated to sewing stash sorting…. I need to name the newest bonnet block….

Published in: on January 27, 2019 at 10:42 am  Leave a Comment  

Post Abdominal Surgery Corset Notes

Sitting here in the corset workshop, I am realizing I should share some of my thoughts on body changes after surgery and wearing a corset. Please keep in mind these are my personal thoughts and observations. They may or may not apply to others.

Background:

Two summers ago, roughly a year and a half, I had four surgeries due to a gallbladder insurrection sticking gallstones in my bile ducts. I have residual problems with my pancreas, liver, and drain scar tissue swelling.

Corset related results:

The most immediate problem was trying to participate in events between surgery 2 and 3. I could not handle any pressure on my rather ballooned abdomen. The biggest worry wasn’t my corset, but the pressure and weight of skirts and petticoats. I opted to wear a combination of my Regency short stays with some bust adjustment, and a skirt support what transfered the weight of the petticoats to my shoulders. Please see this post for those details.

Fast forward… My first attempt at wearing my corset, I discovered just how much asymmetry resulted from organ removal. The gallblabber is fairly central as organs go. On my body, my left abdomen got smaller and softer. My right abdomen got bigger and tougher. This is also the more sore area. My bust was also effected. My right stayed pretty much the same. My left softened and sagged. In a corset, this means three things:

  • The right side doesn’t want a tight corset. It also swells up some days.
  • The left side wants a tighter corset. There is almost a cavity over the rib area.
  • The left bust likes to sink into the bust gusset.

The plan is to tweek my current corsets for use this year. Then make an adjusted one that will meet the needs of my body after it has healed more. This will also let me tone my abdomen and drop the extra fluff I gained in the past few stressful years.

The current corset is going to get a crescent of padding in the bottom of the left bust gusset. The cup area will get some quilting to add firmness. Dresses may need bust padding to smooth from the shoulder through the bust. The rib area on the left will get additional support. It may also get a little dart pinching bulk out. The goal is smoothness and support.

The diagonal \V/ bone placement runs a section of bones over the area where my scar tissue gets irritated and painful. This placement protects this area from waistbands. I am considering expanding the quilting for the hip gusset to cover the rest of this area.

Published in: on January 12, 2019 at 1:00 pm  Comments (3)  

Measuring for Mid-19th Century Hats

There are two factors for finding a comfortable fit: Size and shape.

Size

The difference in wear or placement means we measure for a mid-nineteenth century had differently than we do for a twentieth or twenty-first century hat. The modern hat is measured just above the eyebrow. (This is also where many of us measure for bonnets. We want to keep you on your toes.) For mid-nineteenth century, we measure higher, at the hair line. In this illustration, we can see the difference between where the two measurements would be.

measure

These higher, hairline measurements are often smaller than those taken at the eyebrow. A hat worn at this point can be slightly smaller to slightly larger for comfort. So, add and subtract an inch to your hairline measure.

For example: I am 22.5″ around at my eyebrows and 21.5″ at my hairline. The vast land of the internet tells me that the average woman’s head measures 22.5″ to 22 5/8″ around at the modern measuring point. So, I am about average. I comfortably wear a mid-nineteenth century hat that is 19.5″ to 21.5″

Here is my head with the tape showing where to measure. This is where I wear most CW era hats. This is the circumference of my head. My measurement is 21 1/2″. (Note: this is a full inch smaller than the modern measurement take lower.)

General guidelines I use:

  • Small = Less than 21″ at the hairline (crown less than 20″)
  • Average = 21″-22.5″ at the hairline (crown 20-21.5″)
  • Large = Greater than 22.5″ at the hairline (crown greater than 22″)

Shape

It is helpful to know whether your head is more round or more oval.When looking from above, some people have rounder heads while other have more oval heads. I have an average oval head. Very round hats don’t work for me without adding to the lining.

round oval
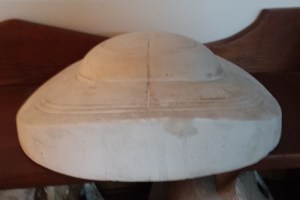
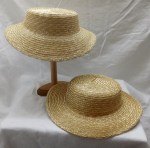
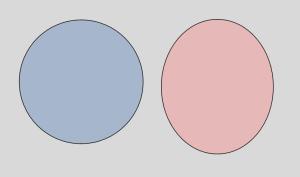
Hat blocks can be more round or more oval with the same circumference. To illustrate: Both of these shapes to the right can have a circumference of 22.5″. Yet, the same hat would fit each head differently.

Published in: on January 10, 2019 at 9:01 pm  Comments (4)  

Millinery 2019

Aka “How Do I Buy a Hat or Bonnet?”

I feel bad when people message me saying “The hat I wanted already sold.” I want to be able to get everyone the millinery they want. Here is a little guide to how to buy my straw bonnets and hats.

This year, I will be trying to make and post 6 straw hats or bonnets each month during the school year. This means one or two pieces each week. During the summer, I will be sewing full time as my sole income.

I sell all of my straw millinery through my Etsy shop.

Pieces can sell quickly. Sometimes that is days. Sometimes that is hours. Sometimes that is minutes.

Be The First To Know

The best way to know new millinery is available is to subscribe to this blog. I post pieces here as I post them on Etsy. To subscribe and receive emails for each new post, look under my photo to the right for the subscribe box that says “enter your email address.

It is a good idea to know what size and style you want ahead of time so you don’t second guess yourself. Take a look at my post on hat sizes and measure your head. Then browse my blog to look at the different styles I offer.

When you see a piece you like, click on the orange Etsy button, also found under my photo.

My Millinery

I focus on two types of millinery: straw plait millinery and quilted/wadded winter millinery. All of my straw pieces are hand sewn using historic techniques. I use both original bonnet and hat blocks, as well as hand carved blocks for blocking my pieces. I use two different millinery sizings. While I primarily offer straw forms, I occasionally offer fully decorated pieces. When I do, I use appropriate techniques and as accurate trimmings as possible. Given the likelihood that antique silk ribbons will shatter or fracture, I strongly prefer not to use them in pieces to be worn. I want you to be able to wear your millinery for years.

.
Eras

I am slowly expanding the time periods I am creating pieces from. As of January, this is a rough outline:

  • 1400-1600s – Researching
  • Late 1700 – Starting to look at
  • Regency era – Developing appropriate shapes.
  • 1820s-1830s – Dabbling.
  • 1840s – Working off an original block.
  • 1850s through 1864 – Making a variety of bonnets and hats
  • Bustle era – Making occasionally. I am eyeing a couple original blocks.

Sizing

For sizing, please be sure to read my posts on sizing and fit.

Working with original blocks, I find these bonnets and hats feel “average” to “small” for most modern women. Most of my pieces are average to small. I do try to regularly make average to large pieces as well. Each Etsy listing will have measurements.

  • Small is 20″- 21″
  • Average is from 21.5″-22.5″
  • Large is 23″-23.5″, maybe 24″

.

Pricing

I will do my best to keep millinery pieces as affordable as possible. Please, keep in mind each piece is entirely hand crafted, that I hand sew each row of straw, and I hand select each trim used. With the current cost of straw, necessary materials and shipping, undecorated straw forms will start at $110. Variations in straw, style, and (brim) will influence the price.

Orders

I am currently not taking requests or commissions or orders. I would love to be able to. I am simply too far behind in last year’s request list to take any more at this time. Goodness, I still have an amazing custom dyed strsw from two summers ago to make up.

I will not do sales outside of Etsy because Etsy is also how I keep track of sales.

Winter Millinery

I am not sure if I will be offering winter millinery this year. I really want to destash much of my over stashed sewing stuff before I unpack silks for sewing hoods.

Let’s see. What have I missed?

Published in: on January 3, 2019 at 9:07 pm  Leave a Comment  

2 Hoods – A Quick Look

This week, my collection of winter hoods and ribbons came home. A friend was housing them during the relocation. Among the boxes was a shipping bag containing the last two pieces I bought before life got disrupted. I never even unpacked them. I think they got as far as the freezer, that is it.

I want to share some quick photos of each of these. I still need to sit down with each to really look at the construction and details. That will be when I don’t have a head cold. So, these are just first look thoughts.

This is an adult size hood. The exterior fashion fabric is a black taffeta with a satin weave dot. It was received with the brim folded back. Black lace is attached to the edge of the brim. I will examine this process closer.

The exterior appears to be constructed of two pieces – a single brim, crown, and sides of the bavolet, with a trapazoidal piece for the back of the bavolet. I will look closer at this when I sit down with the piece. The back is gathered where the bavolet meets the crown.

Close-up of the fabric:

Close-up of the lace:

The interior uses a shot silk and a polished cotton. The silk has shaed of gold, green, and purple depending on how the light hits it and where the soiling is. The diamond quilting is only through the silk and batting. The rectangle placed on the lower part of the brim may be a patch as the opposite side has a different shaped piece of polished cotton.

This second piece is a child’s size. The exterior is a solid brown. Fibers tbd. The exterior is quilted with sets of three narrow rows. These narrow channels may have cording in them, tbd. The seam between the crown and brim is piped. The seam connecting the crown and bavolet may have the cord applied on top. I need to look closer. The brim folds back to show a plaid which is constructed from ribbon.

This may also be made from two pieces – a single brim and bavolet, with a crown piece. I need to look closer to see if I can find a seam connecting the bavolet to the brim, because I did not see one at first looks.

Notice there is no easily visable seam along the bavolet area. It may be skillfully hidden in the quilting. Or, there may not be one.

The interior is made with two solid fabrics, tbd. The whole of the brim and bavolet are lined with the pieced plaid silk ribbon.

I am pointing to the only seam along the bavolet I’ve found. This is nearly center back.

Published in: on December 23, 2018 at 1:29 pm  Comments (1)  

Anatomy of a Drawn Bonnet

The technique of drawing silk or sheer fabric on to cane spanned millinery through most of the nineteenth century. The look can be absolutely stunning when done correctly.

This is one of those garments or accessories where it is absolutely essential to understand the construction of originals before embarking on a piece of your own. Luckily, Dannielle Perry has already written a beautiful book on drawn bonnets compiling an extensive grouping of extant examples. Buy this book!

Capture+_2018-12-20-11-49-53.png

As you read and look at originals, please note the anatomy of a drawn bonnet and its key aspects.

Anatomy DB2

A drawn bonnet is built on a foundation. This foundation was frequently willow, net, or buckram over a wire frame. This foundation gave the bonnet structure and the fashionable shape of the season.

The foundation helped define the main components of a bonnet: the tip, the crown, and the brim. While the drawn bonnet did create some variations in the shaping of these three areas due to the nature of the drawn silk over cane, these areas are still found on the vast majority of extant period drawn bonnets. Notice how the bonnet on the right has a round tip. This is a circle or an oval in nearly every Civil War era bonnet. Even when the bonnet has a “soft crown” such as the bonnet on the left, the basic shape underneath is still round for most bonnets. (There may be some exceptions in the minority. Dannielle – Is this the case for the brown and black bonnet on the second row all the way to the right?)

The beautiful texture that makes a drawn bonnet so very appealing is created by combining the silk and the cane or wire, upon which it is drawn. The fullness of the gathers, the spacing of the cane, the puffing of the silk between the cane, all create different looks. This is done with hand stitching to keep the gathwrs light and airy. Most drawn bonnets combine different spacing and gathering amounts to move the eye around the bonnet.

Sadly, there are some interpretations of the drawn bonnet that are promoted that simply do not have the basic construction elements of original drawn bonnets. Please avoid bonnets without a foundation, as well as bonnets that are drawn on plastic “bones.” These simply no not reflect the construction or look of the period.

If you want to learn even more about drawn bonnets….. Good News! Dannielle is teaching a class on drawn bonnets at this August’s Corsets and Cravats. Capture+_2018-12-20-11-44-35-1.png

Published in: on December 20, 2018 at 5:32 pm  Leave a Comment