2011 Workshops and Conferences….

I’ve been invited to speak at several workshops and conferences over the past months. While I would absolutely Love to, I can’t commit to any until we are relocated and have everything settled down. Since I can’t go, the very least I could do is share the 2011 workshops and conferences I am aware of.

January

 Corset making workshop at Genesee Country Village and Museum (Western NY) – January 8th and 9th. The cost is $50. For more information contact Bevin Lynn (link to come)

Mid-Western Civil War Civilian Conference – Friday, January 28, 2011 at 8:00am – Sunday, January 30, 2011 at 12:00pm. For registration and information contact Marta Vincent  or visit www.midwestcwcivilian.com.

Caps – Plain to Fancy with Marta Vincent-  January 8/9 – Hampshire, IL

February

Bonnets – With Marta Vincent  – February 25/26 – Hampshire, IL –

March

 Ladies and Gentlemen of the 1860s Conference (Harrisburg, PA) –  March 3-6

Frontier Women’s Living History Association Conference – (In Texas) Please see thier blog for more information http://frontierwomen.blogspot.com/

Ball Gown Bodice & Berthes – With Marta Vincent – March 26/27

April

May

June

July

August

September

October

November

December


Published in: on November 30, 2010 at 9:02 pm  Leave a Comment  

Masquerade Dress

Now that the Masquerade has past, I can share photos of the dress I was working on. I don’t have any “in-process” photos though. I’m horrible about that. Here is the dress:

And here is my husband and I:

The fabric is one I’ve had for at least a few years. We’ve been calling it my sunset plaid. It is a taffeta weave with thicker threads and moderately tight weave. It is a bit more red then it seems to appear in the photos.

The bodice is just a basic basque bodice with the  basque cut as part of the bodice rather than as an added piece. I generally like this approach. The challenge is getting the lower part of the darts right. I’ve decided to shorten the darts to get a better front flair. I think the front is too flat. I am also going to change the outside dart because that has some pulling. The neckline is actually a jewel neckline just turned down into the V neckline. I couldn’t make up my mind. So, I did it that way. 
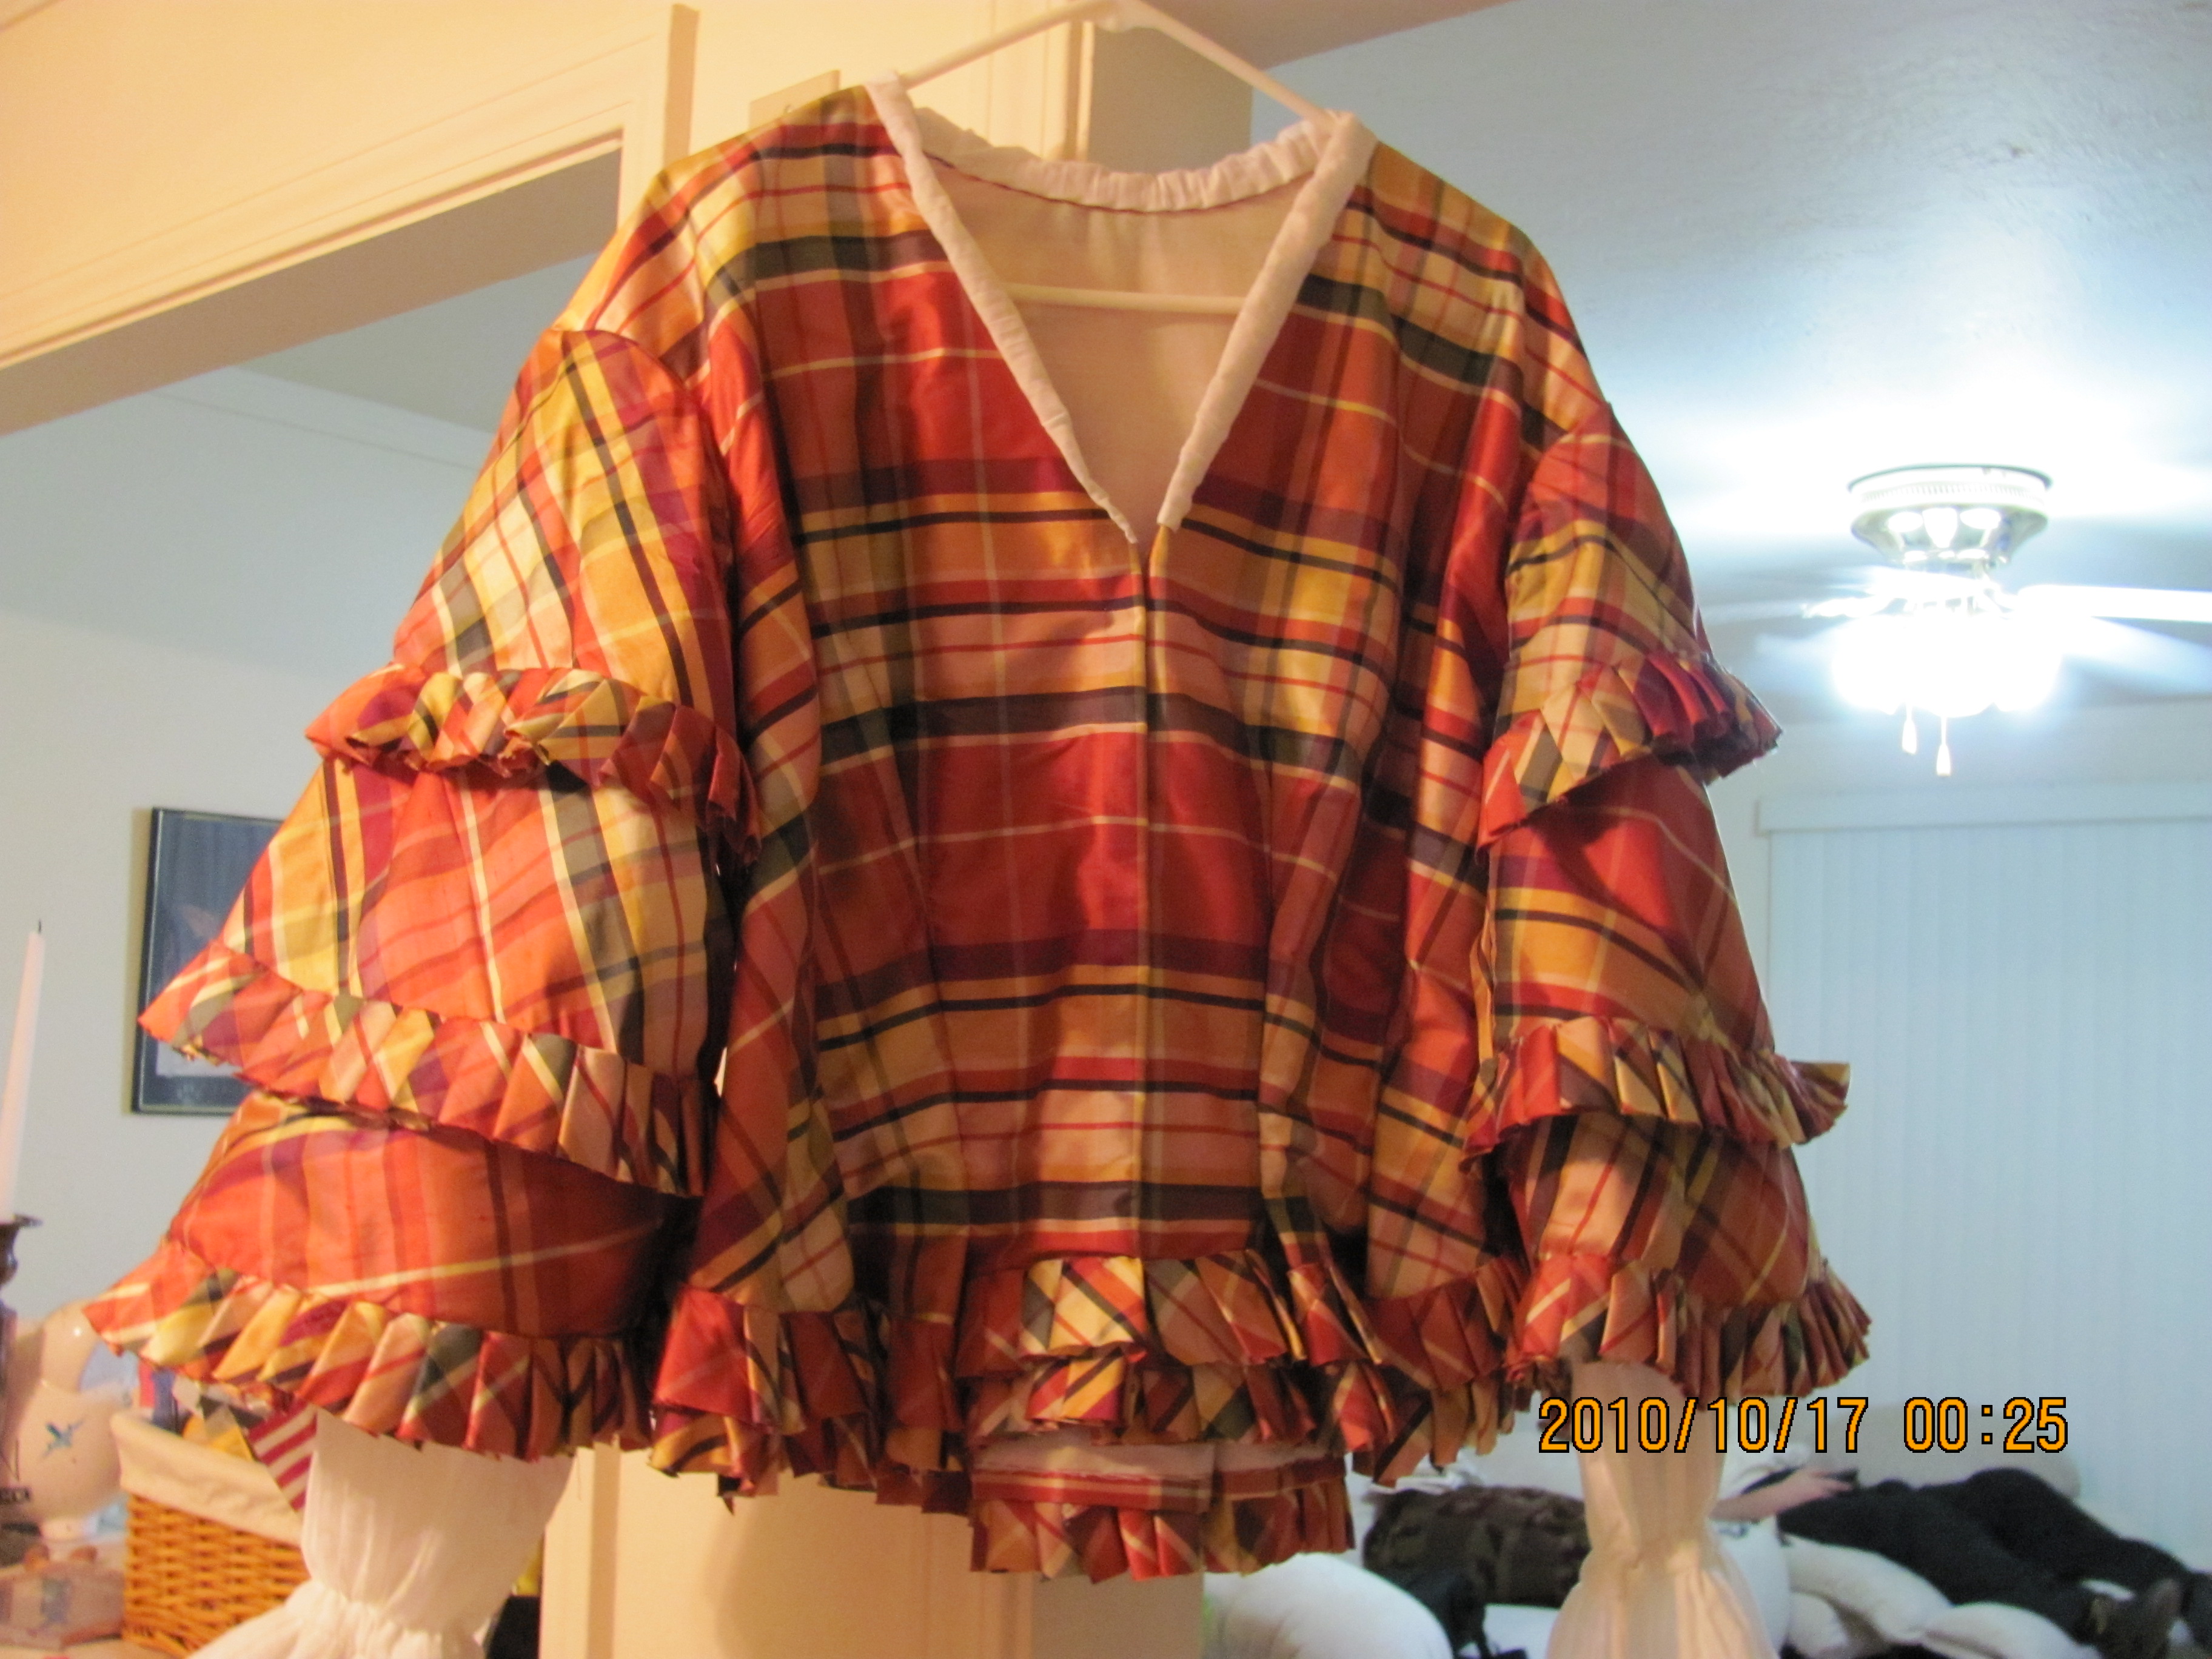
The back is a two piece back. I tried to line up the plaid horizontally. I think I did fairly well given how the pieces curve. The pepulum is shaped with two box pleats underneath the pleating. The trim was actually an after-thought when I had some left.


The sleeves started as a funnel sleeve even though you can’t really tell with the tiers. The base is just muslin. Under the top tier there is some extra tucked out so I can change the sleeve to have the bottom two tiers detachable. For the silk, I took the base pattern & cut it into 3 pieces adding an extra inch to the top of the bottom two for overlap. Each silk piece is cut on the bias. An important thing to know if you want to do this – While three pieces will fit on the straight grain, all three pieces will Not fit in one row on the bias of 60″ fabric. It is most economical to cut each piece open separately where they fit. The undersleeves are a temporary make-do from a semi-sheer fabric I had. They are just tacked inside.

The trim is bias strips pleated with the top edge turned down. There is approx. 10 yards of finished trim for the bodice – two rows around the basque and one row on the sleeves. The 30ish yards of bias came from about 1 yard of fabric.

One last note – Yes, there is a balance thing going on with the skirt. I made the skirt first. Then I didn’t try it on until the night of the event. Oooos. It was a good 4+ inches to big. I did a couple quick tucks in the back to get it to stay up. But, there was still some sagging in the front. So, the horizontal lines dip in the front. I’ll be fixing that.

Published in: on October 18, 2010 at 8:17 pm  Comments (1)  

Projects list….

Some how I’ve developed a project list once again…..

  • Ongoing sewing cases
  • Yoked bodice dress – I don’t have one, therefore I have to have one
  • 19th Century coat – Because I miss mine
  • 21st Century coat – May just be the same one as above (I want a 19th c. one in a different color but for cost effectiveness this may be an all purpost black coat.
  • Dan’s British Rifleman’s Uniform
  • Dan’s muslin shirt
  • Dan’s white shirt
  • Dan’s civilian pants (may purchase those.)
  • Dan’s tbd civilian coat
  • Dan’s tbd civilian vest
  • Medium size leather bag
  • Tiny white silk Regency era bag
  • Regency corset, bodiced petticoat and dress
  • Sunbonnet tbd (since all headwear is in NY)
  • Some ribbony stuff possibly to sell (hairnets and neckbows.)
  • Because I saw the coolest padded bustle made out of a paisley fabric yesterday, I may have to breakdown and make an 1870s or 80s outfit.
  • Then there is at least one surprise project I can’t list online
Published in: on August 22, 2010 at 12:16 pm  Leave a Comment  

Bag Pattern

Here is the pattern/illustration for the bag below inspired two at the MET.

Silk Leather (p1MET bag (p2)

Published in: on August 16, 2010 at 3:06 pm  Comments (2)  

Bags

Since my previous post about wanting a new bag, I’ve decided it would be silly to make what I already have. It is much more fun to make something new.

This first bag is inspired by two bags at the MET. Bag 1 and Bag 2. The originals appear to have the leather center bound. Then the silk whipped to the binding. I opted to work off of a base lining because I think that would make a stronger bag. First I made two muslin circles with one side chopped off. These were sewn together with the straight side turned down to the outside. On the outside I traced the shape of the center piece on both sides. Next I gathered strips of the dark chocolate taffetta I already had cut. Since these were already cut 2.5″ wide, I sewed two together to make them wider. They needed to be wide enough to to cover easily the widest part. (In hindsight, it may have been easier to sew the silk strips together at the end.) I gathered the outer edge of the silk.

If I was going to whip the silk to the binding, I would have turned then end over and gauged like I would a skirt. The gathered silk was basted to the lining along the traced line. I turn the ends to cover the edge of the muslin on each side. (I thought about either using a draw string or elastic to hold the ends closed. I have not done that yet, waiting to see how it works with the open pieces.) I bound the edge of the leather with bias strips of the silk. Since I couldn’t find my needle for the leather, I used the maching. I don’ t like how that looks right now. I may cover that seam with beads. The bound leather was then stitched down over the gathered silk. I ran the needle through just the edge of the silk binding. The straps are on grain cut strips of silk over strips of muslin, folded in so each strap is 4 layers each of cotton and silk. These are whip stitched. The button is a cloth button with the silk gathered over muslin scraps. The button loop is a narrow flat strip of folded over silk. Rolling it would have been better.


The next bag I am looking at making is similar to this 1870s bag found in the NYPL digital archives.

The illustration calls for embroidered enameled cloth, but I have this beautiful piece of blue leather Dan picked up.

The math for the piece will make a bag 12″ wide, 10″ tall and 5″ deep. I think this should make a decent size bag for carrying items through the day when we don’t have a home-base as we are accustom. I haven’t completely decided on the straps. These small straps are nice for the bag above which will carry light stuff. But, I am not sure for a bag that might carry heavier stuff. I’m worried a shoulder strap will look to much like a modern day purse. I want this to be more like a travel bag. So, maybe wider straps.

Published in: on August 12, 2010 at 8:20 am  Leave a Comment  

Bodice Workshop

I have the wonderful oppertunity to do a bodice draping for the local ladies. Now, when I say local, I actually mean from three different states. It was nice to get to meet some of the local reenacting ladies, each of whom were delightful. (I also got to meet several wonderful kitties.) Ann Dixon writes the Frontier Women’s Living History Assoc. blog. She posted some very kind words.

Published in: on August 11, 2010 at 12:31 am  Leave a Comment  

Fort Stanton Event

This past Saturday, Dan and I got dressed and attended an event at Fort Stanton here in NM. I should say we Finally got dressed and attended an event. More importantly, we finally got to dance together as husband and wife.

The event was much smaller then we are accustom to in NY. The site is a large fort begun in the 1850s and working through WWII I think. The buildings cover a very wide range of time. Most of them are arranged around a center courtyard. I like this arrangement. It allowed for a good presentation area, instructional/interpretive spaces in and infront of the buildings and a side yard for the modern food venders. The walk ways were a huge plus as well since it rained on and off most of the time we were there.

After the social, we talked with one of the local reenactors about educational oppertunities. The fort really is an ideal space for a full weekend of instructional workshops and presentations. It looks like we will be doing some of that while we are here.

I fretted all week about what I did and didn’t have with me for the event. I am usually an obsessive planner for events with a packing and a to-do list each made weeks in advance. Most everything is out and sorted, ready to be packed the weekend before. That certianly didn’t happen this time. I didn’t even try on my dress until Thursday evening. This resulted in a panic run to the W store I hate to buy fabric I couldn’t believe I was buying. Then I started sewing. It is a good thing I ended up making a cotton dress as the rain and dirt would have made a mess of primarily white plaid silk.

When Dan and I were driving, we stopped and he picked me flowers. Isn’t he sweet?

Published in: on August 10, 2010 at 2:49 pm  Comments (1)  

Wanting a New Bag

 Over the weekend I was struck with the want of a new carpet bag. In reality, I want one of my carpet bags. But, it may actually be easier to make a new one then to send mom on a hunt for one in storage.

Here is my red plush carpet bag which Cleo decided was her’s. This one really is an ideal size for travel. It isn’t to big, yet fits lots and lots.

I’ll have to look for a photo of my other one. It is bigger with a flat metal frame. It is good for carrying clothes into an event. But, it is a bit big to carry around all weekend.

 The other kind of travel bag I have is this one in Karen Augusta’s collection which looks like a duffle bag.  For a while Shooting Star had an online class for making this bag. It is so easy to make.  

Bevin ‘s Travel Bag http://s136.photobucket.com/albums/q178/canardverte/?action=view&current=travelbag1.jpg

Inside http://s136.photobucket.com/albums/q178/canardverte/?action=view&current=travelbag2.jpg

So, now that I want a bag here, what kind do I want?

Dan’s reaction was that my wanting a bag means more work for him, since he would need to bend a frame. So, maybe I’ll make another duffle bag style bag. Maybe.

I do like the structure of a typical carpet bag:

If I wasn’t making my own bag, the go-to place would have to be the Carpet Bagger.  Another option would be leather satchels made by ______.

Then there are these little carpet bags:

http://www.vintagetextile.com/new_page_12.htm

Making a bag….

The bags at top were made with a pattern Bevin made. I have another idea for a bag with a stronger bottom. If you are looking to make a bag, there are a few resources. For a kit, I suggest seeing if Glenna Jo is still offering her kits. Here are directions from the 1880s.

Frames….. Have I mentioned I like Google’s Patent Search?

Here is one from 1840one from 1863, and one from 1864. There are oodles after 1864.

Other tid-bits

This is a beautiful nameplate with a carpet bag theme.

I made mini versions of the dufflebag style for my doll, Mae and Civility. They were very cute. Mae needs a carpet bag too. Here are direction for a doll sized bag.

Published in: on August 2, 2010 at 2:58 pm  Leave a Comment  

Give Away – From Field to Fashion

In celebration of July, I will be giving away 1 copy of From Field to Fashion: The Straw Bonnet.

Entries are open from now until July 15th at midnight NM time.

To enter….. Either…..

 Post a comment here in the comments section below. Your comment can be about millinery, this blog or other publications of mine.  

or

Post a comment about From Field to Fashion and link to this page on your Facebook account or Blog.  

The winner will be chosen at random from all entries.

Thank you for participating.

Connecting with your Audience – Supplement

While working on the article Connecting with your Audience, I decided I should share some of the activities and techniques I have used. I’m going to throw in some additional stories and observations as well.

Chocolate hands – I’ll never forget this 3 year old girl who was  visiting the art gallery with her family. This little girl had just enjoyed a tasty treat before entering the gallery as her hands were covered in chocolate ice cream. While her family walked with her towards the bathroom, she spied a sculpture of a girl holding a bowl of mini-cobs of corn that was just this girl’s height. She headed right for the sculpture with ice cream covered hands out stretched for that bowl of corn. I’ll admit my first thought was not of this girl’s explorative, hands-on learning experience; it was ‘protect the sculpture’. This is the one and only time I ran across the gallery and picked up a child.

Building a village – Kids are so good at role playing families and thinking up stories. When trying to incorporate mapping into our lessons, the idea of letting the kids build a large map of a village came to mind. We put two tables together, outlined some main roads and a stream leading into a pond. Well, as kids do, they took it one step further. Instead of the flat pieces of paper representing each building in their village, the kids build three dimensional buildings and objects. Pretty soon their village was filled with stores, homes, churches, fences, cemeteries, trees, mills, fields, towers, signs, and more. The kids worked incredibly well as a team making sure every paper building was built well and had a place. To my delight, no one and no object was excluded. They talked about what their village needed. What could go where. Where new roads needed to be. There was a good deal of attention given to the cemetery as well.

Family trees – Each time a group of Pioneer Camp kids looked at the Stone family’s tree, I was amazed on how different their interpretations were. Some groups analyzed the family dynamics. They were interested in who was who to each other (siblings, cousins, grandparents) as well as the ages of the individuals. I remember one girl who was extremely concerned about the ages of the women. Other groups were much more creative with the tree. They learned about the individuals. Then they started creating their own stories, expanding on the family and imagining what their lives were like.

There are many things you can do with family trees. You can have kids create their own family trees. But, if that is a bit to ditto-sheet like for you or your kids, stretch a little further. Provide a visually interesting family tree of the family or families connected with the site you are at or are interpreting. Go one step further, work with a child’s sorting skills (developing in school age children) by creating a family tree puzzles.  For each family member, on a moveable disk, write their name and how they are related to at least one other person. (such as Mary Anne, is the sister of William.) Have the child or children place the people disks on an outline of the family tree.

Artifact puzzles – As children, my brother, a neighbor and I loved to dig through the newly dug drainage creek in the field across the street from our house. We found fragments of dishes that we were fascinated with. We sorted them then tried to figure out which ones went together. (I wish we would have saved some of those pieces.) The act of digging for treasure is almost universal for children. So is solving puzzles.

Working with the camp kids, I found two ways working with artifacts that appeal to kids’ enjoyment of treasure hunting and puzzle solving. The first is giving the kids a chance to dig for treasure in a pre-made dig site. Don’t just stop at having the kids dig up the items. Have them try to figure out the context of their finds and who may have left them. If working with a larger group, divide them into smaller groups with different dig sites each containing artifacts suggesting a different story. (nothing is more boring or disappointing then being the last group with the same information and nothing new to say.)

Another activity the kids just loved was getting to piece together broken artifacts. Each small group would get a tray with a broken artifact. (The artifacts were look-a-like pieces like plates, bowls or cups which were broken ahead of time in a paper bag. The sharp edges were filed with a file for safety.) The kids used tape to piece together their artifact. (tape is quicker and less stressing then glue.) The fun doesn’t stop there. Once their artifact is put together, they kids develop a story about what happened to their artifact, who it may have belonged to and how it broke. Be ready for some very creative and imaginative stories.

Story bag – Children have endless imaginations, love story telling and learn from hands-on experiences. One game Lisa and I developed for an amazing group of kids was the story bag. We filled my carpet bag with antique and reproduction items. Each kid took turns choosing an item from the bag. They could inspect the item to figure out what it was and how it might be used. (they could check with us to see if they were right.) Then they told a story about their object. In another version, a child picked an item without revealing it to the group. They acted out how their item would have been used similar to charades. The group guessed which item it was and how they were using it.

A few observations

Never underestimate the ability of a child – Educators are often required to learn all about developmental stages of children. I highly suggest being familiar with these as guidelines but not letting them dictate your program or activity development. Children are capable of a great many things. Third grade children can learn to do needlework  that will surpass many adults. At the same time, a blind student can learn to do tin punching.

Gotta have limits – It is very important to develop perimeters for any program or activity you develop. At the top of this list is the size of a group. A group of kids that is to large doesn’t work for you and doesn’t work for the kids. You have a difficult (if not impossible) time reaching all of the group. At the same time  the children have a difficulty paying attention to you. I’ve discovered tour groups of 50 children and classrooms of over 100 are just not fair to the kids or you. Set the maximum size group of children your particular activity or presentation can accommodate.

Which games for which kids? – Different games appeal to different kids. Both age and personality can determine which games kids will like. (Also keep in mind weather conditions. On particularly hot days, very active games could result in over exhausting.) Some kids like games where they can sit in pairs or small groups. For these kids games like pick-up sticks, marbles or period puzzles are good choices. Other kids like to be active but don’t like to be competitive. For these kids, consider games like puss-in-the-corner, chase the squirrel, or blind-man’s bluff.

Published in: on May 6, 2010 at 4:10 pm  Leave a Comment