Coming Up

33 degrees!

That is how cold it was this morning on the drive in to work. Brrr!!!! By the way… the car currently has no heat. Did I mention Brrrr!!!!

It is most definitely full on fall here in New York.

With the past few crazy months, I am really looking forward to some happenings coming up.

I have two workshops coming up during the Genesee Country Village & Museum’s Domestic Skills Symposium, November 10th, 11th, and 12th. If you haven’t already, I highly recommend registering for this symposium.

IMG_20170818_153458
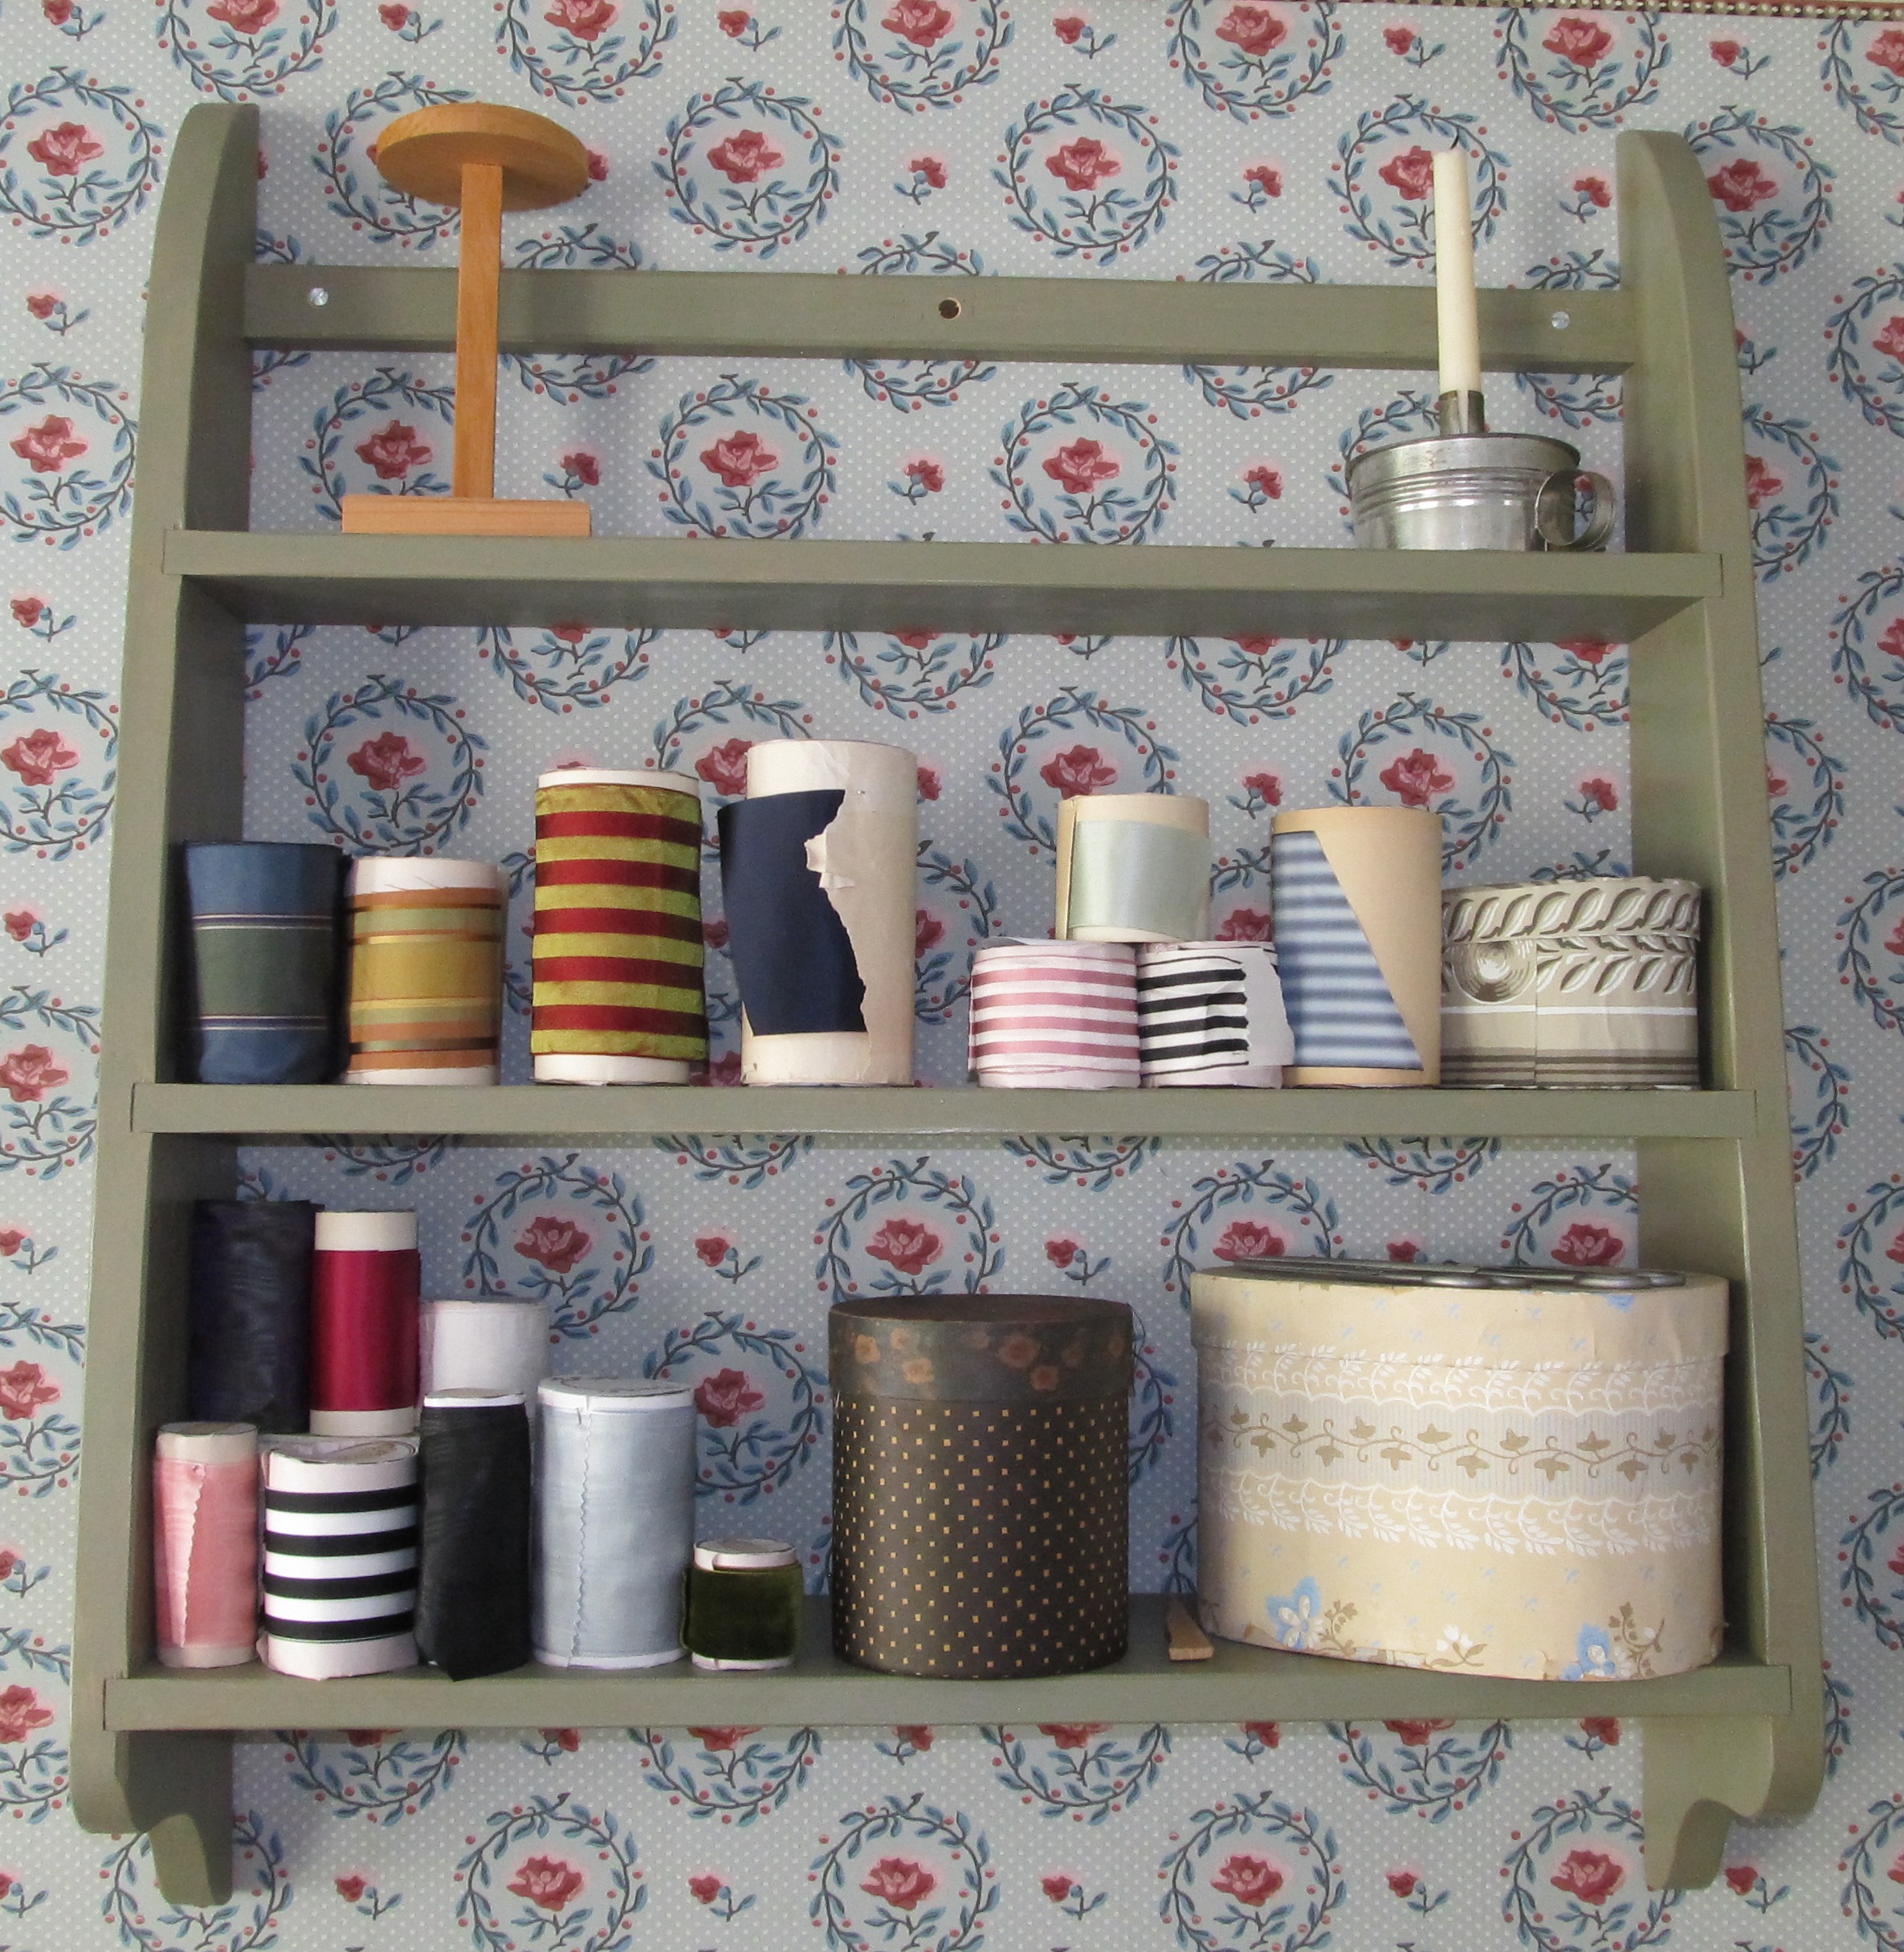
I’ve been cutting the materials for my new Exploring the Work-box: Tools and Trims. This is the workshop held on Friday. Next, I have to make sure I have all the samples organized and pretty. Attendees will be making their own sample book filled with trim samples made with the antique pinking tools I am bringing.  I hope this will be the first in a series of “Explore the Work-box” workshops. Btw, I think I will be naming the pinking machines.

_20171002_181826
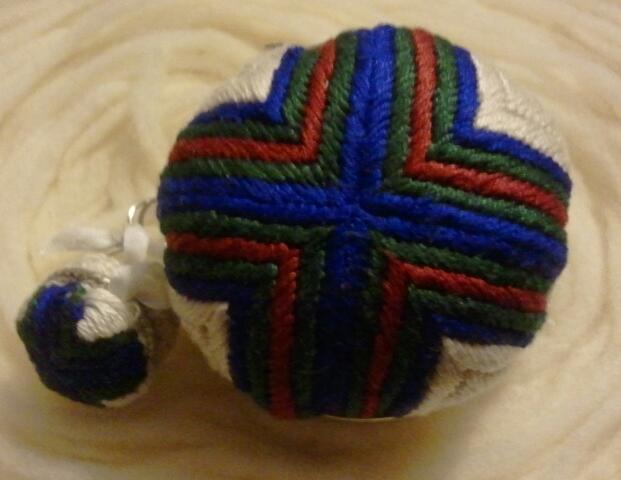
The materials for the Sunday’s Pin Cushion Sampler are almost ready. Well, they have to all be put in one box to make their way to the village. We will be making popular pin cushions of the nineteenth century – strawberries, seashells, walnuts, and acorns.

fb_img_1479602076155.jpgThe weekend following is GCV’s Preparing for the Holiday’s event. This is a great opportunity to see the historic village in the fall as it will be packed full of interpreters planning for the coming holidays and getting ready for winter. Last year, I made strawberry pin cushions by candlelight with a fellow interpreter. The visitors were wonderful, with the best questions. I have yet to decide if I will be making strawberries or walnuts this year.

After that…. I will be working on smaller gift items for the holiday season. I will also be making more winter hoods. I hope to have more writing time because I have two publications I am working on. I am anxious to get To Net or Not to Net: Revisited and Warmth for Winter (Wintering Warmly?) written and available to all of you. If you missed the information on these:

  • To Net, or Not to Net: Revisited. A deeper look at the hairnet, how they wore it, and how to capture the correct look. This booklet expands on the article I wrote about hairnets a decade ago. This updated and expanded research will include extensive photographs and a new details.
  • Warmth for Winter: Sewn Domestically Winter Hoods and Bonnets. A detailed analysis of construction methods spanning fifty years of quilted and wadded bonnets. This e-book will be photo heavy with close-ups of original hoods and bonnets in my collection. (This title keeps changing between Warmth for Winter and Wintering Warmly.)

Lunch? Yes, I still want to do the off-season local history lunches. I’ve fallen behind on planning those, as with so many other thing.

Milliner Shop

In a short hour or so, the Milliner Shop was set up, all ready for the Genesee Country Village’s Civil War event. A big thank you to Anneliese and Lily for their assistance. 

Let’s start with a fun “What’s wrong with this picture?”

In all the preparation for transforming an Insurance Office into a Millinery – bonnet stands , band boxes, appropriate paint, appropriate papers, ribbons, bonnets, hats, veils – somehow I did not think about sitting down …. in a cage… in these three lovely, matching chairs. 

Ooops. Slight problem, especially since each of my chairs were home awaiting their much needed tlc. 

Luckily, I got the okay to borrow two chairs from Hosmer’s . 

Much better.

This even gave us a chance to color check the paint colors. The hat stands are a shade lighter than the chair. Peter tells me Prussian blue had a range of shades, depending on how much white was added. So, mine just has more white. 

Looking around the room:

Here are the three fashionable bonnets on display. Each is one one of the new stands. The one one the left is the batwing soft crown with the blue and plaid silk. The one on the right is my personal bonnet, a soft crown with sheer check organza. Below is a bonnet with a decorative brim using antique straw threads. In the basket below are my slippers and a box of fabric scraps that would make some cute doll clothes or such. I plan not to bring that box back home. 

To the right, is a stack of my recovered band boxes, and my personal bonnet box. This one came from a local stationary shop. It is perfect for holding my bonnet. Atop the boxes is one of my yardsale find stands holding a wide brim hat. This hat is appropriate for a recreational scenario or a dress reform impression. Draped on the hat is an antique lace that may or may not be considered a veil. (Digging deeper into this.) 

In the corner, is a little table filled with assorted bonnets and hats. As we were setting up, I started to think I should have brought my second table and more stands. The top most, on the boxes is a cottage bonnet draped in my newest veil, one I made with silk net and lace. (Coming soon, I will have a post comparing the light control of different veils.) In the center is a coarse straw bonnet that would be worn by a poorer or institutionalized woman. On the left is my example of a woven straw bonnet, by Vivian ! Murphy. The two hats on the stands are children size. The one resting on the table is a large crown fashion bonnet. The top box is the one I made, sewing a heavy pasteboard. The other two are recovered. 

I am tickled that the ribbons filled this mantle. I think it looks pretty”in use” rather than just display. Lily did a nice job. Can you tell which rolls are real and which are fake? 

I forgot to get a photo of the sign. As the lettering was a fail, and despite sanding off the black paint, the tracing depressions show through the new ground coats, it looks very much like the “work in progress” it is. I’ve decided to say the young man who was painting it for me took off to enlist as the trips came near. But, as we expect this fighting to be over by the end of the summer, he can finish it soon enough. 

Agricultural Society Fair – Part 1 – Entries

This year, I decided to give myself an extra little challenge – Make my entries in doll scale. I set this goal for myself at the beginning of the year. While I didn’t manage to find the time to make as many pieces as I wanted, I was able to make few. There are also a couple human size pieces as well.

IMG_7915Since I spent so much time this summer making straw hats and bonnets, of course, I needed to make a pair of straw hats, one doll scale and one human scale. The full size straw hat was a favorite of this summer with its bias plaid silk lining and calla lilies. The doll hat is in the same style, simply trimmed with ribbon. If I ever find lilies small enough, I will be happy.

IMG_7921IMG_7917
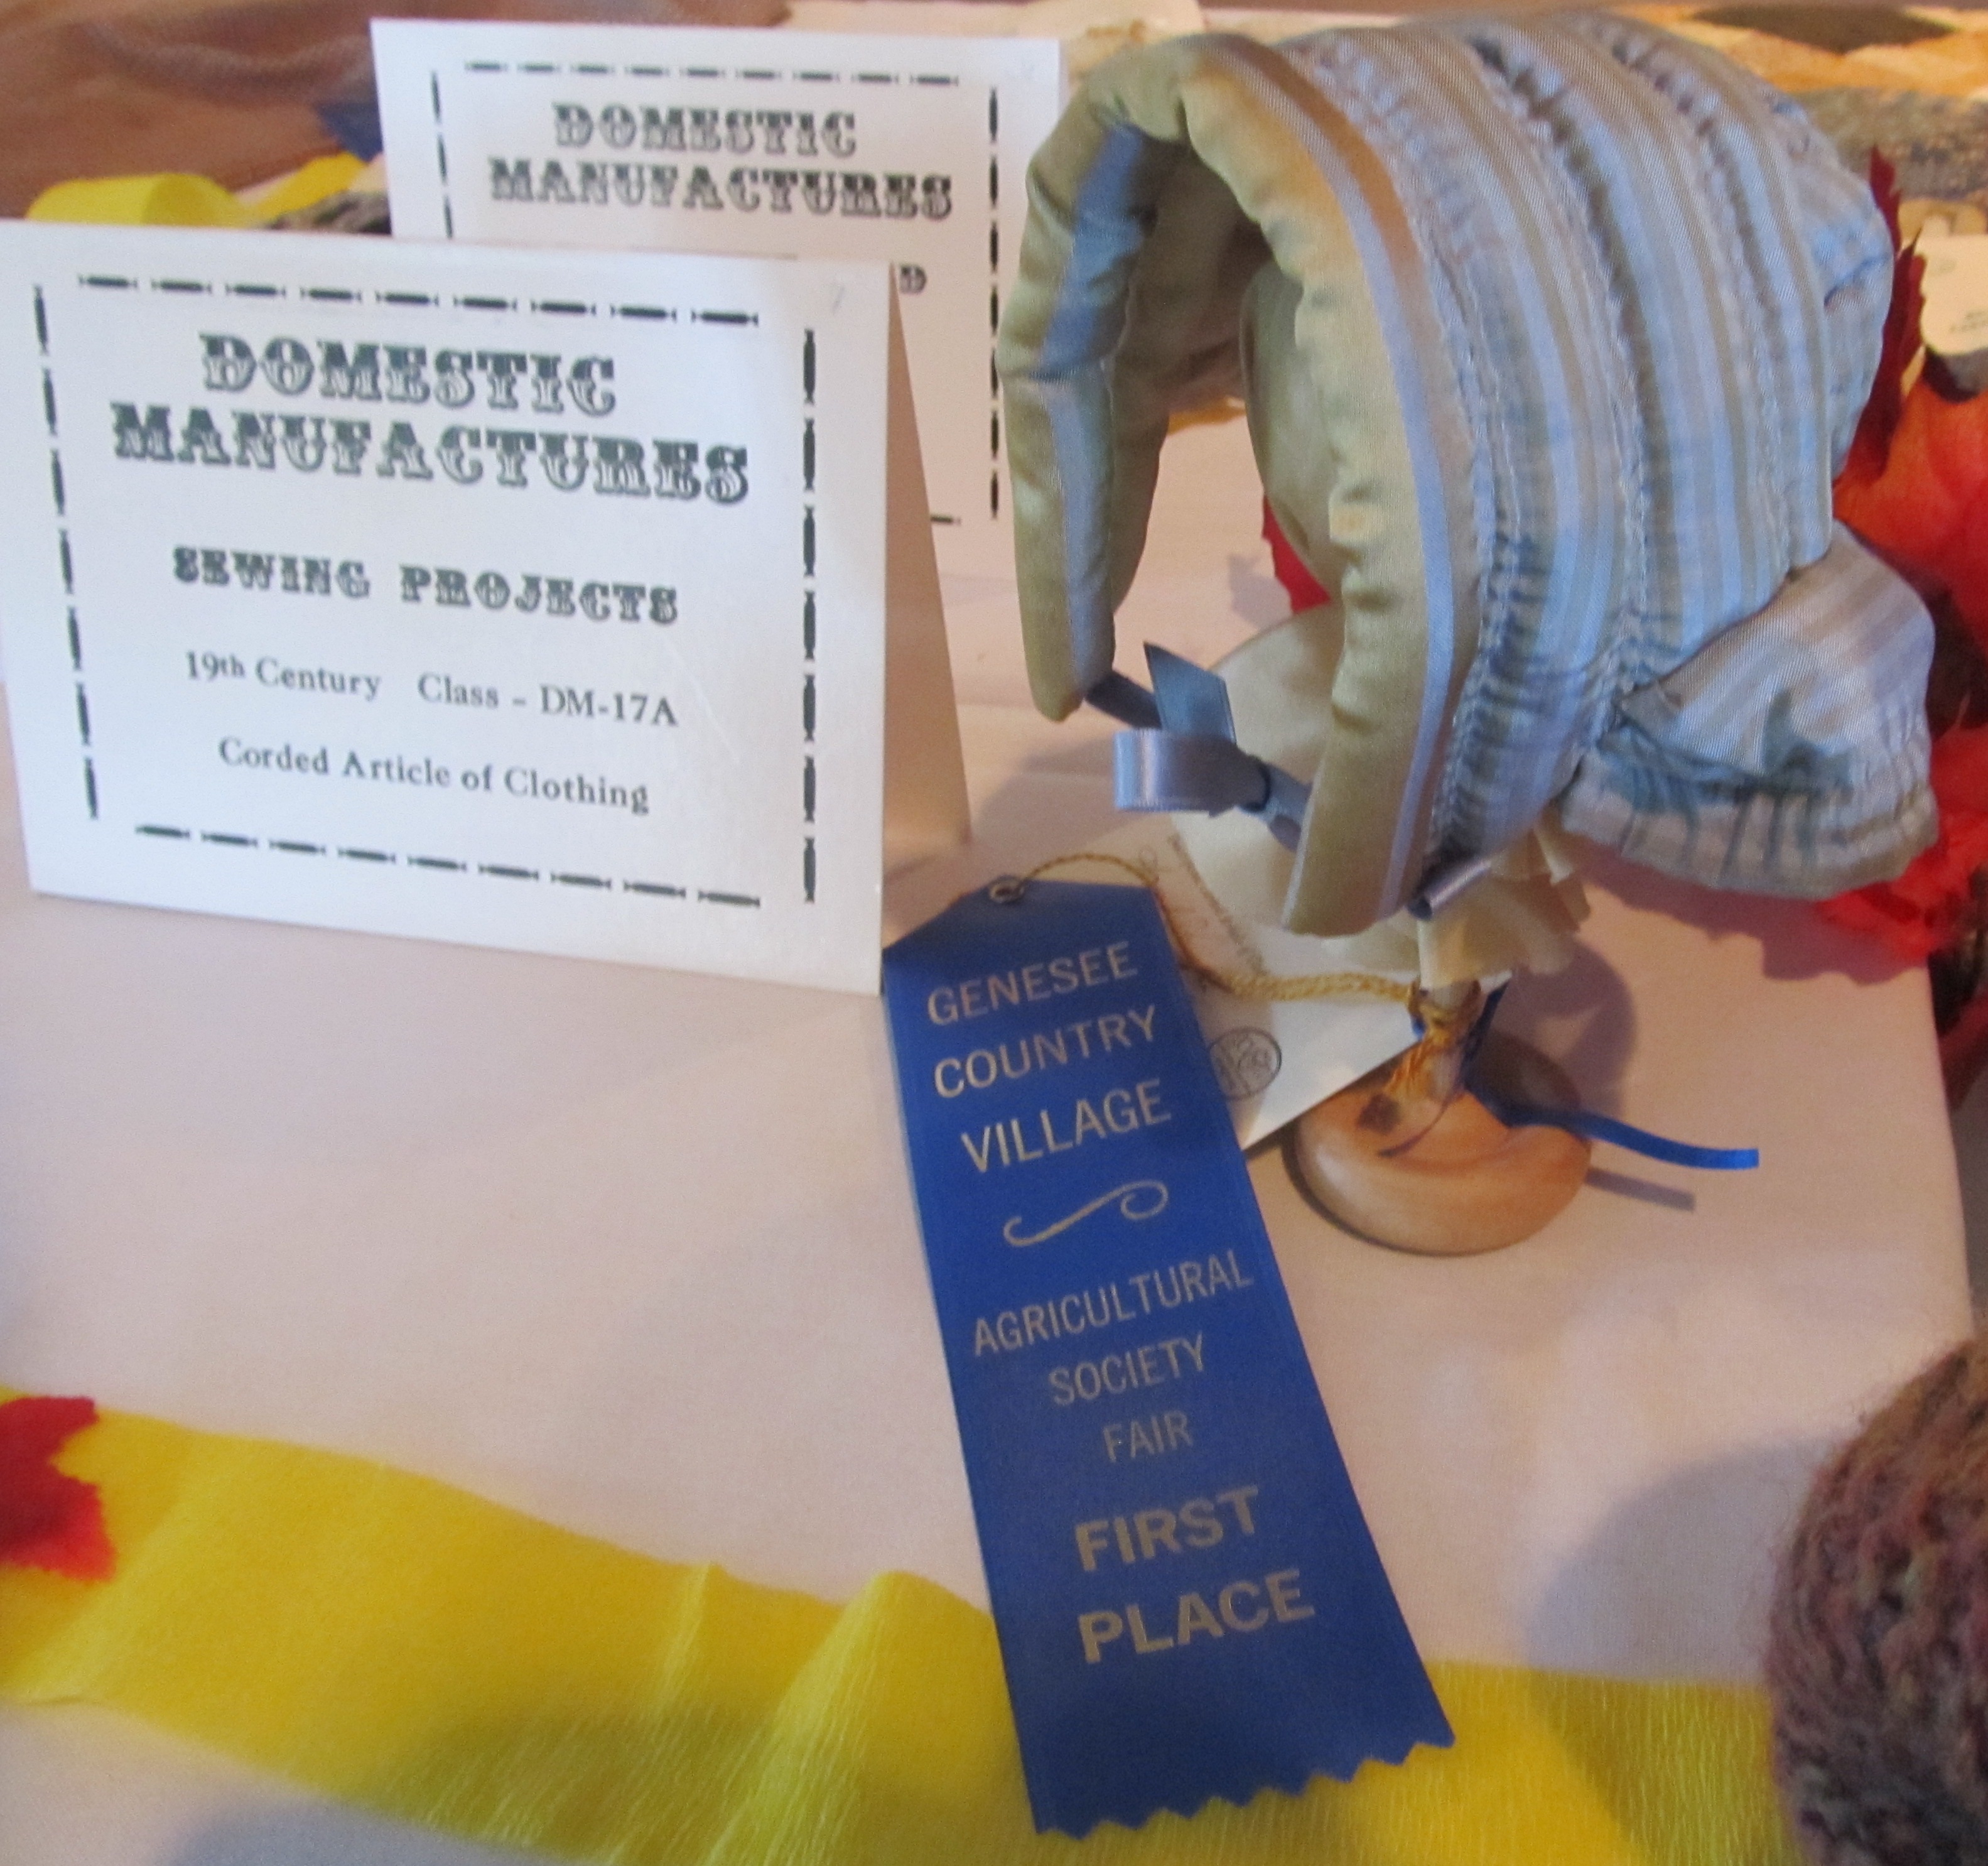
It was fun scaling down the winter bonnet patterns to doll size. I did one in a quilted style using a double twist pattern and one in the corded and wadded style that I find to be nicely warm. These are for dolls with 9.5″ to 10″ heads.

IMG_7918I had lots of fun with this little doll quilt. Triangular piecing was both easy and relaxing. But, as I was almost finished, I realized I needed to bind that curved edge I created. Thankfully, it was a lot easier than I thought. I am tempted to do a full size one in this design. Sometime.

IMG_7908When Mandy found these steel rings, I knew I wanted to do an embroidered pin ball. I did a trial run with simple embroidery on wool. Then jumped into the needlework for this one. Needlework like this is not something I have done much if any of. Some parts were enjoyable. Other parts, well, they made me think “aren’t I done yet?” After finishing the full size one, I wanted to see if I could do the doll size one.wpid-2015-10-01-06.13.49-1.jpg.jpeg wpid-2015-10-01-06.14.02-1.jpg.jpegOne challenge was deciding on what to use for the ring. I pondered an actual ring, but didn’t find one in the right size as I was working. The next challenge was turning the embroidered linen right side out at that small of a scale. I think it came out pretty cute.

IMG_7923I had every intention of doing my household quilted item in both doll and human scale. Then, as I made the full size one, I decided this was the one and only I was making… ever. This quilted tool case was inspired by an 1872 illustration in Peterson’s Magazine. It could hold sewing tools or toilet tools nicely.

Canandaigua Lady Excursion

This is information for the small group of us taking an excursion on the Canandaigua Lady.

We are each making our own reservations for this excursion. Please call Sara at: (585) 233-5019  (585) 396-7350 to schedule the July 10th tour at 6:30 without the meal and with upper deck access. (You can order online, but there is a $6 fee.)Please comment below or in the Facebook event page that you have made your reservation.

Afternoon/Evening Excursion on the Canandaigua Lady

Date: Friday, July 10th, 2015

Boarding time:  6:15

Cost: $22.00

Duration: 2 hours (630-8:30)

Address: Docked at 205 Lakeshore Drive in Canandaigua, NY

Pre/Post Picnic at Kershaw Beach Park (adjacent to the boat launch.)

For our picnic, please bring:

  • A picnic blanket
  • Food for yourself in period containers
  • If you bring food to share, please bring a list of ingredients
  • Period entertainment if you wish.

***I will add to this page as we develop more information. Please be sure to check back.***

Map: Map

Historical Inquiry:

I am looking for mid-century images and textual references of the steamboat passengers.

An image of Canandaigua Lake and one of her steam boats in the mid-century:

Joseph Wood on Canandaigua Lake http://www.hallofnewyork.ny.gov/finger-lakes

Account of a picnic on the lake and a steamboat – Village Life in America, P27

Picturesque Canandaigua, 1899

A late century photo of the pier and a steamboat.

An illustration of a Water Cure resort on a different lake.

Cr0quet at Sonnenberg, not dated. (approx 1867-70. Visual of recreation in Canandaigua.)

This looks like a similar size steamboat in 1858. It is a river boat though. Some women and children shown.

Published in: on March 18, 2015 at 6:30 am  Leave a Comment  

FanU Workshops at the Domestic Skills Symposium

3

I will be teaching two Fanciful Utility workshops at the Genesee Country Village and Museum’s Domestic Skills Symposium. 1

The Symposium takes place on Saturday, November 1st, with Workshops on Friday and Sunday. This is an incredibly affordable program at $75 for Saturdays Symposium with 4 full presentations.

Key lectures include:

  • A survey of printed fabrics from 1760-1860 by Susan Greene, author of Wearable Prints
  • Midwifery from colonial times to the Civil War, by Nancy Webster
  • A history of 19th-century sweets and confections by Patricia Tice
  • Kitchen Gardens and Seasonality by Emily Conable.

Friday and Sunday Workshops cover domestic skills such as:

  • 18th century Pastry Making
  • Wool Spinning
  • Making Your Own Trivet
  • Choosing Appropriate Fabrics for Reproduction Clothing
  • Sit Not in Idleness
  • Make your Own Hand-bound Notebook
  • Custom Draping a Personal Pattern
  • Recreate a Day Cap From the Susan Greene Historic Clothing Collection
  • Making Green Sage Cheese
  • Civil War Cookery
  • Fun will flax
  • Tin Care & Make a Tin Nut Grater
  • The Complete Confectioner
  • Making a Rolled Sewing Case **My Workshop**
  • Making a Mid-19th Century Sewing Box **My Workshop**
  • Make a Cheese Basket

The only bad thing about teaching workshops is missing attending the others. “Sit not in Idleness” sounds like so much fun. I’ve really wanted to get Lily a trivet. I would love to have a hand-bound notebook for when I set up the millinery. Um, Yum, Cheese! And, a basket too?! It would be great to know more about taking care of tin. Plus, I loved the little tin nut grater we had when I was a kid.

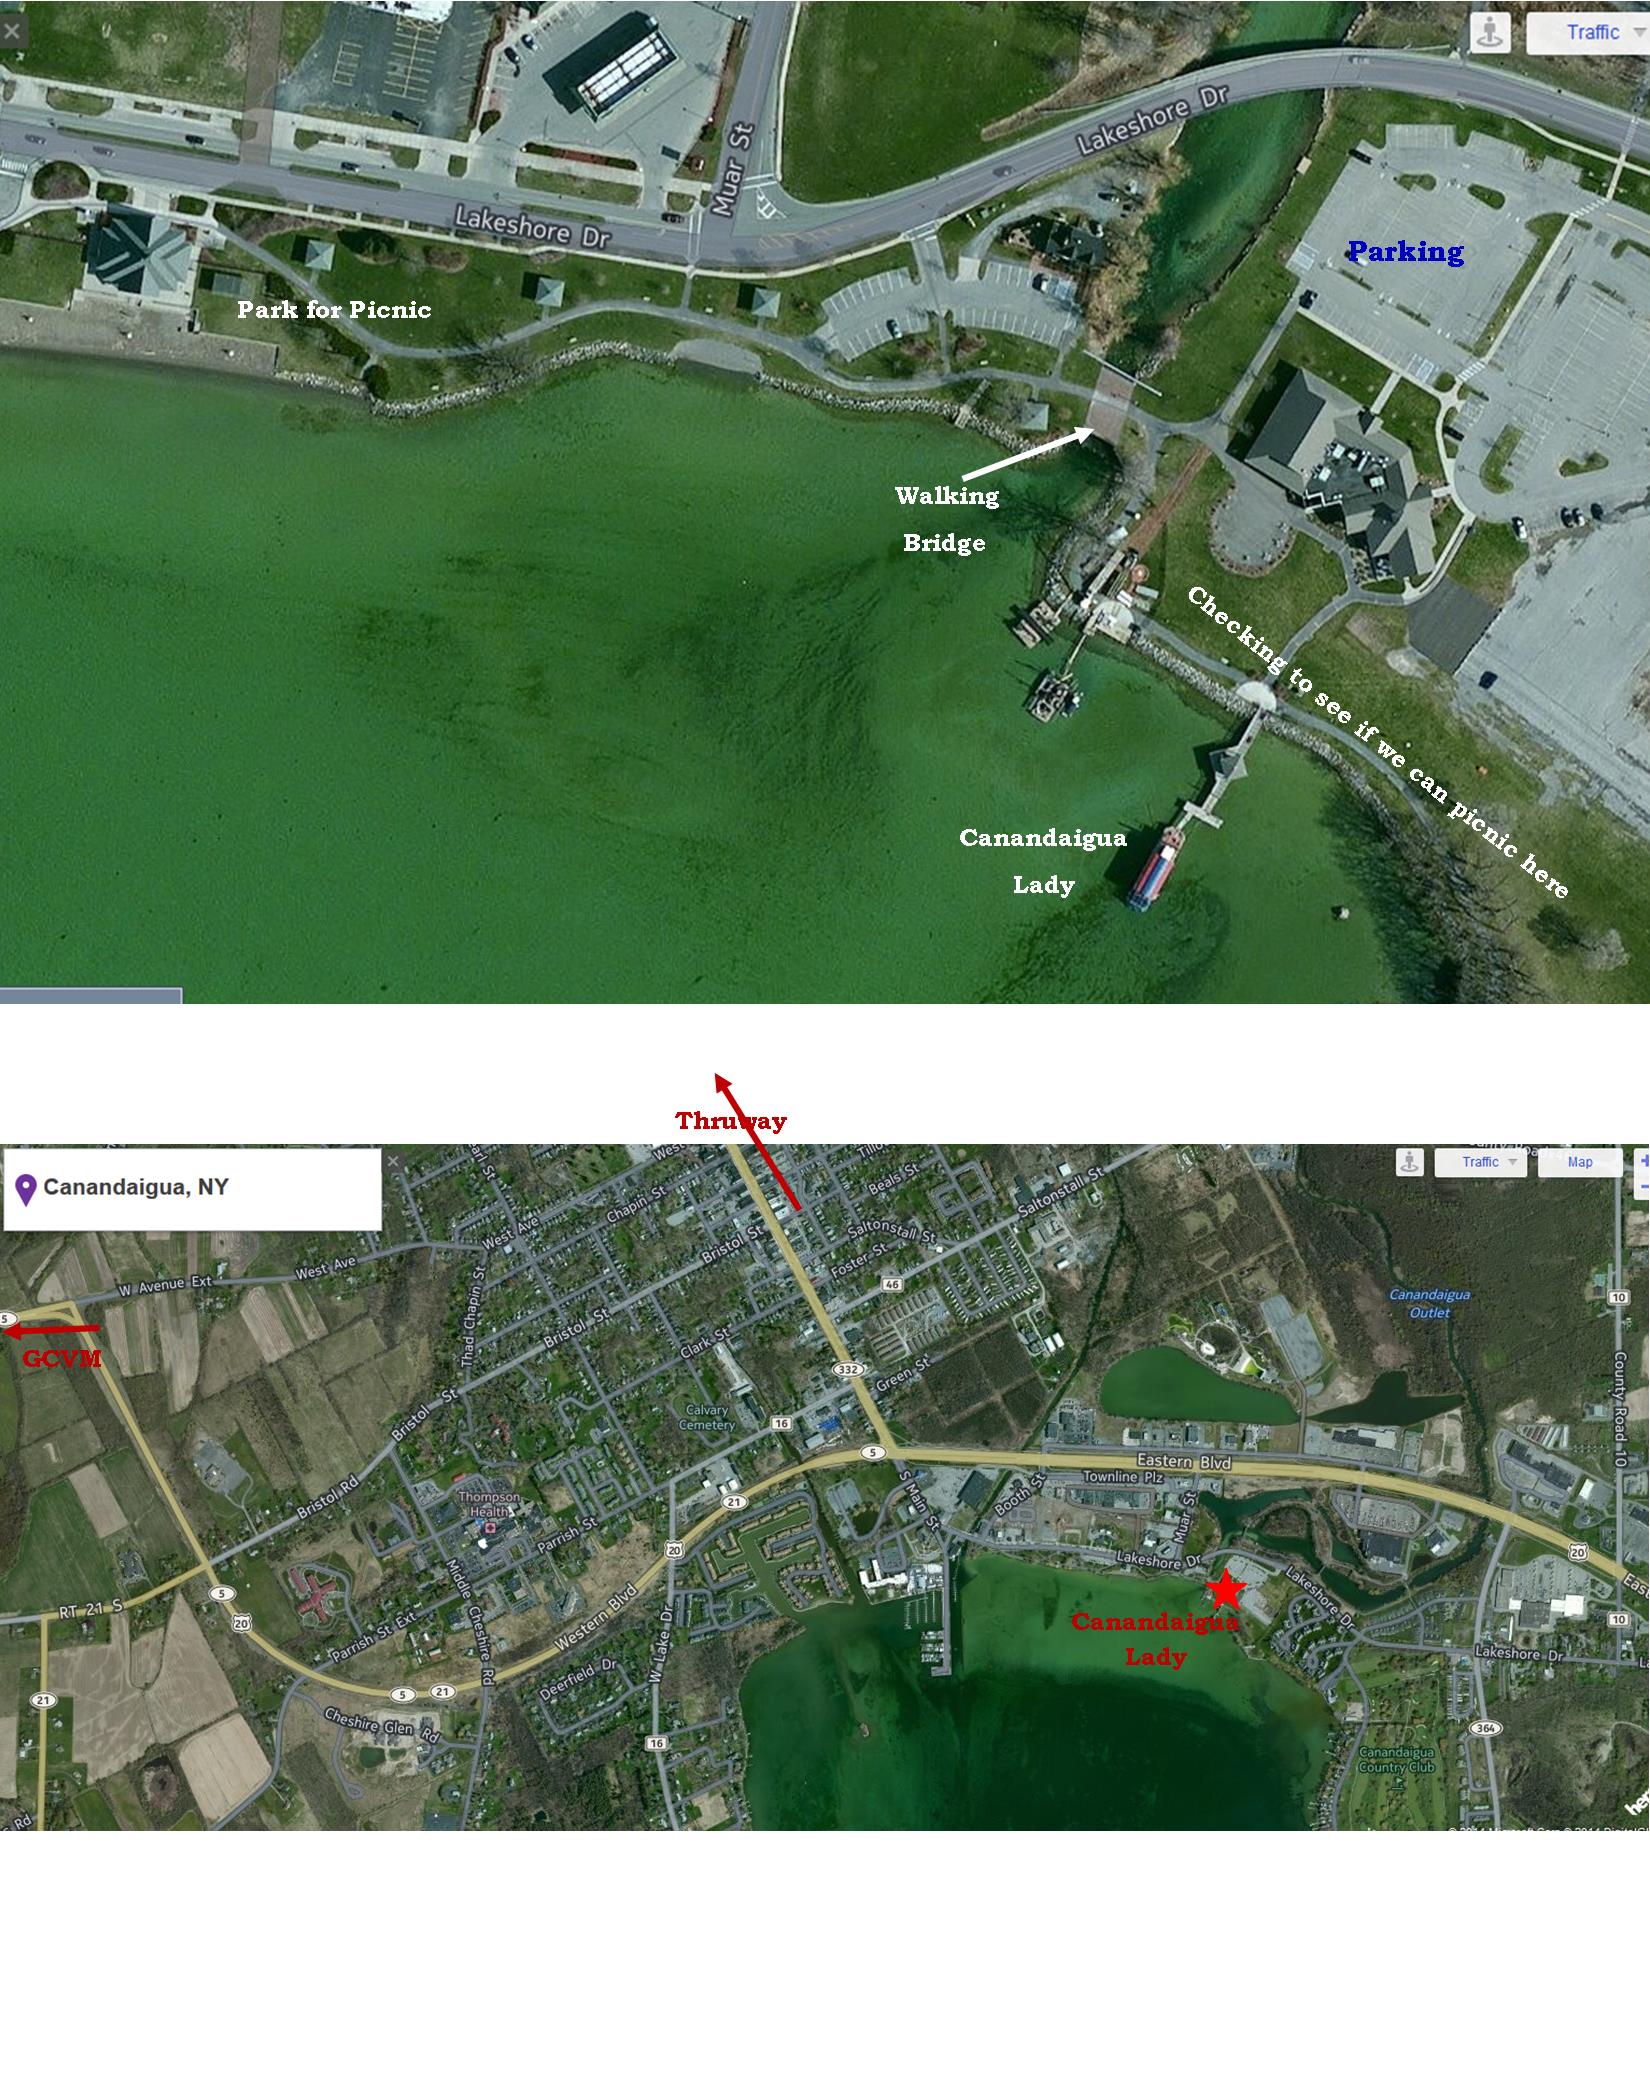
I hope to see many of you there. The museum is just outside of Rochester, NY; about an hour from Buffalo/Niagara Falls and 2ish hours from Syracuse. There is a beautiful B&B right down the street. There are several nice hotels in Henrietta too.

The full description of the program along with registration information is on the museum’s site: www.gcv.org


GCV’s Civil War Event – Late War Millinery

IMG_4587
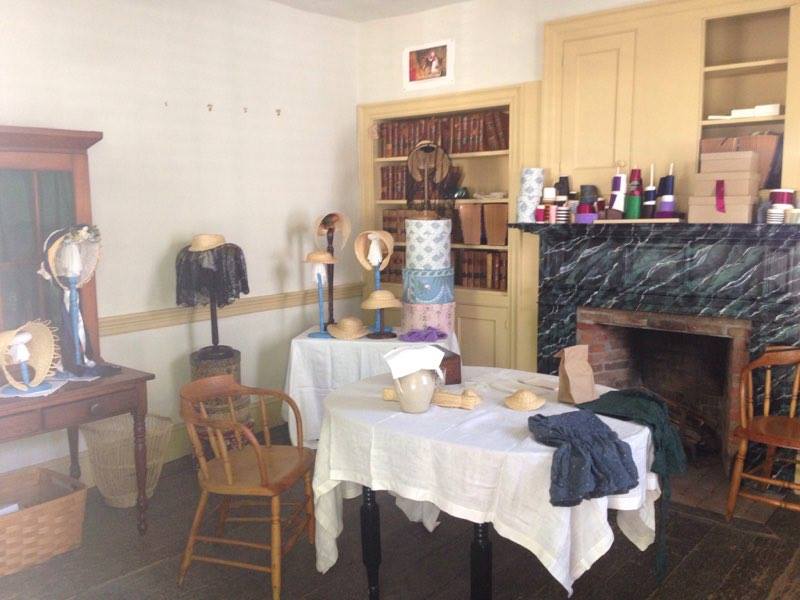
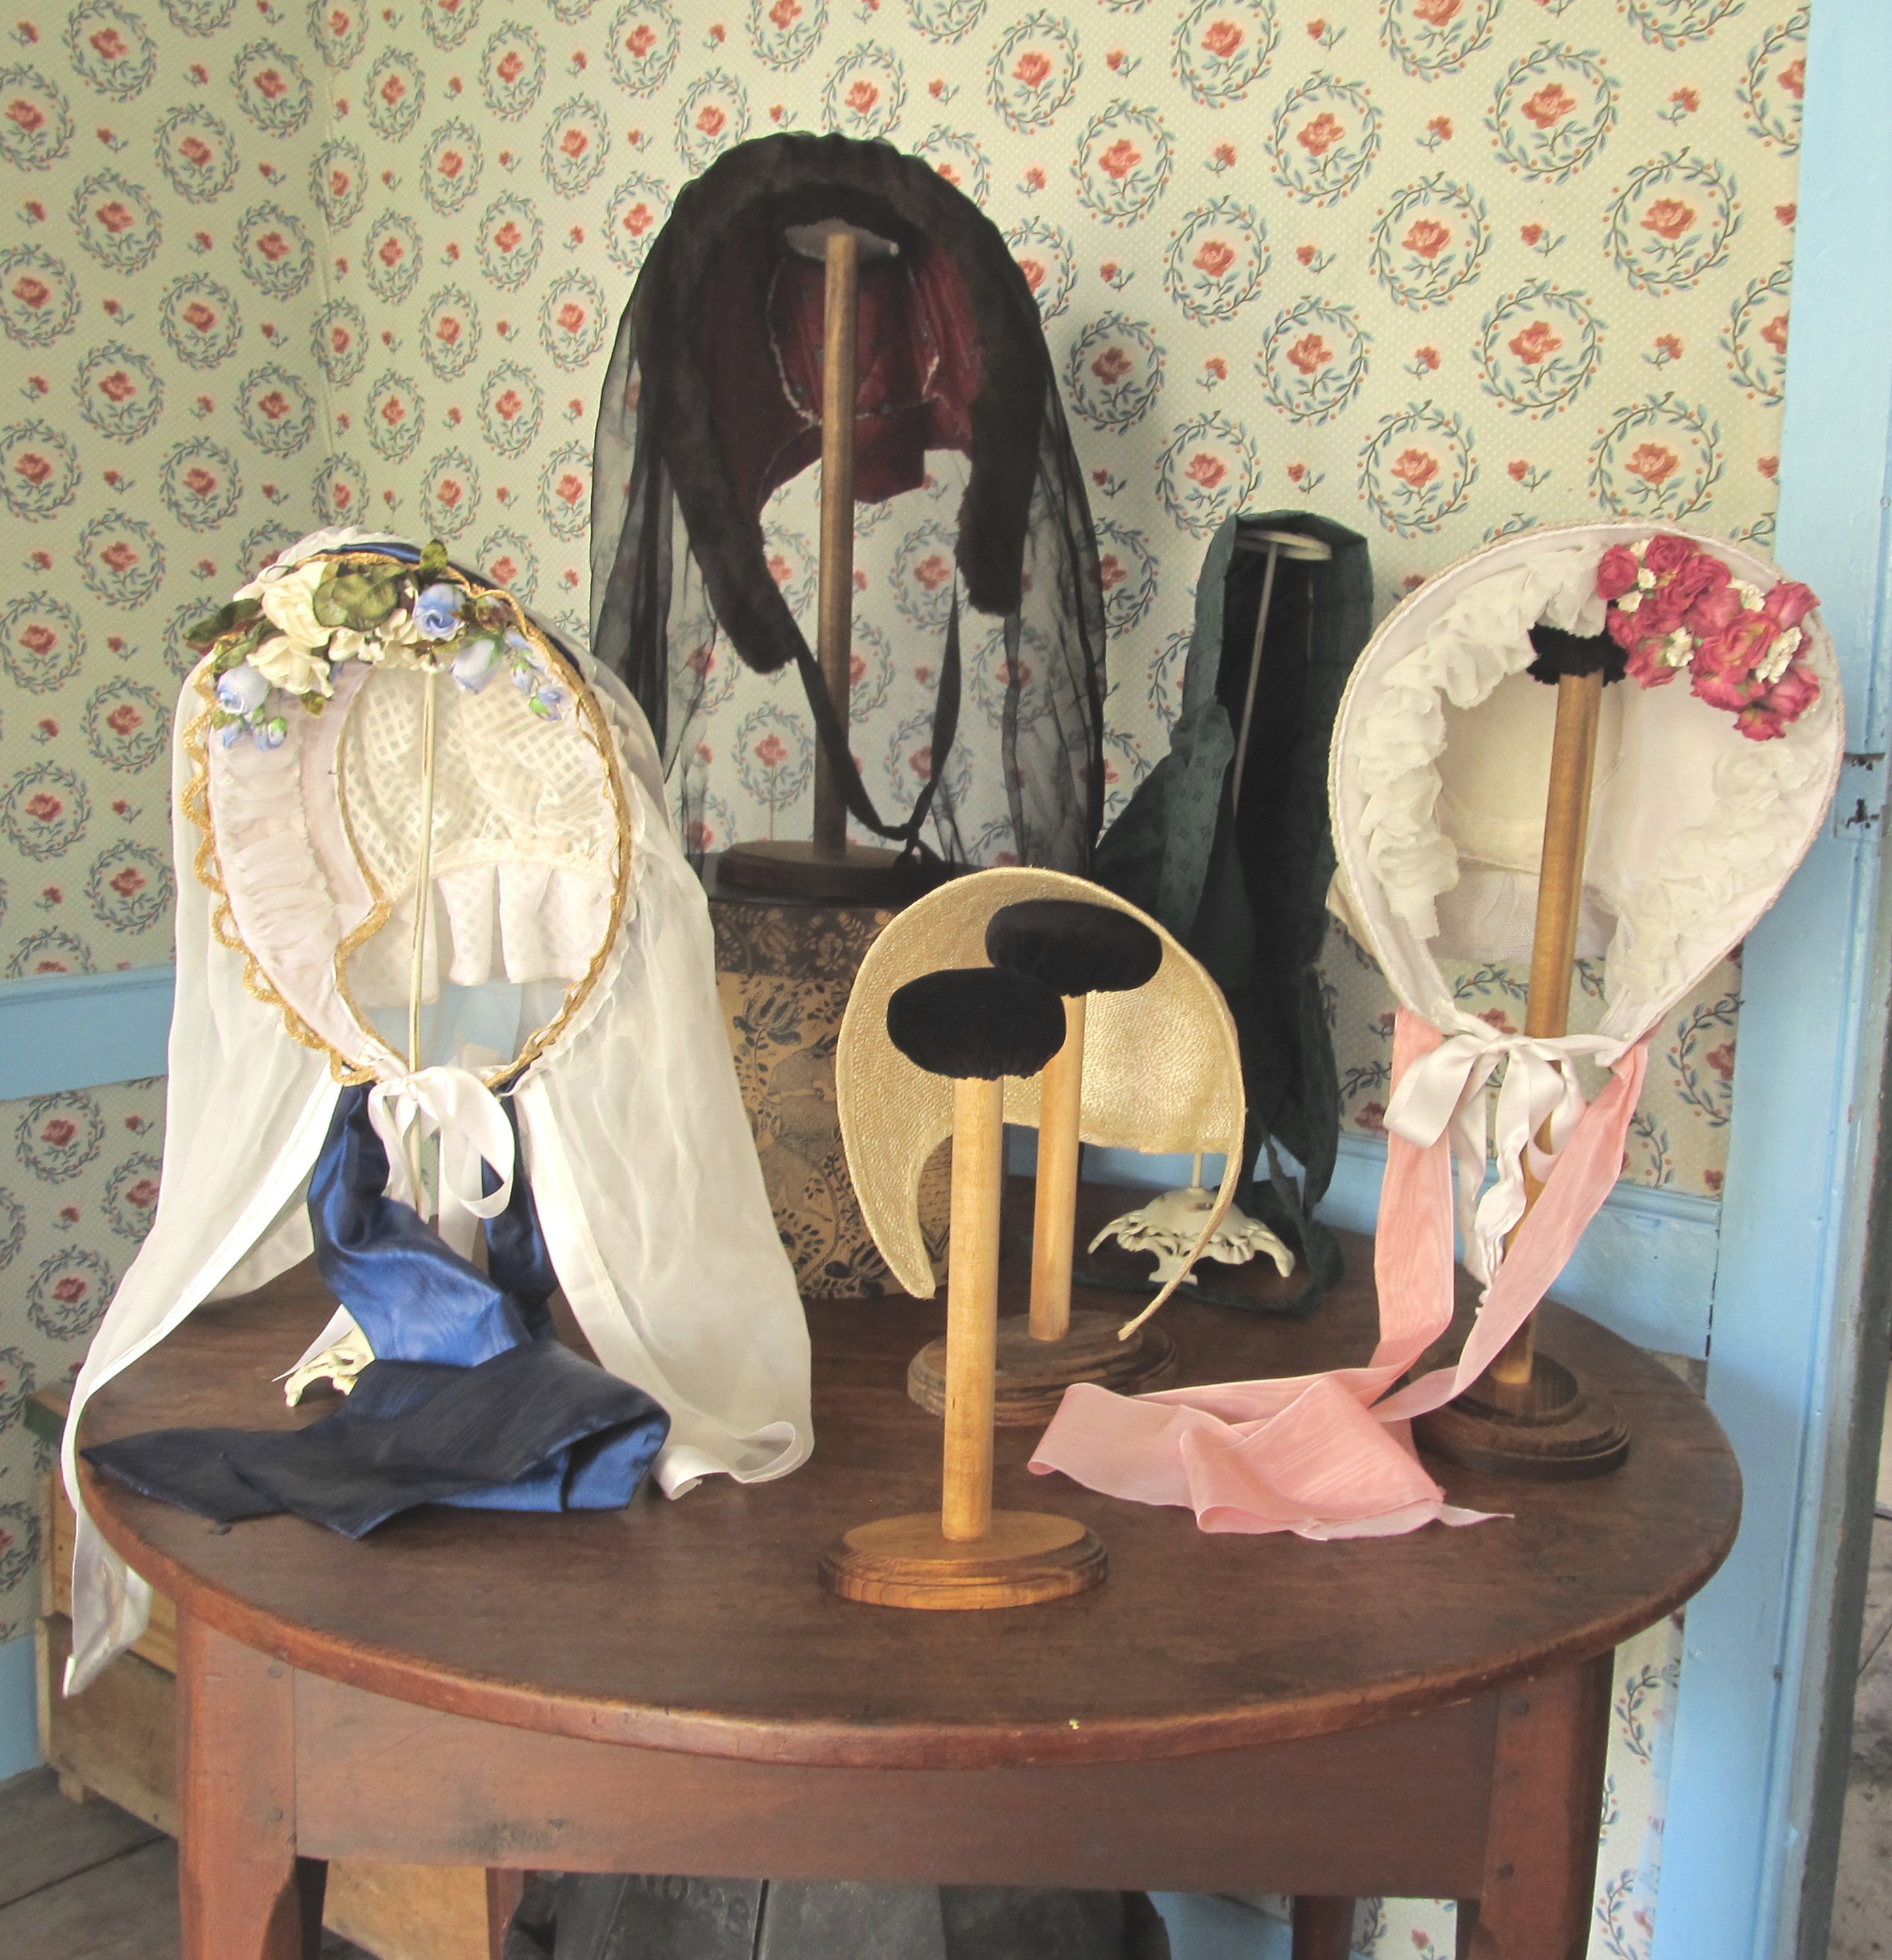
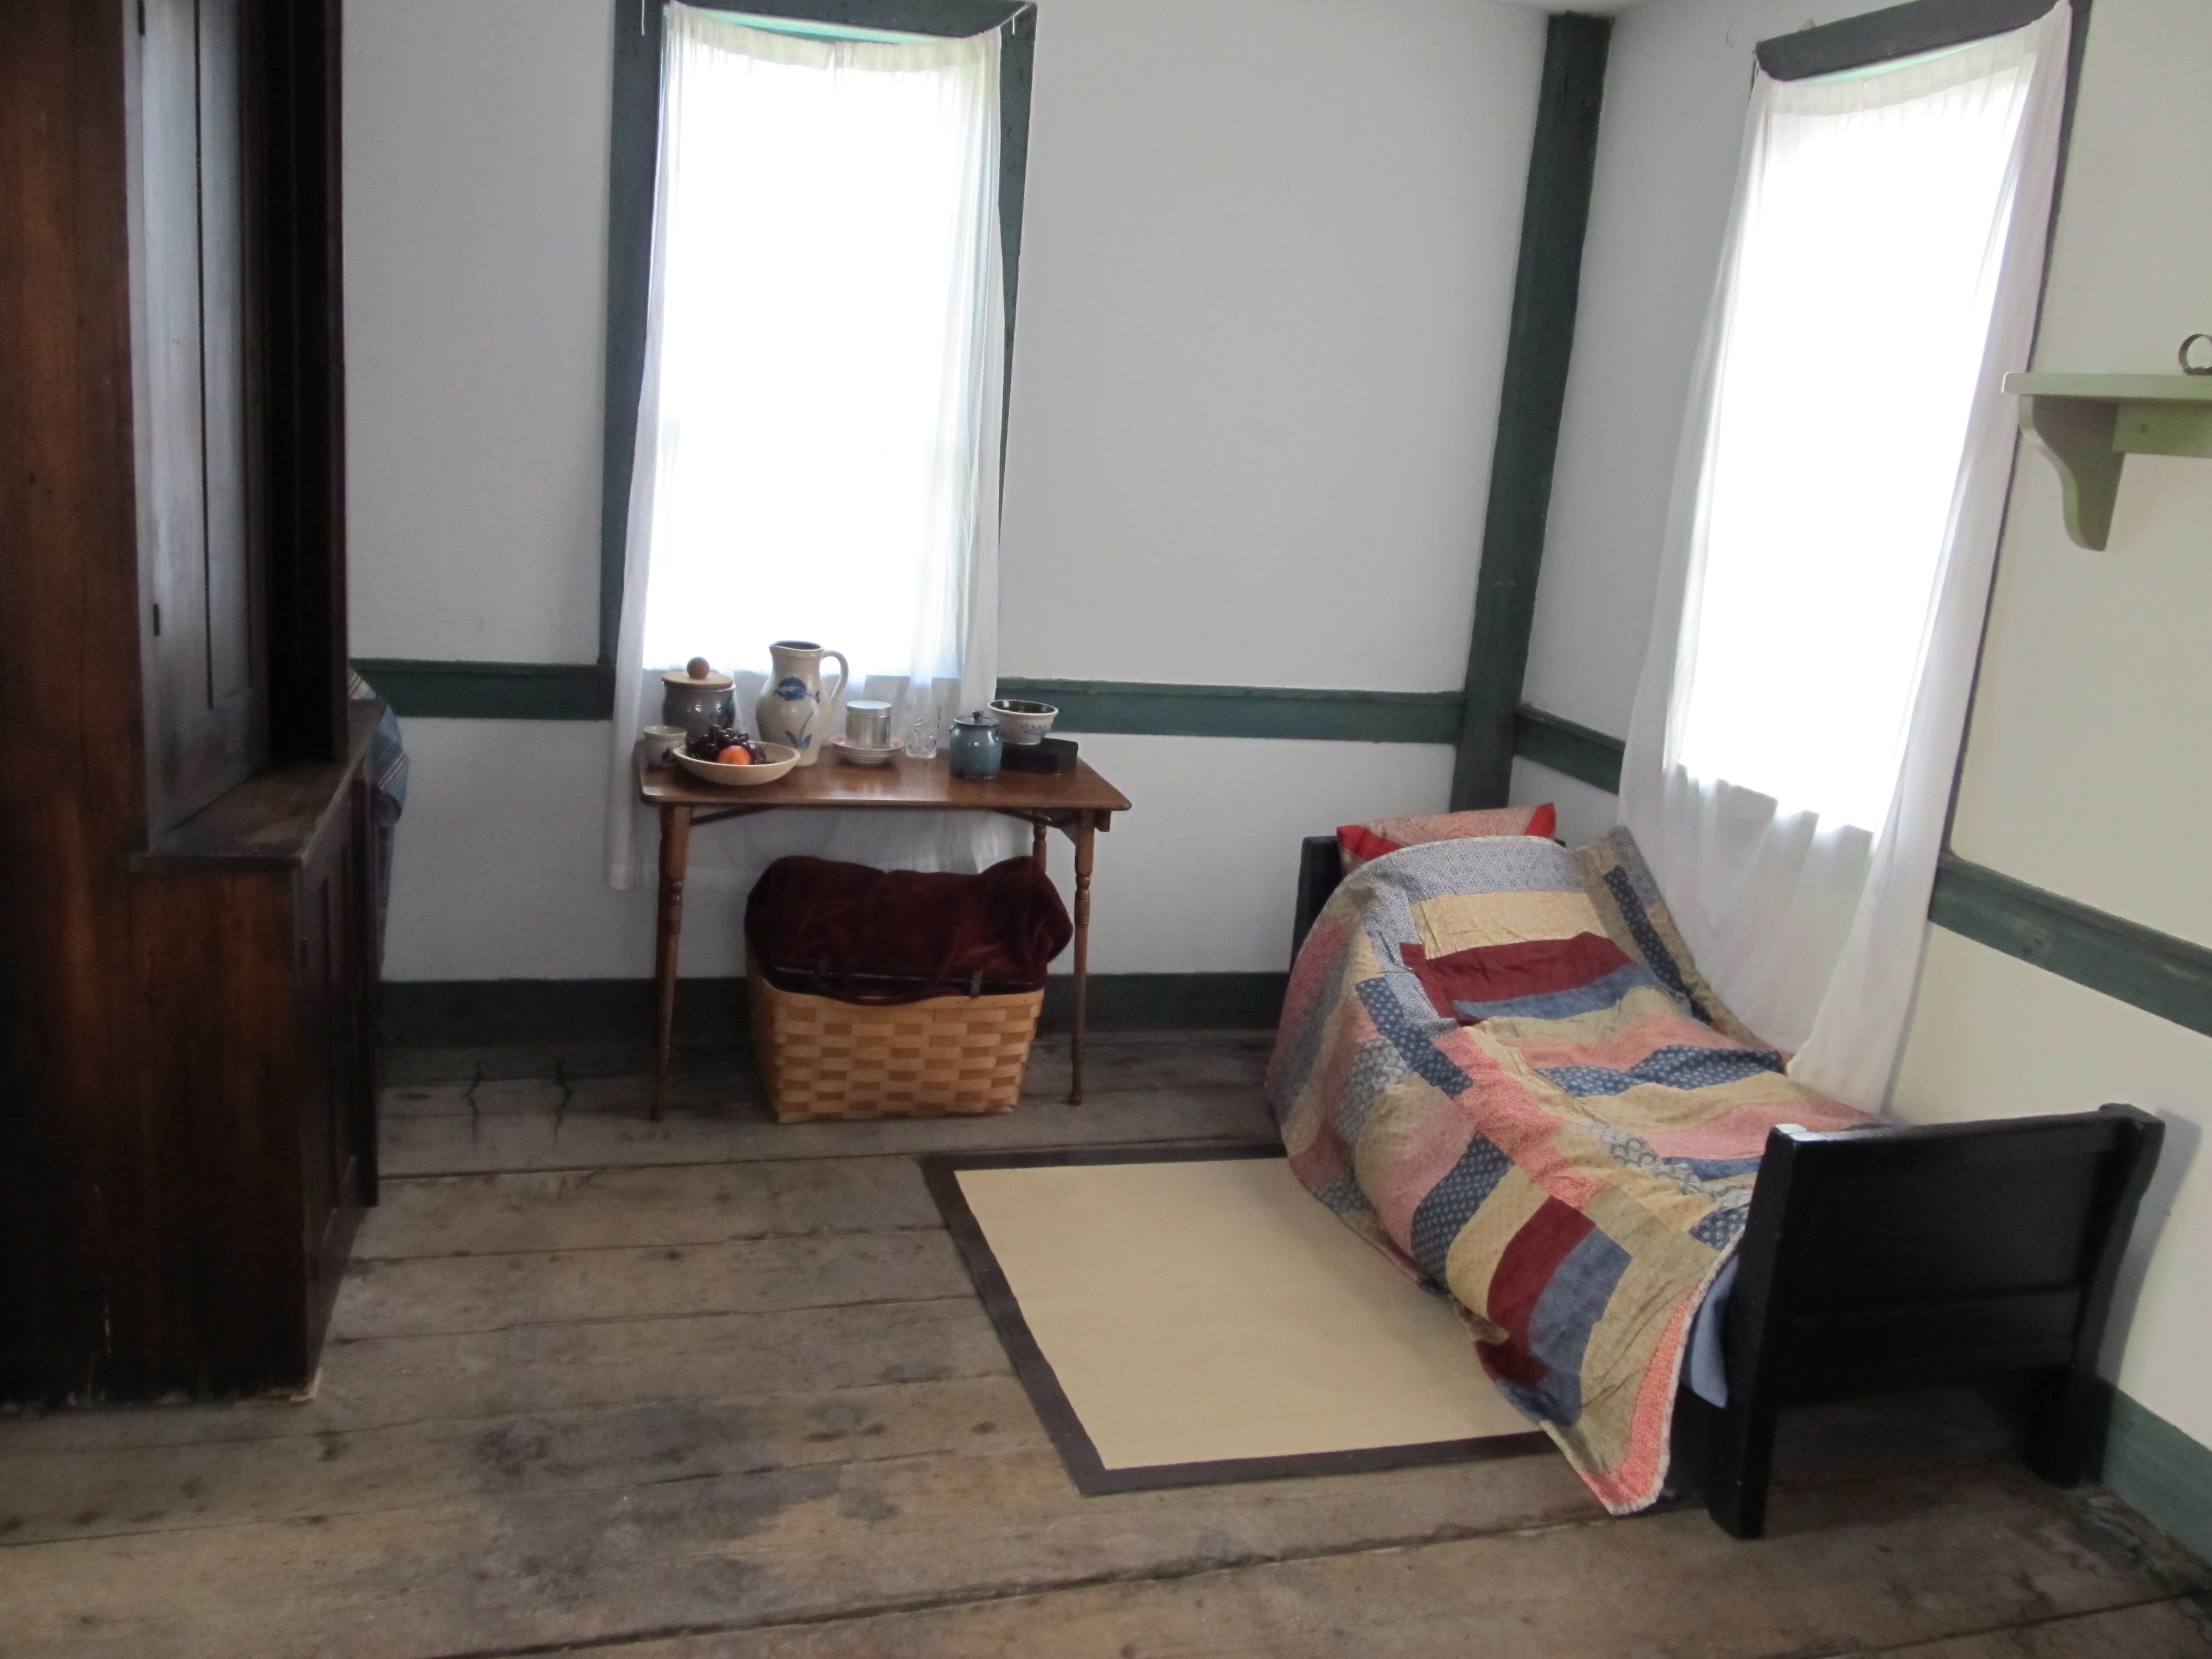
This was my second year in the Dressmaker’s Shop at the Genesee Country Village for their Civil War Encampment. As you can see Saturday morning was pleasant and sunny. You can also see the soldiers struck camp right up to my back door. While I was thinking this might make for some fun interaction, after-all I was prepared to say all my firewood was stollen as well as my wooden head forms. But, in the end, they kept to themselves. Well, except for eating all the beautiful black raspberries I was eyeing the night before.
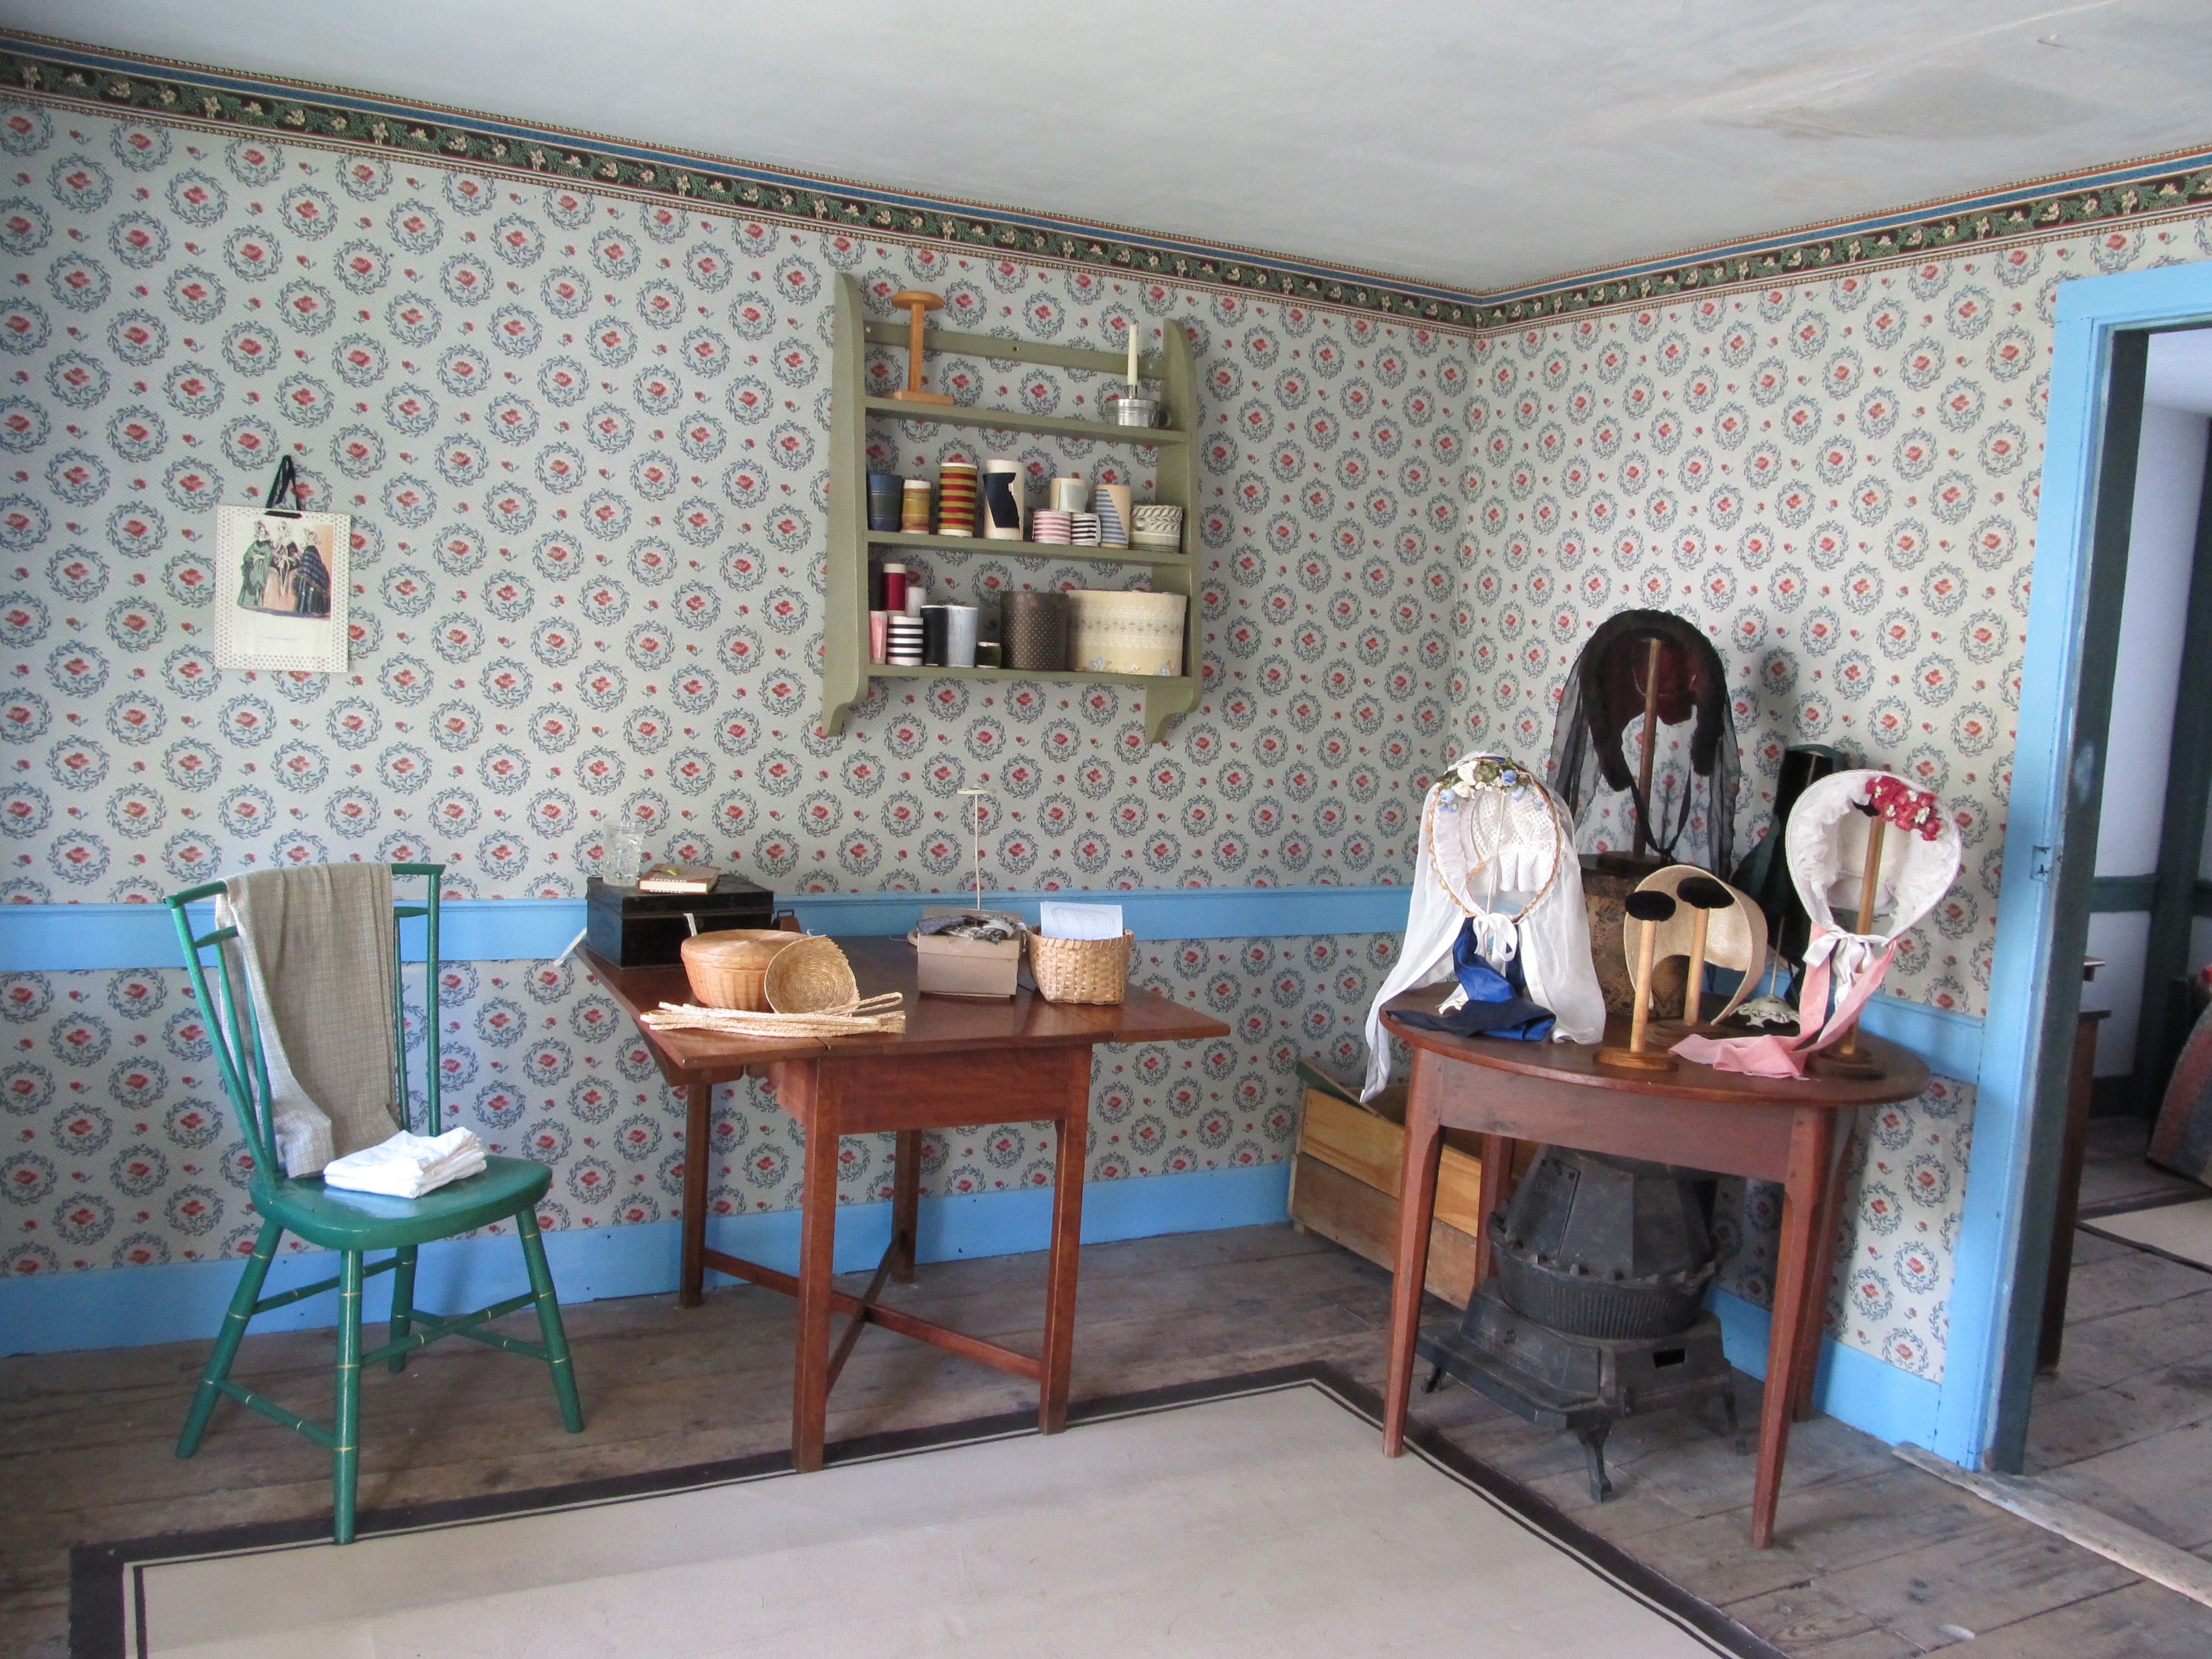
Rather than interpreting the pretty pink building as a dressmaker’s shop, I dressed it as a Millinery. The blue and rose print interior makes for such a pleasant place to work in. You can see the working table and display table. (Yes, we did put it right over the stove. No firewood, no need for a stove.)


IMG_4577

I wanted to bring a basic sampling of bonnets to show visitors. As I was working on a straw plait form, I would compare that to the woven straw in the middle, Vivian Murphy’s work. Then I would discuss the two finished fashion bonnets, left and right. We would also talk about the winter bonnet in the back and the sun bonnet just below. Many people asked about the veils. This was a good teaching point to explain the differences in the mourning veils and every day veils. (An interesting set-up/interpretation note – There was notably more touching this year than with with last year’s set up. This is good to know for determining what display pieces to bring and place where. The pink and grey was the most touched followed by Lily’s green when it sat on the empty stand.) Oh. Those wooden stands are the ones I made on Wed/Thursday last week. I’m rather pleased.

???????????????????????????????

Here are the faux spools of ribbon I have been working on. I was excited to see them on the shelf. They aren’t quiet where I want them look-wise. I need to come up with a better way of doing the ends with the labels. That is why they are all up on end. Each roll is faked by using only a short piece of ribbon, usually 5-6″ but as short as a 3″ trapezoid, around a roll of original or mocked paper. I’m also planning to take my original ribbons, reproduced on white silk ribbon via the printer and make faux rolls out of those. In the works as well are sample cards. I started a set, but was not happy with the look… at all. So, back to the drawing board on those.
Faux Rolls of Ribbon

This was the “home” area for the weekend. The little day bed is napping suitable. The large cabinet is truly ideal. It reminds me a lot of the cabinet Dad had stripped for me when I was little. Those cabinets hold everything. It made storing food, supplies, etc very easy. It was okay if visitors opened the top because everything was period containers. We really didn’t need to have food out on the table at all. It did help as a reminder to actually eat though. IMG_4581I am utterly lacking in actual impression photos, worse than usual. All I have of myself are these “selfies” I played around with while it was raining in the morning. The bonnet is a coarse straw, meant to represent those made cheaply, worn by poorer women or those institutionalized. This can also be the “last remnants” straw of late war.

10489660_10153049758302846_2229377948184184845_n10540635_10153049758642846_4402057427875164636_n

“My Day” Challenge!!!

I am currently reading “‘Another Domestic Beast of Burden’: New England Farm Women’s Work and Well-Being in the 19th Century“. The author, Linda Borish, brings together several descriptions of farm women’s daily life and chores. From kindling a fire to laying soot on raspberries to pounding potatoes for the hogs, she gives us a hint of what went into a woman’s day in the first half of the 19th century.

My challenge to each of my friends and readers who are interpreters, reenactors or just want a writing challenge….

From the mindset of a woman you interpret, write, in detail, what your day would have been from the time you wake to the time you sleep again.

I will work on my response and share below. Either add your day in the comments below or give us a link to it.

Published in: on May 15, 2014 at 11:45 am  Leave a Comment  

“Don’t Hack Your Sleeve”

While I patiently wait for the photos of this weekend to come out of my sister’s camera, I’ll share with you the story of the sleeve. While this sleeve did not go well in the making process, I am okay with the end result.

I knew I didn’t want another open sleeve as that is what I used for both green sheer and semi-sheer dresses from last year. I wanted something with shape. Looking at this inspiration sleeve,

ea292e56fb4eff9b388dcf3813c14410

this is what I came up with: ???????????????????

After the sketch, I added a bias cut, double gathered ‘puff’ to the top. I liked the idea of the extra drop before the fullness.

In the drafting, I wanted to make sure I had a good length and a nice curve into the enlarged elbow. I thought this is what I had. It looked pretty good.

2014-04-30 19.27.03-1Well, not so much…

2014-04-30 20.12.50-1

Full, yes. But, way too long. (do ignore the corset-less state.) So, I took off the bottom sleeve. Cut 2 inches off. Re-gathered. Re-attached. Oh, I also rotated the sleeve, moving the gathered fullness towards the back and added some trim.

Two inches should have worked. Right? …… Wrong. It was still too long:

???????????????????

Oddly, it actually looks longer. Doesn’t it?

To make matters worse…. there was this screaming blue horizontal stripe that was driving me crazy. (again, please ignore the corset-less, dress over the clothes state.)

???????????????????

So, what do I do? What any over-tired, over-hungry, cranky person would do…. I got out the scissors and hacked off the lower part of the sleeves. One big crescent shape. Yeap. And the moment I did, I knew I did bad.

I lack photos of the hacking and the hacked state. I decided it  was time to put the dress down and go eat something.

After a few moments away, the sleeves told me they were going to be an open sleeve after all; they were even going to make use of the odd, dipping V in the opening created from the hacking. As such,  I finished off the edges and trimmed away… down the outside of the sleeve and around the new opening. I added a second vertical piece trying to play with the curve and down play that blue line. In the end, I am okay with how it came out.

2014-05-11 09.14.00-1At one point, I thought I would use this sleeve for the show, then make a new one more like the sleeve on Lily’s dress, just longer (these are ‘matching’ adult vs teen dress comparisons). But, after wearing it on Sunday, finding it comfortable, I may just leave it as is. We’ll see what the other photos say.

Published in: on May 11, 2014 at 8:00 pm  Comments (1)  

What I’m Up To

I have had a couple of inquiries of late as to what I am up to. I suppose I ought to share. Well, share what I can as some of these projects are secrets for now.

In the sewing realm, it is bonnets, bonnets, bonnets. I have had one particular special request I was excited to receive. This follows a few requests I was quite honored to make. In the next few months, you will see a few 1860s and 1850s bonnets from the French plait that I just love becoming available. For personal sewing, I really, and I do mean I really, need to get going on the new corsets and the matching fabric dresses. Those need to be ready for wear soon. (It is a good thing “spring break” is a week away. But, just how much can I really fit into one week while still taking care of a husband?)

In the research, writing, educating realm, I have a trio of secret projects. I am waiting for a “thumbs-up” on two of them. The other is in the information acquisition and planning stage, with the in-depth writing taking place this summer.

I have fallen way behind on the Commemorative and Memorial project. I feel quite bad about that. I have such a vision for it. Hopefully, I’ll get back to the details and the making of the objects soon. As these will each hopefully be relaxing projects, the spring and summer might be best suited for them.


Geneseo Antique Show (pt3)

This segment turns out to be about some containers I saw.

There were several spice containers in beautiful condition. The patina on this one just glowed.

image

This tin spice box has a space for the nutmeg grater in the lid. I should have taken a photo of the nice painting on the front.

image

We’ve been picking up painted tin boxes (toleware) lately. So, of course this little box caught my eye. It was so small, not even 5″.

image

There were only a few band or pasteboard boxes. This pair was incredible. They were also huge. From memory, I would say they were each at least 15″ wide and 12″ tall. How can these not spur one to want to paint their own?

image

This box was much smaller, possibly 8″ across. The photo of the side didn’t come out. There are figures all around the sides.

image

This last image I took because I want to look this up. Too curious.

image

Published in: on October 30, 2013 at 6:00 am  Comments (2)