 Here in the Northeast, summer held fast through much of the fall and Mother Nature was fierce. Temperatures would dip into the seasonal fifties, then hop back up into the seventies, close to the eighties, only to swing back again. Each swing was accompanied by a shift in air-pressure, wind, and rain. Some of these spells sent waves of walnuts bouncing off the neighbor’s new metal barn roof. Oh! That Sound! We had to be quick to catch the changing leaves because as soon as they would change the wind and/or rain would send them to the ground. Then… Thursday night came. Wind, pressure, rain became snow as the temperatures dropped. It was 50 degrees as I drove into work that morning; barely 25 the next.
Winter arrived begging the question:
Are You Ready for Your Cold Weather Events?
I invite you to enjoy this version of a long favorite blog article, with a couple revisions:
November tends to have cemetery services and even candle-light tours in honor of Veteran’s Day. A good many attend Remembrance Day activities in Gettysburg, which can be delightfully mild or down right blustery.
December brings Yuletide and Christmas events for many living history sites. Communities may also have festive caroling or even a Dickens festival.
January and February are perfect for social sledding events. I believe this is also when some groups do Winter of ’64 weekends in the depths of the snow.
March brings maple sugaring events when it can still be snowy or just plain wet, with the promise of cold.
For each of these events, attendees deal with ….. Cold!
(and also wet and wind and ice.)
How to be Ready for Your Cold Weather Events
Keep in mind – Layers are the Key to Warmth. This means your:
- Underpinnings
- Dress
- Outerwear
- Accessories.
Your underwear acts as your warmth protector and your moisture protector. Even though it is cold, you still sweat. You need to pull that moisture away from your body without it feeling retained in the fabric near your skin. Consider the following that can help you keep warm:
Aspects of your dress to consider:
Your Outerwear acts as warmth, wind and moisture protection. You want a garment that will protect you from the wind and snow, while minimizing the restriction on your movement and not requiring you to hold it in place.
While your outerwear protects your core, your Accessories help keep your hands and head warm. Consider these:
What did they say about dressing for the cold?
The following passage, published in The Home Monthly, comes from an area often struck with frigid cold and an incredible amount of snow, Buffalo, NY, in 1859
Winter Clothing – Style and Material
We do now propose keeping our readers in the latest Parisian style, for we have no Genio Scott, Genin or Brodie to consult, and we hardly think we shall fail of our purpose without them. We do not choose to cater to fastidious fondness for the very latest pattern, and encourage ladies in exhausting their entire time with thoughts in the “where-withal shall we be clothed.”
Every lady ought to be dressed well, if not her purse will permit, but that does not mean to cast off a garment, because something later than that has appeared in the fashionable world, and that too with no regard to the better uses to which such expenditures could be put. But of course we need not mention this, for that sort of woman would scarcely read a magazine without fashion plates.
To dress meanly with no reason for so doing, and above all, to make religion an excuse for shabbiness, as Timothy Titcomb says, is abominable. It lessens our usefulness. We should be as beautiful as we can make ourselves, but that is not accomplished by any means in following the rule of fashion plates.
Merinos, and all wool Delaines are the most sensible as well as most durable of all materials for out-door wear at this season. Cut with pointed basques on slender figures, and trimmed neatly, with a dainty cambric collar and sleeves, and you have a costume suited to all ordinary occasions for winter wear. One’s own taste and length of purse should be the guide for extraordinary ones. Large plaids on small people, stripes on very tall ones; and Bayedere on short persons, are all equally unbecoming. Indeed, all conspicuous patterns weary the wearer who has refined taste, as well as the beholder. Above all thinks, consult, if possible, in an indirect way those you love best as to color, &c., provided your complexion will permit a choice.
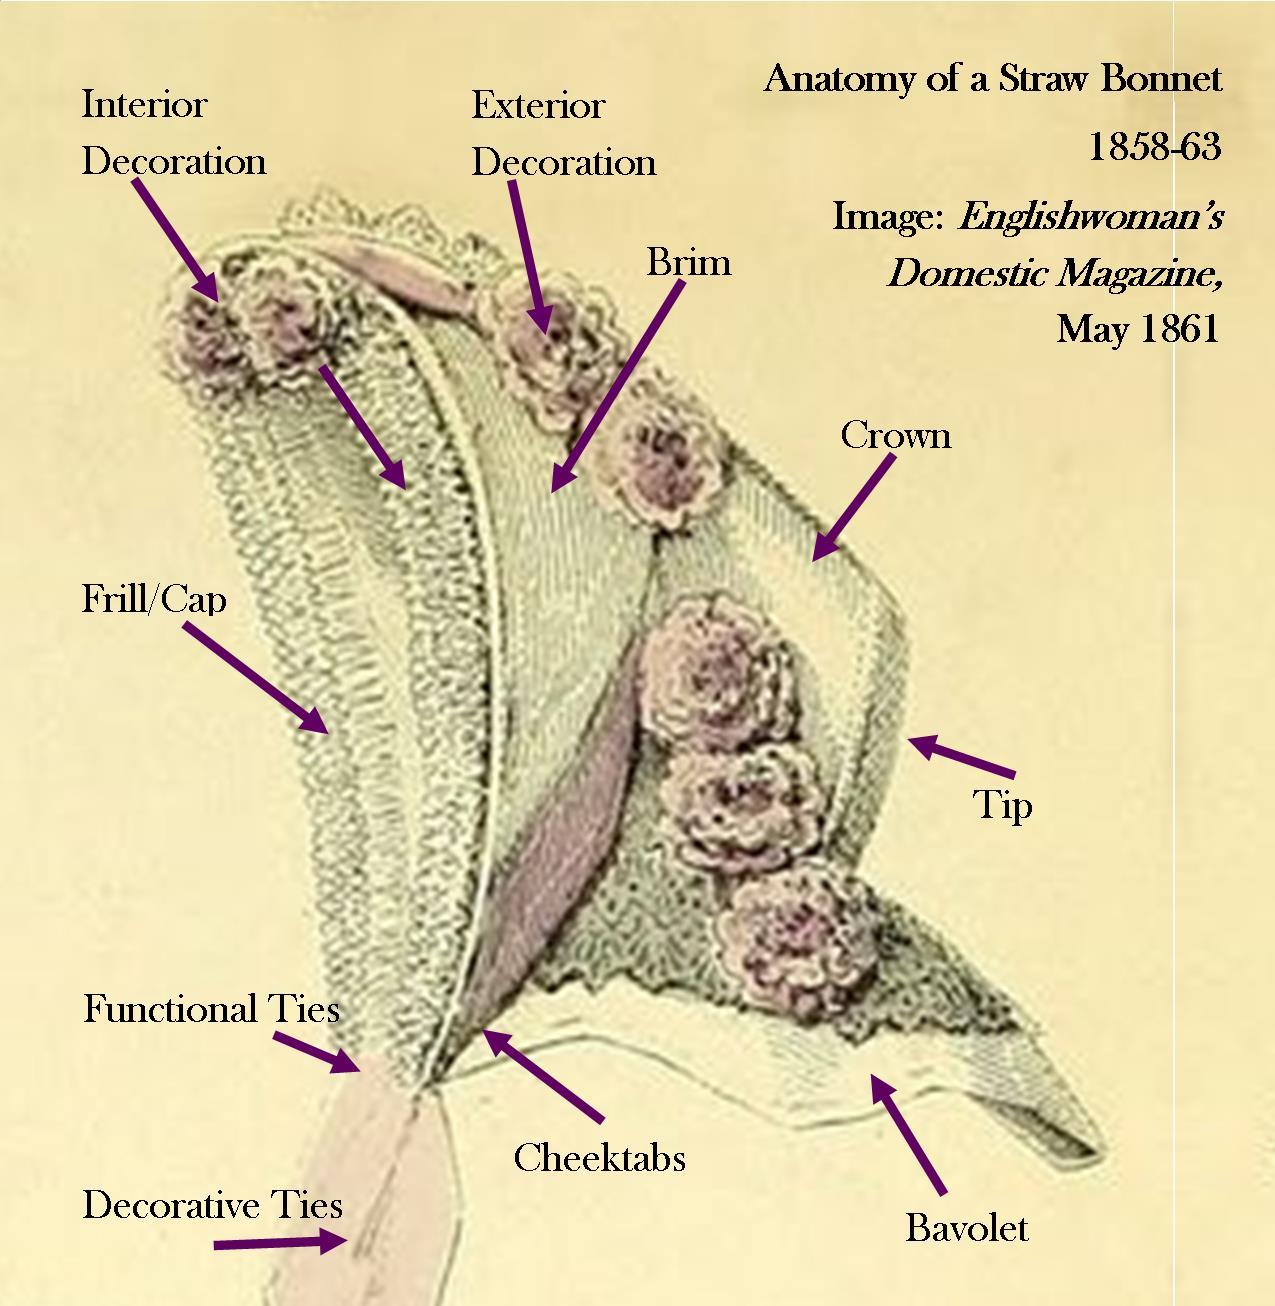
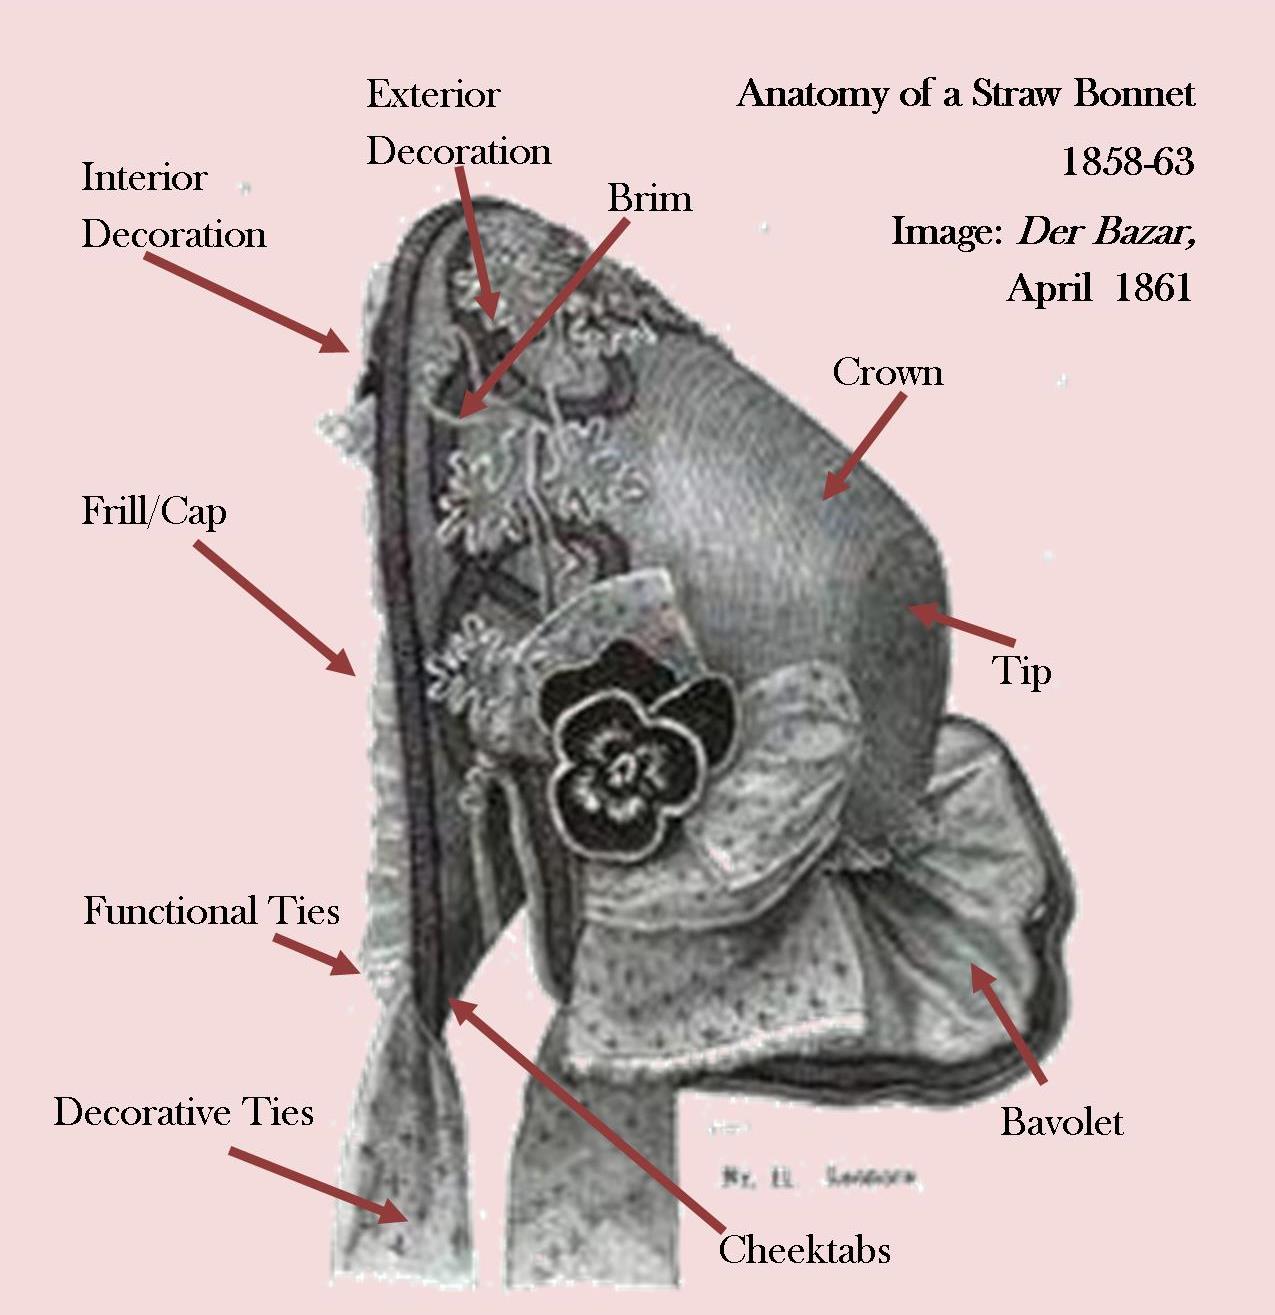
The prettiest and most serviceable bonnet for winter is a black velvet. It admits of remodeling, and can be worn with propriety with any colored outer garment, and any color about the face.
The loose sacque or raglan of ladies’ cloth, is exceedingly convenient, as well as pretty and inexpensive for a cloak, as not trimming is required – nothing but a binding neatly stitched on.
The same material to be used for children’s wear, both boys and girls. Pretty wool cheques are cheap and durable for girl’s winter dresses, and boy’s coatees for the house. Above all things, don’t let them be made too short at the top and bottom of the garment. Many a mother’s pride has been gratified by the praise bestowed upon the fair neck and rounded limbs of her child, and after her heart has been broken, while laying them from her sight forever. Which will your choose?
Dress them warmly and let them out into the frosty, fresh air to grow rounder and fairer, albeit no one but yourself see how fair. We did not purpose saying this much, but it is written. Quarterly we will endeavor to suggest whatever is worthy of mention among the novelties of the season, always keeping our peculiar views of substantiality and beauty side by side.
New Materials
The challies which are offered at very reasonable prices this fall, are pretty, and seem likely to be the most durable of any commone dress goods that we find. They are nearly all in bayadere stripes – some of them high colored, but where warmth and durability are required we think they will be found very desirable. There is also a new material of Angola wool for dresses – heavier than wool delanes or merinos, which we judge to be very desirable for these qualities, viz: strength and durability, unless the satin stripe that adorns it should be found to fray out. – Dresses of this material can be bought in New York at $6, the pattern. This comes the nearest to ladies’ cloth of anything we have seen. The high-colored printed cashmeres – merino styles – are offered as low as six shillings per yard, while we found recently at Stewart’s the best colors of printed French merinos at a dollar per yard. The bright chintz, patterned, all wool delaines are offered lower than ever before. But no delaine can be as cheap as a good merino at least to those who wear their dresses out. We are glad to see more durable material for dresses coming into market. Much time and labor in dress-making will be saved by those who emply these materials. It is also a saving of expense, for the cost of making and trimming a dress of good, and of worthless material is very nearly the same. Every lady, then, should feel that time and labor are wasted in the making up of flimsy material and even if her means should be at first seem too limited to purchase that which is better, she should make a special effort to save up “capital to economize with”.
(bayadere stripes = horizontal stripes)


 When sewing on the go, I am doing one of two things: Either I am sewing small things with pieces already cut or I am sewing straw. This means I need two types of scissors – One for cutting thread and one for cutting straw. To the right are some of the scissors I use in my various sewing kits for the thread snipping part and the occasional ribbon cutting. Two are reproduction. Three are antique. My straw cutting scissors are roughly 5″ long, an estate sale find. To have a rounded visual interpretation I should carry a larger pair of scissors as well. Admittedly, I remember these when I take my large box, but tend to forget them when I have my smaller kits.
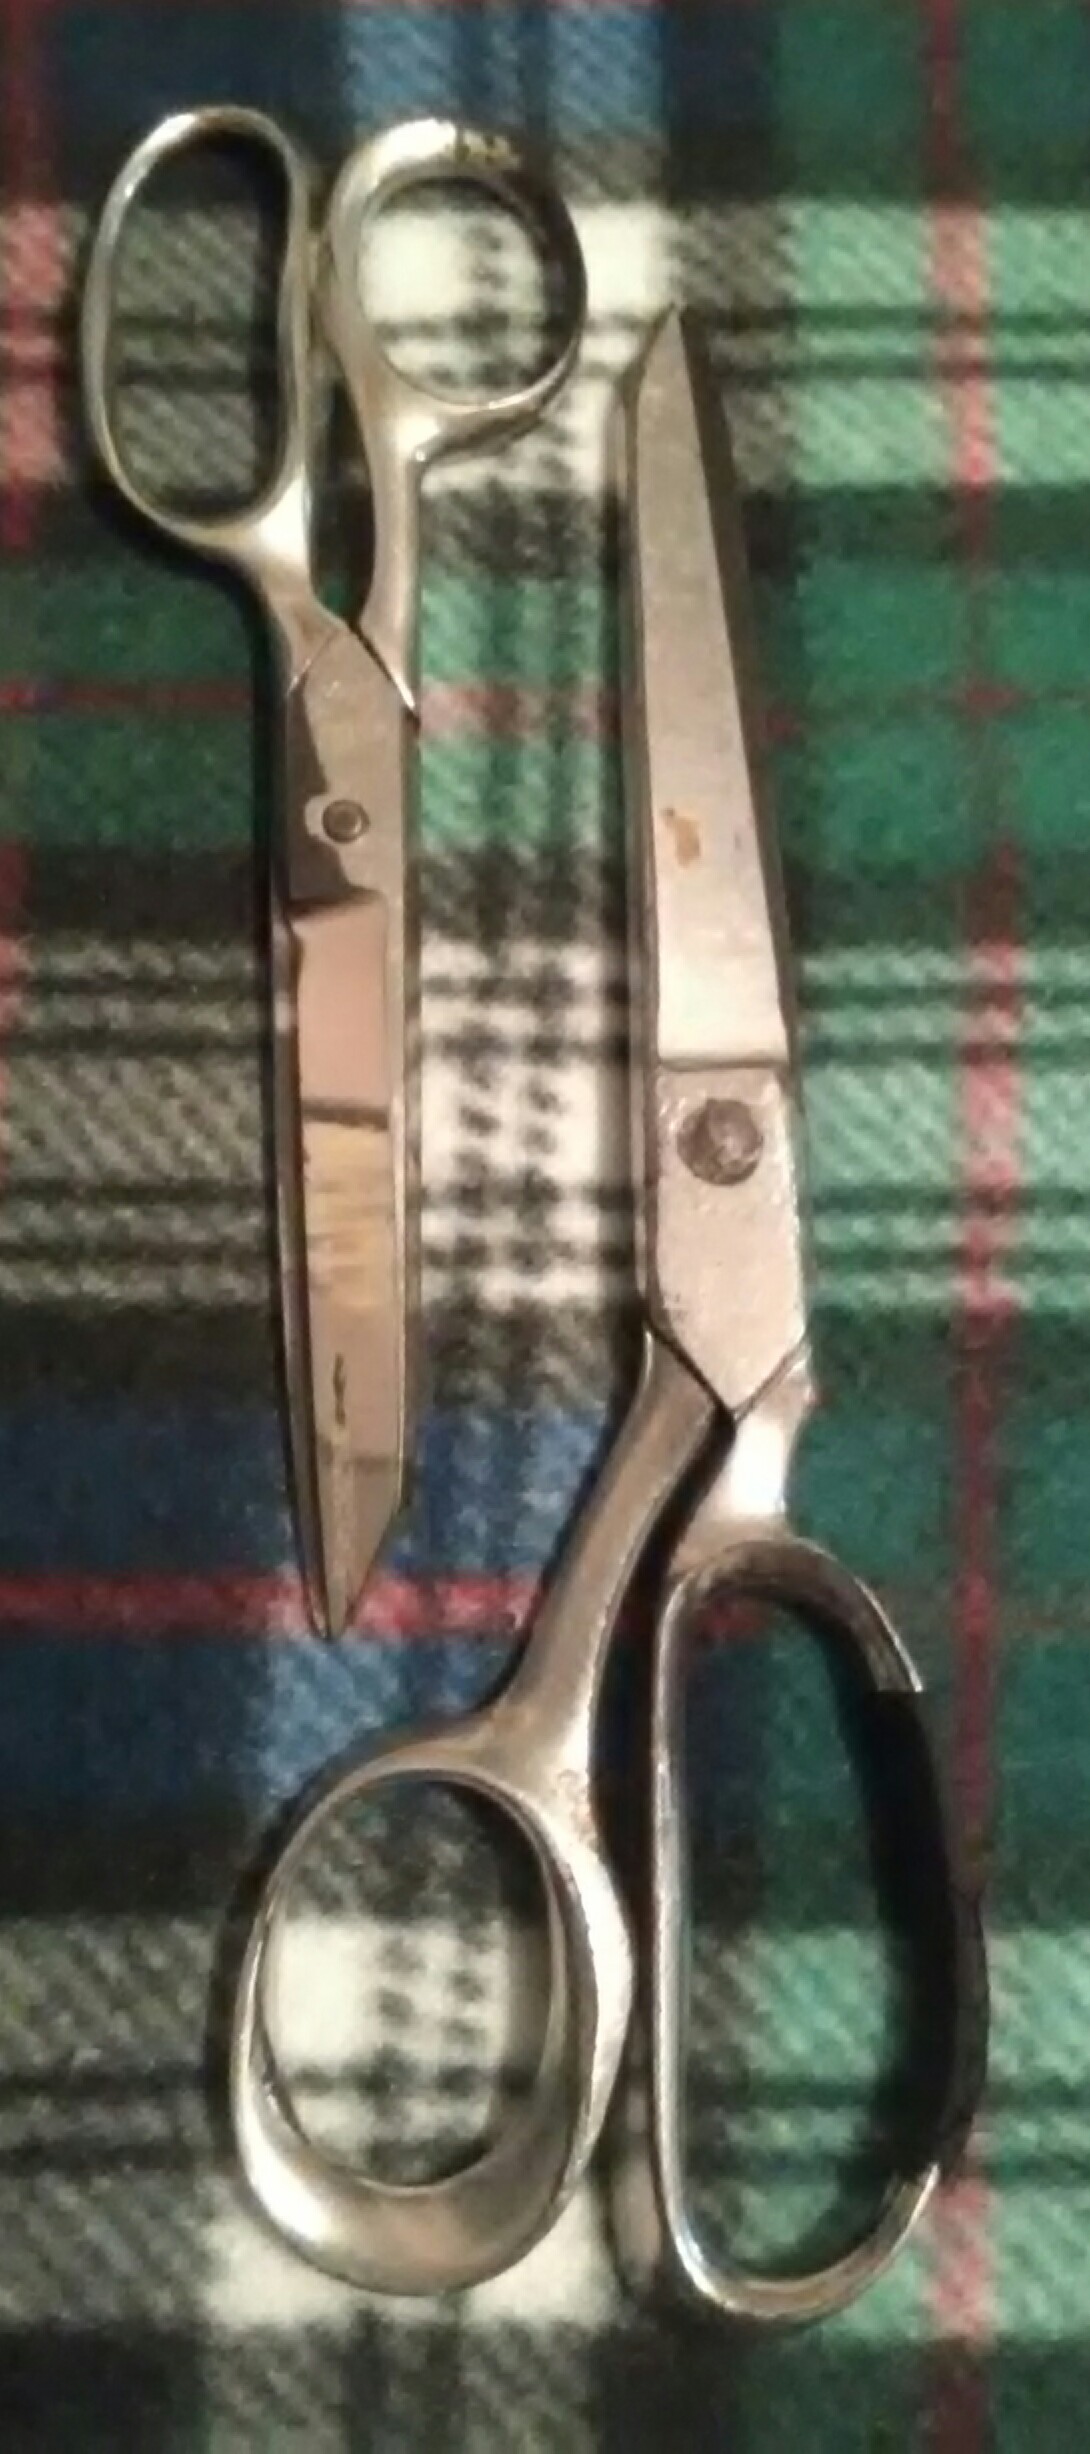
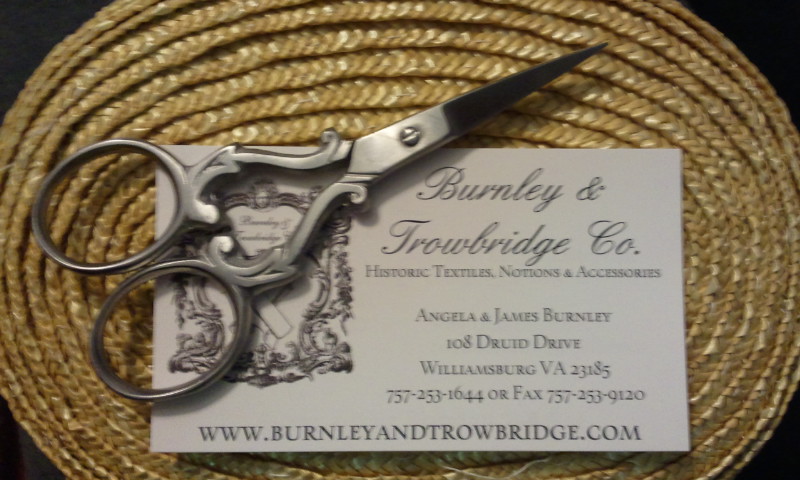 Small Scissors options:


 The only bad thing about teaching workshops is missing attending the others. “Sit not in Idleness” sounds like so much fun. I’ve really wanted to get Lily a trivet. I would love to have a hand-bound notebook for when I set up the millinery. Um, Yum, Cheese! And, a basket too?! It would be great to know more about taking care of tin. Plus, I loved the little tin nut grater we had when I was a kid.
 I hope to see many of you there. The museum is just outside of Rochester, NY; about an hour from Buffalo/Niagara Falls and 2ish hours from Syracuse. There is a beautiful B&B right down the street. There are several nice hotels in Henrietta too.


