Aka “Finally making a Dress”
Aka “The Evolution of a Dress in My Mind”
I finally decided to take a millinery break and make a dress. It is kinda funny that my first dress diary is on a dress from an era I am new to rather than an era I could rattle on about in my sleep.
This has been a molding and remolding process. This fabric has been sitting in my cabinet for going on or just past two year now. I originally bought it off a CW era FB group with the intention of making a 50s/60s washable, if I am ever laborious again dress. Well, over the past two years I’ve gone from liking to disliking the fabric due to the color. In the last couple months it grew on me again. I am still quite worried that the color will look awful on me. It is something about browns and yellow that sallow me out. (Fingers crossed.)Still, actually making a dress was just not catching my fancy. It was all about the straw.
Then, well, spring came.
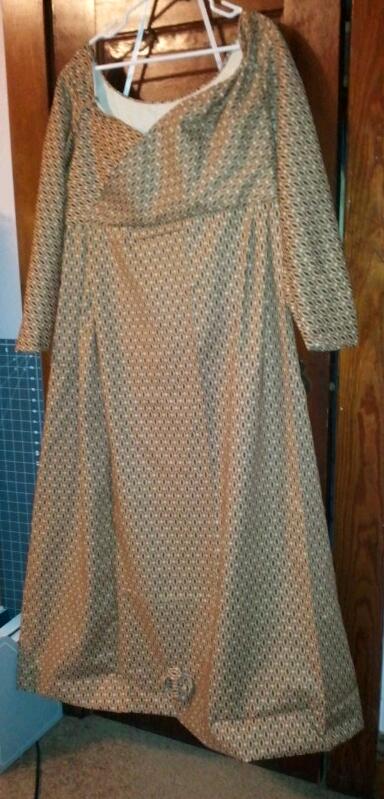
On Saturday evening I had it in my head I needed a dress for the museum’s upcoming 1812 event. I had a two piece (sacque and petti or shortgown and petti) combination in my head. The shortgown was a crossover front and fitted back. The cabinet offered a couple options – the plaids were out, the paisley is reserved – the brown sorta stripe ovally motif was the fabric. (In my head is still has a blue in it.) By morning, I wanted to make the dress. As the day progressed wandering the historic village the want/need of an early teens dress evolved into a want of a late teens to early twenties dress. Ideas of one pieces vs two piece, earlier vs later, with or without the crossover jumbled around in my head cooking in the sun. By 1 am when I had a toothache (um late 30s, why is that wisdom tooth moving???) the dress was distinctly a single piece, crossover bodice 1820 dress.
Of course, it was 1 am and I had to work in the morning.
 Monday was toasty, particularly with a windowless classroom full of computers and broken ac/fans. I was pretty comfortable despite coworkers insisting it was hot and that I must be hot. I did feel hotter on the drive home. But, still went straight to the sewing room sans ac or fan. Out came the pencil, scissors and corset. A thunderstorm rolled in and out; time blurred, as time often does in the sewing room. It is a good thing I have an alarm set in my phone, aka the techie fabric weight. By dinner, I had the lining cut, constructed, fitted and the fashion fabric cut, constructed and ready to attach to the lining. After dinner, I sewed away as the temperature eased, attaching the two layers. I was pleased with the way it looked. I was not pleased with the photo hubby took to show the fit. Off came my head. Thank you crop feature. (I still don’t know if I’ll share that one.)
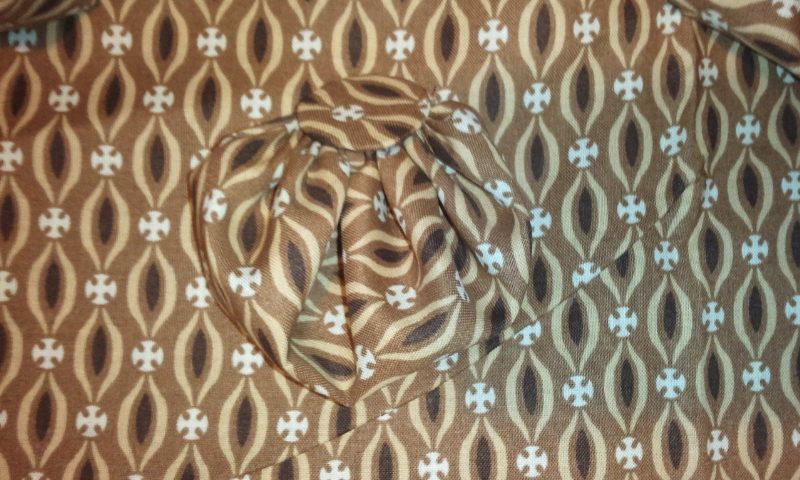
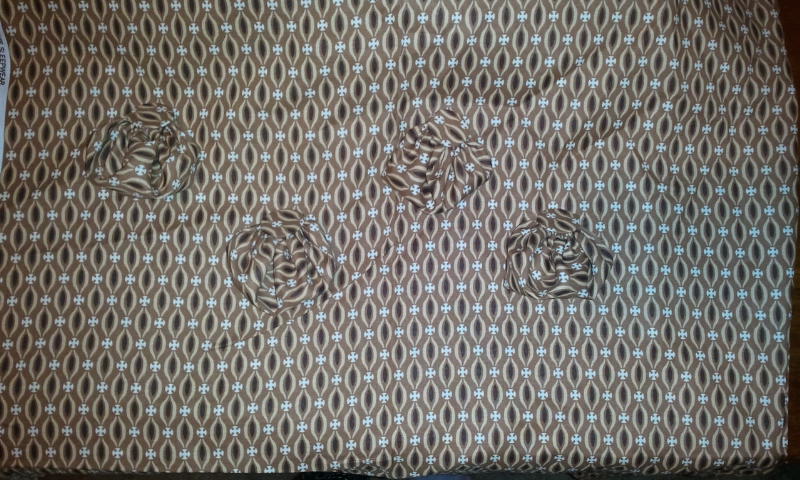
 I still wasn’t quite tired or ready to go to sleep since it was such a nice day out and my body was so enjoying the warmth and the breeze from outside. So, I grabbed the excess cuttings from the bodice to see what they might want to be. I had thought I would do a few rows of bias ruche around the skirt. But, with these little pieces to play with…..
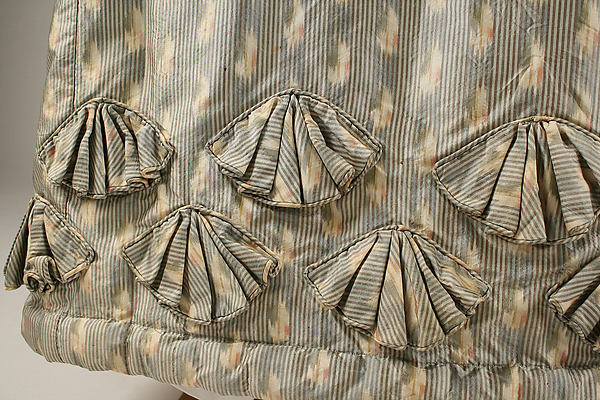
 I ended up with scallopy balloony shape gathered behind a faux self-fabric button. I figure if I set them 4.5″ apart in two rows (sorta like this), I’ll need 20 of them. I do need to learn more about those hems that look padded. In terms of wet grass, I think that would be uber-obsorbant and a soggy mess. I think I see some dresses with cording. So, maybe a corded row under the balloonies. As far as the balloonies themselves, I am considering a smaller version for the bodice. The other option being a plain self fabric or blue fabric button. Why? There is this button over neckline from this earlier dress that I am just smitten with. As Monday came to a close, I had to tell myself to go to bed as the weather was just so nice and warm making me feel so good. If I had allowed myself to start the skirt, I would have likely kept on going through the night.
 Tuesday had higher ambitions that the incoming storm allowed. The skirt panels were cut, then recut (two right-hand side front angles just don’t work.) Once assembled, I basted them into place from the sides to the front closure. Then gathered and basted the full panel into the back. I distributed the back gathering across the full back. (I haven’t settled upon that yet though. A big part of me wants lots more fullness center back.) It was pretty relaxing sewing the skirt to the fashion fabric. It was far more relaxing to the point of sleepy whipping down the lining as the air pressure continued to change and the temperature dropped more. In the end, I only got the skirt assembled, set and attached. I was hoping to get it hemmed and some sleeve sketches done.
  Oh, I did plop on the balloon scallops (how I need a better name for these) and cut out more disks.
 Part of me wonders if the cold, coldness of Wednesday contributed to my sleeve decisions. On Monday, I was thinking about looking up when short sleeves were okay for the teens and early 20s. By the time I sat down to draft on Wednesday, the idea of short sleeves were out the window, far out the window and blown away by a frigid wind. The choice was then straight sleeve or shaped sleeve. While the shaped sleeve had appeal due to its similarity to the coat sleeve I’m used to in the 1860s and utility of fabric, the straight sleeve had the appeal of challenging my fear of wearing a straight sleeve and the simple laziness of the easy draft. The straight sleeve it was. I happened to be wearing a light fleece. So, as I worked, I kept trying the sleeves on. My rational was if the sleeve fit over the fleece, it wouldn’t be too tight. I am pleased with the sleeves.
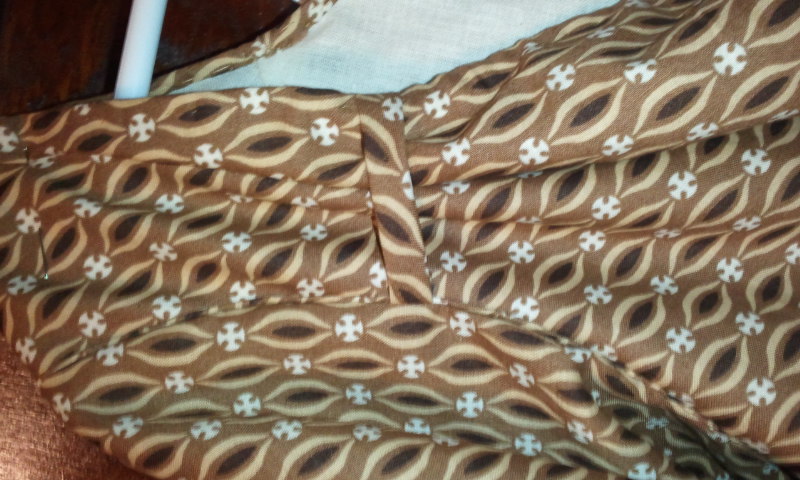
 I made the little pleat-over part of the neckline. I think it turned out pretty cute. I initially planned to do a little self fabric button like the original inspiration. Now, I’m not sure if I will because I rather like the fabric piece as is. tbd.
I started the hem just before bed. As it was so cold, I was looking forward to crawling under the covers. So, the hem hangs half completed.
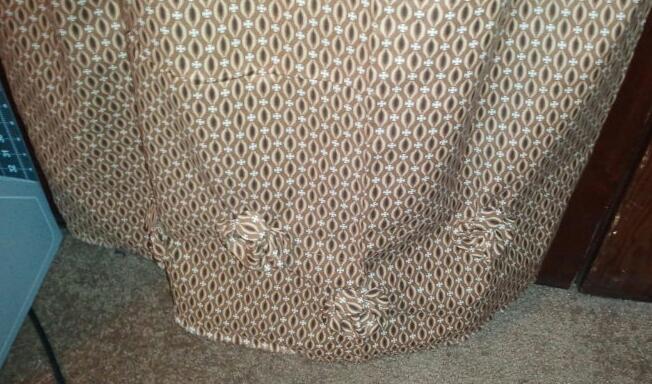
 Thursday, ah, Thursday didn’t go so well. I hoped to finish the dress to have this post ready to go Friday morning. Then came food poisoning. It was my own fault. Completion did not happen. I managed to finish the hem and set some hooks & eyes. I also managed to get a few of the scallop-balloonies made. For two rows I need 20 of them. With a few pinned on, I do think the hem needs something more, either another row of scallop-balloonies or a bias or corded bias strip under them or weaving through them.
Part 2 coming as soon as I finish the dress and get photos….
 Thank you to each of the ladies who took the time to enter my “Show Your Millinery” Give-Away.
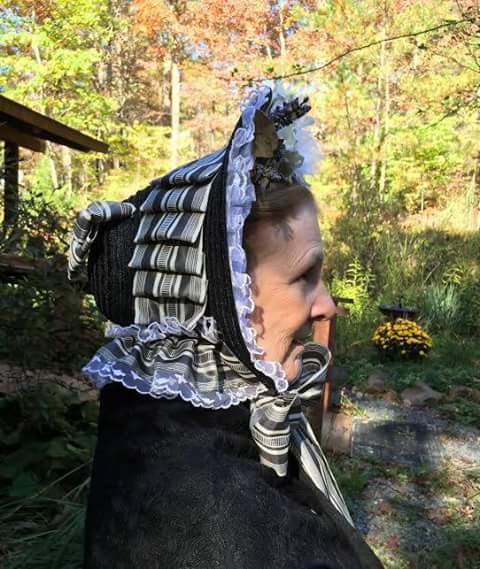


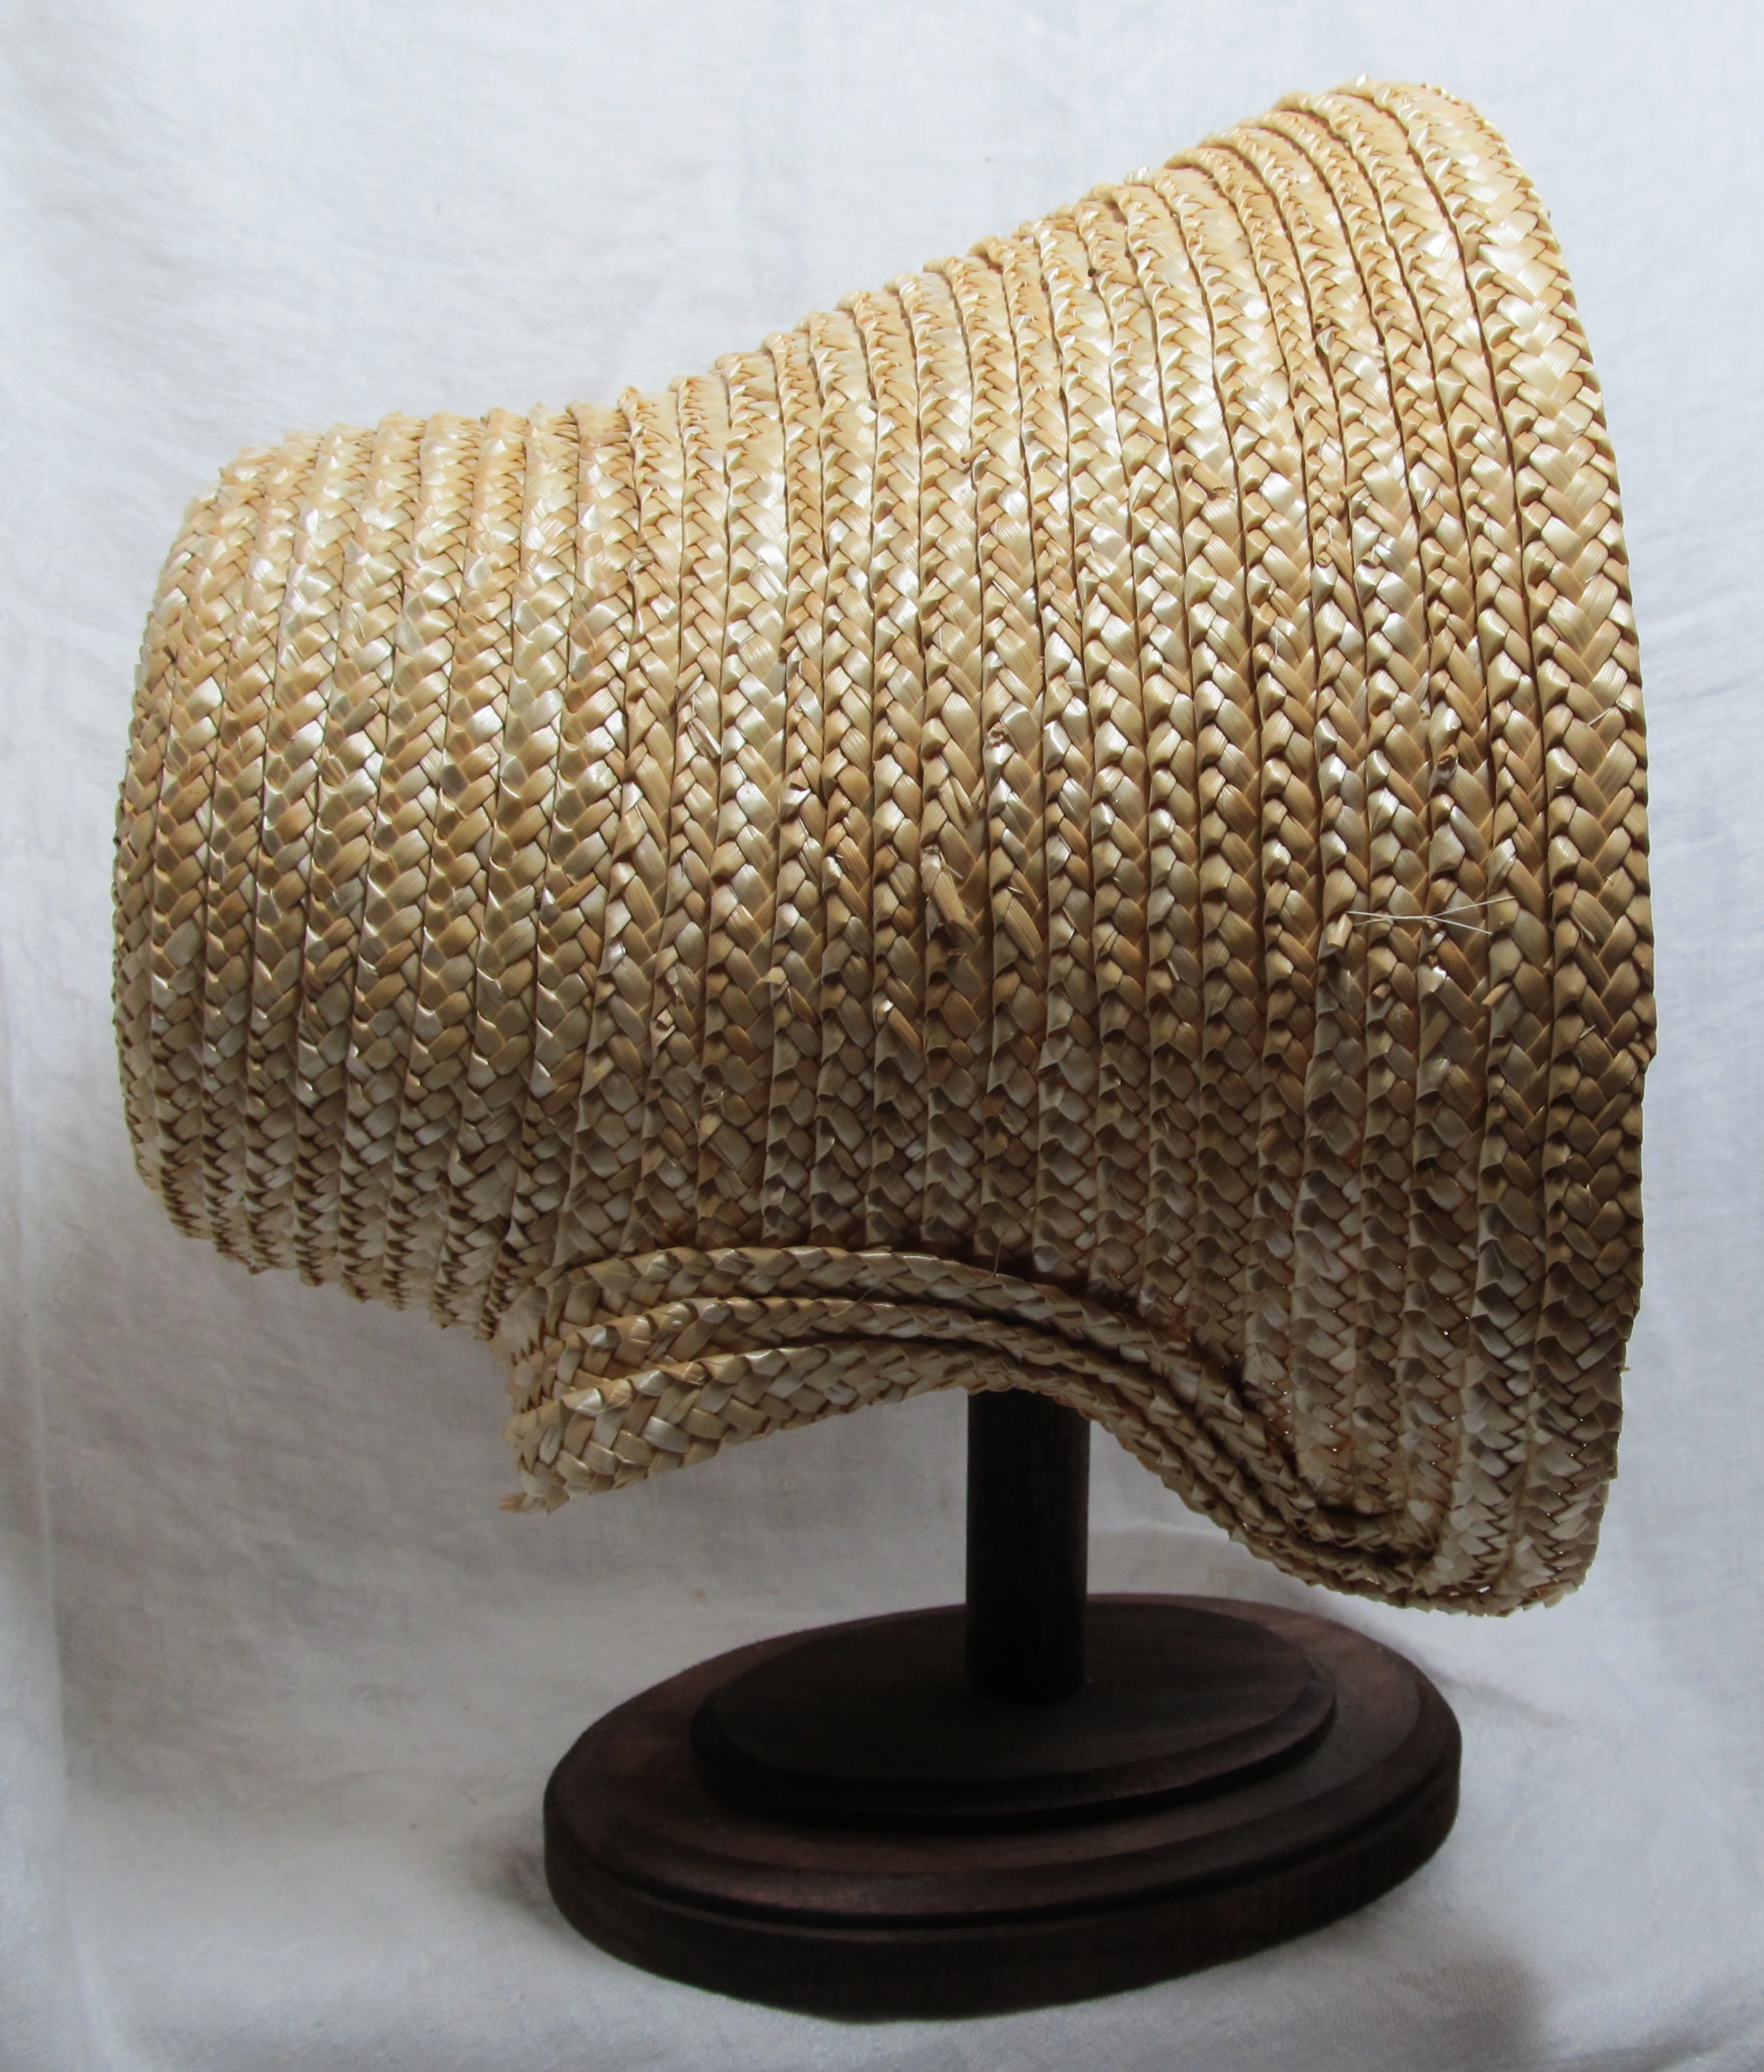
 Here is the bonnet I’ve been working on this week. It started with a page of 1841 bonnet illustrations (see
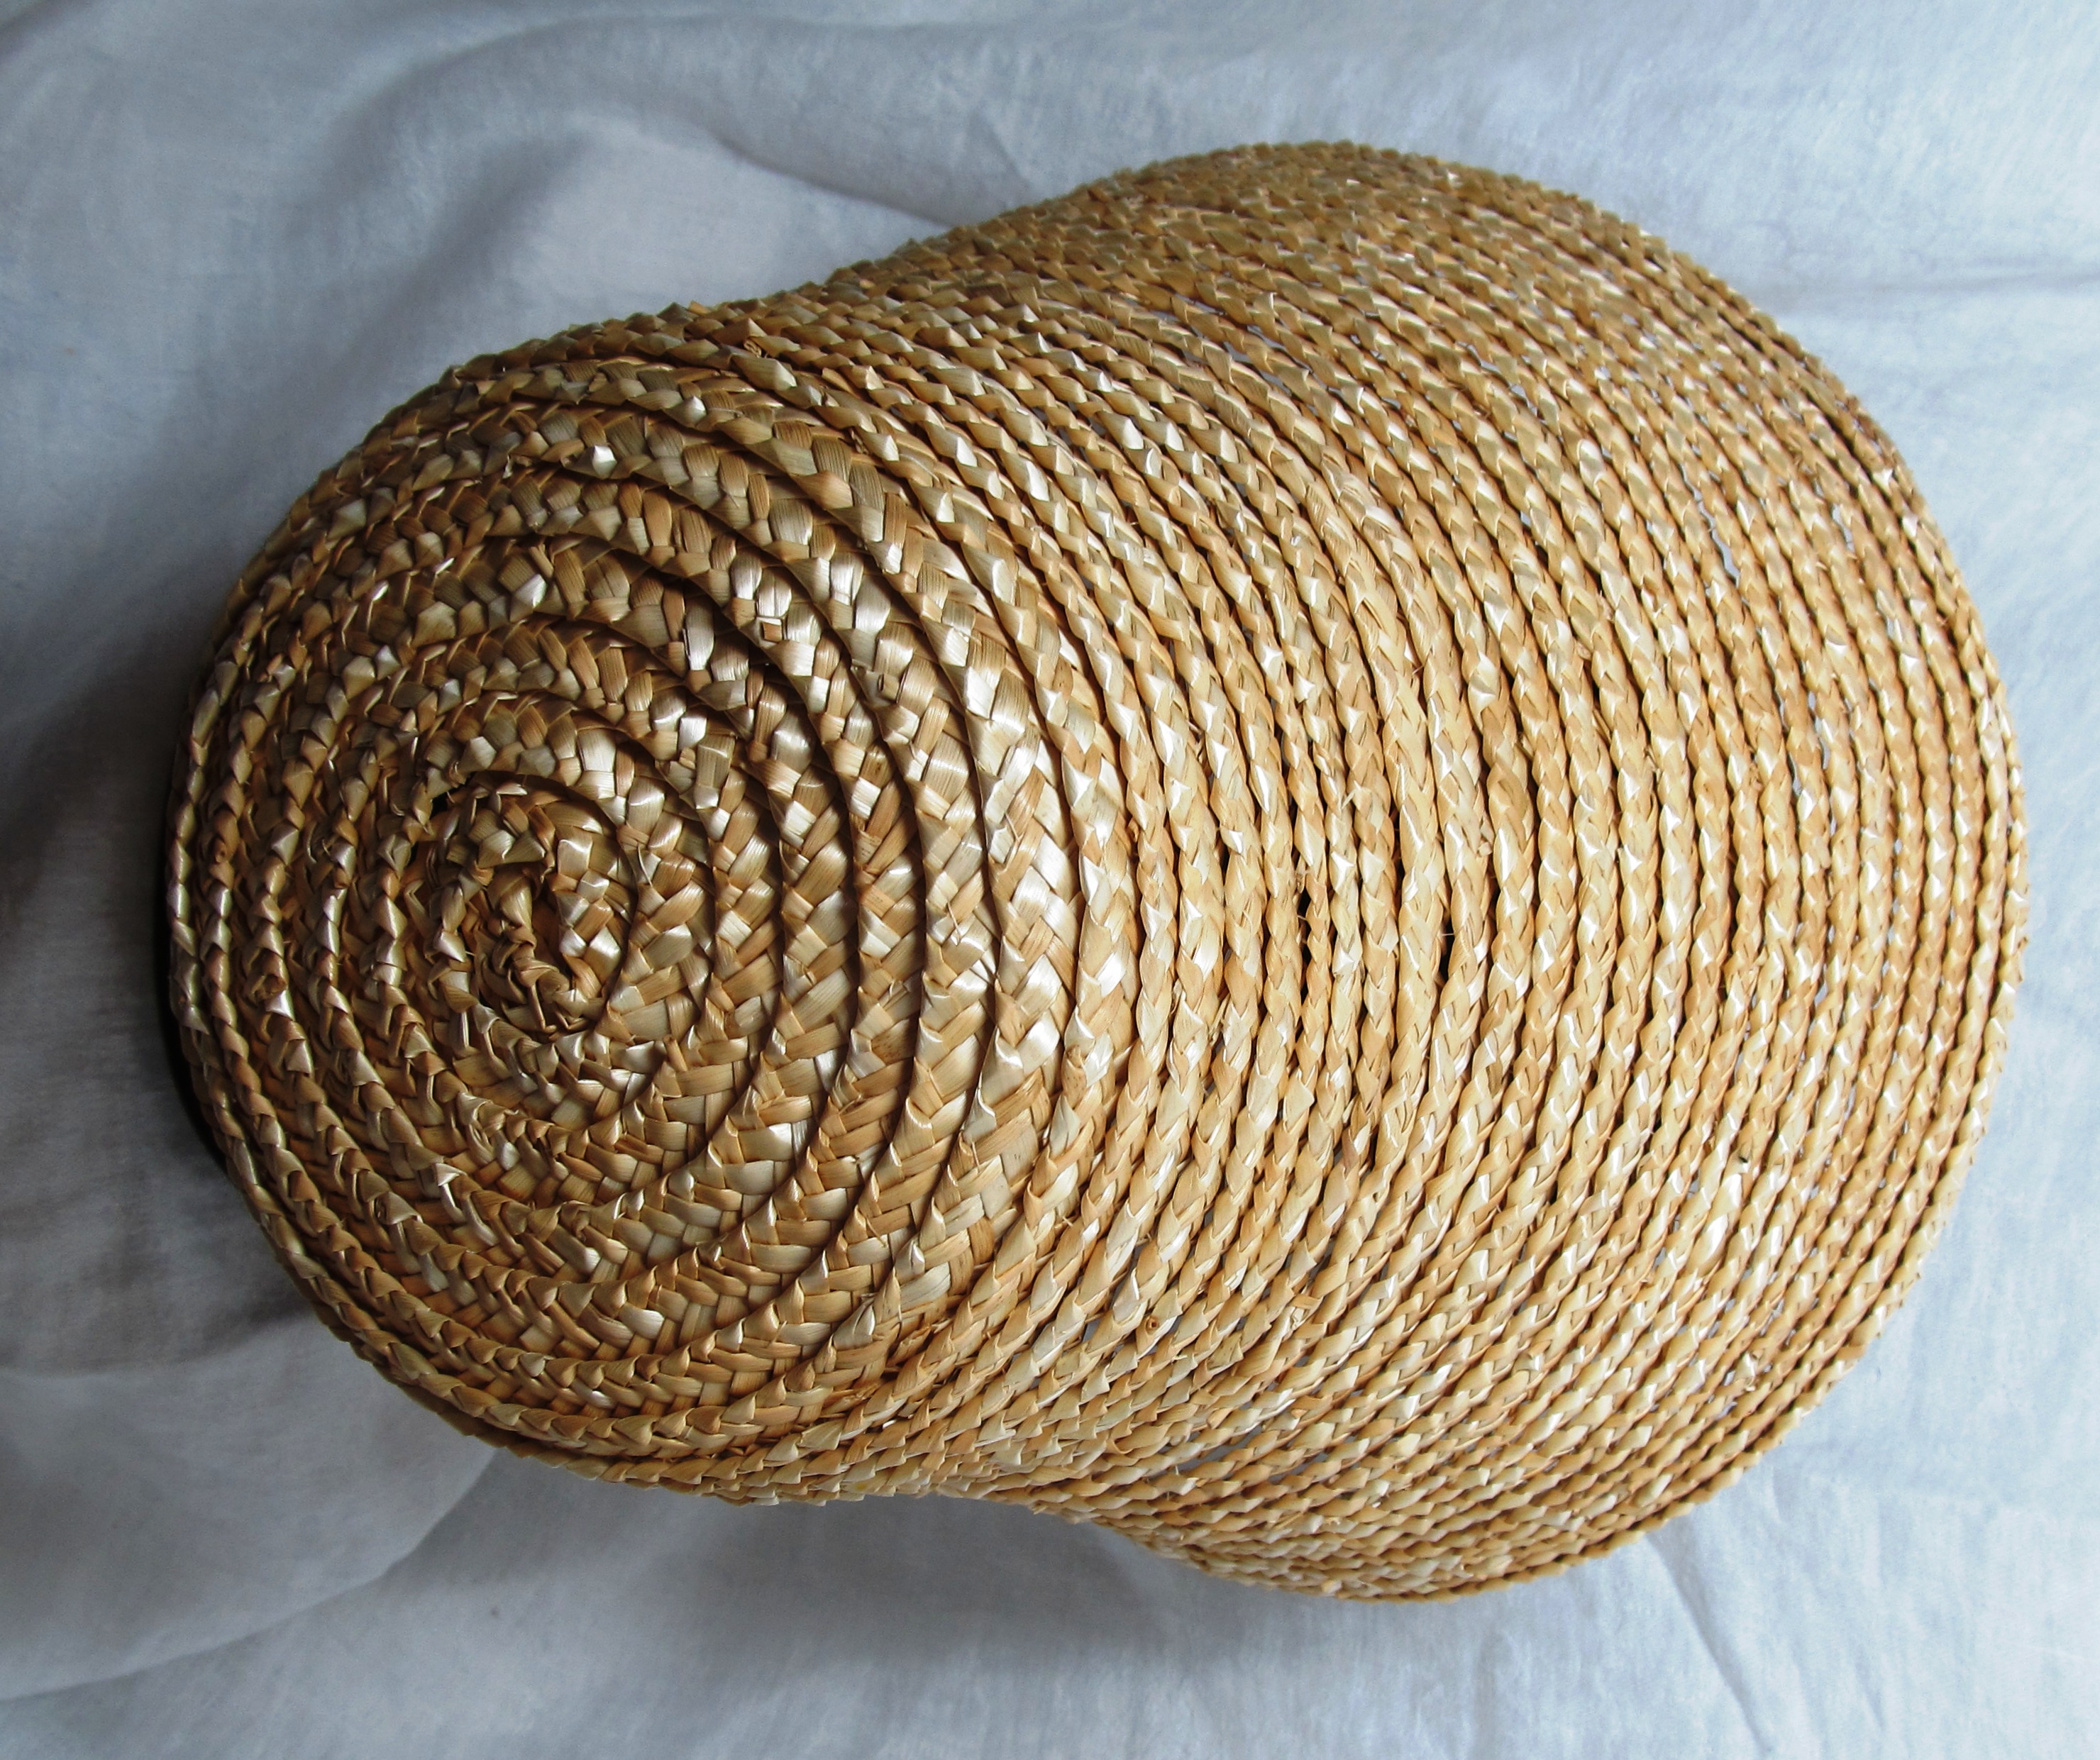


