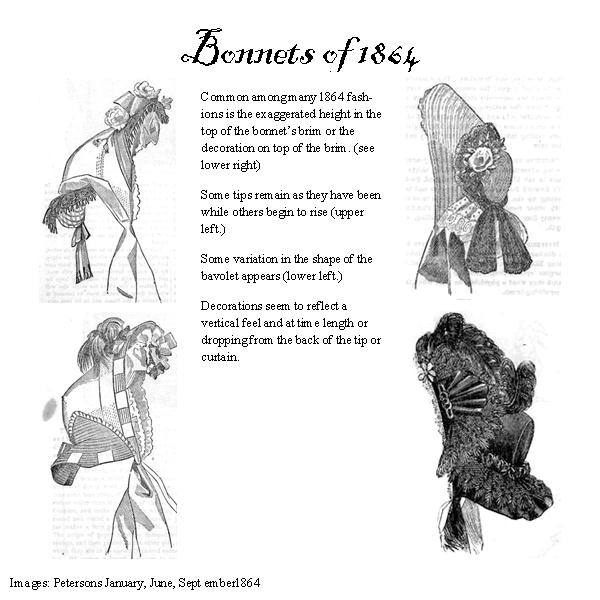
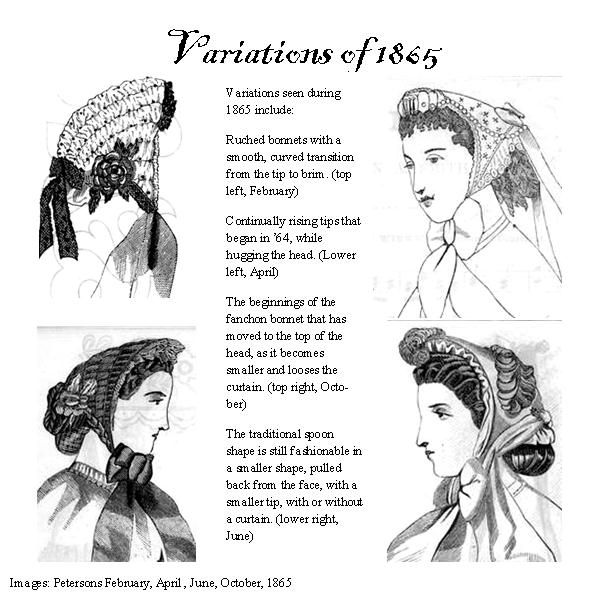
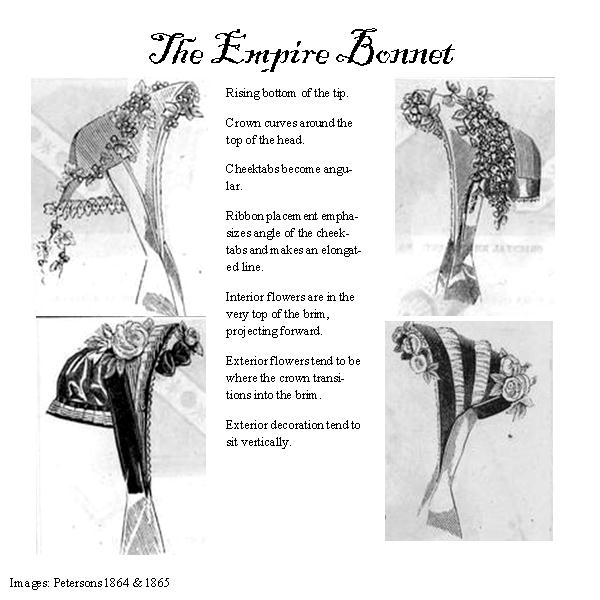
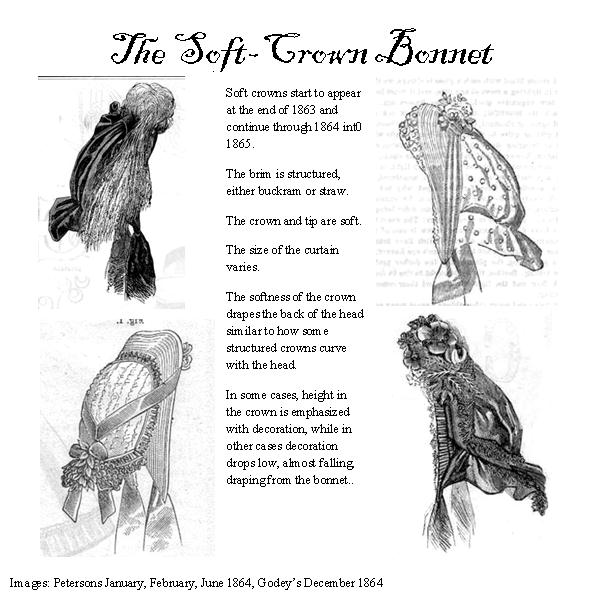
I’ve been creating some millinery visuals for those looking ahead to 1864 and 1865…. (click on each to enlarge)
I have a couple more in mind to do…..
I’ve been creating some millinery visuals for those looking ahead to 1864 and 1865…. (click on each to enlarge)
I have a couple more in mind to do…..
Over the last week and a half getting the mail has been much more fun than usual. Instead of offering bills and junk mail, the mailbox offered handwritten envelops filled with fabic from the first of the Fanciful Utility Fabric Swaps, the Cotton Swap.
I want to thank everyone who participated. I hope each of you have had as much fun with this as I have. I loved sending the pieces of fabric and receiving them. It was fun opening each one. There were even some surprise extras.
Here are the fabrics I received (this is both groups of 8 people):
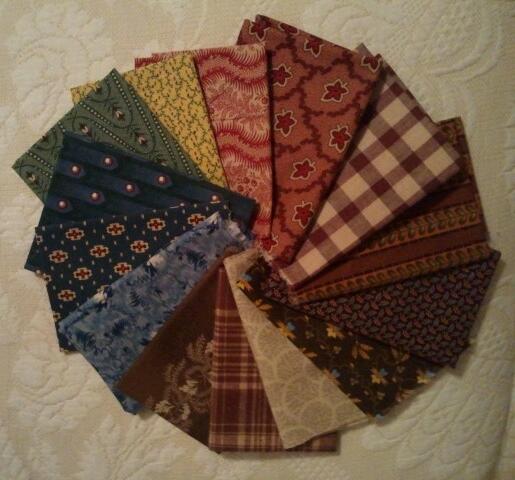
Two more arrivals:

I will add some information on several of these fabrics asap.
As I started receiving my envelops of fabric during our recent FanU Fabric Swap, I couldn’t help but think swapping would be a great way to build or expand a swatch reference. The more I thought about it, I realized a swatch swap in person would be fun for reenacting groups to do at a meeting.
Here is my thought process. (You are welcome to steal this idea.)
*Note – Tech friendly groups could try a digital approach for those swatches not requiring feel. Each member brings a larger sample, say 10″x10″ and a large print card with the documentation. The fabrics are all layed out in a well lighted with their card sitting on the fabric in the lower right corner. Members then use the cameras or phones to take photos of the swatches with cards creating a digital swatch.
Swatch Cards and Books
There are several ways you can approach your swatch book.
Each person will want different information on their swatch cards. Here are the swatch cards I did a few years back. For new swatch cards, I would want to include information on the print (block, roller, etc), colors/dye, finish and dating as well as how a fabric might be used. That could look more like 2013 Swatch Card.
Here is Lily’s green silk caned bonnet trimmed out in pale pink satin and pink & white flowers.

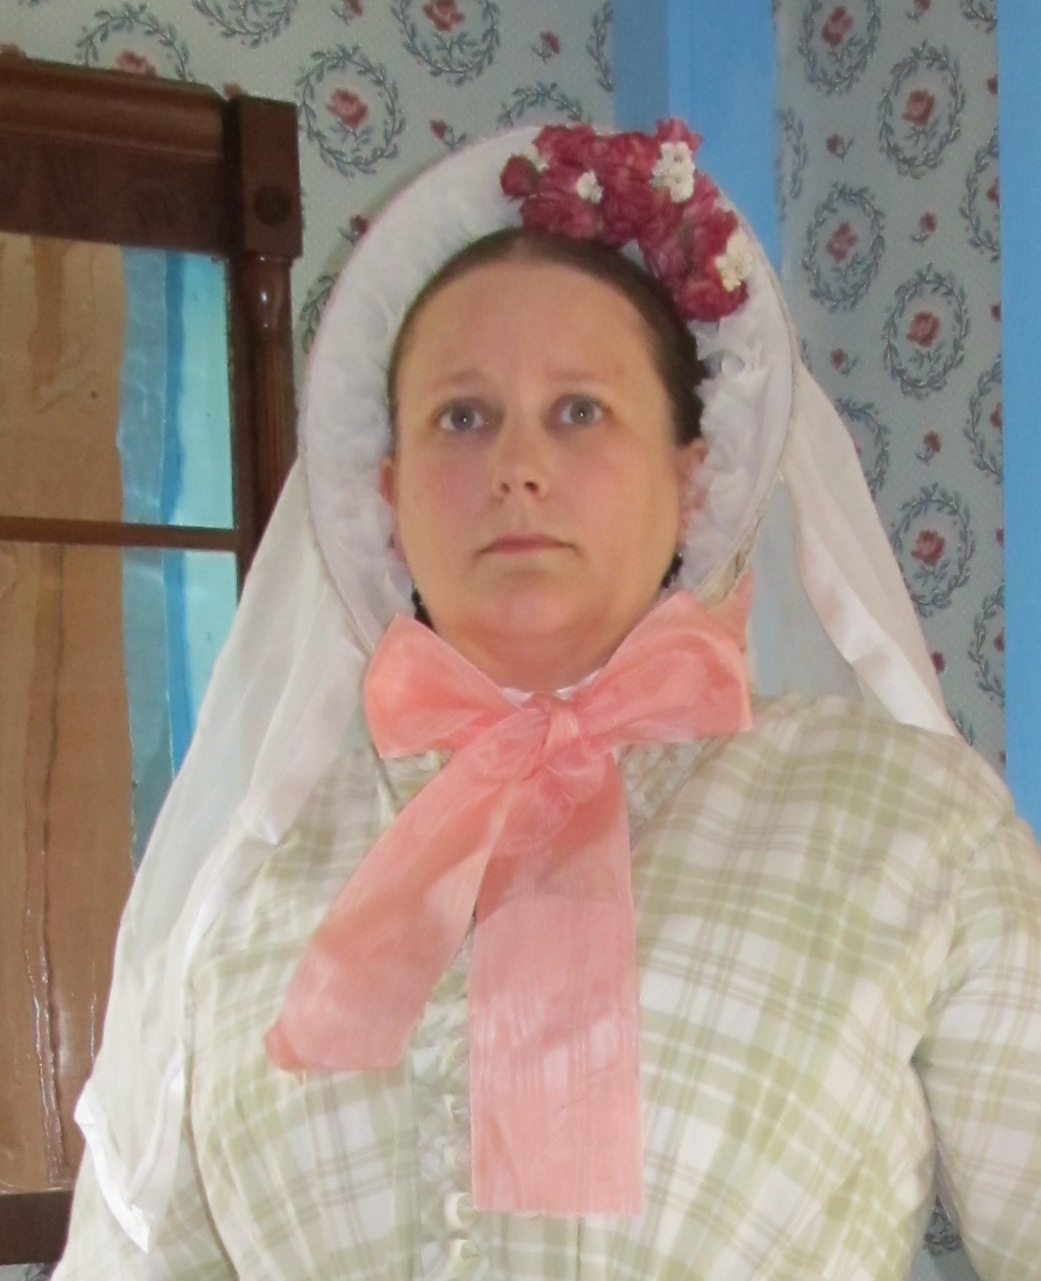
 Here is my pearl silk caned bonnet trimmed out in rosey pink and paper roses with a silk bordered veil.


Here is a lovely example of how to do a seaside or recreation appropriate hat. She chose a hat with a fine, narrow plait. The shape she gave the brim allows it to dip down nicely in the front.
A job very well done.
The Quintessential Clothes Pen
I recently participated in an outdoor mid-century dance performance for which the weather was an un-obliging 90-something degrees + humidity. Yup, not kidding. It was HOT! And we were dancing on asphalt. Luckily, we were out on an island in the Boston harbor and had a breeze. But it was HOT!
Anyway, more on that performance soon, because it involved a new cotton print day dress made from one of my recently acquired historic cotton prints! In addition to the dress, I also restyled a straw hat to go with the outfit and keep some of the sun off of my head. The hat has been used with various other clothes (1780s and Regency come to mind), but I had only ever added a simple ribbon to it rather than really styling it. This was the perfect opportunity to really make something of the hat!
I wanted to…
View original post 494 more words
Today I’ll start with something completely silly. Eggs in a tin. Yep, I told you it was silly. I picked up a bunch of matching tins for Dan to take food to Gettysburg a couple weeks back. To my delight, I found one dozen large eggs fit perfectly in the tin. I’ve never been a ‘cooler at events’ person. But, when I saw what those compressed paper pulp cartons do in melting ice, I knew there had to be a better way. So, this is how the eggs traveled to the event. I took my eggs out and sent the rest of the tin via little sister currier to Dan. I have yet to see how the tin did. I do worry it may have rusted. Next up, pickling or a crock.

I do love crocks.
For this event, we had a crock of cherries. You can see it on the right hand side of the table. We also had a crock for pickles. That is the smaller center one that should next to the eggs. The brown and red pieces are the museum’s pieces that were available for me to use in the Dressmaker’s Shop. The salt glaze pitcher is the one Lily bought for me on Friday. I have been wanting a large pitcher for a good while. I was so surprised when she handed it to me. It holds a half-gallon of water.
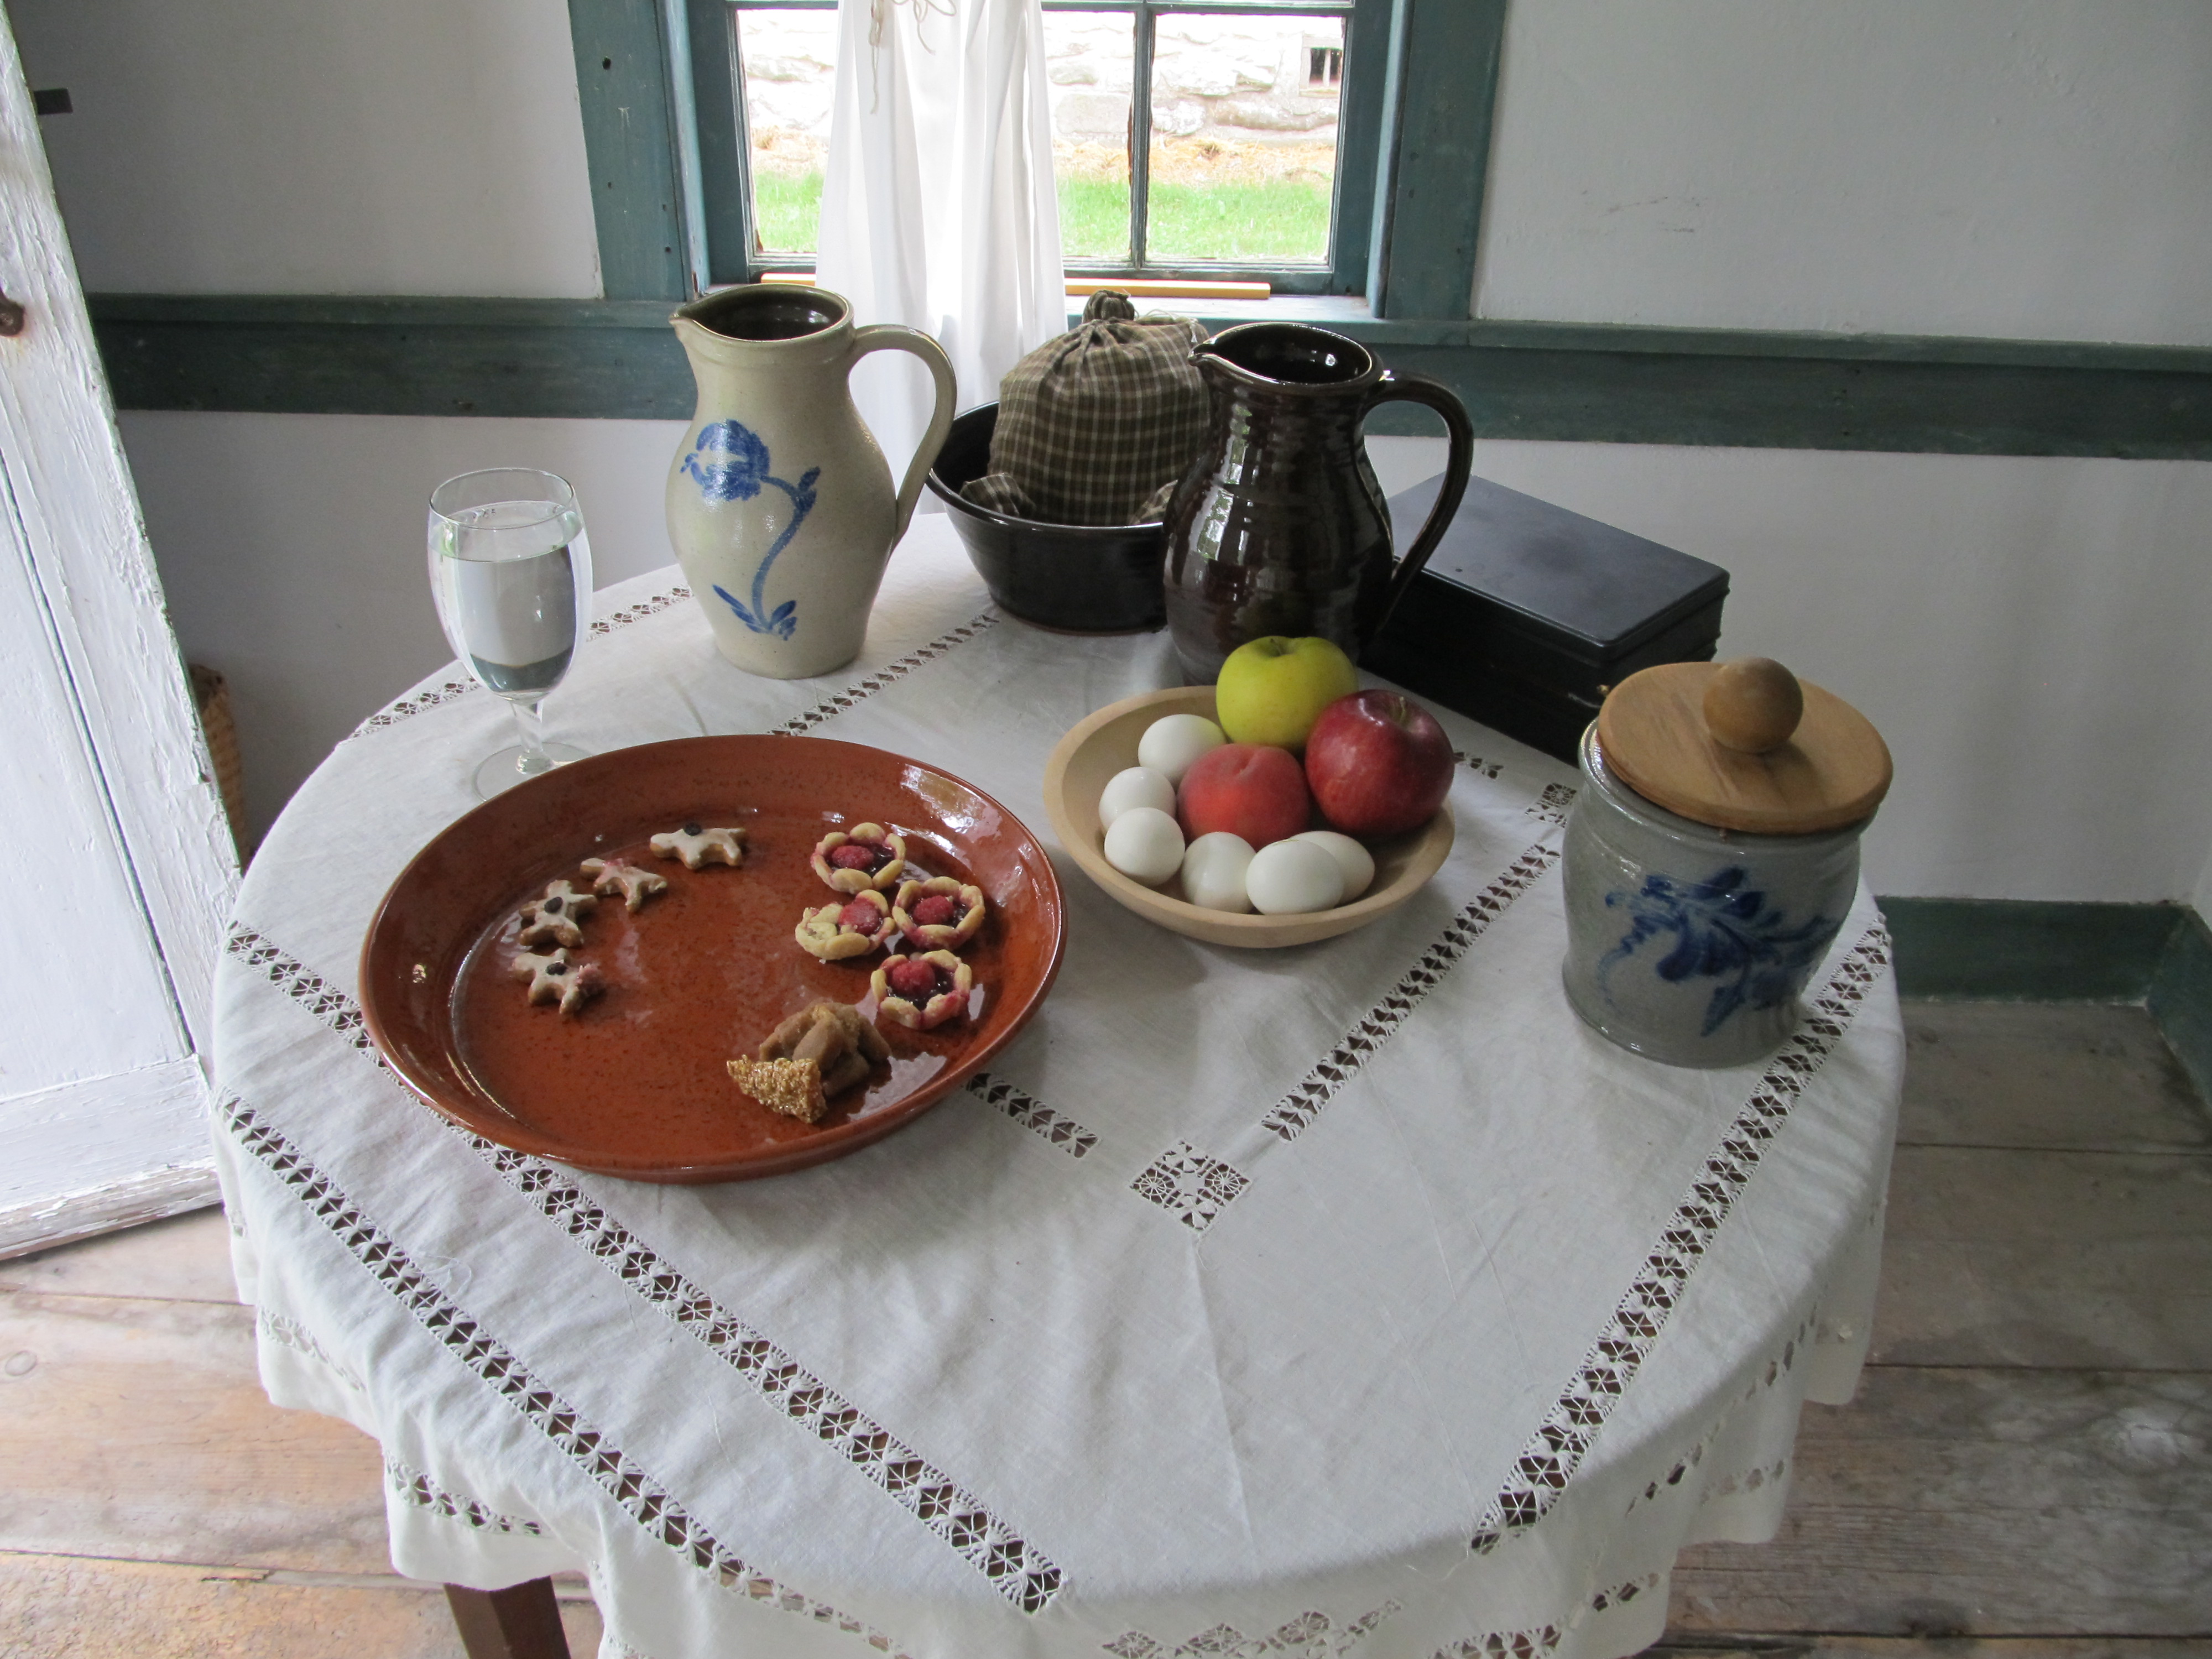
In the large center plate is some of Lily’s tasty goodies from her Confections class this past week. (I’ll be putting up another post bragging about her goodies)
In the back, you can see a homespun bag sitting in a crock. That has the bread in it. Need to research the proper bread containers they would have used.
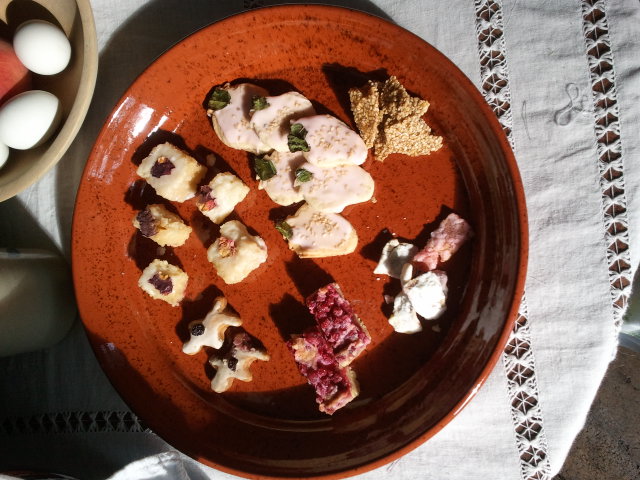
This is totally a brag post. My little sister took the confections class last week. Take a look at the goodies she made:
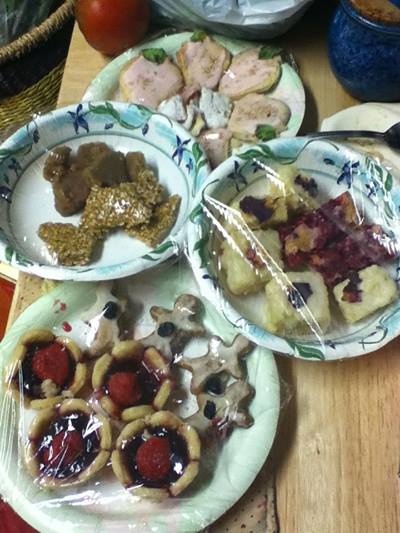
Clockwise from the top:
Coriander Cookies Candied orange peels Currant tarts Lemon cake with rosewater icing Mollasses cookies Maids of Honor (tarts) Benne brittle Maple fudgeI know you want to know about the clothing from this weekend. As the event approached, the week of high temps, humidity and scorching sun the concern over keeping cool was rising. Luckily, the temperature dropped Friday night as an enormous storm rolled through.
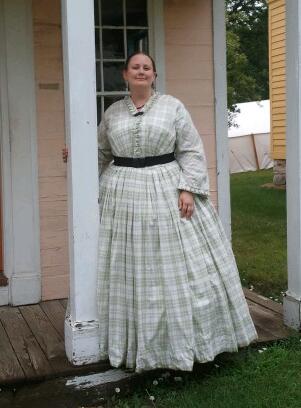
Here is my little sister, Lily, in her well worn dress. This is a light weight plaid cotton shirting. Her short sleeves and shallow V neckline work very well in the Village kitchens. As this dress is several years old, it has survived both growth spurts and cooking classes. It is time for a new dress, making this her wash dress. Her cage was pieced together the week prior from my old work cage. It is designed with a good back shift for the later part of the war. (I anticipate by the time the new cycle comes around, the cage will need to be remade for her mid to later teens.) The cage does need another petti with the fullness in the back. Her new dress will also be set with more fullness in the back.

Here is my Saturday dress. This is the green plaid I made in May. This is also a light weight cotton shirting. For accessories, I’m wearing a reproduction gutta-percha buckle from Elizabeth Aldridge and a repro gutta-percha mourning broach from The Civil War Lady. This dress is made with my favorite gathered V neck bodice and open sleeves with a funnel shape. There is self fabric trim around the neckline and down the front of the bodice as well as around the sleeves. The trim on this dress is evolving as I have several ideas for it. While May was just two months ago, fitting issues have developed with this dress. My corset now closes closer to how it used to close, meaning I’ve lost a couple inches around my ribcage. (The bust has done some odd fluffing on the other hand) As my ribcage has shrunk, the length of the bodice has dropped in the front. In a side photo, I can see how bottom edge, and thus the waistband, angles down from the back to the front. This half inch to inch in the bodice has resulted in a drop in my hem, the hem that I stepped on over and over and over again. Solution? The front of the bodice will come off, be shortened and reattached. At the same time, it will be brought in as well. I’m hoping the latter part will not require a complete skirt reset.
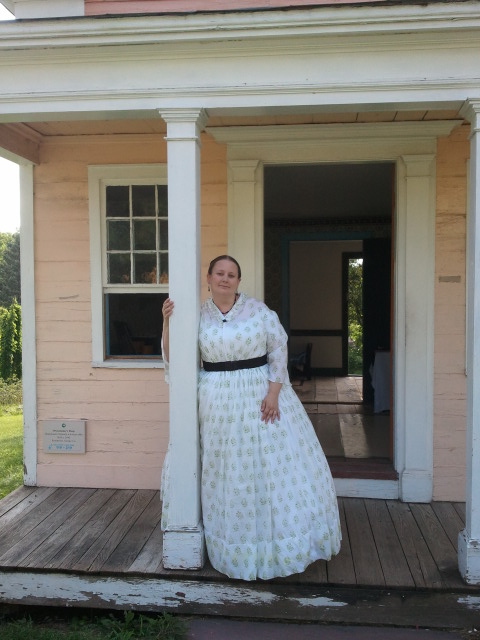
This is Sunday’s dress. This is the knock me right over fabric that was gifted to me from a dear friend. I wanted a white fabric with a floral print in just this size for so long. The fabric is incredibly light weight with a green block print. I just love how this turned out. It feels amazing to wear. I used the gathered bodice with V neckline bodice that I love so much. The sleeves are simple open sleeves with a slight funnel shape. These are a tad shorter than those for Saturday’s dress. A self fabric box pleated circles the neckline. I left the sleeves without trim for now because the fabric is so light, I don’t want to hinder the soft, airy feel the sleeves have when I wear it. I have the same belt on as a the day before and a small jet broach.
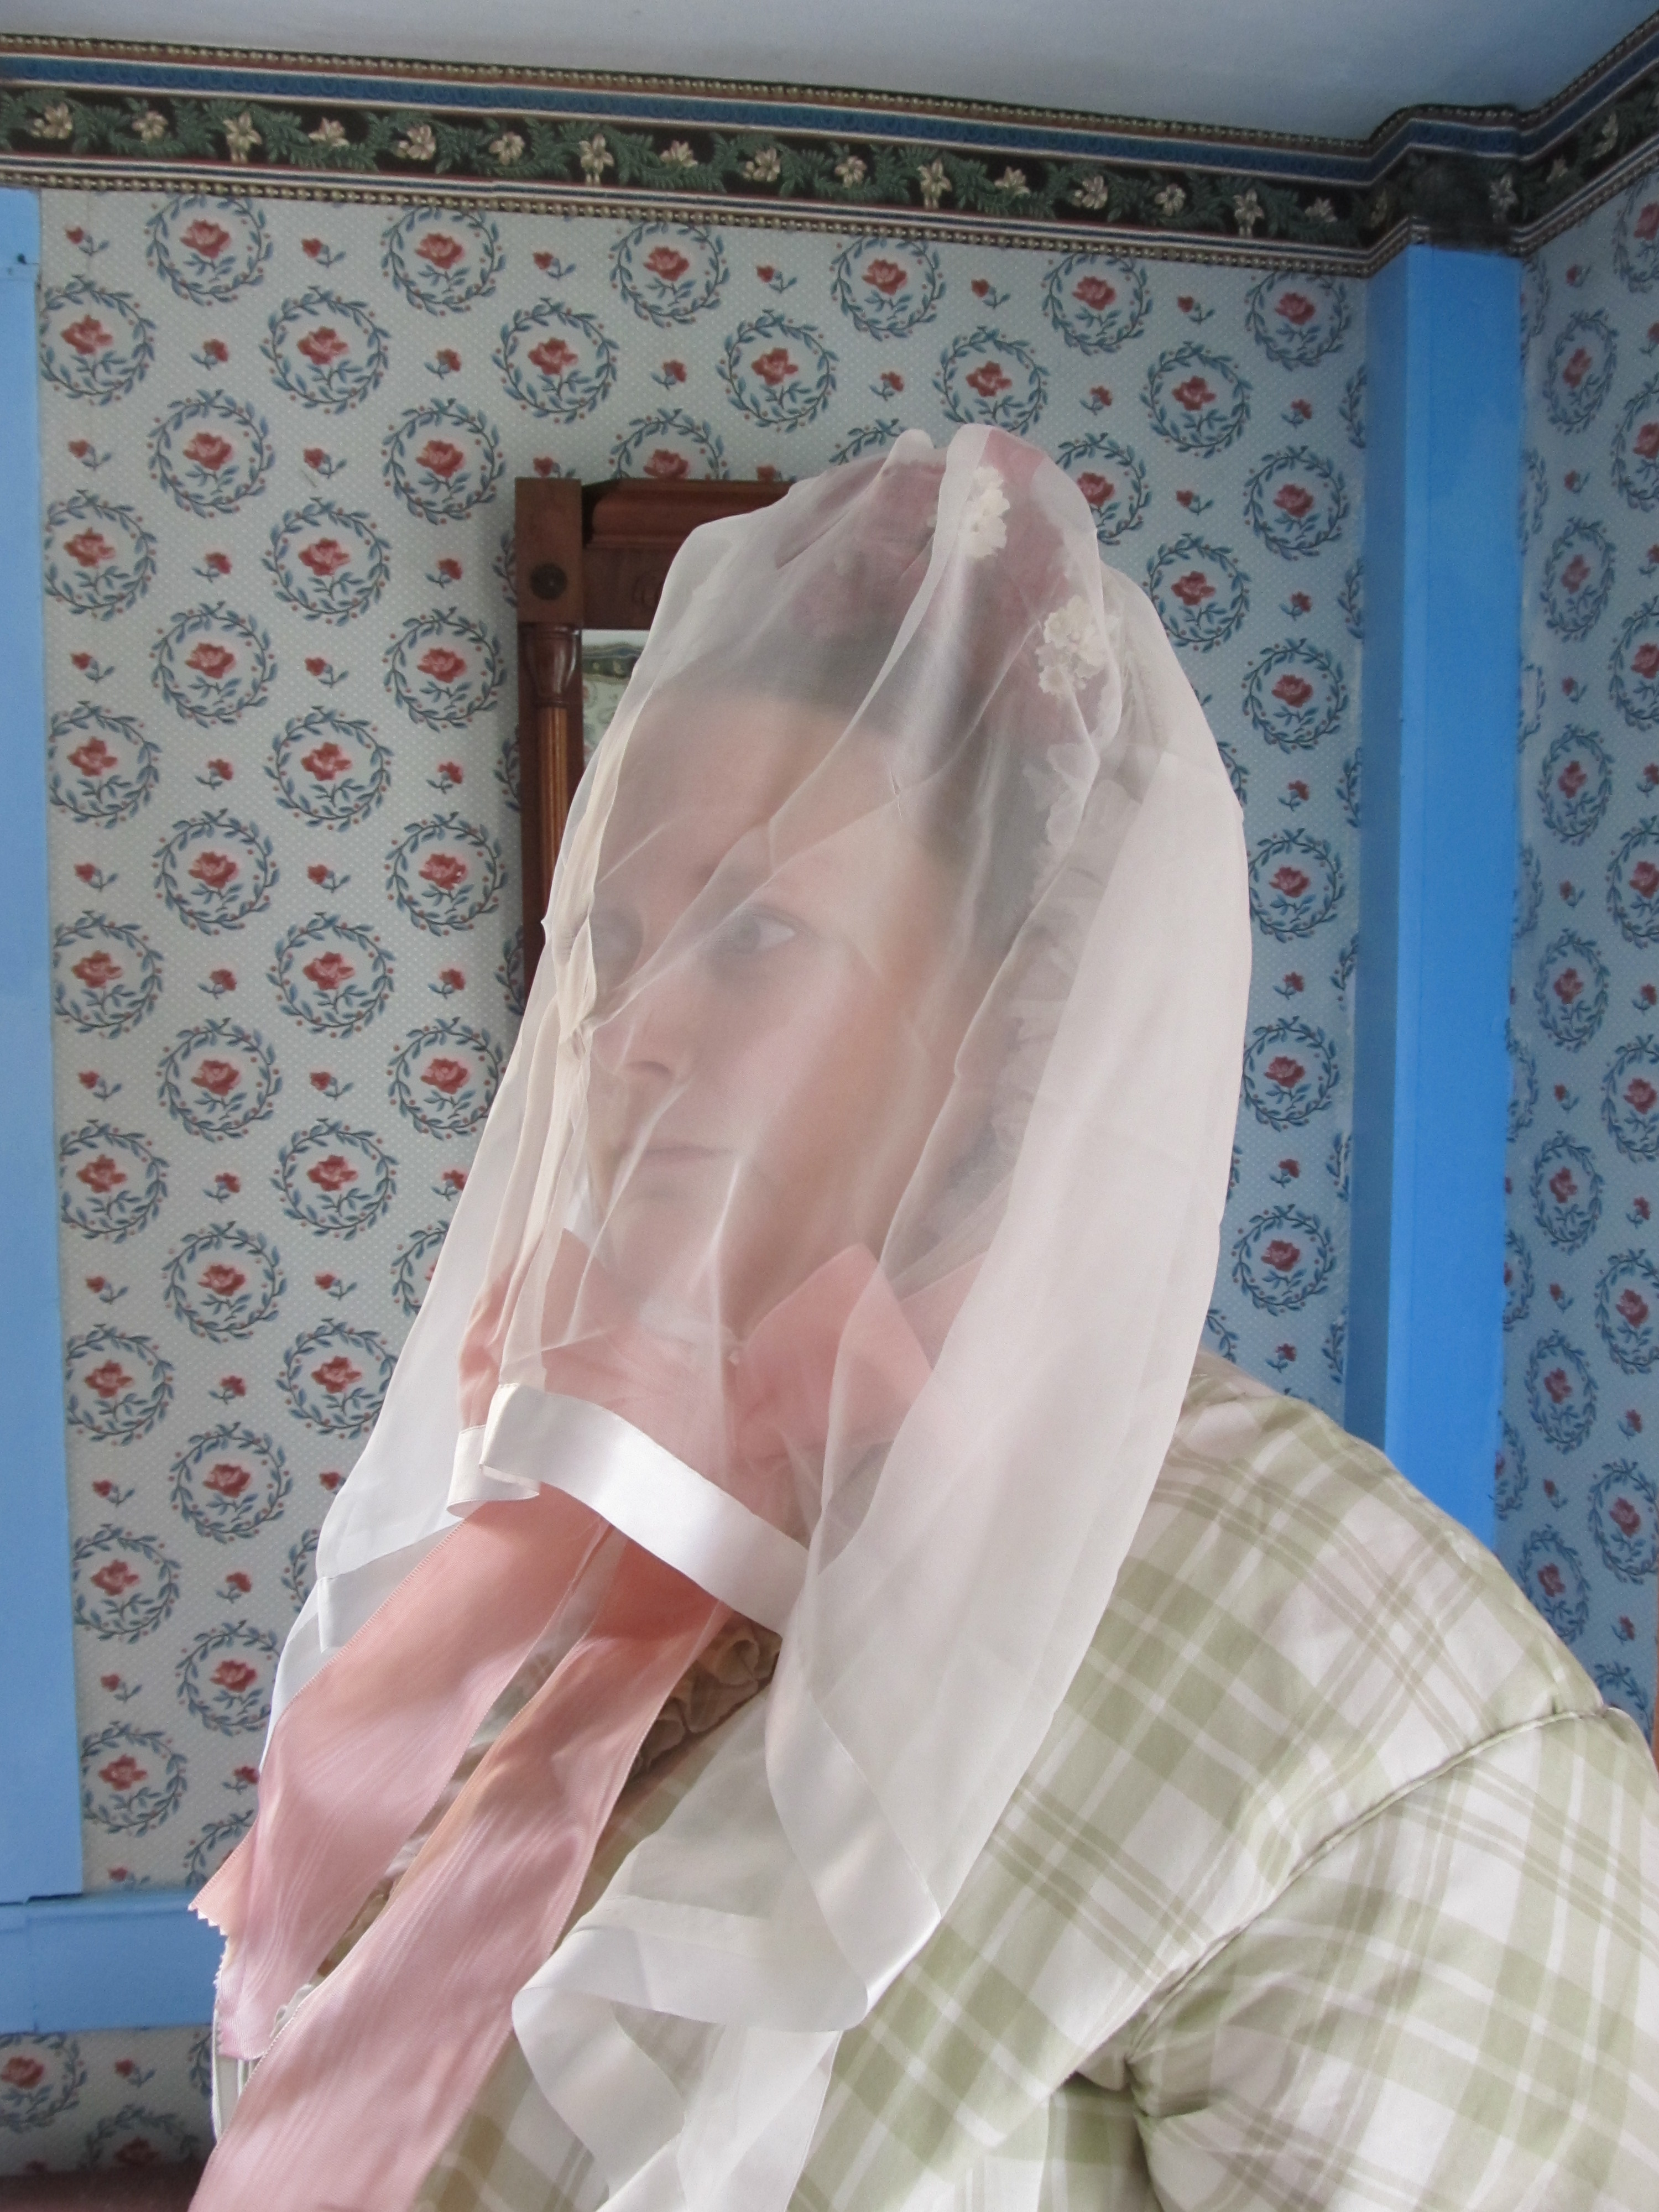
Ignore the vacant stare in this photo. Each of this set came out that way while I was attempting to go for serene. This is the veil Bevin made me when I first got to New Mexico. It was very helpful with the sun on Saturday when it was overcast. It wasn’t as helpful on Sunday when the sun was brighter. The white made the sun glare. I am thinking about dying this veil green since I know the green veil I wore for the Museum’s travel program helped nicely with the sun.
I want to thank everyone who visited me and had their books signed at the Genesee Country Village and Museum this past weekend. It is so nice getting to meet those who I have corresponded with online as well as meeting completely new people. I met several wonderful people including some brand new reenactors that I am sure will have great futures in the hobby.
This past weekend was absolutely wonderful. From the doorway of my favorite pink building, the Dressmaker’s Shop, the weather was perfect. Saturday morning it rained and rained and RAINED! Everyone and everything was soaked. But, this was very welcome after a week of incredibly hot days.
The Dressmaker’s Shop is both a fun building to interpret and a pleasant place for a book signing. The interior of the front room is has just the right colors for a lively yet calming environment.
Before going any further – I just love this photo that Robin, the museum’s guest and shop guru, took on Saturday morning. I was so excited to see she captured just how I felt.

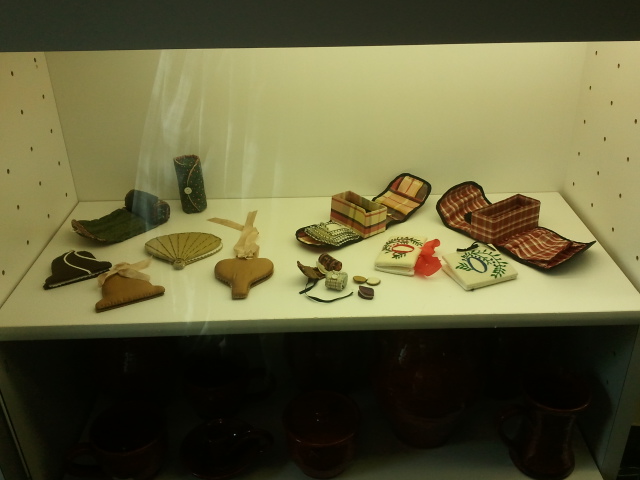
Right across the street from the Dressmaker’s Shop is the Village mercantile, one of the Museum’s gift shops. Here Fanciful Utility was available for purchase. Samples of sewing cases and needle-books were on display in the case where the pottery is usually on display.
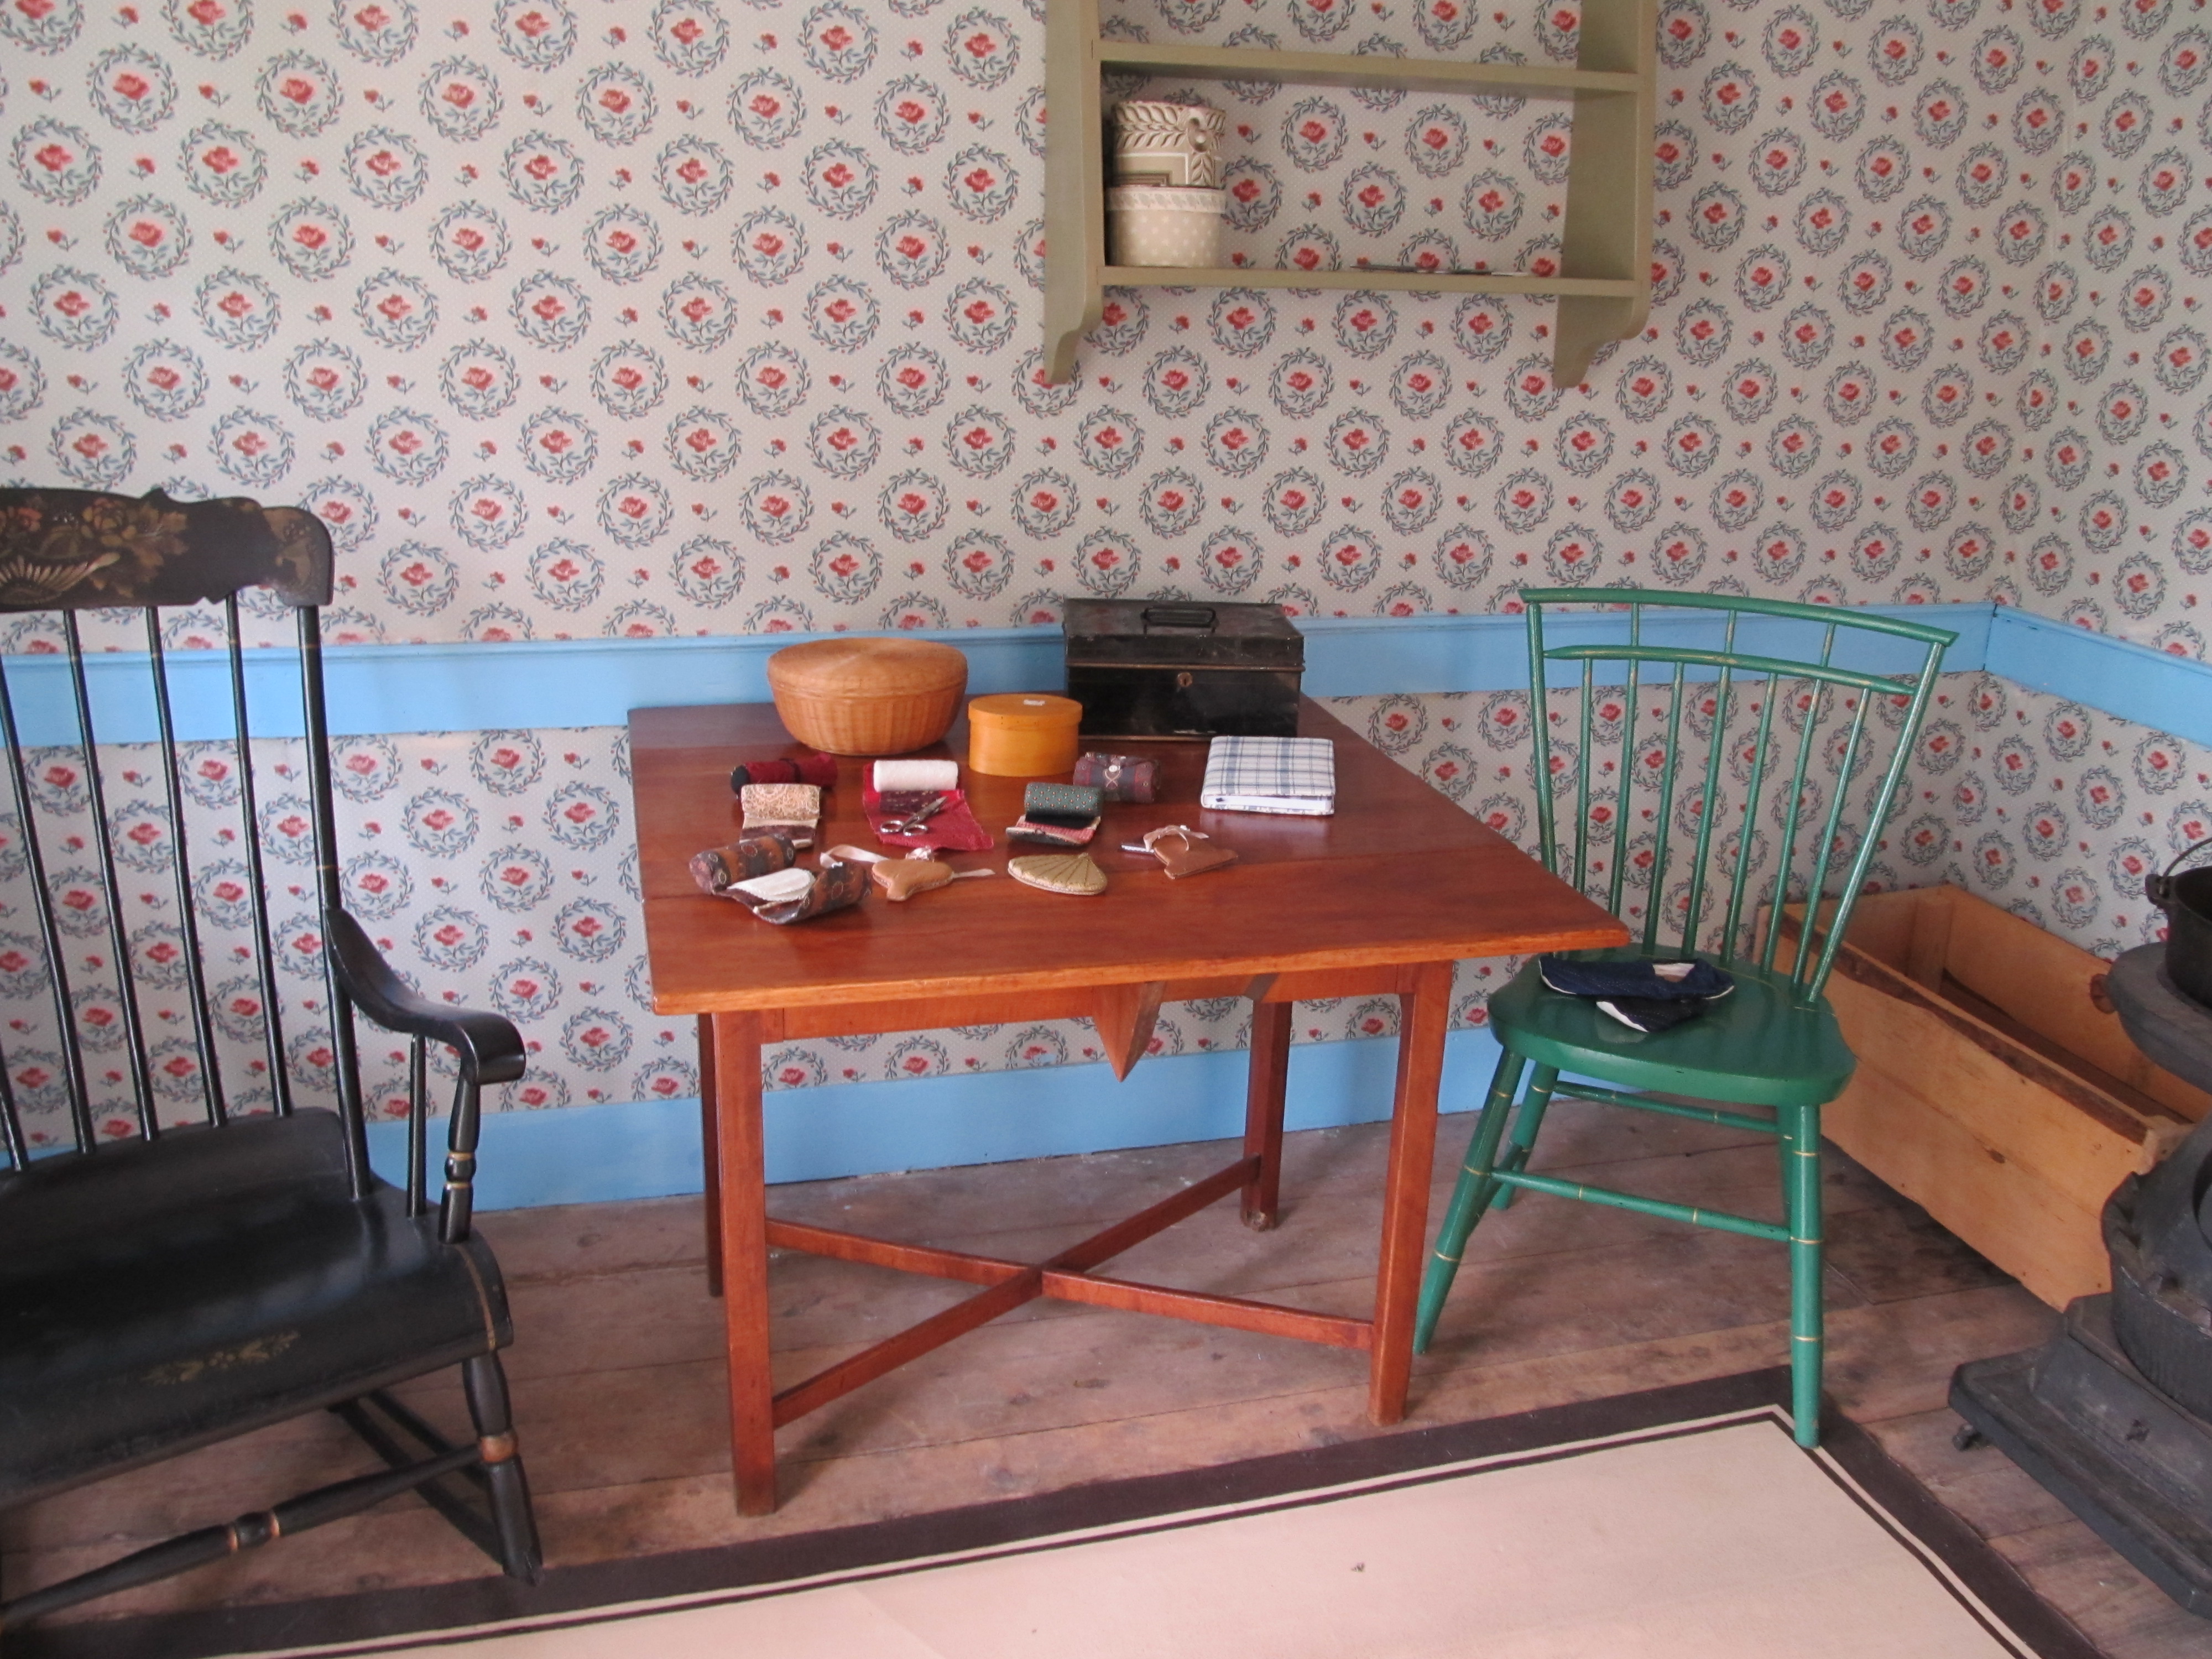
Here is a look at where I signed guests copies of Fanciful Utility. The table gave me just the right space for showing off some of the sewing cases and signing. As the day progressed, this also became a great space for designing pretend dresses with young guests. (Let me tell you that was an absolute hoot of a time.)
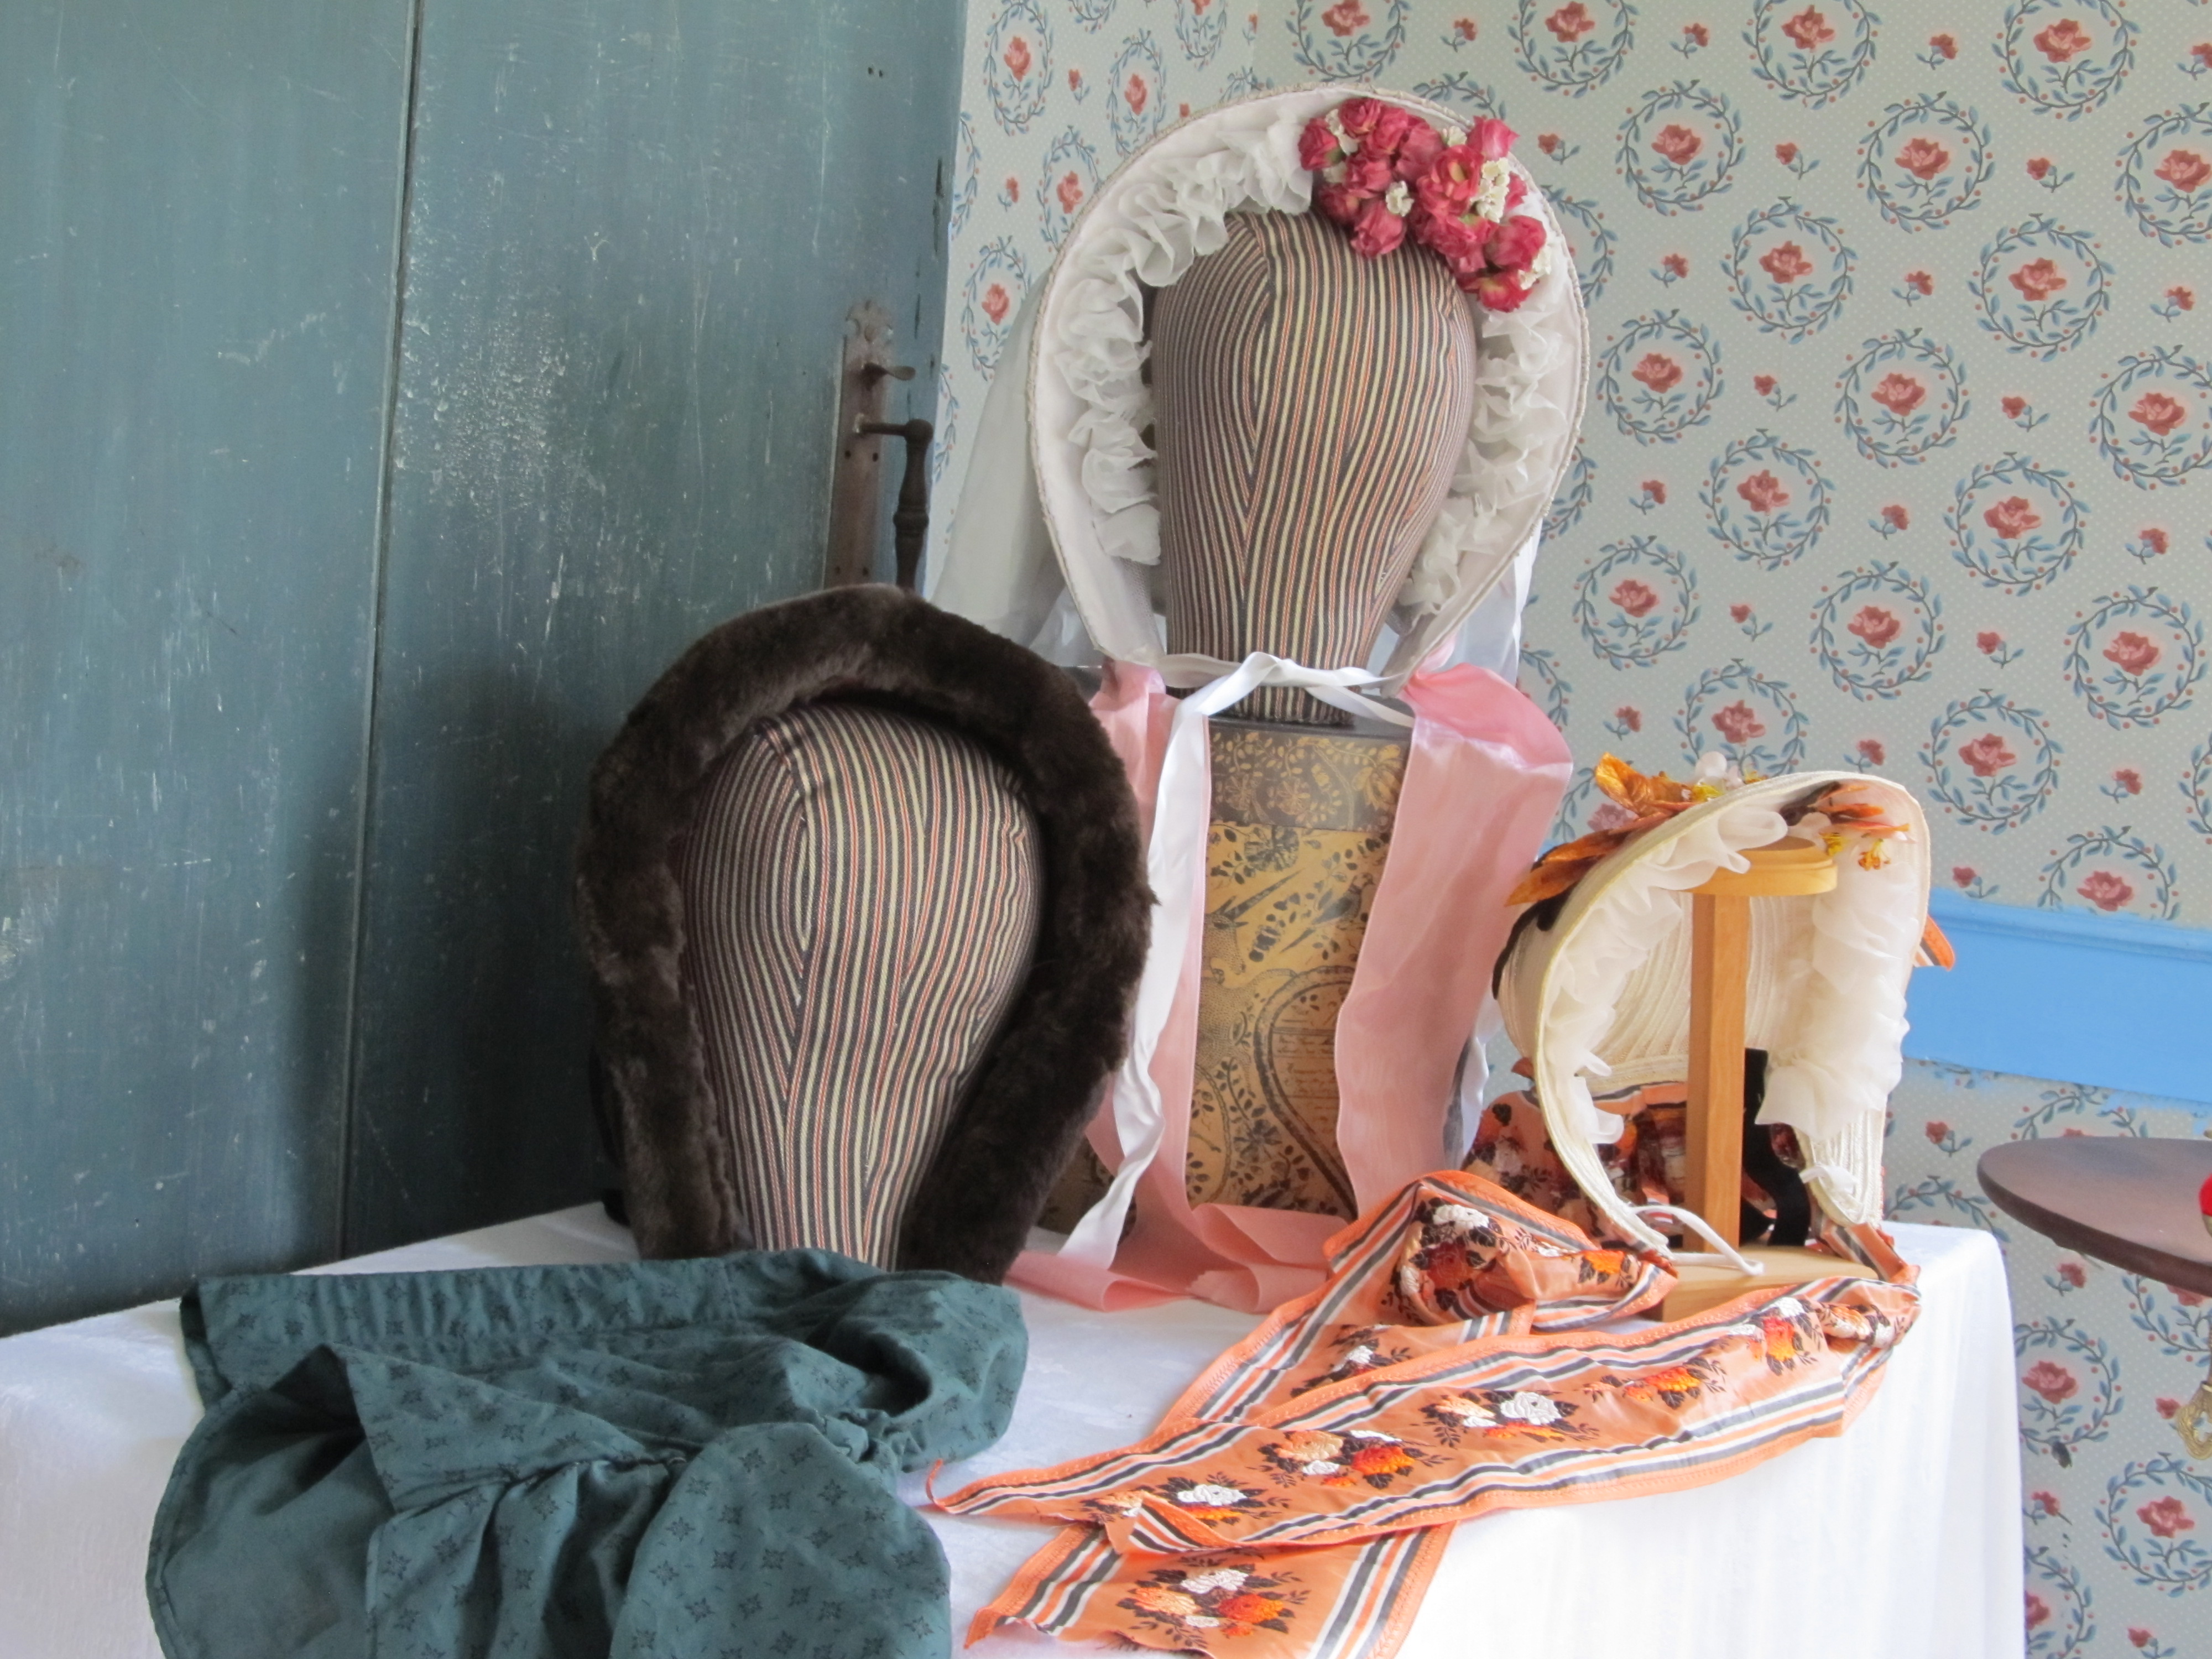
The millinery table happened by accident. I needed a place to put my bonnet when I was inside. Bevin needed a space for her bonnet when the rain came bursting from the sky. Robin wanted to see my winter hood. The sunbonnet was just incase I needed to go out in the rain. As it turned out this was a great assortment for talking to guests about types of millinery. We could talk about what they were made out of, how straw was comfortable in the summer, how the quilted hood was warm in the winter, how they sunbonnet helped shade the face and so much more. This also gave us the opportunity to talk about the differences between a dressmaker and a milliner. I just loved some of the questions people were coming up with.
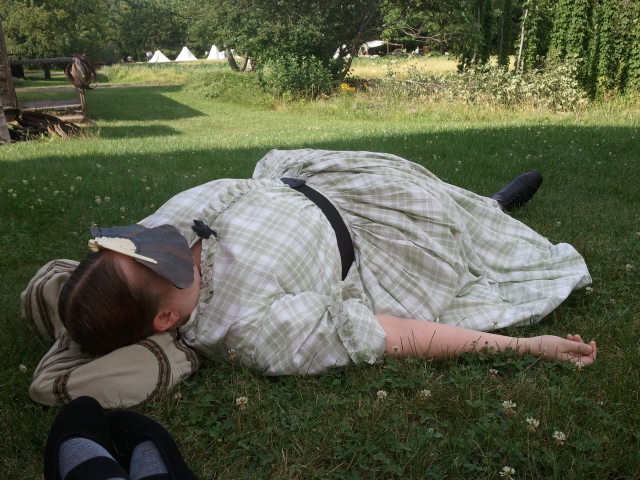
One more photo. What do I do after the Museum closes and the visitors have left?
Find a shady spot….
I’ll share more photos of the event this week.
Recipe for Making Good Hard Soap – Eds Genesee Farmer: – In the May number of the Farmer, among the “Inquiries and Answers,” I find that C. A. Chase, of Ohio, is desirous of obtaining a recipe for making good hard soap. If he will be very particular and attend fully to the following recipe, he will possess as good, and as pure a chemical soap as he ought to desire. But let me warn him, just here, that if he deviates from the principles laid down here – which are simple and comprehensive – the chemical process will thereby be destroyed. I know this to be so from experience.
PURE CHEMICAL SOAP – Pore 12 quarts of soft boiling water upon 5 lbs. of unslaked lime. Then dissolve 5 lbs. of washing soda in 12 quarts of soft boiling water. Then mix the above together, and let the mixture remain together from 12 to 24 hours for the purpose of chemicalizing. Now pour off all the clear liquid – being careful not to disturb the sediment. Add to the above 3 ½ lbs of clarified grease, and from 3 to 4 oz of rosin. Boil this compound together one hour; pour off to cool’ cut up into bars for use, and you are in the possession of a superior chemical soap.
The cost of this superior article is about 3 ½ cents per lb. (The Genesee Farmer, June 1860)
To Make Hard Soap – One of your correspondents – C. A. Chase, Ohio – wishes a recipe for making hard soap. I think if he will try this one he will be pleased with it. Take six pounds of soda, seven pounds of grease, three pounds of unslaked lime, and four gallons of water. Put the soda, lime and water in a pot, and boil until they are dissolved; let the dregs settle; pour off the liquid and throw away the dregs; add the grease to the liquid and boil until it is the consistency of honey; then pour it off to cool; set it in a dry place and in a few days it will be dry enough for use. (The Genesee Farmer, July 1860)
Totally random photo:


