

“Preparing for Winter” – Winter Hoods
I took a quick video of this weekend’s display of winter accessories, including a sampling of winter hoods.
Also, this weekend’s Holiday Whimsy video shows how to make two gift card holder pockets.
https://youtu.be/VXinO-V3cYY
What do I Give My Reenactor or Interpreter for the Holidays???
Years ago, my What Do I Get My Wife for Christmas post was a big hit. Actually, it got spike in views for years after writing it.
Time for an update!
There are some great craftspeople creating wonderful items to give as gifts. This is a short list of some of my favorites. I am trying to include newest products or at least new to me. Each (non-consumable) item I’ve included is well researched by the makers and made to last.
Fits in a Stocking (under $30)
Reproduction Handkerchiefs based on originals from the Susan Greene collection at GCVM available exclusively from Burnley & Trowbridge. I literally squeeled and jumped out of my chair when I saw these beautiful pieces announced. B&T added these 3 new handkerchiefs, each suitable for a different span of decades to their already excellent line of handkerchiefs.
How about a little gift that is super useful? The Reproduction Safety Pins from Wicked Stepsister is just the gift for the later Victorian reenactor or interpreter.
I am late on the up-take with this next one.i finally tried LBCC Historical Apothecary‘s products this summer. They instantly won me over. They offer period cosmetics and fragrances. They detail their offerings with era and ingredients.
Tea can be a favorite gift for some. In recent years, there has been an increase in small shops offering loose tea. Most offer an assortment of period correct varieties. I pick my tea up from TeaLicious Trendz. You may have a shop local to you. (ps – Tea ships well because it is light weight.)
I wasn’t going to include anything from a previous list. But, I love Delp’s silk stockings too much not to recommend them. Their silk stockings are a great gift idea. They come plain and clocked, in a few different colors. Blue has been on my personal wishlist. I find them to be an excellent summer stocking, staying comfortable all day. They fit comfortably on my 18 inch calves. (ps – I also recommend several of their other stockings. Their speckled blue/white ones used to fit my mountain of a Dad.)
Wraps up nice
Family Heirloom Weavers Fabrics available through the Button Baron. I’ve been swooning over these fabrics for months. Each one is based on an original textile or garment. The wider width means you only need 5 yards (6 to be extra safe) for a dress length. A single yard will make an apron or a sunbonnet.
SJ Pottery. I’ve become a big fan of this potter over tha last couple years. (It takes a lot to distract me from my fabulous local potters who I also highly recommend. Find the GCVM pottery in the Flint Hill Store..)
Do you have someone who likes to bake? I stumbled onto SR White Carver when looking for a friend. These are handmade cookie molds. How cool is that? (I have not yet personally bought from this artisan. GCVM also offers beautiful Springerle molds in their Flint Hill Store.)
Shaker, or Shaker style boxes are useful for holding sewing tools, hair pins, or even jewelry on the go. They come in many sizes from a couple inches to about the size of a serving bowl. While I get my personal Shaker style boxes from a local artisan, here are two online options to choose from: the Shaker Village of Pleasant Hill and C Mack Shaker Box. (PS – You can put more gifts inside when you wrap this one.)
There May Be Tears
Looking for a drool worthy gift for the late 18th to early 19th century? Check out the millinery offerings of Kitty Calash. Her work is excellent with high attention to accuracy.
Beth Miller Hall’s Reproduction Gutta Percha and More. Beth is recreating a fine selection of broaches, earrings, necklaces, and even haircombs to mimic gutta percha, horn, and bog oak. Her pieces are thoroughly researched and carefully crafted.
May I selfishly recommend one of my own Gift Filled Pockets or Filled Sewing Pockets? While most of the gift filled tie on pockets are sold out, I do have two left at this writing and am working on making some additional sewing work pockets. Either of these can be a very useful gift, being used again and again throughout the years.
I am having a difficult time deciding whether to recommend a reproduction Jenny Lind Fan or a knit purse from Ruede La Paux Repros. So, I will recommend both. These are both detail pieces, amplifying an impression. Either will make a delightful gift.
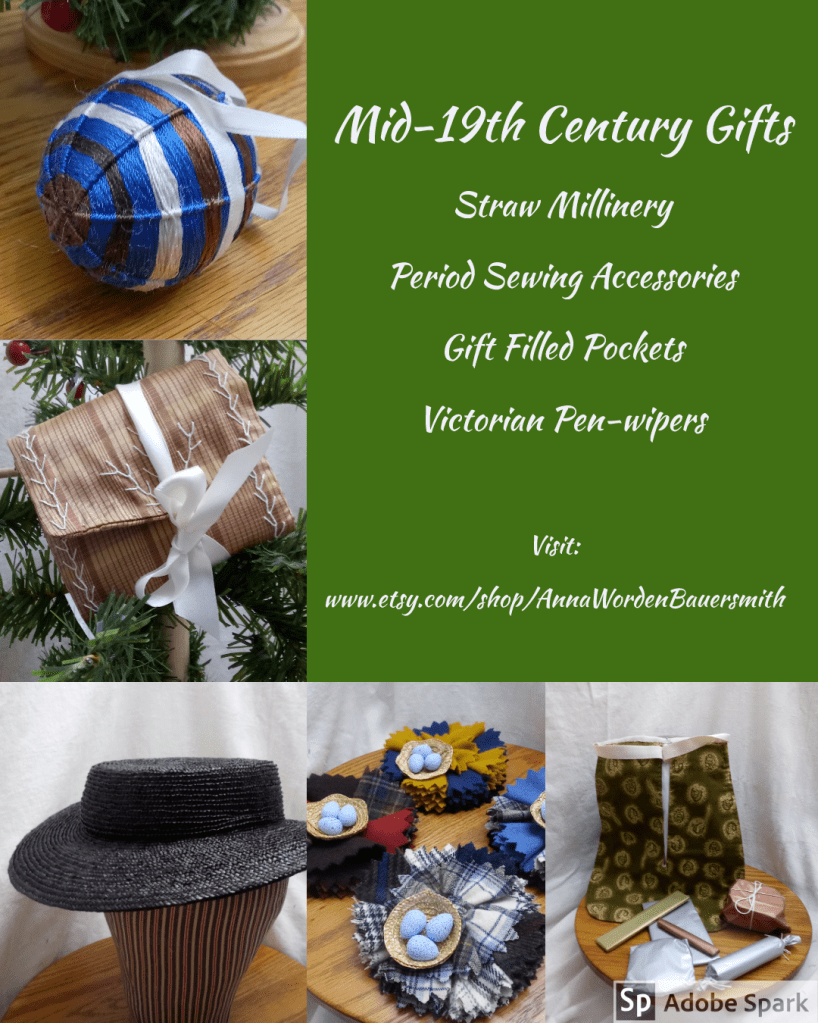
What’s in My Etsy Shop?
I have an assortment of select items in my shop this year., including Gift Filled Pockets, Pen-Wipers, and sewing accessories. I will be adding a limited number of straw millinery during Thanksgiving week (as I complete each piece.)
❄Please remember to order early. This increases the likelihood of safe and timely shipping. It also helps the artisan or craftsperson you are ordering from. ❄
Holiday Happenings
This post will cover the coming holiday season while acting as a bit of a brain dumb for me.
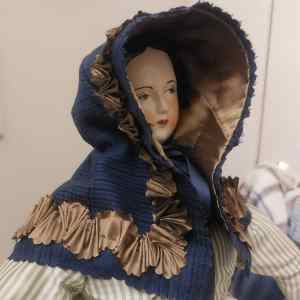
In a week and a half, I will be out at GCVM’s Preparing for Winter event. This year, I will be talking about types of winter hoods worn to keep heads warm. I’ll be bringing an assortment of reproduction winter hoods to display and talk about. This means, this coming weekend I need to get all those winter hoods out and ready, along with some heads or stands. I do need to double check that my warmer red basque fits as it has been a while. Violet will be accompanying me as well so she can demonstrate how the Princess Capote is worn.
I need to get Bonnie ready for Yuletide, which comes quickly after Thanksgiving. She will have a decorative roll in the village. Meanwhile, I will be talking about homemade gifts of the nineteenth century during the open
house Sundays. I’ve been adding to that interpretation over the last few weeks.
In the shop…. On the drive home from work I was thinking through the rest of the November sewing plan. I think I came up with a good plan. While I have most of the items I was planning to fill my shop with, I have a few more items to make. I will dabble each day on a couple pin balls and sewing cases. Those will be added to the shop as I complete them. I will also be sewing some straw pieces that I will hold until Thanksgiving week. Though, looking at the calendar, that is getting closer and closer.
Currently, the shop is filled with a combination of interpretation focused gift items and whimsical decoration gift items.


I started a new video series for the season: A Little Whimsy for the Holidays. This crafty series focuses on making simple, mostly sewn, decorations and ornaments. The vast majority of these can be made with odds and ends from the craft stash. The introductory episode covers three of my favorite techniques for making basic ornaments. The second is adding a second fabric layer to one of those bases. The coming third will be a mini scrap garland good for a wreath or smaller tree.
Do remember:

Belated October Reflections
And suddenly it was November, 4 days in.
I’ve been so busy with some many nifty things, I completely missed the October reflections.
Sometime in October, that creative part of my brain caught a breath and reclaimed its space from the school stressed part that was simply taking up too much space.
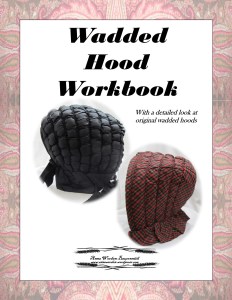
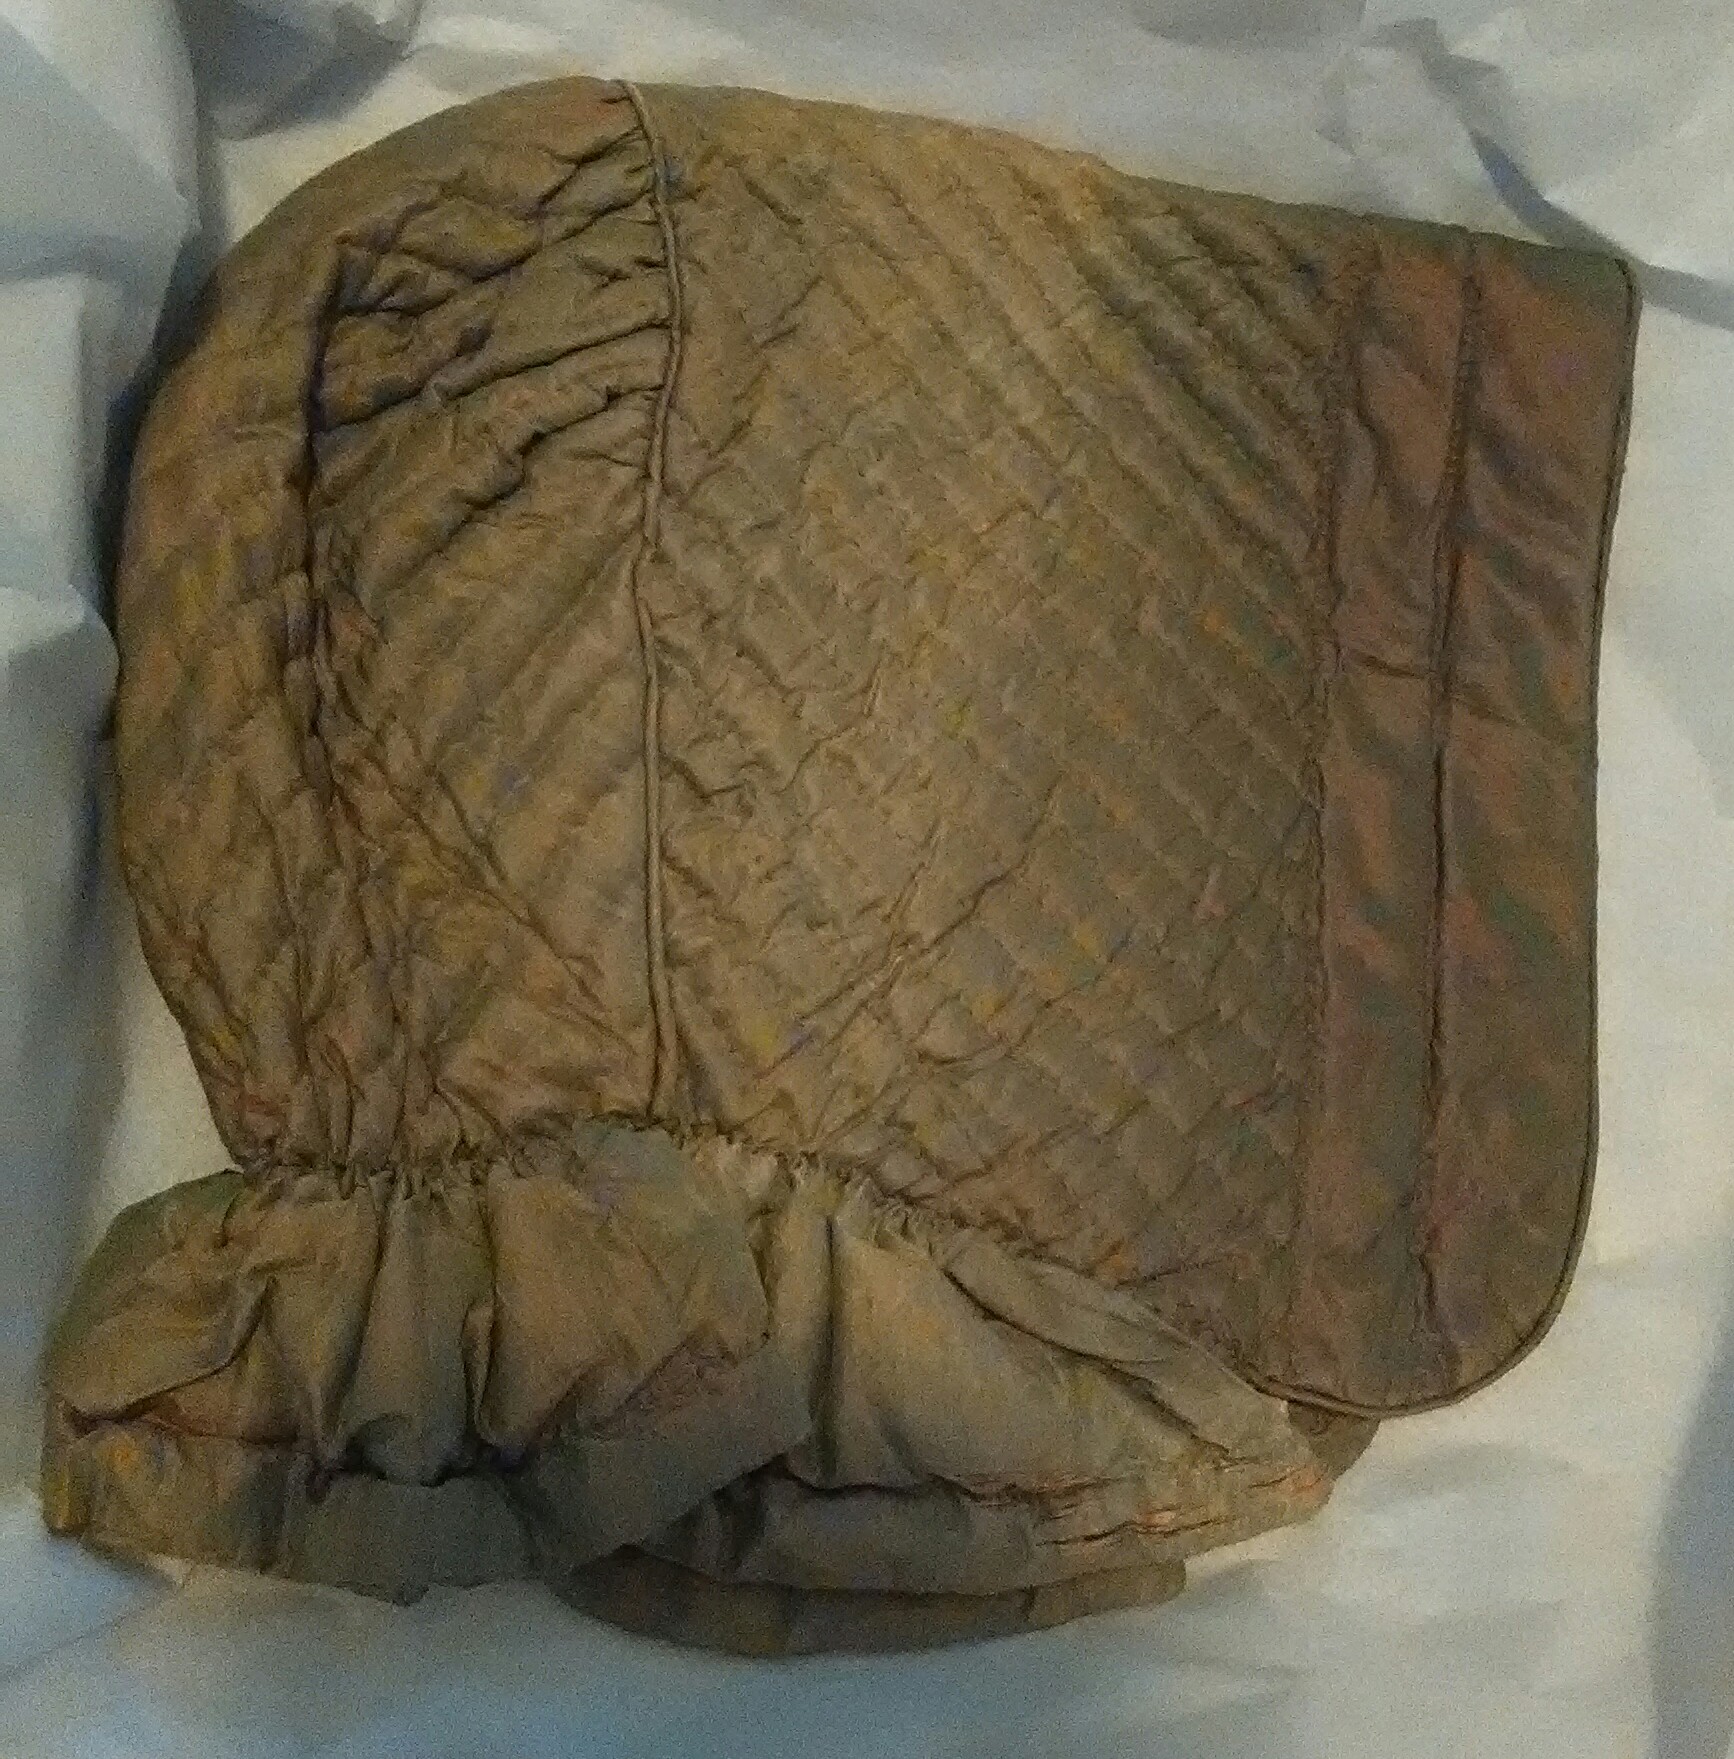
I hunkered down during the long weekend and caught up on some long delayed writing. I finished up, I mean I finally finished up the Wadded Winter Hood Workbook. I also worked on an other winter hood pattern. That just has a few details left to wrap up before it is available soon. Don’t miss my blog post on choosing a winter hood.
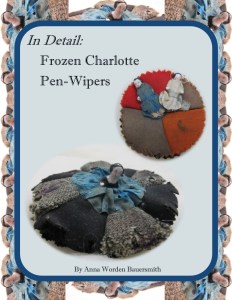
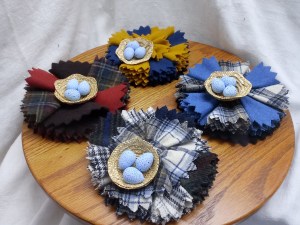
Next, I wrote the latest edition of In Detail that focuses on two pen-wipers using frozen Charlotte dolls. I really can’t decide which I like working with more, pen-wipers or tiny dolls.
I made just a couple millinery pieces.
My focus for the end of the month was to get some items in the shop for the holidays. I had the idea for the Gifts Filled Pockets in mind since June. I was getting pretty (good) anxious about all the bits and pieces together for them. I was delighted to see them come together all wrapped up in their tissue paper. I am doubly so seeing that there are only 2 left!
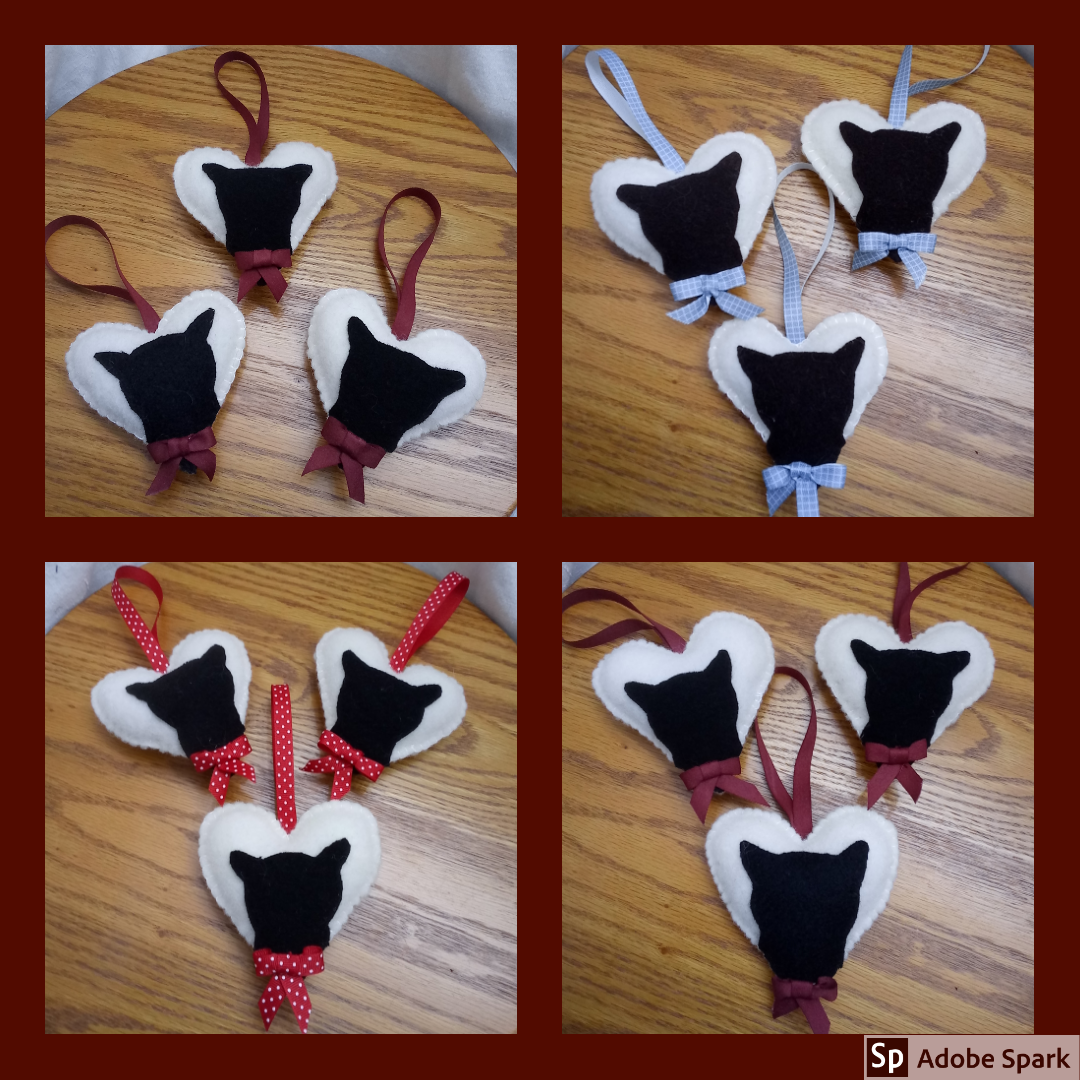
Pockets complete, next came ornaments. I have two for this year. First are the shadow heart cats that come in trios. Next, in the works, are plaid cats who will be getting eyes and bows still. I think they will be available in pairs as a big with a little and littles together.

I had some fun making pen-wipers with straw nests. I really enjoyed making the eggs.
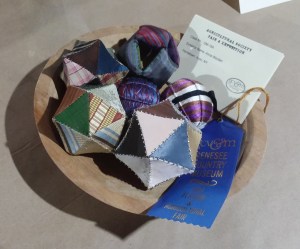
I had decided this year’s feature sewing accessory would be the Pin Ball with an assortment of pin balls available. I need to get those photographed and up in the shop.
Seeing the response to the gift filled pockets, I decided I would make a few sewing cases with a few sewing accessories.
I was able to purchase a new document camera with Patreon funds. It will be arriving soon. This camera will act as an overhead camera for filming my hands as I do projects and give a better view of original items I share. I will be doing more crafty how-to videos like this first A Little Whimsy for the Holidays video, just with a better camera.
Looking Ahead
- Preparing for Winter is a two day event this year. I will be focusing on winter hoods with a display of different styles worn during the the cold months of the nineteenth century. Violet will be accompanying me to demonstrate how some styles were worn.
- Yuletide Open House will span three Sundays this year. I will be sharing the many handmade gifts made during the century with a focus on items that could be made by children or families. Bonnie will also be attending Yuletide elsewhere in the village.
- A Little Whimsy for the Holidays will continue with videos of various holiday decorations and crafts.
Thank You!
Thank you to all of you who support my work through Etsy, Patreon, and simply reading or watching. I appreciate each of you.
The support from Patreon has paid for the platform for my blogs this year as well as video editing and the new camera. Support on Patreon and through my Etsy shop help me make ends meet financially. The “spikes” in reads or views on my blogs or YouTube bright my day.

Selecting a Winter Hood for Your Mid-19th Century Impression
Some time in the depths of the night, I awoke to the sound of ice hitting my window. I sighed, thought “winter is coming,” rolled over, and fell back asleep.
With winter coming, many are thinking about how to keep warm in their nineteenth century attire, including how to keep their head warm.
The great news is there were several styles of winter hoods worn in the nineteenth century.
The challenging news is there were several styles of winter hoods worn in the nineteenth century.
With the many styles available, how do you pick the one right for your impression or interpretation?
I have this ongoing love (obsession) with sewn winter hoods. I am fascinated by how each is put together, what
the commonalities are, what the uniquenesses are, and which suits which situations best.
This overview looks at sewn winter hoods focusing on the mid-19th century. It does not include the many knit
styles that were made.
Let’s start with some basics.
Sewn winter hoods generally fall into two catagories: quilted and wadded, with some draped hoods which do not have interior guts. Winter hoods were most frequently made with a silk exterior and a silk or cotton interior. They could also be made from wool. The breakdown lands somewhere around ⅔ silk with ⅓ wool. The silk used is most frequently a tight weave taffeta, with the occasional fraille or tight jacquard weave. The tight weave and smooth texture is important for resisting water. Think about how an umbrella resists water. If rain or wet snow fall onto a silk hood, you want the moisture to roll off. If dry, fluffy snow falls onto a silk hood, you want it to slide off. The same principle applies. Similarly, when wool is used, it too needs to be a tight, smooth weave. A tight weave will minimize absorption. A smooth weave will encourage snow to slide off. A fuzzy wool will act almost like velcro, grabbing and holding onto snow. In terms of weight, the vast majority of original wool hoods I’ve examined have been light weight with some slightly medium weight wools.


Turning to the interior, silk and cotton are commonly found. Silk is often a solid color, either a taffeta or tissue taffeta. Cottons is more often a polished cotton in a solid color or a sateen, with the occasional smaller print. Often, the interiors include multiple fabrics of the same fiber. The color selection can be a dark neutral, black or brown, or a bright, vivid color such as pink or yellow.

Now, let’s talk situations and styles.
I break this down environmentally.
If you are doing an event that is likely to be windy and/or stormy, you will want a hood that can protect your face. For this situation, I recommend a hood that comes forward, protecting the face. A lappet style hood is a good choice for this. The brim extends forward of the face with the lappets hanging below. This was the style I had on when a sudden heavy, icey burst of rain hit. I found while walking through the village, my face was fully protected and dry. A capote style hood, one with minimal structure and a deep brim, would work well for a stormy situation as well.

If you are doing an event that will be very cold, while you need to be active, you will want a warm hood that stays in place while giving you a good line of sight. For this, I recommend a wadded hood. A wadded hood is likely the warmest of the hoods as it is filled full with wool wadding or down. A well fit wadded hood will snug the head, keeping out drafts, and stay put while you actively work. The edge of the brim frames the face giving you full range of peripheral vision, which is important for working with livestock or visitors.

If you are doing an event where visitors need to see your face while giving you protection from the cold weather, I recommend a quilted hood with a brim that can be turned back or is shaped with wire. This style hood can be made with lighter or cotton batting for subtle warmth or with heavier or wool batting for more warmth. A channel can be added to the inside of brim so the hood can be drawn in to hold in place if it is windy or the interpretation role is an active one.

While some winter hoods are trimmed, the majority of the everyday/common hoods I have studied are not trimmed. Simple trims can include ruched ribbon or pinked silk along the brim edge or simple bows on the crown or along the center top of the brim.

A Little Whimsy for the Holidays: How to Make My Three Favorite Basics for Ornaments
This video walks you through three of my favorite basic techniques for making ornaments. Each of these can be used in many different shapes as a base for additional decoration.
Here are some previous projects using these techniques:
Holiday Bird Ornament – https://dontpaintthecat.wordpress.com/2017/12/01/fanciful-utility-bird-ornament/
Tree Ornament: https://dontpaintthecat.wordpress.com/2015/12/21/this-years-christmas-ornament/
Babble Ornament (In Video): https://dontpaintthecat.wordpress.com/2015/11/26/bauble-ornaments-blog-cross-over/
Mitten and Stocking: https://dontpaintthecat.wordpress.com/2015/11/19/mitten-and-stocking-ornaments-blog-cross-over/
For the Pasteboard mentioned in the video, consider recycling when you can. Look at the backs of old notebooks and packing materials Pasteboard is available on Amazon, where it is called chipboard. I consider the 30 point to be light weight suitable doubled for ornaments. The 50 point is better for structural items like boxes.
I invite you to follow me on either or both of my blogs.
For modern, crafty projects, visit Don’t Paint the Cat at https://dontpaintthecat.wordpress.com
For history focused projects, visit A Milliner’s Whimsy or If I Had My Own Blue Box at http://www.amillinerswhimsy.com
Please consider supporting me on Patreon as well. Support from Patreon goes towards platform and video expenses, as well as research.
https://www.patreon.com/AMillinersWhimsy
Holiday Shipping Reminder
Holiday Shipping Reminder:
With expected delays in shipping, the last day I will ship for Christmas will be the morning of Saturday, December 11th. This will be orders through the night before: Friday, December 10th. I highly recommend making your purchases earlier. I will be working hard to make fun and accurate gifts available throughout November.
History in a Muslin Cat
Memories can be so strong at times. When the memory of a little stuffed tabby cat picked up during a childhood museum visit danced in my head earlier this week, I decided to see if I could find a replacement for my cat. Little did I know the history rabbit hole this cat provided.
It turns out my little cat was part of a long history of Caesar, the Ithaca Cat. Created by Celia and Charity Smith, sisters-in-law from Ithaca, NY, the Ithaca Cat is a story of creativity, utility, women’s employment, and national phenomenon. I encourage you to learn more about the Ithaca Cat’s story:
http://www.thehistorycenter.net/ithaca-kitty
Do you want your own Ithaca Cat Caesar?
https://www.thehistorycenter.net/Sys/Store/Products/127348
This is where to find me:
Consider Patreon for special content: http://www.patreon.com/AMillinersWhimsy
A Milliner’s Whimsy – If I Had My Own Blue Box (History Blog):www.amillinerswhimsy.com
Don’t Paint the Cat (Crafty Blog): https://dontpaintthecat.wordpress.com
Instagram for If I Had My Own Blue Box: http://www.instagram.com/if.i.had.my.own.blue.box
Instagram for Don’t Paint the Cat: http://www.instagram.com/dont.paint.the.cat
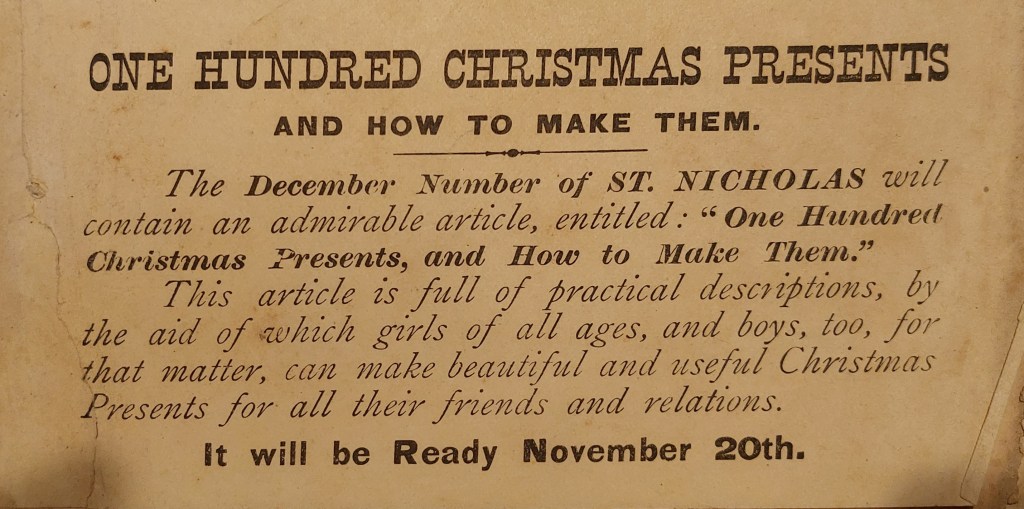
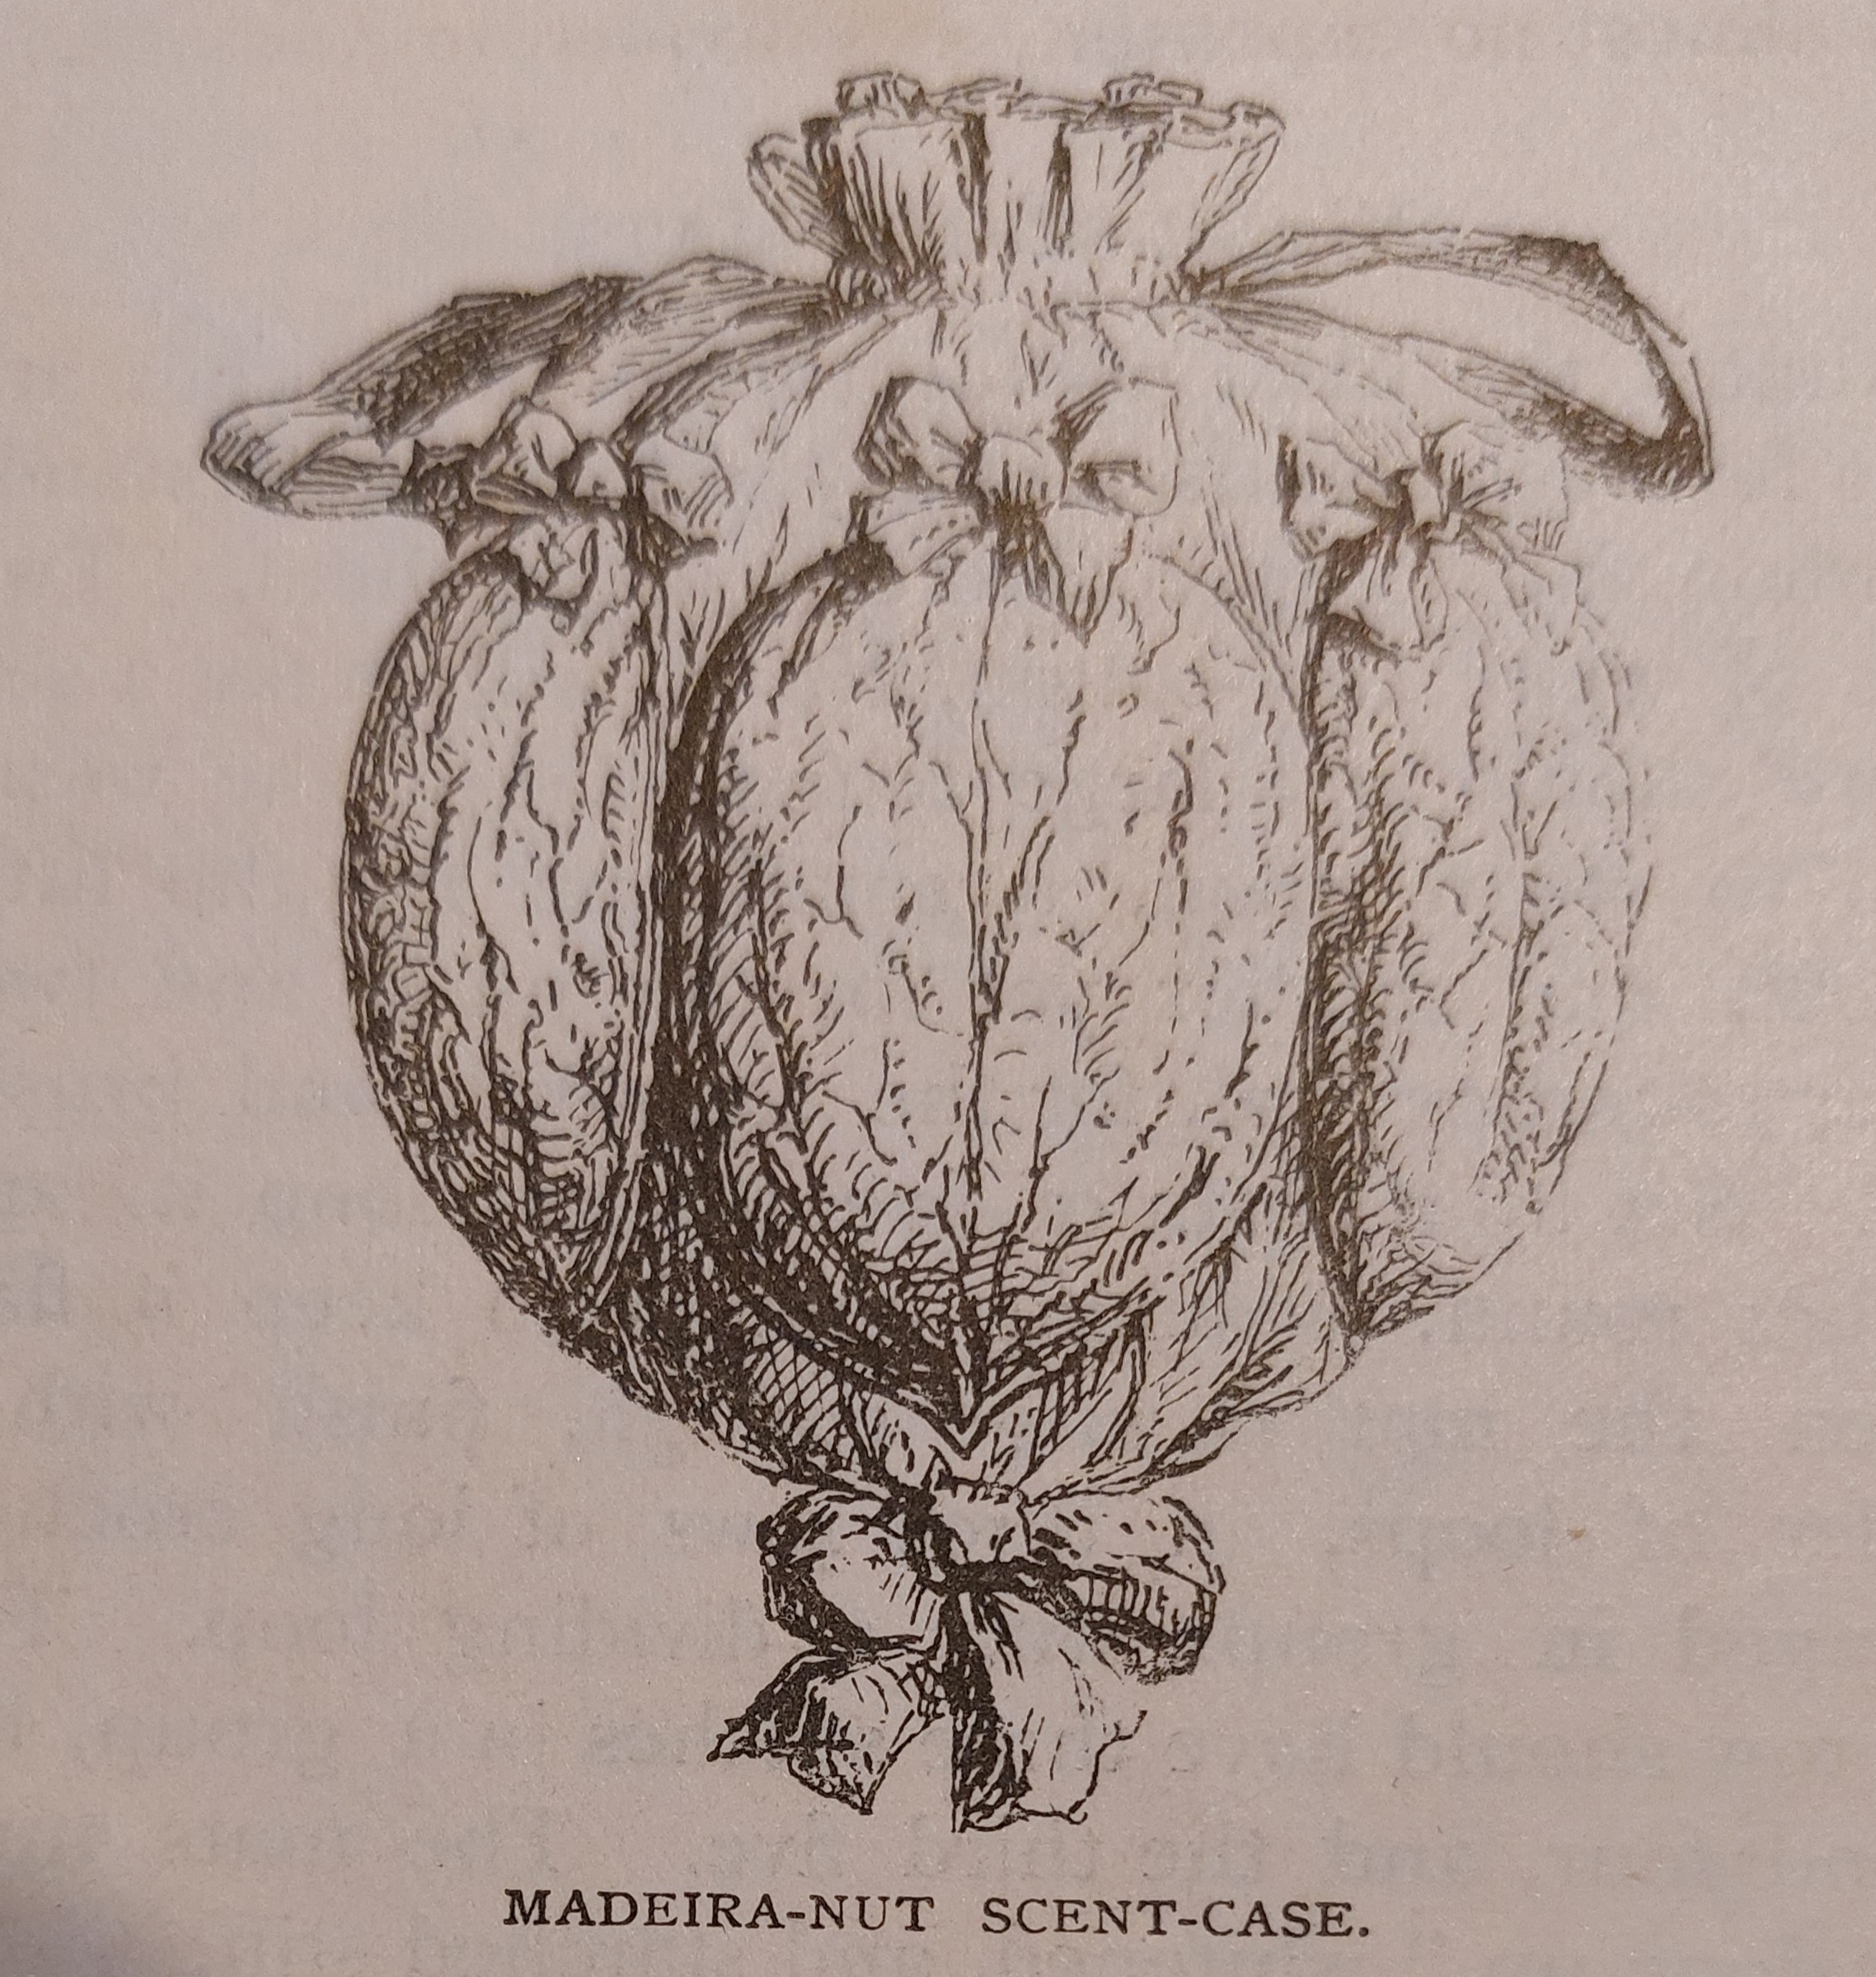
Leaf Pen-Wipers
In reading through the directions for making pen-wipers, one design group caught my attention: The Leaf Pen-Wiper. The leaf pen-wiper shows up again and again in both publications for adults and youth. This type of pen-wiper stands out for me as having possibilities as a youth or family project. Helen Campbell’s directions
include selecting an actual leaf, a maple or oak, to be the pattern for the pen-wiper:
“Leaf Penwiper.
“Choose a pretty maple or oak leaf for the pattern of your penwiper, and select cloth of a color that would suggest the leaf, – reddish-brown for an oak, or yellow for a maple. Take a paper pattern of the leaf by
laying it on stif paper, tracing the outline with a pencil, and then cutting it out with a pair of scissors. Cut out two leaves of your brown or yellow cloth, and three inside leaves of chamois-skin or broadcloth. If you like, you can imitate the veins of a leaf by embroidering them with silk in stem-stitch on the upper leaf of the
penwiper.” ( The American Girl’s Home Book of Work and Play, 1902.)
What a great outdoor to indoor project. I am picturing children collecting leaves outside as the leaves
fall in the autumn. Then, coming inside and creating their own pen-wiper.
“Leaf Pen-Wiper. – Work a leaf in green cloth, with the veins all marked in lighter silk, and black pieces
underneath. Any shaped leaf can be taken; a fern will do even, as the pinnules can be worked on it to imitate the shape tolerably.” (Three Hundred Decorative and Fancy Articles for Presents, Fairs, etc. by Lucretia Peabody
Hale, 1885.)
A Leaf Pen-Wiper.
Your pattern for this must be a beech-leaf again,—a long one this time,—or you may trace the shape from the illustration. Outline the shape as before, and from the model thus secured cut six leaves in flannel—two green, two brown, and two red, or red, white and blue, or any combination you like. Snip the edge of each leaf into very tiny points, and chain-stitch veins upon it with gold-colored floss. Attach these leaves together by the upper ends, arranging under them three triply pointed leaves of black broadcloth or silk to receive the ink, and finish the top with a small bow of ribbon. (St. Nicholas Magazine for Boys and Girls, Vol 5, 1877.)


