Actually, the question is usually “Only single women could be milliners. Right?” or “Could milliners be married?”
Many of us were taught married women didn’t work outside of the home or couldn’t work outside of the home for much of the nineteenth century. This is a misconception.
Looking at advertisements, Miss. and Mrs. are used with women’s names. Of course, this could be for public relations purposes.
Looking at census records, milliners have statuses of married and widowed. In 1855 Livingston, New York 47 women’s occupations were recorded as milliner. Of the 47, 7 were married, 5 were widowed, 6 were head of household. 12 were living at home with a parent (listed as daughter to the head of household.) 13 women were living in homes other than their biological family, listed as milliner, assistant, boarder, servant, laborer, and maid.
In New York, prior to March of 1860 a married woman’s wages were legally her husband’s money. In March of that year, a bill went through the legislature and was signed into law giving married women the right to the wages they earned.
A married woman may bargain, sell, assign, and transfer her separate personal property, and carry on any trade or business, and perform any labor or services on her sole and separate account, and the earnings of any married woman from her trade, business, labor, or services shall be her sole and separate property, and may be used of invested by her in her own name.
The 1860 Act also required a married women to get her husband’s written consent to sell real property but gave ways to do so when a husband was unable to do so. (In New York, married women also retained ownership of businesses owned prior to marriage after the Married Woman’s Property Act or 1848.)
Do you enjoy reading my blog? Do you find it helpful? Please consider supporting through Patreon or Sending a Tip.
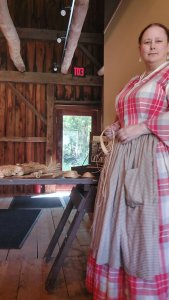
Today, I did something a little different: An activity focused activity.
Rather than just demonstrate and discuss making straw hats and bonnets, I gave visitors the opportunity to braid straw themselves. Well. Raffia.
I chose raffia instead of wheat or rye straw because it would be easier to work with. It was also more affordable.
Despite a background in working with young children and developing a wide variety of camp and craft activities, I was a little unsure of myself going into this one. Bridging from interpretating straw millinery as an aspect of women’s history to straw as a hands-on experience was a leap for me. When I was brainstorming around the idea, I knew I wanted to focus on the “this become this,” or the “fiber to function” if you will. In my mind, it would have been great to show off more than wheat & rye to plait/braid to hat: flax to linen, cotton to cloth, corn to broom, bark to basket, etc.. But, in reality and two weeks, one component was it.
I learned a few things during this activity today:
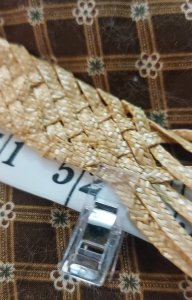
I plaited 52″ of plait today between visitors. This may go on a hat.
There are just so many times I can drop a pair of scissors into my apron pocket point down before the tip makes a hole and everything starts sliding through.
Fewer people knew how to do a basic braid than I assumed.
More adults wanted to do this than I anticipated.
Some adults really wanted to do this. I am very glad I brought along a couple hanks of my petite plait. I was able to set a few up to make 6 strand bookmakers
Natural raffia expands, really expands, when unpackaged
Some of my school coworkers know me well enough to stop by and make sure I’ve eaten.
Long time members will search out favorite interpreters. They told me this.
The downside of doing cool activities is you miss the other cool activities. I really wanted to do the ax throwing.
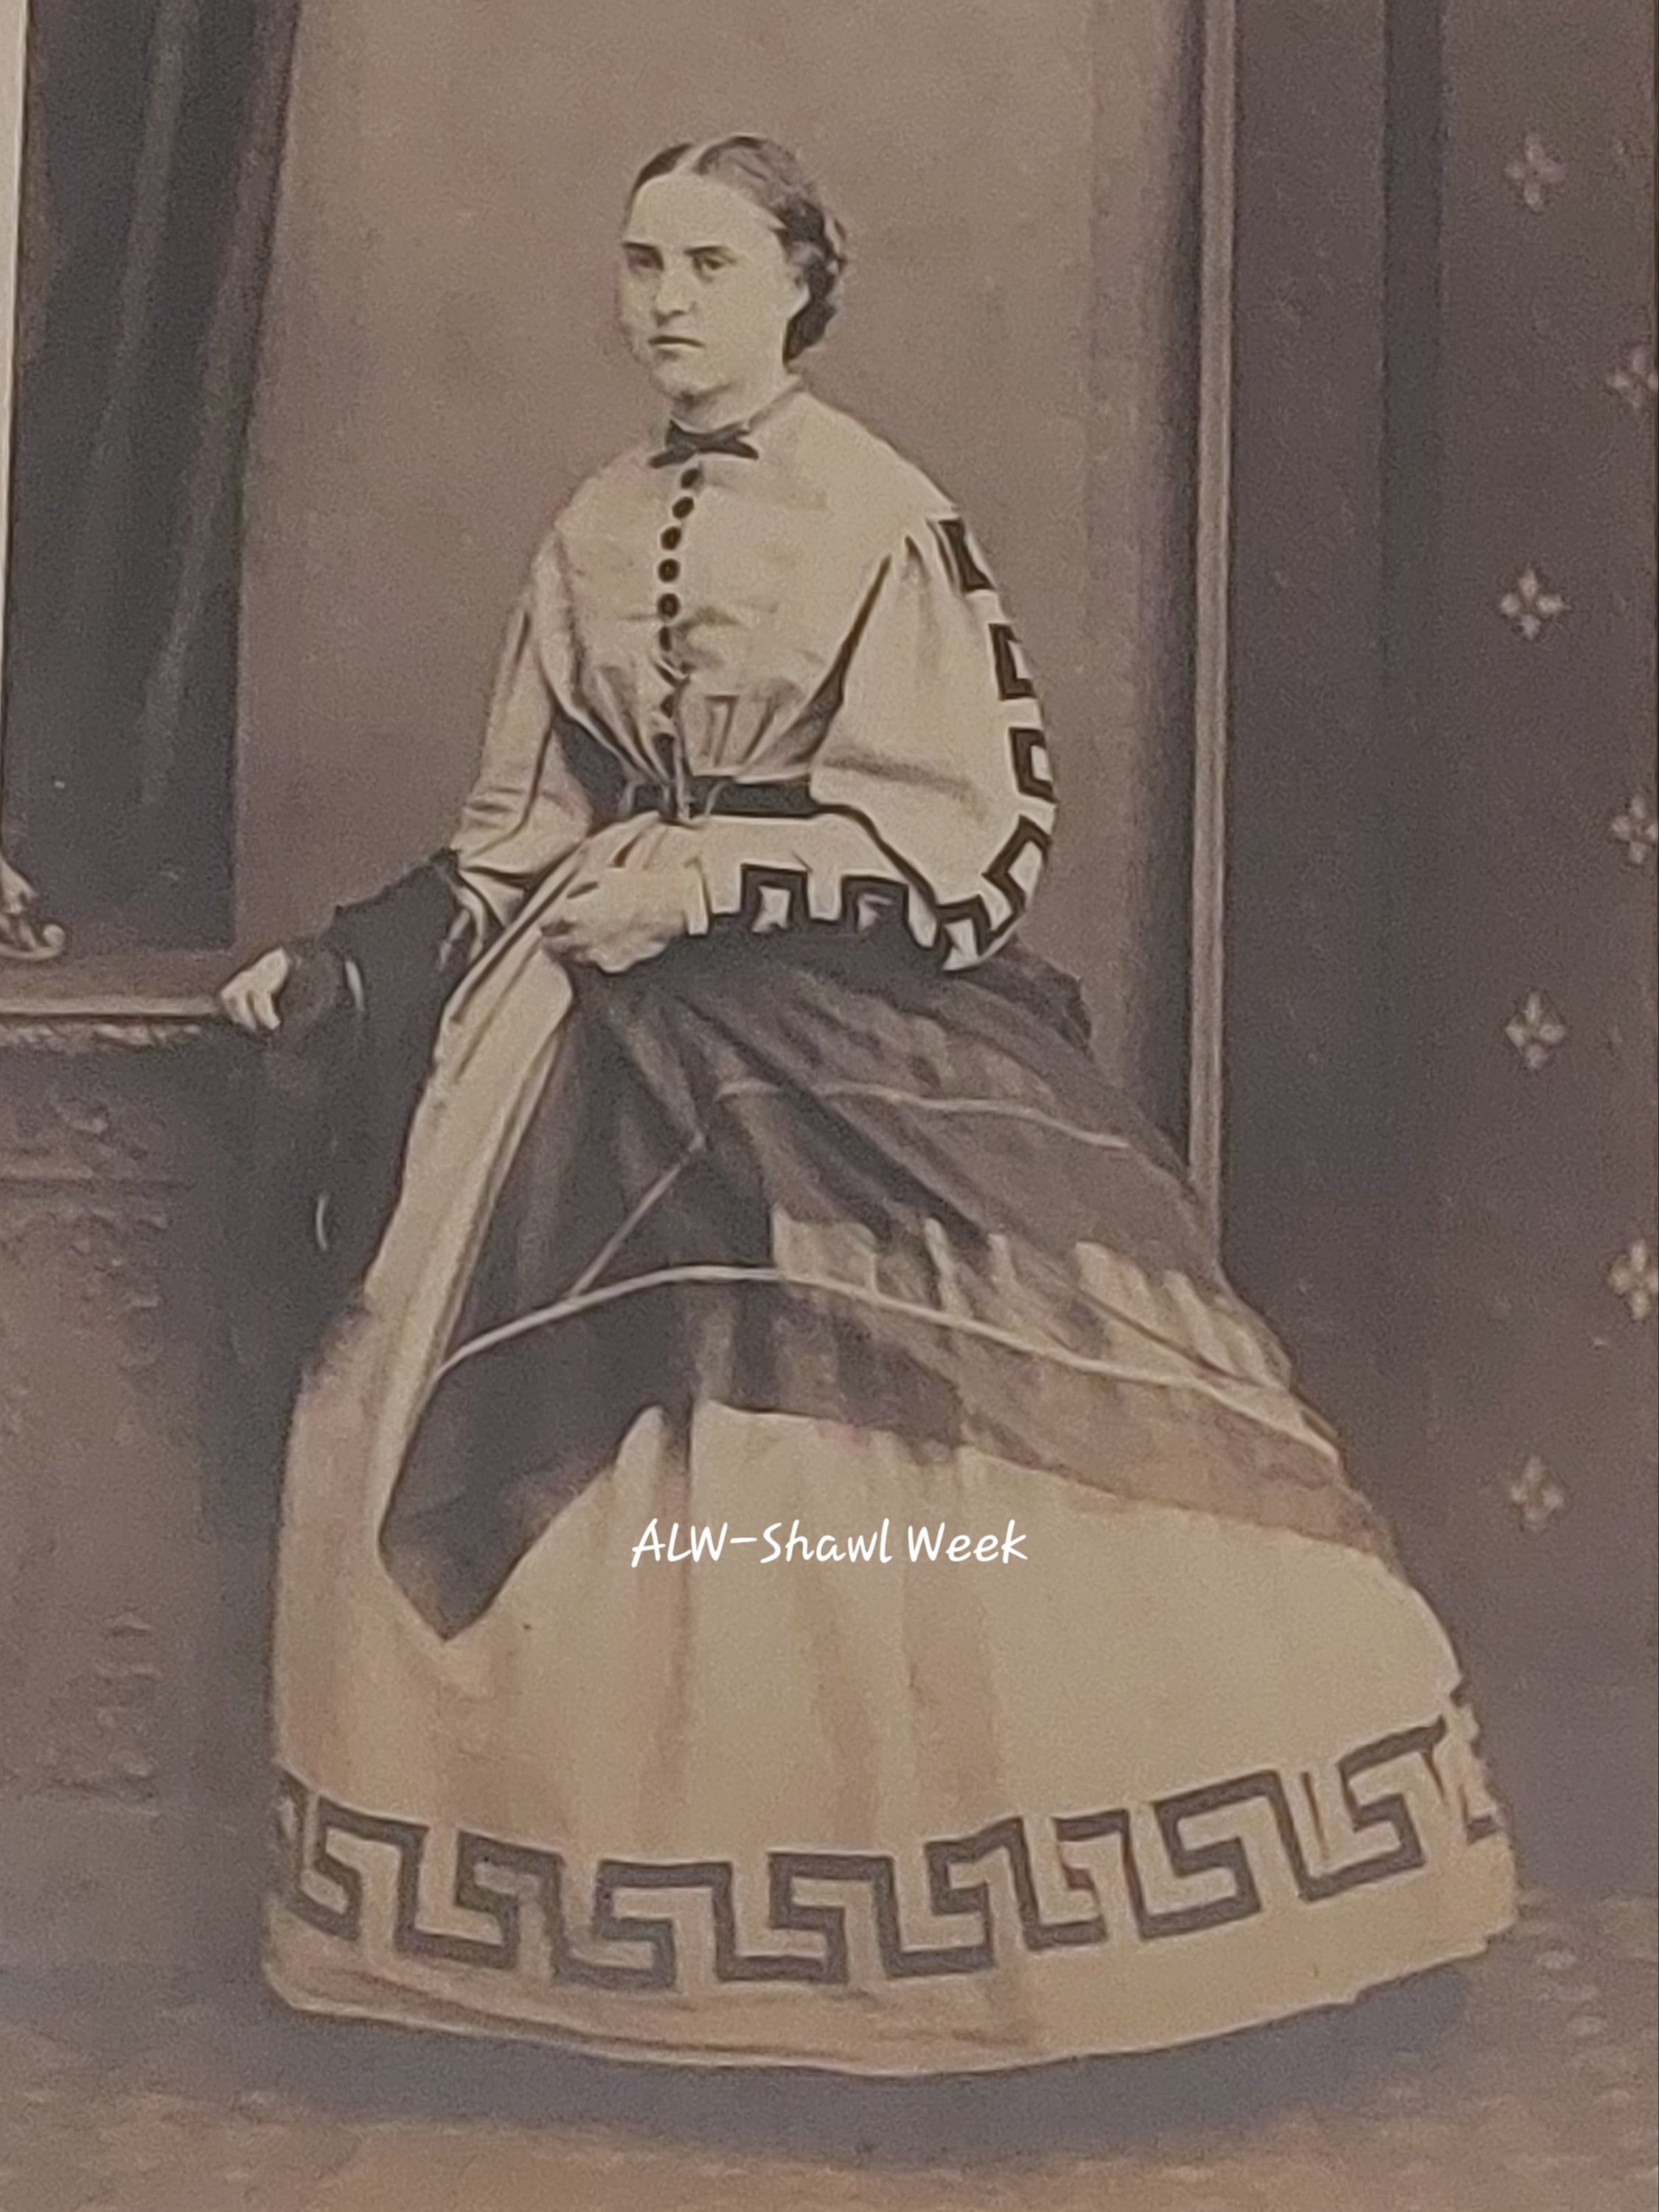
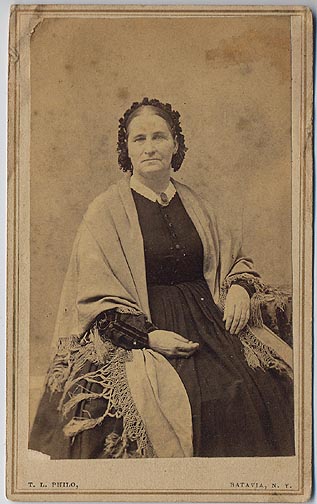
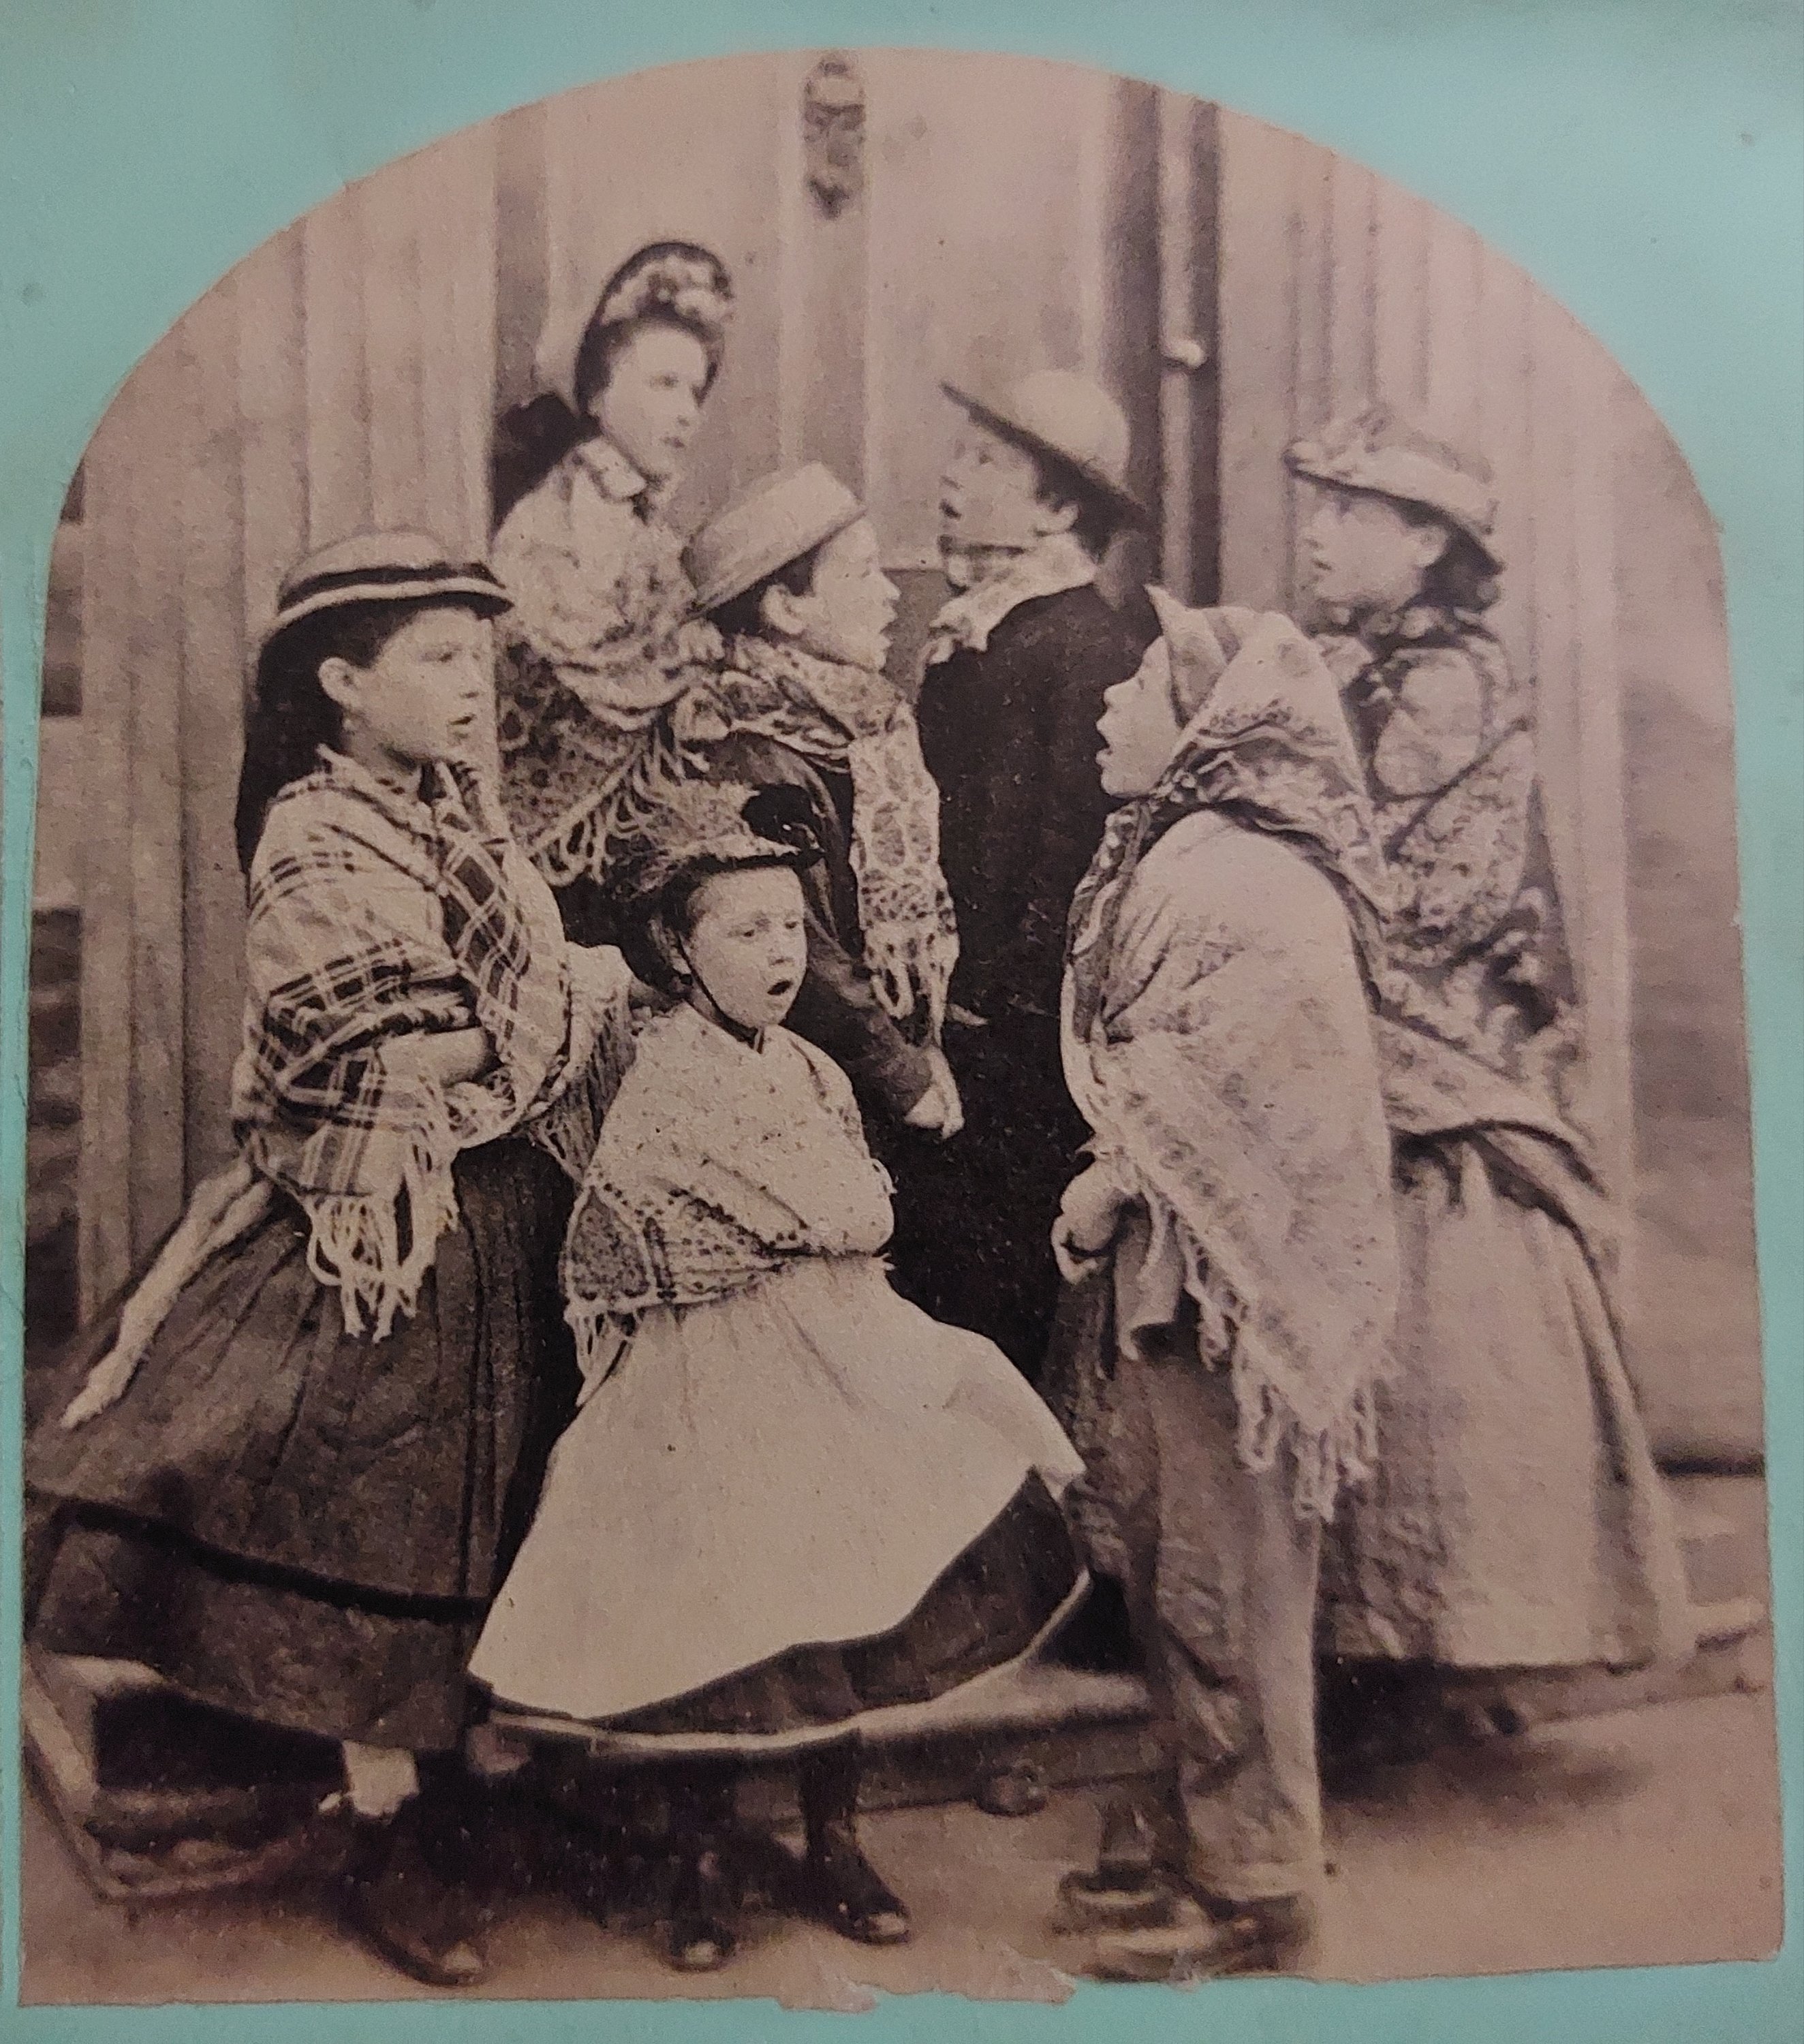
As I start this article, I find I have the mental picture of how not to wear a shawl stuck in my head. It is of a poor shawl draped loosely, falling low on the back and being dragged across the ground behind. I can not tell you how many times I’ve seen a shawl worn this way. One may argue that shawls are show falling low on the back or draped about the skirt in photos such as those to the right. But, these are posed photos meant to show off the form and garment. If this young woman were to walk around with that lovely sheer silk shawl draped like that, it would be a sure way to ruin the shawl. And note, many shawls were costly, sometimes very expensive.
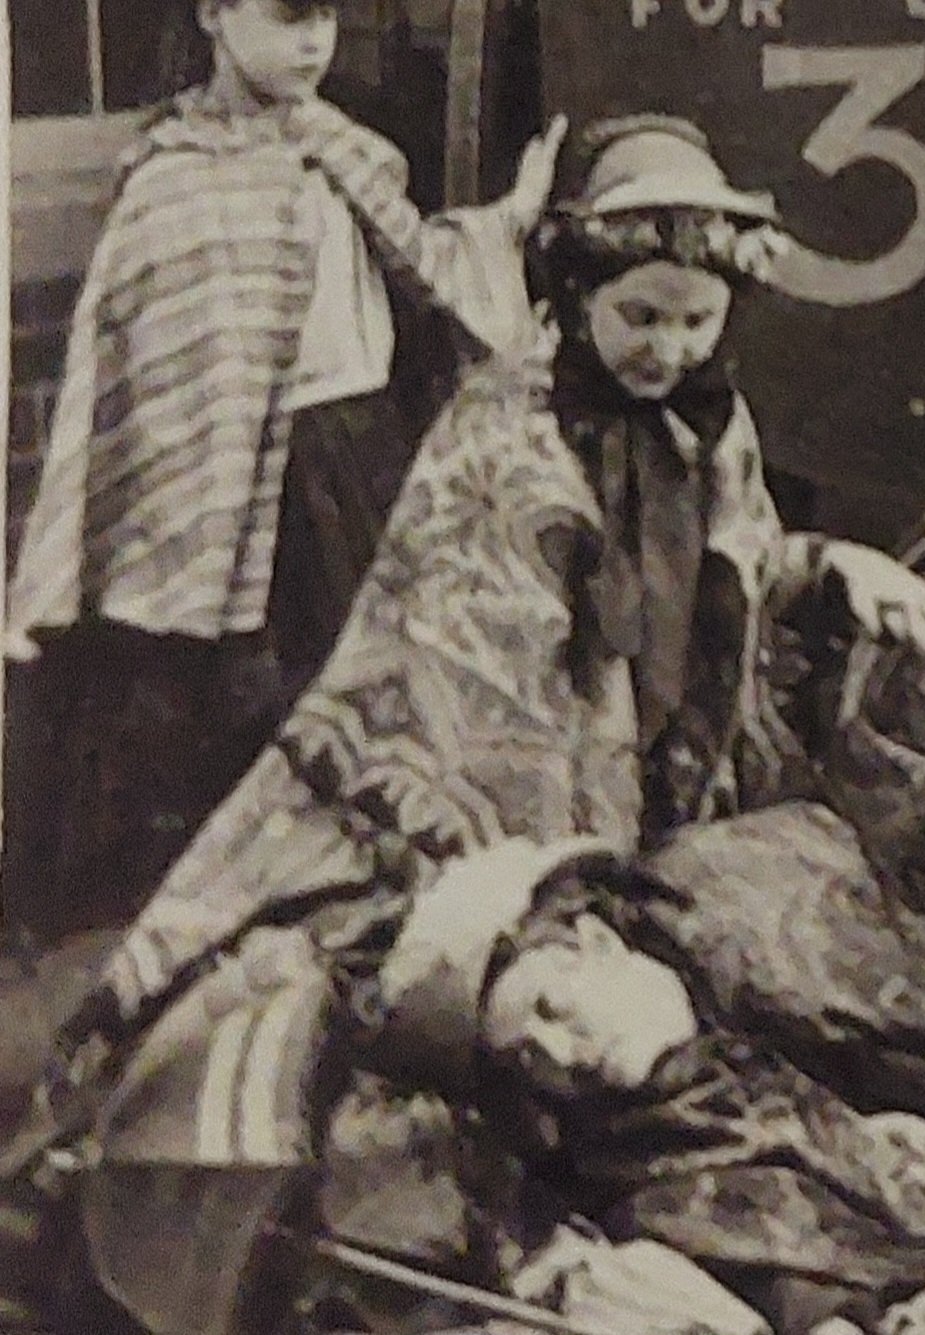
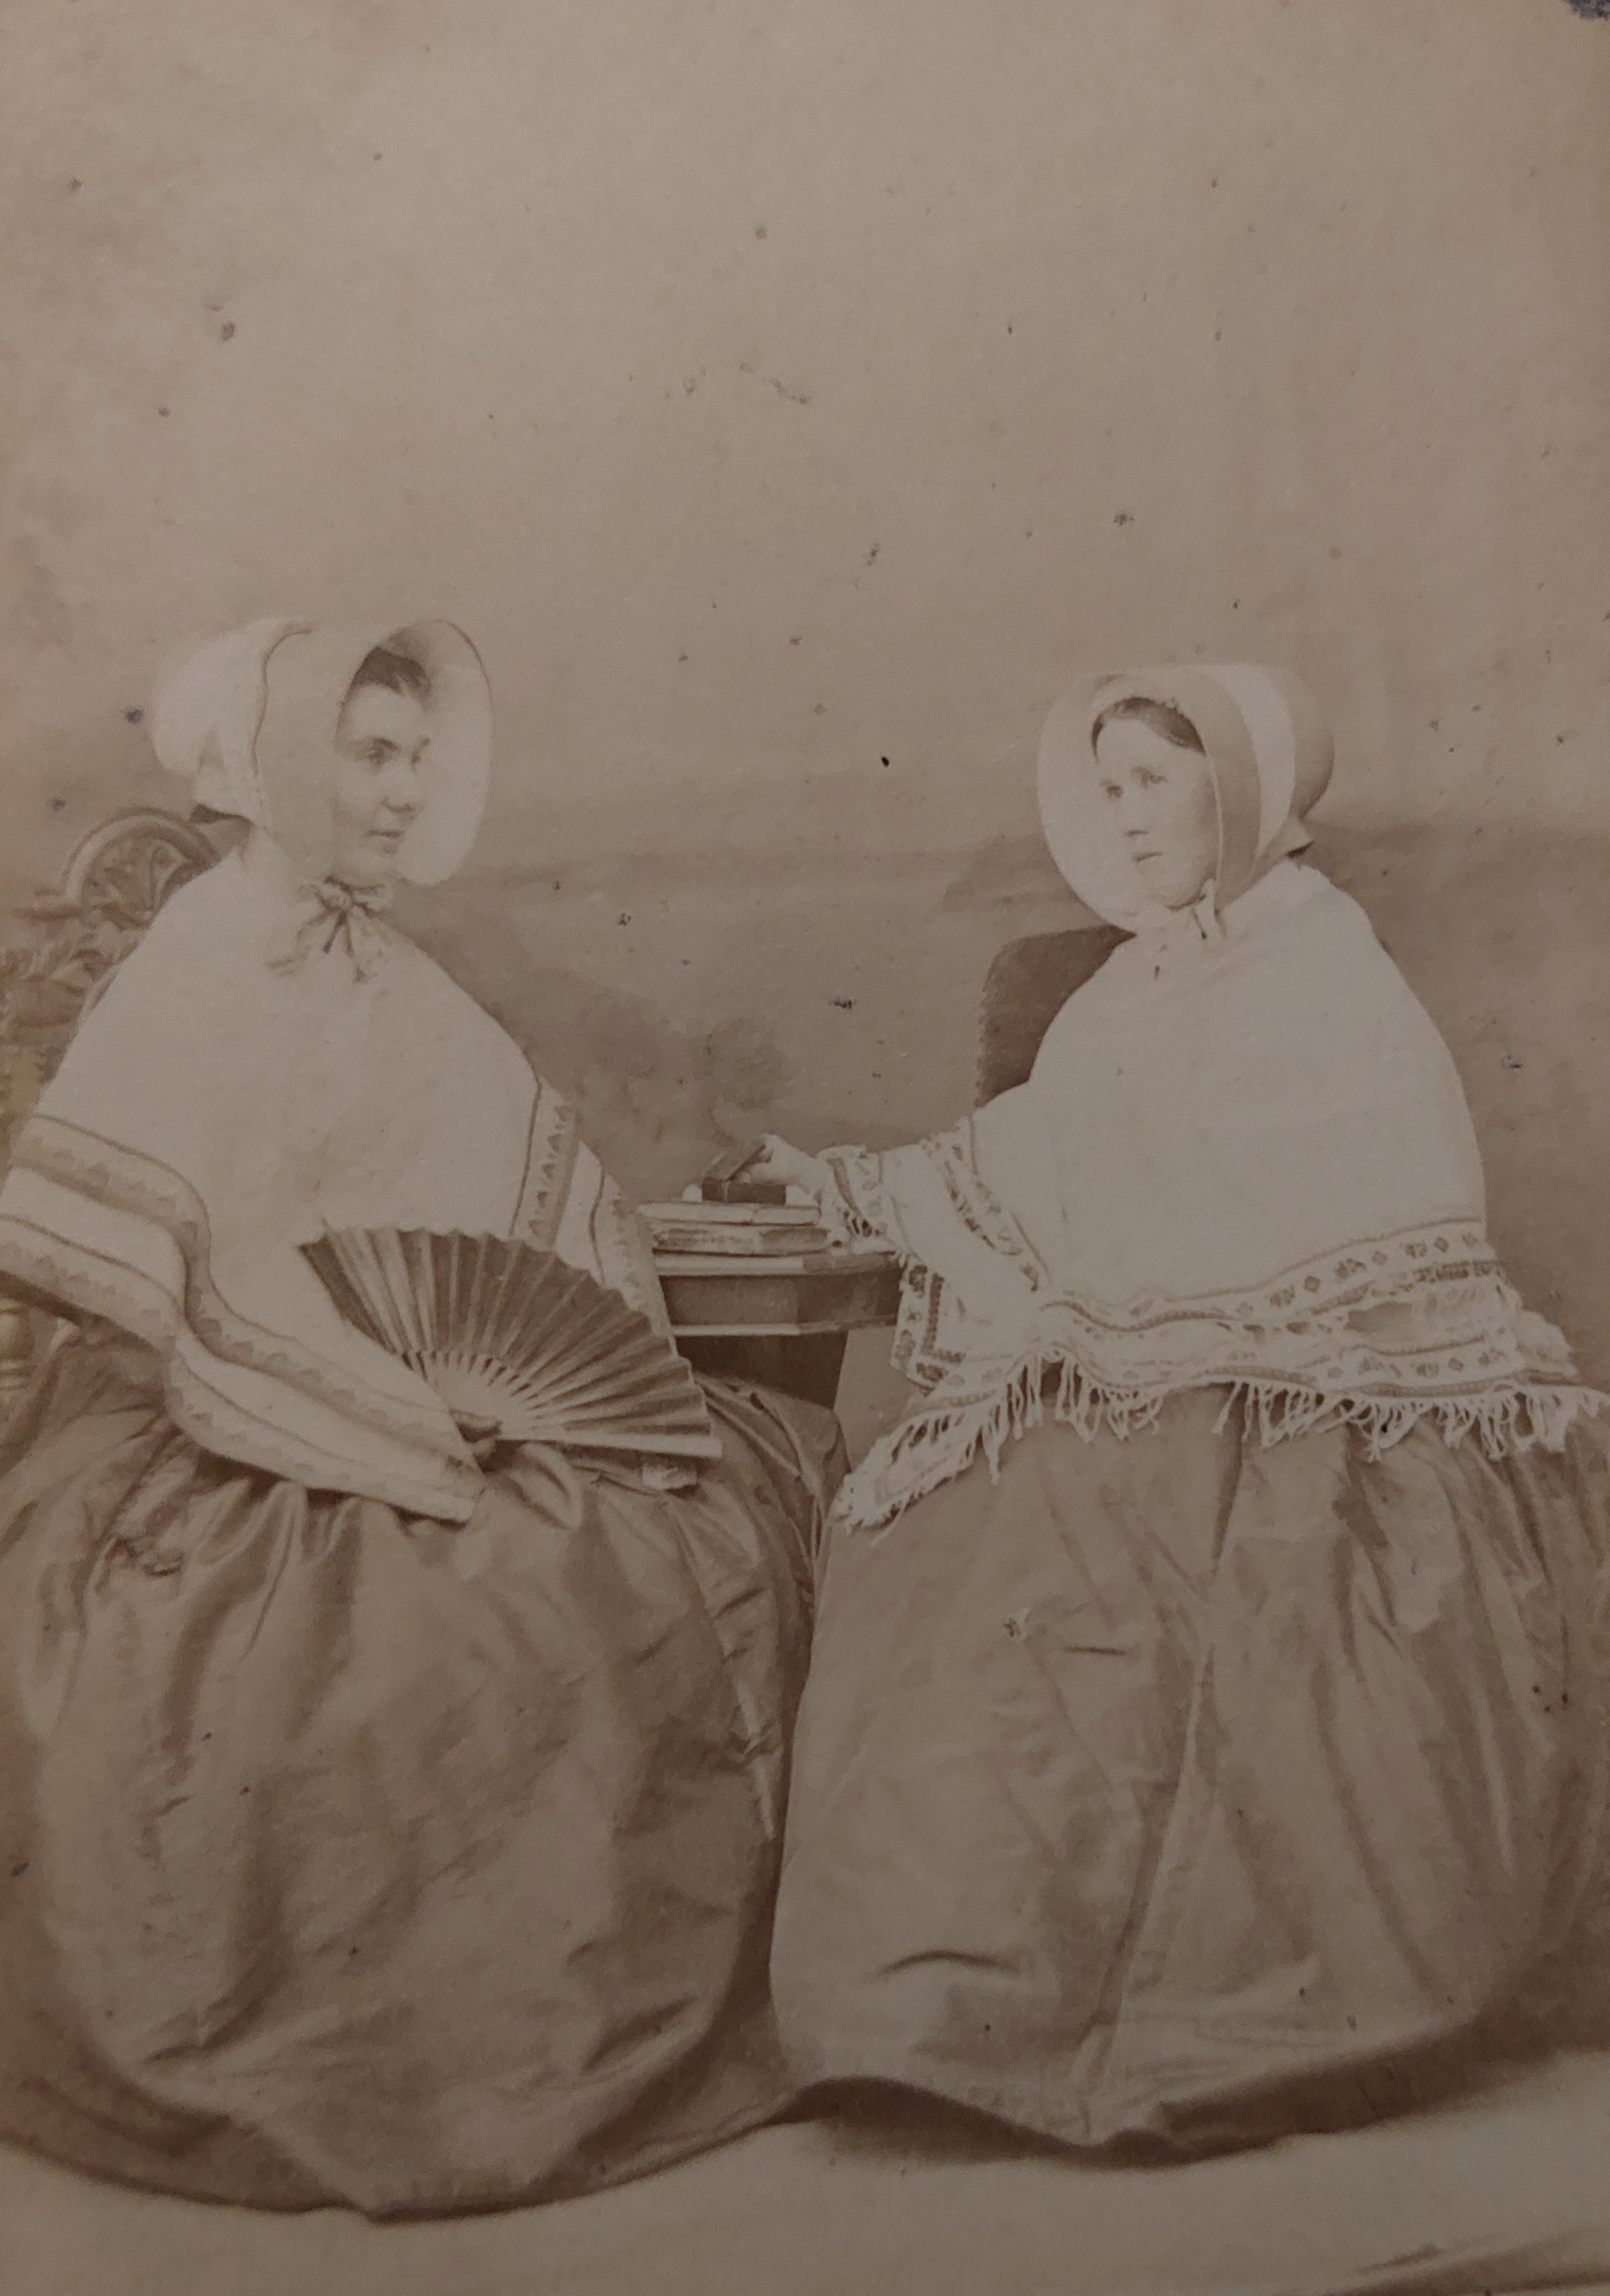
How were shawls worn? Yes, we still need to look to photographic examples, keeping in mind the purpose of the photo. These ladies, left, are shown in a real situation rather than posing for a portrait. Notice how their shawls are worn up on their shoulders, close to their necks. In the front, the shawls may be draped over their forearms or closed in front with a pin.
To achieve this look with a square shawl, fold the shawl in half diagonally from corner to corner. This creates a triangle. The fold of the triangle can then be adjusted allowing the upper half of the shawl triangle to be shorter than the lower.
For a rectangular double square or long shawl, start by folding the shawl in half creating a square first. then fold the square in half diagonally creating a triangle. The first fold should be worn on the under most side allowing the corners of the shawl to be on display in the V draping the back.
Continuing with stereoview images similar placement can be seen in this detail. This woman wears a paisley type shawl draped over her shoulders, high but not crowding her neck. The ends of the triangle are caught over the inner bend of her elbow.
On the opposite side of the same stereoview, a flower seller also wears a shawl. Her simpler, likely wool shawl is draped over her shoulders, worn closer to the neck. As it falls over the shoulders, it is pinned at the center chest as is evident by the curves of the draping. This allows her to hold her tray of flowers.
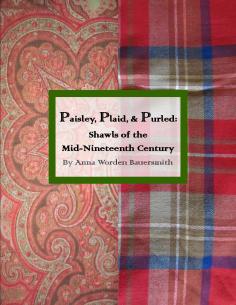
For more in-depth information, please read Paisley, Plaid, & Purled: Shawls of the Mid-Nineteenth Century.
Back in 2009, I wrote what would become one of the favorite posts on my blog. “Fringe Frustration,” later “Fringing Shawls,” walked through my process for turning a length of wool fabric into a mid-nineteenth century appropriate shawl. Since then, I published Paisley, Plaid, & Purled, going far deeper into shawls. Still, making a shawl from a length of wool is one of the easiest and simplest ways of boosting a waredrobe. Here, I offer an updated look at …
Fringing Your Wool Shawl
The red wool shawl from my original post was a favorite for many years. It traveled to event after event with me. Eventually, it traveled across the country on my first plane trip, which found me stuck in a wild storm being bounced from flight to flight to flight. By the time I reached my destination, I had scarring blisters on my feet, and my red shawl accidentally found its way into the washer and dryer, where it fulled up on itself. The wool became soft and cuddly, but the shawl was no longer usable as a 19th-century shawl.
The core of my shawl research focuses on the 1840s through 1860s. During this time, most shawls were fringed on two or four sides. This applies to wool, silk, and cotton shawls. As a shawl’s fringe was often made from its warp and weft threads, a squared shawl was fringed on the grain. The shawls I have observed have had fringe ranging from 3 inches to 10 inches in length.
The large, long, scarf shawls of the earlier Regency era tend to be fringed on the short sides. Again, the length of fringe varies.
Helpful hints before starting
Make sure you purchase plenty of extra length to work with. I often find merchants do not cut along the grain. If your fabric is not cut on the grain, you will lose length on one or both ends.
Have a lint basket nearby. This works much easier than a bag.
You might also want a lint brush to clean up with.
Pick up your favorite movie or audio book from the library. You will need several hours of video or audio.
Purchasing Your Fabric
~ For a long, scarf shawl (1800-1820s), you will need a length of fabric approximately 3 yards long by half width of the wool. This means you may be able to get two shawls from 3 yards of wool.
~ For a square shawl (1830s – 1870s), you will need the width of the fabric, plus twice the length of fringe, plus waste. For example: The fabric width is 60″. You want 5″ fringe on each end. There is approx. 1.5″ waste on each end. You will need 60″+10″+3″= 73 inches.
~ For a long shawl or double square shawl (1850s – 1880s), you will need twice the width of the fabric, plus twice the length of the fringe, plus waste. For example: The fabric is 60″. You want 6″ fringe. There is approx. 1.5″ waste on each end. You will need 120″+12″+3″=135″. If you are working with a plaid, stripe, or check fabric, you may need additional length in order to have a balanced design. Be sure to lay your fabric out on the cutting counter to double check you measurements.
Squaring your fabric
Sometimes, fabric becomes wabbly or off grain when rolled or stored. If the warp and weft threads of your fabric are not nearly perpendicular (at 90-degree angles), you will want to square your fabric up. This is a good time to get familiar with the warp and weft of your fabric.
You will need a large, flat, traffic free space for this. Double check prior to doing this that your fabric is color fast. Otherwise, you may stain the drying surface.
At each end of your fabric, snip at the selvage and tear the fabric along the weft threads. Do this at each end. This will create a straight edge along the weft. Wet your wool fabric. Do not agitate it as this can cause your wool to shrink. Press out excess water. Lay the fabric out flat using a quilter’s rule to square the edges. Place weight (jars of food work well) on each corner and side. Allow your fabric to dry.
Step 1 – Setting the depth of the fringe
You can create fringe on two opposing or all four sides of your shawl. To fringe the selvage sides, you will need to remove the selvage edge either by ripping/cutting it away or unpicking it.
At one cut end of the fabric, measure in from the end the desired length of your fringe. Mark your measurements along the width of the fabric. Repeat this at the opposite end of the fabric or all four sides.
Using a seam ripper or embroidery scissors, carefully snip the weft thread that passes through these markings.
With a thick needle or small crochet hook, carefully remove this weft thread. The space created by removing this thread becomes your measurement guide in the next step. If this line is not easy to see, remove a second weft thread in the same way. Repeat this process at the other cut end of fabric.
Step 2 – Sectioning
It is easier to fringe in sections, removing short pieces of weft rather than long lengths. Make cuts, dividing the width of the fabric into 2 inch sections. To do this – Cut along the warp threads from the cut end of fabric to the removed weft line you created above. Repeat this on the opposite end.
Step 3 – Fringing
Here is the fun part! Put a movie or audio book in the player. Using your fingers, large needle, crochet hook, or anything you think might help, remove the weft threads from each section. I find it easier to alternate from working vertically to working horizontally, removing threads.
Step 4 – Finishing
You can finish your fringe in a few ways; knotting, hand stitching, or working a weft thread back through the fabric.
One of the simplest ways to finish as shawl is to stitch along the fringed edge. Using a matching thread, make a sort-of back-stitch and whip-stich combination along where the fringe meets the fabric. Go forward 5-7 warp threads at the fabric edge, then back three threads and up tree warp threads, catch the stitch, and go forward. This sounds much more complicated than it is. Picture to come.
A method used before taking a shawl off the loom is to work the weft thread back through the edge. This process could be attempted if you can save enough of your weft thread. I have not yet tried this.
For knotting your fringe, I suggest an over-hand knot (as you would knot the end of thread) instead of a square knot (as you would start your shoe laces), because a square knot tends to pull threads together creating a puckered look. If you are going to do multiple layers of knots, creating a nice diamond pattern, I suggest starting with an overhand knot rather than continuing with a square knot for a flat diamond pattern.
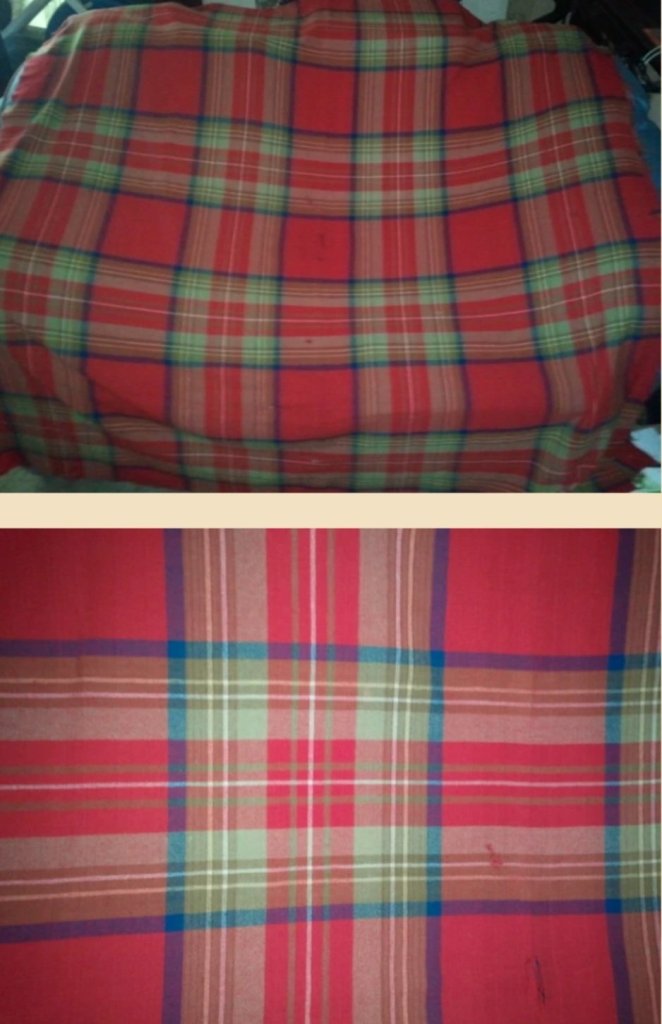
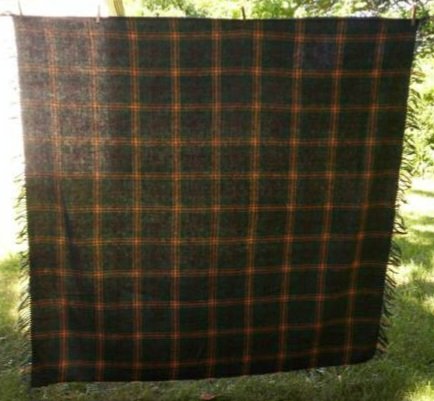
Original double square shawl with a symmetrical plaid.Small scale symmetrical plaid shawl made from wool fabric.Medium scale symmetrical plaid shawl made from wool fabric.
Mistakes to Avoid
Wrong weave – Most woven wool shawls were a plain or simple twill weave. For making a shawl this way, a weave that pulls apart fairly easily will be preferable to one that sticks to itself.
Wrong weight – One of the most common mistakes I see is choosing a weight of wool fabric that is too heavy for a shawl. Most original shawls were lighter weight, folded to get warmth though layers. Look for a tropical, light, or medium weight wool. Avoid heavy and coat weight wool.
Wrong design – Choose a solid or symmetrical plaid for your shawl as these will beset reflect common shawls of the century. Avoid prints, asymmetrical plaids, and jacquard designs for the vast majority of the century.
Shawls of the mid-nineteenth century were very large by modern standards, huge in many cases. They were so large that they are often mistaken for blankets or tablecloths when pulled from trunks or at antique shops.
The shift from scarf shawls, those that were long and narrow, of the Regency era to square shawls was firmly in place by 1830 and 1840s. The image to the right is ca 1840s. Notice the size of these shawls.
In the 1850s shawls began to increase in size dramatically. When folded in half diagonally, creating a triangle, these shawls descended nearly to the ground from the shoulder. Rectangular shawls, known as long shawls, double squares, or plaids, became popular. These were folded in half to create a square, then in half again to be worn as a triangle.
Square shawls should be in the range of 55 inches to 70 inches square with 64 inches square being standard.
Long shawls are double squares, sometimes called plaids, which should be 55 inches wide by 110 inches long to 70 inches wide by 140 inches long with 64 inches wide by 128 inches long being the most common.
Three-quarter shawls are 3/4ths the width and 3/4ths length of a standard double square shawl. A three-quarter shawl would be 48 inches wide by 96 inches long.
Handkerchief Shawls are notable smaller in size. Shawls this size were listed and taxed differently in tarriff schedules. It was common to add borders to a handkerchief shawls.
Scarves are much longer than they are wide. A shawl 3 feet by 9 feet would be considered a scarf. These were more popular earlier in the 19th century.
Exceptions to these standard sizes can be seen for lace, knit, and crochet shawls which tended to be triangular.
Next, consider weight. One of the mistakes I observe is the use of wool which is more of a blanket weight than a shawl weight. The weight of fabric is determined in ounces per linear yard. If you want to think of wool weights in terms of modern suit weights, a tropical weight is the lightest and regular is generally the fabric worn for a winter suit.
For more in-depth information, read Paisley, Plaid, & Purled: Shawls of the Mid-Nineteenth Century
Fibers, weave and size: These shawls should ideally be made of hair brushed from the Kashmir/cashmere goat or from a wool and silk blend. The silk should be the warp or blended into the wool in a small amount. Avoid shawls with a rayon or acetate blended with the wool. Original Kashmirs are very light weight because of the tapestry twill weave. I have yet to be able to compare the weights of original and new. Look for sizes around 64 inches square or 64×128 inches as a double square.
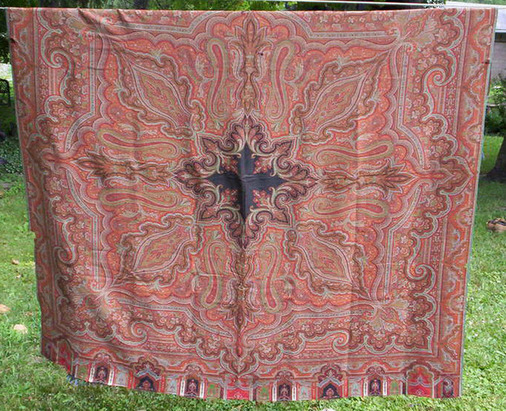
Design: When looking for a Paisley shawl, look for a strong cone motif. The cone motifs should radiate out from a center field of black, white or red. These radiating motives create a star or spoked flower appearance from a distance. The spokes should be connected with ribbon like borders consisting of small floral motives. By our era a newer shawl would have a smallish center. But, the higher cost of these shawls along with their durability means it would not be unlikely for a grown woman to have a shawl with a larger center from her youth. The outer border can be on two or four sides. This borer should be comprised of smaller designs brought together in the border. Kashmir borders will have more independent blocks of design while French borders will visually entwine each block with it’s neighbor.
Two other design options include the striped shawl and the border shawl.
Where to look: There are some nice shawls coming out of India. Many of these are available on online and via Ebay for various prices. When doing an online search use “Paisley Shawl” or “Cashmere Shawl” or “Antique Shawl” for your key words.
Woven Shawls
Fibers, weave and size: Wool or wool/silk blends. These should also be 64 inches square or 64 inches by 128 double square. A shawl relatively near these dimensions will look nice. The weave should be a tight plain or twill weave. The shawl can range from light weight to rather heavy if hand-woven.
Design : Look for solids, checks, plaids (preferably symmetrical) stripes and border plaids.
Where to look: This is a type of shawl you can make yourself. Many Museums offer weaving classes thru-out the year. You can also make a fabric shawl from woven wool lengths. You will need a dress weight to coat weight wool rather than a heavy weight in a 54 inch to 60 inch width. Plain woven fabric and plaid woven fabrics work well. The yardage can fringed on the end by unravelling the ends by hand. To calculate your yardage, decide if you want a square or double square shawl and how long you wish your fringe to be on the ends. For a square shawl, purchase the width of the fabric plus 6 to 12 inches for fringe. For example: if you want a double square shawl out of 60 inch wide fabric purchase 130 inches for a 120 inch shawl with 5 inch fringe. (see the article on fringing a shawl)
Printed Shawls
Fibers, weave and size: Printed shawls come in wool, cotton and blends of wool, silk and cotton. Ideally, you would find a 64 inch square shawl, but the common 55 inch square shawl is not bad.
Design: Printed shawls vary by region. Look for period motifs and borders.
Where to look: It is difficult to find accurate printed shawls. The Russian Pavlovo Posad company still makes printed shawls using variations of their 19th century designs.
Sheer Shawls – Muslin Shawls, Grenadine & Barege
Fibers, weave and size: I still have not found sheer shawls that I like. These were silk, wool or cotton. They frequently had a plain central field and a stripe border creating a plaid motif.
Lawn, Gauze, Voile, Silk Organza & Batiste fabrics can be used to make a sheer shawl. The edges would need to be hand finished with a rolled hem. This isn’t what original shawls have though. You may want to starch the fabric as well. You can add tucks to the border or ribbon to the border or edge.
Where to look: – Online fabric merchants including Exclusive Silks and Fashion Fabric Club
Silk Shawls
Fibers, weave and size: I have not yet found the ideal silk shawl. Thai Silks has larger white shawls in their scarf section. These are a little smaller than ideal, but may suit your needs.
To make your own shawl, you want a durable silk, in the 64inch square range, no slubs with or without fringing. Look for a taffeta, china or habotai silk. Do not use satin. I have seen solid color, shot (or changable silk) and patterned silk shawls. A couple of the India, China and Thai merchants sell nice silk shawls. I tend to think play it safe for silk shawls and go for simple. Also, many list as silk but are selling Viscose.
Design:: If you want to embroider your shawl, I highly suggest looking extensively at originals.
Lace Shawls
Sadly, accurate lace shawls are not reproduced currently as far as I am aware. Modern lace shawls tend to be synthetic, with incorrect motifs.
Original lace shawls are fragile. In my opinion, they should not be worn.
Knit and Crochet Shawls
Great thing about these is you can make them your own. There are several patterns available in magazines and guide books. Many of these patterns are available digitally through Accessible Archives and online from various sites. There are now social media groups dedicated to 19th century knitting and crochet.
If you are purchasing a shawl, be sure to ask where the pattern design came from and what fibers the shawl is made out of. The shawl patterns above are worked in wool or silk.
For more in-depth information, read Paisley, Plaid, & Purled: Shawls of the Mid-Nineteenth Century
Now Available. Paisley, Plaid, & Purled: Shawls of the Mid-Nineteenth Century
“Isn’t straw delicate” is one of my favorite questions. It shows a visitor is thinking through what I am working with, imagining the fiber itself, and questioning either what they see or what they think.
Straw as a straw is delicate. It can be snapped or shredded with little effort.
Yet, straw once paired together with other straw can be quite strong.
Straw braided and sewn together can hold its shape well. It can be relatively strong. It can also withstand elements better than other contemporary materials.
One of the great things about straw is it can be forgiving, allowing it to be retrimmed or redecorated a number of times.
One of my favorite straw bonnet stories from the nineteenth century tells of a young woman who has the same bonnet for ten years. She redecorates it yearly.
Advertisements for millineries and straw goods stores often include bleaching and reblocking of straws in their lists of goods and services. Straw bonnets and hats can be reblocked into their original shape with new sizing (stiffening) or, within reason, be reblocked into a newer shape for a more updated style.
Straw can also be repaired. This can be seen in original bonnets and hats with patches of straw plait.
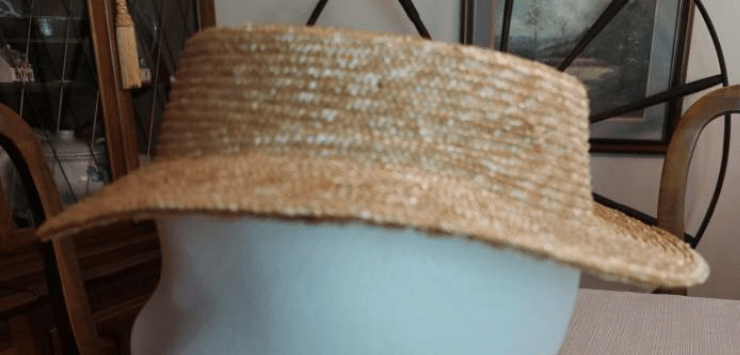
Clients have shared with me a few survival stories over the years. Most recently, is this hat who had a rough journey to its owner. The box suffered significant damage including the dented in side seen here and the opposite side ripped into. The hat within survived with only some mis-shaping from the trauma.
Another hat took an impromptu flight and dip into the ocean while its wearer was on a leisurely excursion. The boat was able circle around while the hat floated in the water. When it was fished out, the hat needed only to dry before it could be worn again.
Now, this isn’t to say straw millinery is invincible. A straw hat or bonnet is unlikely to survive being sat on or trampled. Straw can also be susceptible to mold or mildew if not properly dried after getting wet or damp. Straw can also become brittle if stored too long in a dry area.
Do you enjoy reading my blog? Do you find it helpful? Please consider supporting through Patreon or Sending a Tip.
Clara would like me to start by telling you she strongly opposes the production of publications such as this, as doing so resulted in not only I forgetting to feed her dessert last night but also second breakfast this morning. Such lapses in responsibility can not be tolerated.
That said….
These little booklets are all Malinda’s fault.
Once upon a time, a group of then young interpreters and reenactors in Western New York got together occasionally to learn and create new items for their impressions. With the discovery of a supply of small boxes, the practice of maintaining a hair kit began.
Some two decades later, I still use the same hair kit when at home.
Being said once young interpreters and reenactors are now less young and some have young of their own, the next generation is now building their own hair kits.
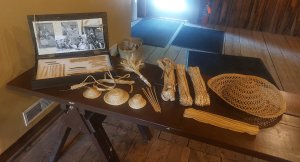
A hair kit is essentially a portion of the toilet, often meant to be mobile to meet the modern needs of interpreters and reenactors. The container, selected to meet the needs of user, houses the necessities used in dressing the hair.
These small booklets are meant to accompany the hair kit with the beginner or novice in mind. I arranged one for teens and one for adult women. Each gives very brief tips for the beginner and an assortment of photographs & illustrations for inspiration. The contents focus on the hair of everyday, working- and middle-class women.
To create the booklet, print the PDF in black & white or color. Select double sided, flipping along the long side. Stack the three sheets of paper on top of each other. Cut across the center horizontally at 5.25″. Place the top three sheets on top of the bottom three sheets. Fold in half. Stitch in the fold with strong thread or string if you choose.
Part of me thinks I should be placing these with the option to purchase (Etsy or Patreon) due to the number of private collection photographs included. But, I feel this type of resource should be easily accessible. If you wish to say thank you for publications such as this or the many free projects I offer, I invite you to join my Patreon.


