Even since making the bonbon baskets, I have been wanting to make other items from straw. Luckily, lady’s magazines and fancy work manuals are speckled with projects, including workbags.
There are three different style workbags I want to make in straw.
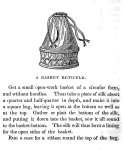
The first style is this basket bag style. The base is a basket made of straw plait sewn to shape. The top is a silk bag that draws closed. The construction concept is seen in A Girl’s Own Book, by Lydia Child as well as other publications. The basket base is made with a variety of materials in each description.

For my first two of this style, I created a tapered square straw basket base. The bag tops are silk taffeta with drawstring closures. Both the basket and bag are lined with silk. I may have over engineered the process considering it was past 10pm when I finished the bag portions last night.
Both of these bags are available in my shop. I think I will be able to do one more. I have a smaller round version in mind as well. If there is interest, I will make a couple straw basket bases as well.

The next style is one I can’t help seeing as a taco. The straw base is a circle or oval in a taco shape with the silk bag set inside. I have a mini taco waiting as I write. I have two different ways of making this in mind.
The third style came to me as I was looking for something else yesterday. I already misplaced the image. It was a “duh” moment as I was reading a description of plaited grass/straw fibers being sewing into circles and used for the centers of what was essentially a Balloon Bag. Yes, the Balloon Bag for the sew along years ago. So, of course, I need to make one. I am not sure how well guaging silk onto straw will go. I may add a layer for strength.
Look forward to these styles in the next few days.
Many thanks to Joyce, ot the Time-Traveler’s Rabbit Hole, and Marna for their assistance in finding the examples in the thousands of pages of original publications.
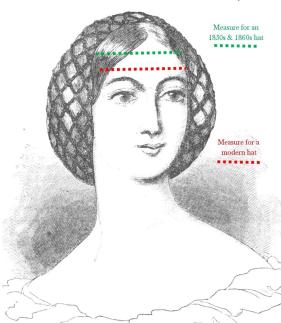


 Hat blocks can be more round or more oval with the same circumference. To illustrate: Both of these shapes to the right can have a circumference of 22.5″. Yet, the same hat would fit each head differently.