Oh, for the love of tea…..

The moon was lovely. As the eclipse reached its peak, the line of clouds embraced it. I was off to sleep. Apparently…. not enough sleep.

Oh, for the love of tea…..

Okay, so the images aren’t tea. But, if it were, oh, how this is what I need.

Coffee stall,  from Charles Knight's London, vol.4, 1843

Coffee stall, from Charles Knight’s London, vol.4, 1843

Breakfasting Out, 1859, by Robert Dowling,

Breakfasting Out, 1859, by Robert Dowling,

Published in: on September 28, 2015 at 6:00 am  Leave a Comment  

Dry Goods – From the Shopper’s Perspective

I am hesitant to recommend this book because it is 1872 and I don’t want those interpreting the 1850s or 1860s to rely on it too heavily. At the same time, I would be remiss if I did not share the book because it is so useful.

This book gives an view of dry goods for the consumer as it was written for that audience. In addition to the over view of fibers and colors, it breaks down the materials and goods available in sections divided for dress goods, household goods and misc.. It ends with a listing of where many of the goods are manufactured.

I find it to be a nice introduction, if advanced in years for some, and general overview of what was available in the United States for dry goods.

Scissors and Yardstick; or, All About Dry Goods, by C.M. Brown and C.L. Gates (Hartford, Conn. 1872)

There is an earlier publication in a similar format covering dress goods and related items. This in a British publication rather than an American one. So, some of the items may be different. This book’s Haberdashery section will be of interest to those who sew or wish to know some of the details of what goes into their garments.

A Treatise on Haberdashery & Hosiery by E.E. Perkins (London: 1845.)

Published in: on September 25, 2015 at 6:00 am  Leave a Comment  

Beyond the Slubs

In the mid-19th century, we know

dupioni silk = slubs = bad

When “is this silk okay” or “can I use dupioni” questions come up in forums and discussion groups, the go-to explanation is about the slubs. In the mid-nineteenth century slubby* silk was considered inferior.

This is true. But, there are a couple more layers to it than that.

There is the dupioni part of it and there is the inferior fabric part of it. Let’s look at the dupioni part first.

wpid-2015-09-24-16.49.27.jpg.jpeg

A sample of dupioni. Notice the slubs in the weft threads. When frayed, see the difference between the finer warp threads and the uneven, thicker weft threads.

Dupioni is a plain weave silk. It uses two different types of thread though. In the warp, the threads that go up and down on a loom, the threads are fine with a tight twist. In the weft, the threads that go back and forth on a loom, the threads are loose, not tightly twisted. This weft thread is irregular, uneven and contains the cocoons of the silk caterpillars. Those cocoons are what make a dupioni fabric slubby. Beyond those slubs, those weft threads are also soft and fuzzy. The weave of a dupioni silk unravels much easier than that of a taffeta. The unraveling is a fuzzy one, rather than a dangling long, fine thread of silk.

Why is this important?

wpid-2015-09-24-16.47.27.jpg.jpeg

Three silk samples, two taffetas on the left and one dupioni on the right. See the thread comparison below.

Because, most modern interpreters are shooting for a taffeta, one of the most common silks used in the mid-nineteenth century for women’s clothing. Silk taffeta is also a plain weave fabric. It uses fine, tightly twisted silk threads for both the warp and the weft. Taffeta (that meant for clothing) has a full drape but retains an airiness because it is light weight. Taffeta will also crease sharply when asked and retain shaping. When we compare the two fabrics, dupioni is heavier, it drapes fully but with a bit of cave due to the weight, it also tends to be thicker due to the weft threads being uneven. Dupioni will not hold a crease or particular shaping like taffeta.

In the end, even if a dupioni has little to no slubs, it still retains the unruly weft threads.

Now, on to the inferior silks part.

Inferior silks did exist in the mid-nineteenth century. We wouldn’t hear about them otherwise. So, the questions are – What were inferior silks? and What were actually done with them?

To get a full understanding of inferior silks, there is plenty to read in Google Books.

To stick with the basics… Inferior silk can start with the fiber itself as it comes out of the cocoon. Inferior silk can be so at the spinning stage as well. Shorter fibers and uneven fibers in a strand or in a thread make for an inferior silk since the ideal was fine, even and smooth.  Many manufactures used those inferior fibers and threads for the tram, the filling or thicker cords that make the ribs in ribbed fabrics and ribbons (think grosgrain, bengaline and faile.) Some inferior threads were used for knitting stockings.

In terms of the silk fabrics themselves, textile dictionaries refer to specific fabrics as coarse or rough. While these fabrics did in some cases become materials of fashion late in the century, during the mid-century they were not the ideal as they did not offer the drape and shaping needed for the style of the era. In some domestic guide books there are sections on how to select goods while shopping. I am trying to recall which one it is that goes into silk, discussing how to determine a silk’s quality. As soon as I remember which it is, I will include it. Until then, the existence of the passage tells us inferior, or at least lesser quality silk fabrics did make it into stores. It can be deduced that there was a manufacturing <> economic factor to all of this.

So, in end…. Dupioni is slubby. But, the un-desirableness to the fabric goes beyond the slubs.

————————————————————————

wpid-2015-09-24-16.45.37-1.jpg.jpeg

The dupioni threads are noticeably different, warp on the left, weft on the right

wpid-2015-09-24-16.45.53-1.jpg.jpeg

The taffeta threads are both find and spun.

wpid-2015-09-24-16.46.07-1.jpg.jpeg

Even though this silk, which is a shot silk, has two different color threads in two different thicknesses, all three thread (white, green and yellow) are even, fine and spun with a twist.

*btw – What we call “Slubs” were known as Slugs, Nubs, Nibs and Knots in the nineteenth century.

ADDING: Jessamyn mentioned the difference between between dupioni and shantung in a comment on FB. I thought I should add a link to this modern article on “How to tell the difference between silk dupioni and shantung.” If you have seen my plaid 50s dress with the big sleeves, that is shantung.

Published in: on September 24, 2015 at 4:00 pm  Leave a Comment  

A Closer Look at My Winter Bonnets

IMG_7764I have been meaning to write about how I make my winter bonnets for a while now, a while being over a year. I really want to share with you what goes into each of the bonnets I make.

Why do I love working on winter bonnets?

As you know, with my straw bonnets it is all about the art, the lines and curves that make up each style. For the winter bonnets, it is equally as much about the why and how of the construction, they layers and the materials. I love figuring out why a bonnet was constructed in a specific way, what the material choices were for, why this little area was done this way, etc. There is also something about the visual texture the quilting or wadding creates. I find it pleasant.

I also get very, very cold in the winter. The soft, snuggly warmth of a wadded or quilted bonnet is comforting. I often want one of my 19th century bonnets for everyday wear during my frigid, pre-dawn morning commute.

Where do the patterns come from?
Each of the bonnets I am now making come directly from original bonnets in my collection. I have slowly been collecting winter bonnets with a variety of shapes and construction techniques. Each piece goes through my version of a conservation process (how I wish I had the resources to do everything I would like), ensuring there are no buggy nasties, helping the all too often crushed, scrunched, flattened fibers back into shape and stabilizing. Once I think a piece is ready and I am ready to focus on a piece, I have a note taking process that I am sure would make some people’s heads turn sideways in puzzlement. Hey, it works for me. From my notes, I draft a pattern. These patterns are what I use for creating my winter bonnets.

What materials do I use?

I try to use the same types of materials I find in original winter bonnets. Sadly, as with many things, we simply do not have the same silks they did in the 19th century. Of the fabrics we do have, I use silk taffeta, tight weave silk twill, silk faille, some special weave silks and tight weave smooth wool. For linings, again, I use what originals bonnets show – polished cotton, cotton prints, cotton weaves, silk and tropical wools.

For the batting and wadding, I use 100% wool batting. Occasionally, I will layer 100% wool batting with 100% cotton batting to get the right loft and firmness. Depending on the bonnet, I use a variety of lofts and layering. I refuse to use polyester batting. I do not think it is warm enough or gives the look of original bonnets. Due to allergy issues, I will consider using just 100% cotton or alpaca/cotton batting.

How do you know which bonnet will be right for you?

When choosing the right winter bonnet for you, I suggest thinking about the type of weather you have in your area and/or where you will attend events. Picture when you were out in the snow last winter, did the snow stick to your coat and hat? Was the snow wet? If you are in an area with sticky snow, I suggest a very smooth fabric like a silk taffeta. If you have wet snow, the tighter weaver the better. For wet snow, you really want a wool batting, I’d even consider silk interlined with a light wool fabric.

How do you trim your bonnets?

I look to originals to determine what kinds of trim I will use. While period fashion columns do suggest some additional trims, I have yet to determine to what extent these trims were actually used. So far, I have stuck to ribbon and silk trim. I may venture into tassels and beading. Maybe.

For the functional ties, I have found I love cotton sateen. This is entirely Eileen Hook’s fault since she showed me the cotton sateen she picked up at Needle and Thread. Cotton sateen is durable and ties nicely. I anticipate it doing very well in the wet of winter. For decoration, I do prefer silk ribbon, but will also use high quality modern ribbons such as Hyman Hendler’s. 

How do you quilt your bonnets?

Far prefer doing quilting by hand. I like the look of hand quilting more than that of machine quilting. That said, hand quilting can take a long time, a very long time in some cases. Yes, this has to be reflected in the price.  I understand machine can be faster, making a bonnet more affordable. In addition to the time/cost factor of machine quilting, there are occasions when a piece wants a tighter quilting than I can currently get with my hand quilting. I often end up arguing with myself over which approach to take, that of the tighter machine quilting and that of hand quilting.

What is the deal with wired and unwired?

From an interpretive perspective, this often comes down to two factors: Do you need to pack your bonnet flat? and How do you want it to frame your face? But, in terms of historical construction techniques, wiring is just one of several structural materials found in originals. (I’m going to hold on to the list of those materials for a certain something special.)

Why do I show photos of the insides?

I want to show you how I finished the insides because I know some people like pretty finished seams. As with originals, sometimes I make the seams pretty and sometimes I leave them.

EDIT TO ADD:

Do I have an Etsy shop?

Yes! A Milliner’s Whimsy by Anna Worden Bauersmith

Published in: on September 23, 2015 at 6:00 am  Comments (3)  

Interested in a Sew Along?

I am pondering doing a sew along this winter. It would be some time after Christmas as it is cold and we try to ward off cabin fever.

The project I am thinking about doing is a work bag. See examples in this Pin Board. This would be a Fanciful Utility based project. So, it would be helpful to have FanU on hand during the process.

The format I have in mind would include an introduction to the project with a shopping list followed by step-by step posts with directions and photos. I am estimating you will need at least 2 weeks between the shopping list post and the start of the project.

I need your thoughts to work out some of the details.

  • What level of interest would I have?
  • How often would you want the step-by-step posts? Once a week? Twice a week?
  • The type of work bag I have in mind has originals in solid silks and wildly printed cottons. The details of construction are a little different. Which would you rather do, silk or cotton? (If there is enough interest, I would consider doing one set of directions for cotton and one set for silk.)
  • Would you want a share along Facebook group or would that exclude someone? (I would keep it locked.)
  • What other thoughts do you have?
Published in: on September 22, 2015 at 6:00 am  Comments (24)  
Tags:

Come Sit With Me

Warning, this may be the love me or hate me post.

This past weekend, my husband got to go to an event while I could not. This is new to me. As some of you know, I’ve been having issues with the sun and heat, more so the sun. (see the sucks post from July.) Thursday evening, I pulled out some of the things he would need from the sewing room. I sat on the floor pulling his whites out of the dresser. I sulked as I refolded my drawers and chemises back into the drawer and his drawers and shirts into little piles. Friday morning, I took a bit of an emotional whammy at work regarding not being able to go out for the students’ Homecoming Pep-Rally, something I think is important for the kids and something I enjoy. When I pulled in the driveway to see husband packing, the next wave of whammy hit. While he continued to pack, I pretty much ended up laying on the bed trying not to cry, with the occasional saber retrieval from the depths of the closet. After the nice “good-bye, have fun” kiss, I sulked and fell asleep on the couch. When I moved myself to sleep in bed, I was stuck on the “now what?” realization that I Have to figure out what I Am going to be able to do at events.

Shade and Sewing Circles – Shade is the absolute must.  Shade  I need to sit in the shade. I need to look into the shade.Venturing to scenarios, social gatherings, activities in the sun is pretty much out, even if fully veiled and with parasol in hand. I need to not have to venture far in the sun to the outhouse.(Please, don’t even go there with “what if you….”. Please.) Next season, when I give functionality a go again, I’ve decided at events I will do one of two things – Millinery or a sewing circle. That is it. (Actual indoor presentations are another story.) Sewing circles may be Soldiers’ Aide related, domestic sewing related, or even item specific – the ladies, sewing, shade stays the same.  Luckily, I have historic sites nearby with buildings. If I happen to brave a tent, I will be sitting, facing away from the sunny areas. (It is quite possible that by late winter/spring, I will have decided to completely switch eras for the lighter weight of the Regency.) I may still find I need to get my joy from the background stuff, ie gatherings, workshops and such.

Now, with that said…. What I really wanted to talk about….

I caught a discussion thread in one of the FB groups about young women in camp with colorfully dyed hair, one with purple, another with pink and blue. Given that later in the initial post the writer mentions children staying home, I get the impression these young women were teens. The threaded discussion rolls along with comments on inappropriateness, parent shaming and teen shaming. It also has comments on event coordinator standards and unit standards. (yes, I am skipping over how ever they were dressed.)

Something pushed a button.

For years, I’ve emphasized the importance of event standards and written civilian standards for groups. I have a set outlined in the PDF section that I know several, no many, groups have asked to be able to use. I enjoy helping women improve their impressions. I’ll nudge if they like. Yes, I have made women eat their nail polish off on Friday nights.

But, these are teenage girls. These are 21st century teenage girls. They have complex lives. Yes, actually, I do think their lives are far more complex then ours were at their age.

Hearing that they should “stay home” really pisses me off.

There. I said it.

What in the world does that accomplish??????????

Nothing.

You don’t know the situation. You don’t know if she grew up in a reenacting family, but really has other interests. You don’t know if she has a budding interest in history. You don’t know if she wants to learn new skills but didn’t know where to start. You just don’t know.

You won’t know by looking from a distance and getting all huffy about something you don’t like.

Guess what, the teen with the colorful hair may be the prequel to some amazing research.

But, you will never know.

Teens need guidance, information, mentors. Sometimes, they just need someone to talk with.

So, here it is.

You know how I mentioned that I will be doing sewing circles, sticking to the shade? You are welcome to come sit with me, even if you have brightly colored hair. You are Welcome. Come. Sit. Sew. Chat. Learn. Share. At times, we will talk in soft first person. At times, we’ll share our research. If you want help pinning up your hair, just ask.

No, this does not mean I happy to see inaccurate clothing, material culture, behaviour at events. This means, I believe we should take our time with each other, especially with teens, as we learn and grow. I believe we shouldn’t be mean to each other. I believe my research and my work is solid, but that does not put me above anyone else.

Oh, and by the way….. when I started doing living history, my hair was 13 shades of red and purple.

Published in: on September 21, 2015 at 6:00 am  Comments (11)  

A Little Bit Short

For a few days now, the on going theme seems to be “A Little Bit Short”. I was one small piece short on a project. I was an inch short on batting. I was a teeny bit short in backing. I was just a tad shy of enough fabric for another project. At which point, I had to laugh. Then I nearly lost my mind when I was just two inches short of straw. Even Monday morning I found I was a little short on gas. (really, who wants to stop for gas on a Monday morning when you aren’t quite awake???)

The upside of being a tad short is it makes me think about when folks in the nineteenth century were a tad short. We all know it a happened. Lucky for us, there are still some examples that show us what they did when they were a little bit short.

I have two winter bonnets that show creative make-do. One uses the salvages. Both are beautifully pieced together. In each case, the piecing is in the lower back corners of the crown. This is the area between your ear and the nape of your neck. In many ways this makes sense because it is one of the areas with less wear daily.

{oops, I really meant to get some photos and examples for this post. But, I just hit the ‘publish’ button.}

Now, as far as my projects go when I found I was a little bit short…. I did a little make-do on one, I went and bought new for two and I switched fabric plans for another. The straw? Well, there are certain parts of millinery pieces that make me crazy to have a change in the plait. I’ll deal. But, it will drive me crazy.

Published in: on September 14, 2015 at 10:17 am  Comments (2)  

“What’s in Your Work Pocket?” – FanU for the Modern World – Part 2

On Tuesday, I shared my pocket of pockets for my desk at work. Be sure to catch that post.

One of the easiest projects in Fanciful Utility is the basic folded or rolled work pocket. As a sewing accessory, it is an easy one to make and carry around.

IMG_7800
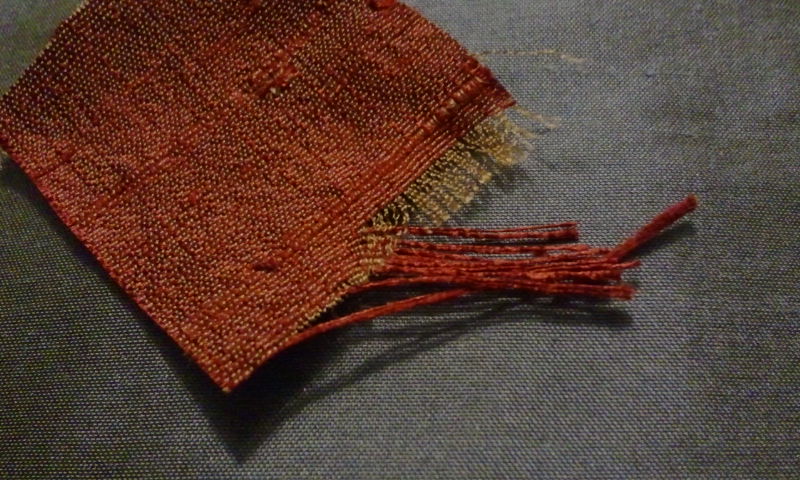
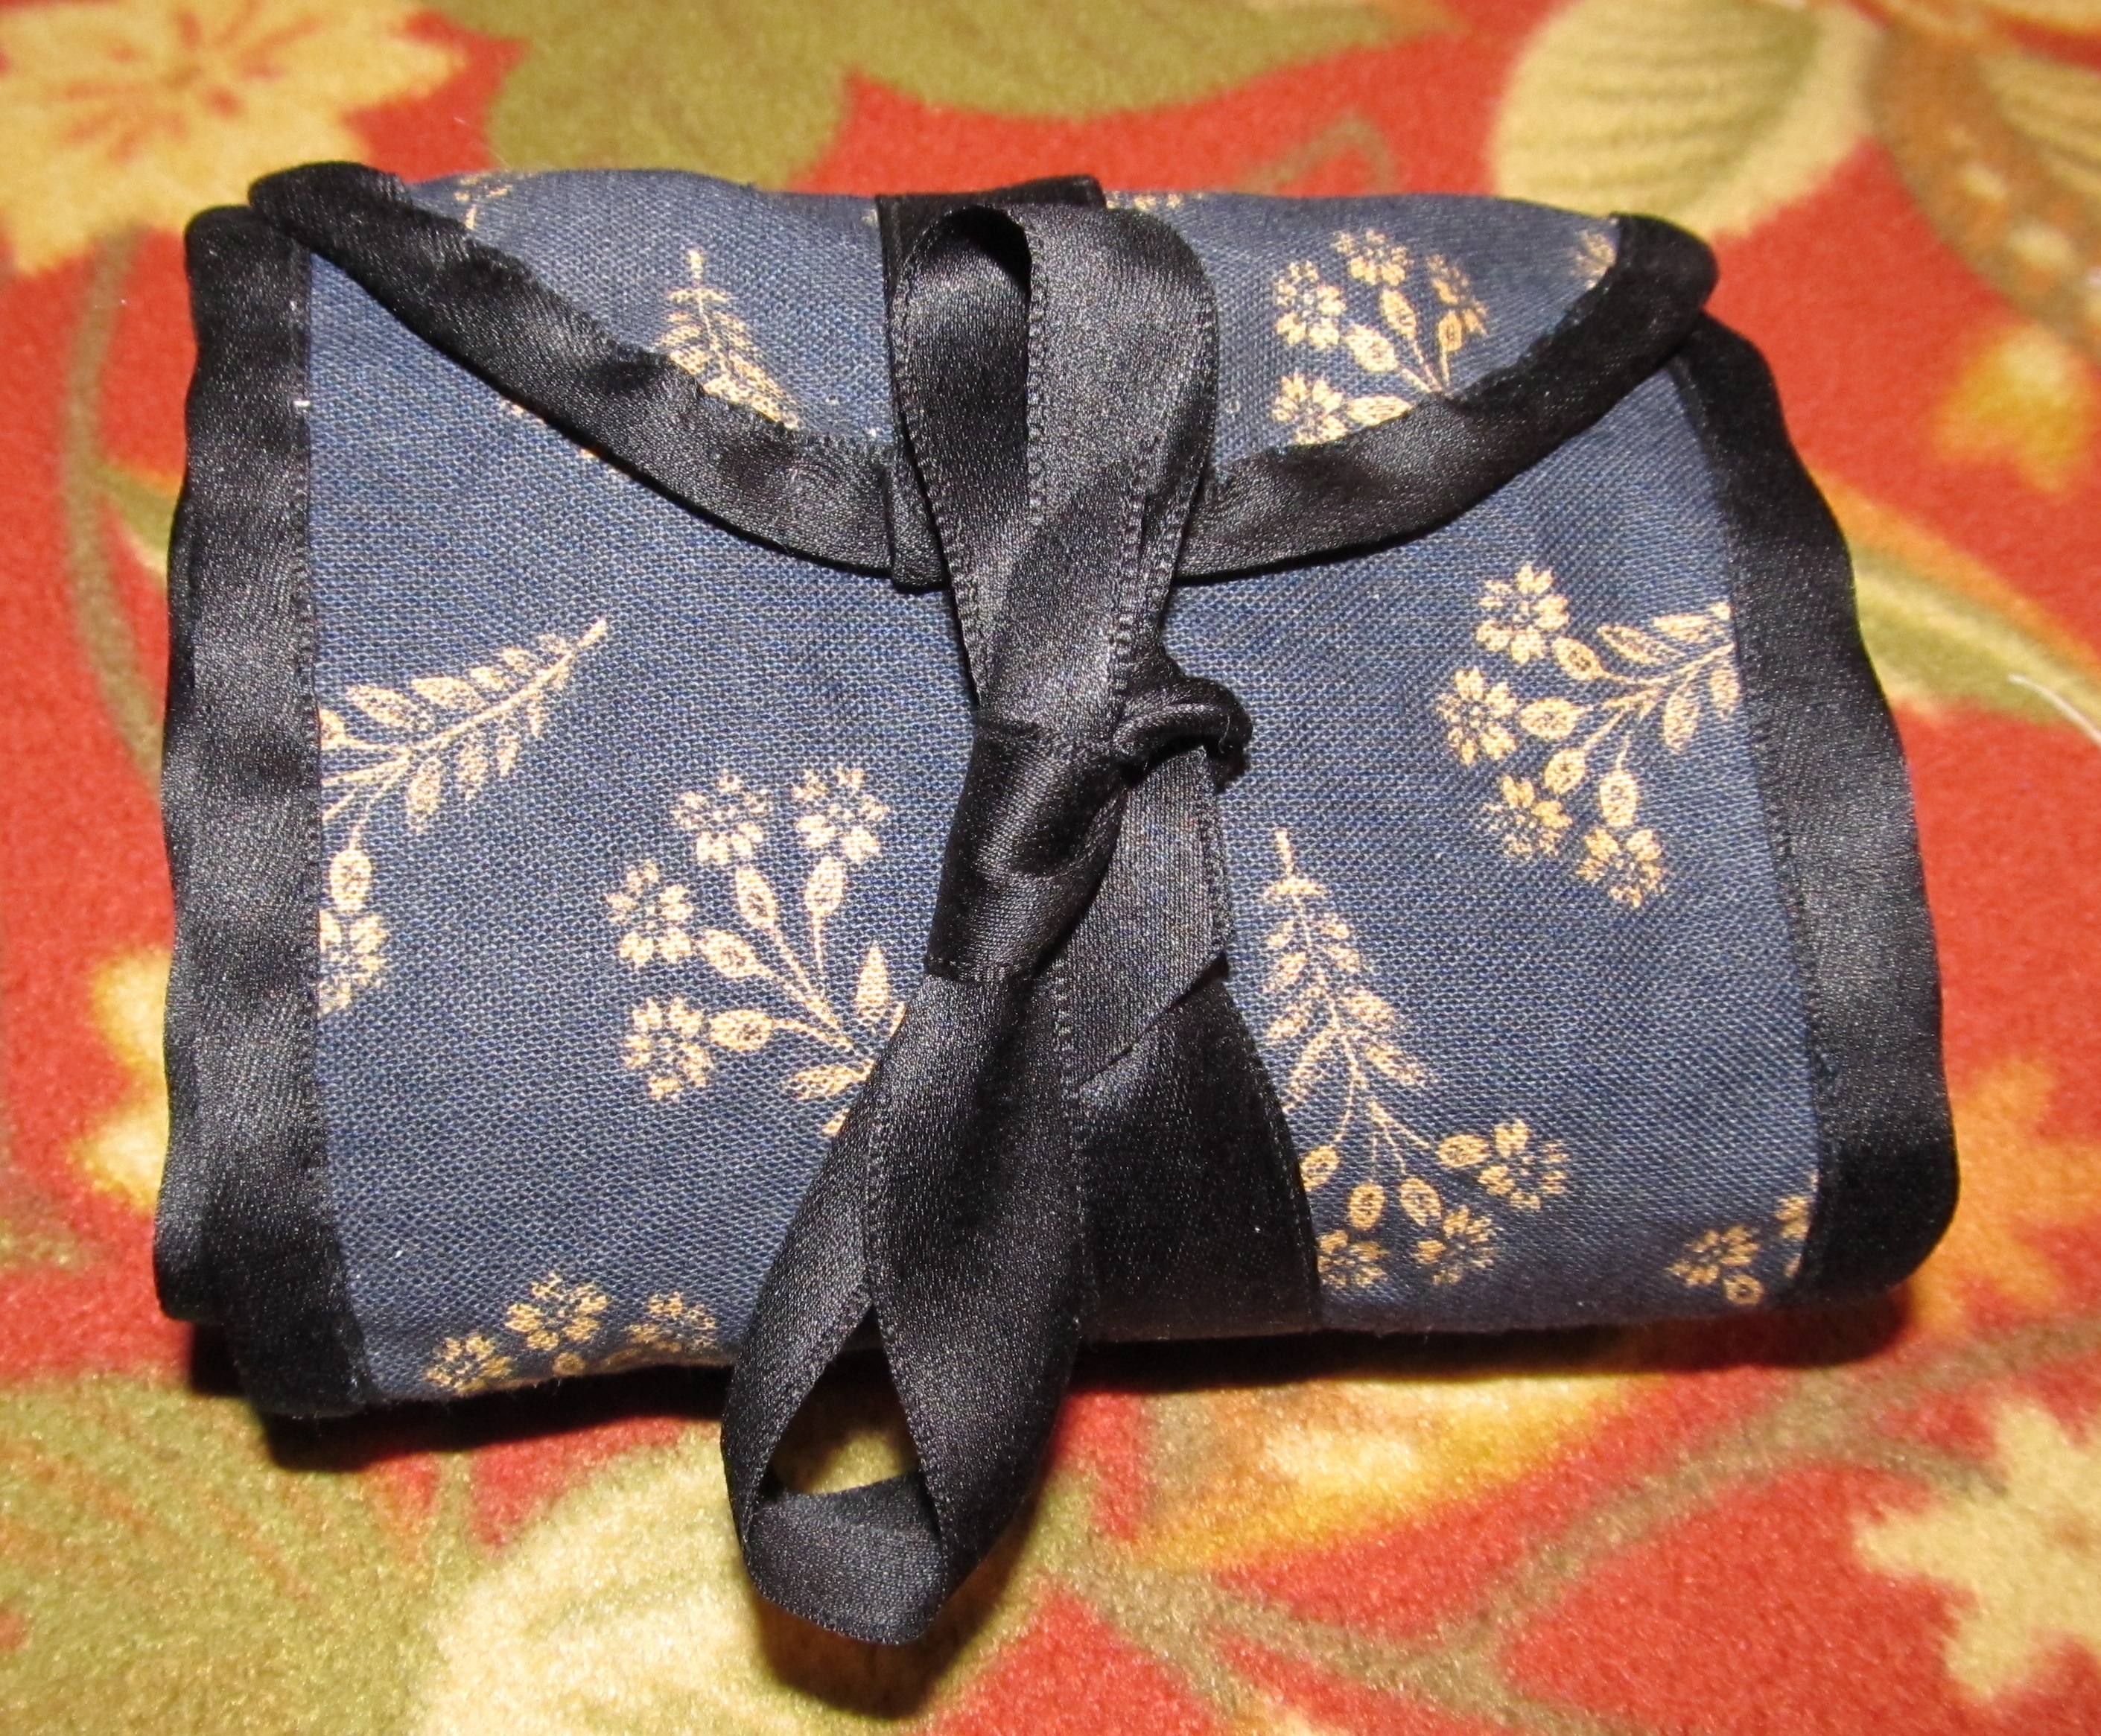
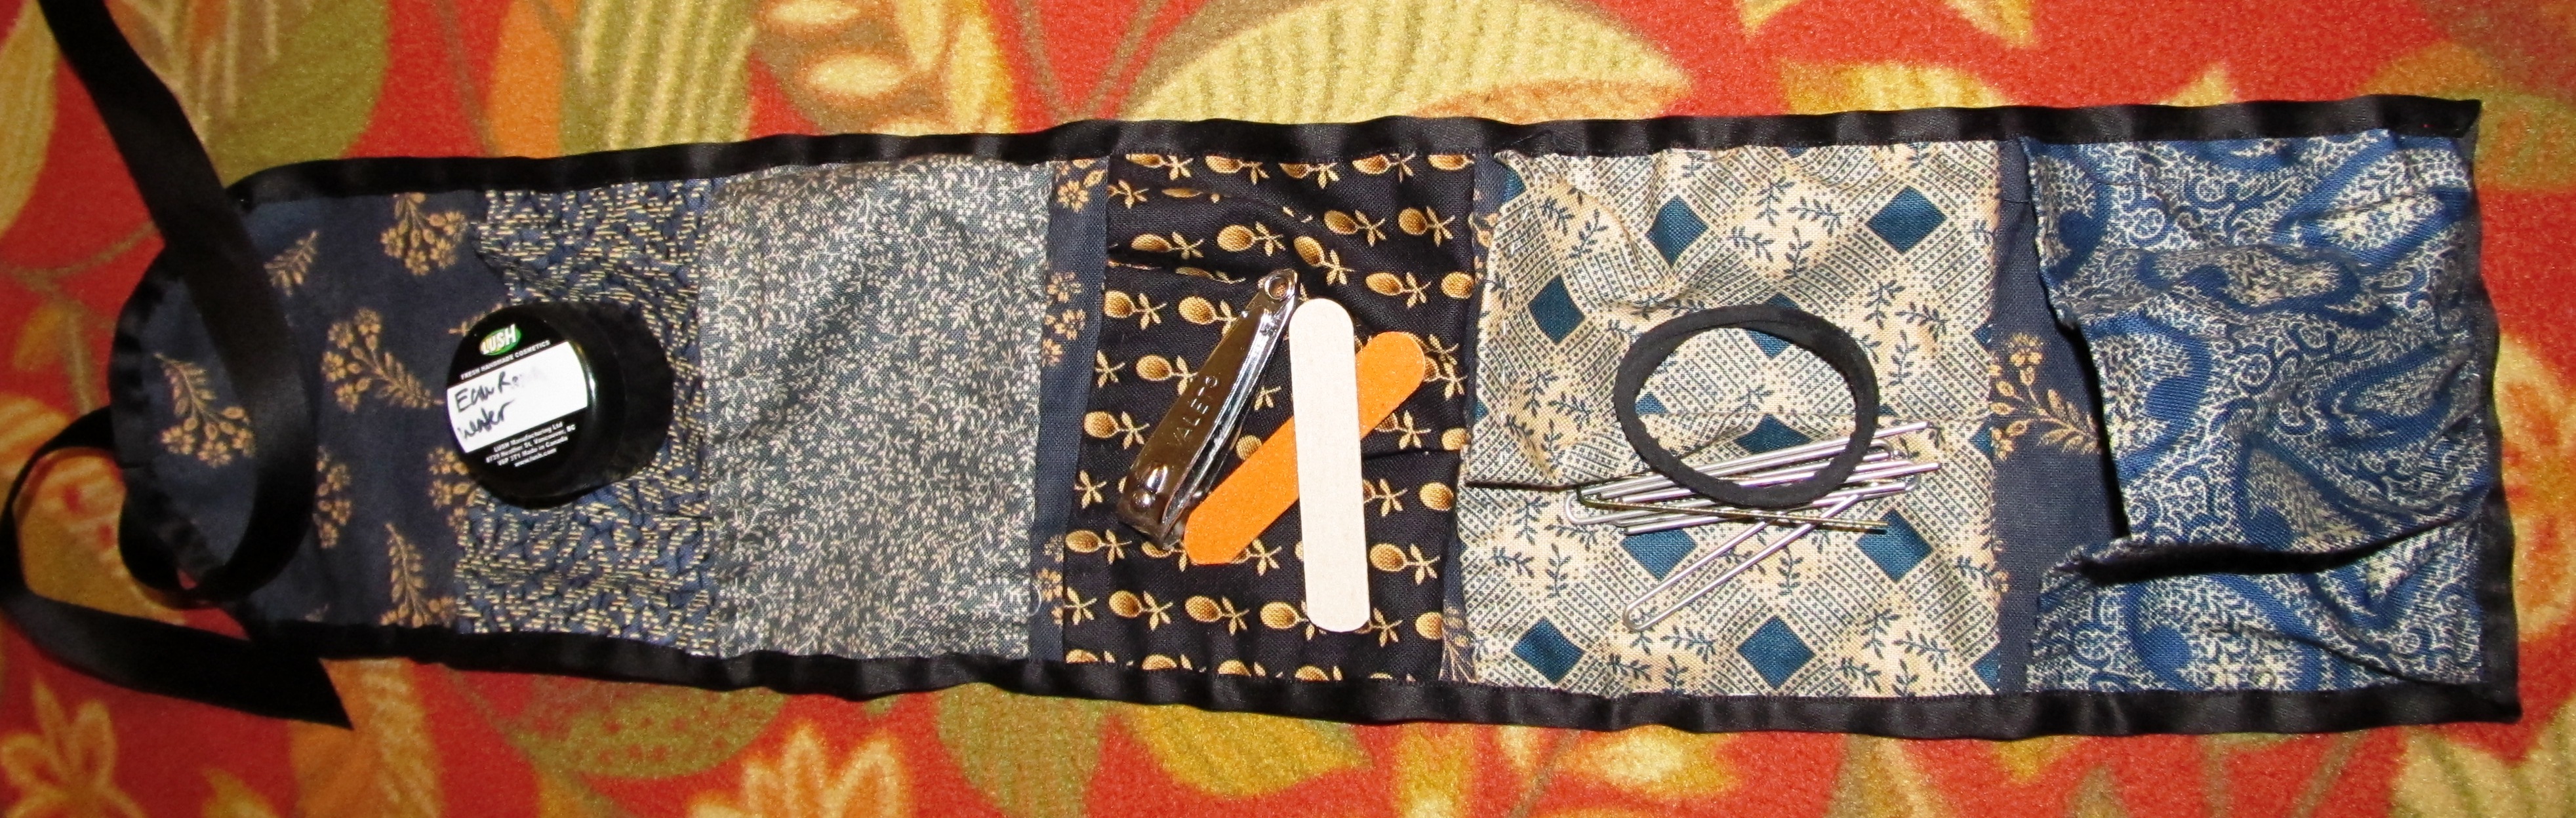
In the modern world, single pocket work pockets can be a very personalized option for holding so many other things.  They can also be made up in a great many fabrics for modern use. Because of how these fold up, they can be lots of fun with various prints. My examples use some of the silks I had laying around including a boldly embroidered piece and a large scale print. The larger motifs were a lot of fun to play with.

Here are just a few of the uses I have found.

IMG_7787

Since I finally have business cards that I am happy with, I needed a simple case to carry them in. Fanciful Utility’s basic folded/rolled work pocket was the perfect option. I just needed to increase the finished width to 4 3/4″ to hold several cards after the binding is put on. I find silk is particularly nice for this because the cards can slide in and out easily.

IMG_7794
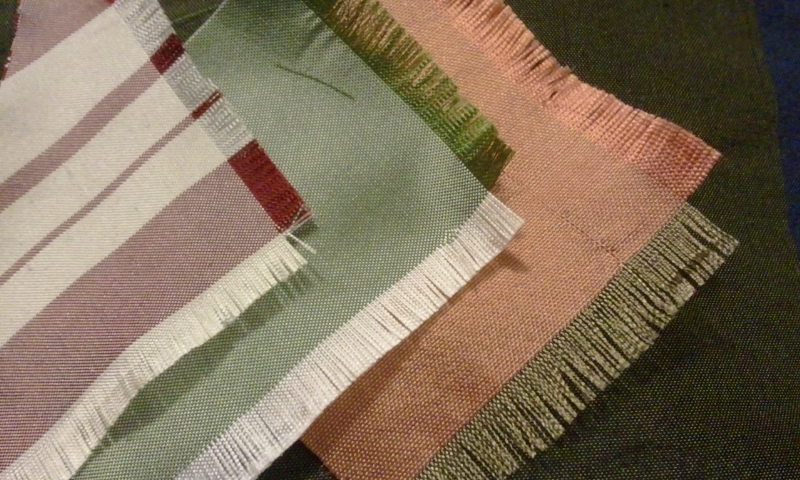
These work pockets are 4″ wide, also made in silks. Here the one on the left holds a little cash, while the one on the right holds a credit card, or actually a GCV membership card.

IMG_7798Those of us who get teary at weddings or funerals, may like one that holds a few tissues. How nice to have a pretty pocket discreetly sitting on your lap rather than have to dig through your purse? Or, if you happen to have two, how nice to pass this down the aisle rather than a handful of tissue?

I can tell you this pocket nicely holds a migraine medication in a foil packet. It would also hold a blister packet of allergy medicine too. I also see a pocket holding sanitary products, keeping them from getting lost in your purse or bag, and easily being popped into your pocket or carried to the ladies’ room with none the wiser.

I suspect many of you may be working on your Christmas gift list. I would be delighted if you made a few Fanciful Utility goodies with a modern twist for those on your list. I would love to see some made up in festive holiday fabrics.

Published in: on September 10, 2015 at 6:00 am  Leave a Comment  
Tags:

Modern Utility – Fanciful Utility for the Modern World – Part 1

There are a few ways I find Fanciful Utility projects useful in the modern world that I would like to share with you.

Let me start by saying I had this whole plan to do  a bunch of videos talking about how useful FanU projects can be in the modern world. But, it seems my webcam hates me and loves audio feedback. When I do get it all figured out, I’ll do some videos. Until then, photos…

IMG_7789 With school starting back up, this is a good time to IMG_7792show you the roll of pockets I have for my desk. You will notice I used 19th century fabrics. Well, that is what I have a bunch of in my stash. Go figure. When making a FanU project for modern use, you can use just about any fabric, sky’s the limit. (Just keep in mind you want a durable weave.) I would love to make one up with some of the Doctor Who fabrics. I could see one made with spring or fall nature prints looking really cute. There are so many options.  This rolled pocket of pockets is a longer version of the basic rolled/folded work pocket, just without the needle pages.

When you become one of the building ‘go-to’ people for little ‘uh-oh’s, it is good to have a mini-stash. My pocket of pockets for my desk holds those little things you don’t want to dig around in a desk drawer for but often need. Right now, it has nail clippers and nail files (I cut a regular file in half rounding the corners so they would fit nice), a hair tie and pins (I’ll add a bunch of hair ties), and a small thing of lotion (in a Lush sample jar. Reuse.) I’ll be adding a small sewing roll too with basic thread, needles and safety pins as well as some emergency sanitary products.

This style pocket of pockets can also be very useful in the purse. Just think about those times when you’ve had to dig through your purse or bag for your chapstick. Or later, when you are switching bags and find a half dozen buried in the bottom. There are so many options…  when traveling either for you or for a child’s activity roll, the diaper bag or a child’s play bag, for a bridal party’s dressing rooms… the list is endless.

To be continued…. 

Published in: on September 8, 2015 at 6:00 am  Comments (1)  
Tags:

Mixing Seasons – Cold Weather Millinery while it is still Hot out

This week I spent the days in a sweltering hot school and the evenings working on cold weather millinery. Weird. I know.

But, I know if I don’t get started now, there will be some chilly heads this winter.

I just finished the berry and tan check silk on the right. It is densely wadded and corded with a leafy print inside. Last week I finished the frosty blue gray silk that is lightly batted and trimmed in a self fabric ruche that was cut with my antique pinking machine.

IMG_7756 IMG_7758 IMG_7764

Published in: on September 4, 2015 at 1:06 pm  Leave a Comment