March has been quite the roller coaster of weather. Here, we tossed and turned from winter to spring and back again more times then I can count. The wind certainly tossed us about. It does look like we may have finally made the shift to spring though. There was light as I drove into work this morning. It was kinda neat to notice how the sky reflects on the random pond by the mailbox. I do want to recognize that Mother Nature was not so kind to the mid-west with the landmark flooding. I hope my readers from that area are safe. I can only imagine the personal devastation and heartache.
I really have no idea where March went. I feel like I was just figuring out February stuff last week. I started trying to work out some of the blog’s technical stuff, aka space management, by moving videos over to YouTube. The [current] plan is to use YouTube as a storage spot with WordPress still being home-base, not to use YouTube as a separate viewing platform. So, don’t worry, you shouldn’t have to go anywhere else or worry about missing anything. I am going to try to do more videos though. I did have the writing urge hit a few times this month. Be sure you don’t miss:
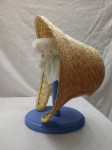
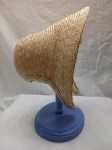
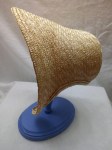
Millinery….
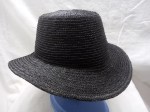
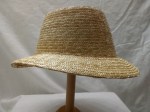
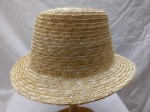
My planned theme for this month was Mousquetaire March. I enjoy this fun, fashionable shape.
What was even better was seeing the photos client sent back. Holly brightened my day when her hat arrived and it looks absolutely perfect on her.

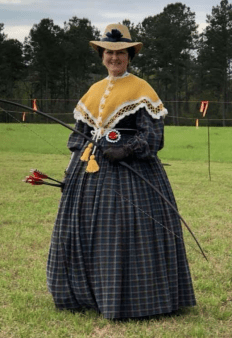
Then a hat got to be part of a perfect ensemble. Check out how great Lizzie looks in her archery ensemble:
Bonnets made it into the millinery works as well. Each of these bonnets sold very quickly, less than an hour. Remember, subscribe to this blog to get the quickest look. I will post pieces here right after I post them on Etsy.
Other Works in Progress…..
Time for a little project accountability…. You know that coat I started for an event in January? The one without the sleeve attached? I put it away for now. It was all too quickly becoming a fuzzy gray coat rather than a black wool coat thanks to far too much attention from Clara.
I did start off the month working on an extra special Fanciful Utility related project. It was nice to do a piece like that again. Sorry no photos. This is one of those really cool things you just can’t share fully.
I will be doing a straw millinery demonstration coming up soon. This particular venue gives me different opportunities than the historic village. I got this idea stuck in my head for a display of straw bits and pieces. Well, the idea is stuck tight but I can’t seem to find the base piece for it. As you know, when an idea is strongly stuck in your head, any substitution just isn’t going to cut it. So, eventually, I will find what I am looking for and make my display piece. It may not be in time for this demonstration.
I finally tried on the red plaid dress I was working on last summer before everything went arry. Let me tell you what a difference mirrors make! How did I make any garment without a decent mirror or duct-tape dummy for the last 7 years??? Medicine cabinet mirrors are not adequate for seeing what I look like. Seriously, this dress has hip wings! The hip wings will be removed and the waistline re-fitted asap.
My corset will also be getting a tweak or two. The dress try-on let me know I can now lace to a correct back spring without causing pressure or pain in my surgical area. This is very exciting for me. I will be replacing my hip gussets as that is where my extra fluff resides currently. Since I will be replacing them, I am going to quilt them because I miss the soft quilted hip gussets of my old corset. I will also be adding light quilting to the bust gussets/cups to add more support for changing/aging flesh density. (Goodness, I wonder how much spam this paragraph will attract.)
I bought the prettiest pink plaid silk. It will be a dress by summer… I hope.
I think that about sums up March.
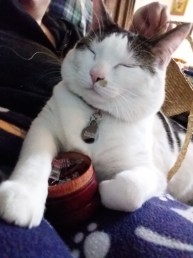
Hello from my feline helper…


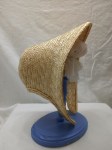


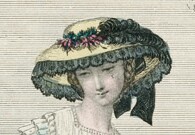


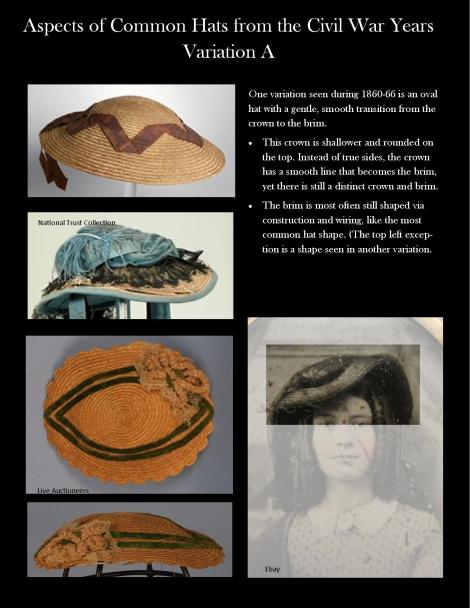

 We are entering the time of year when people are thinking spring and about decorating their bonnets. Straw bonnets have a great appeal because they are cooler to wear in the heat as the straw allows the head to breathe, and the embellishments can be changed fairly easily without leaving as obvious thread holes.


