I first became aware of PEC (Post Event Crash) after the 135th Gettysburg event. The day after returning from the event, I found myself sitting on the floor utterly exhausted and at a complete loss for what I needed to do next. The months of planning and preparing built up to a nearly week-long event experience – sights, sounds, people, ideas, followed by a massive adrenaline drop.
Years later, I still feel this “Post Event Crash” after some events. The tiredness is still there, maybe more so with age. The daze is still there, though changed as it has an added sense of accomplishment. “Events” are no longer about just going. Each has some aspect of personal challenge, whether it is skill based, presentation based, or physically for myself. A new aspect of PEC has developed over the years; a combination of contentment and self-separation. The contentment is a calm awareness of balance and self. The self-separation is packing an essential part of myself away in a little box until the next event.
Another aspect of PEC is the “what is next?” Back in my early 20s, the answer to that was “the next event”, which was usually just a week or two away. It was wash, repair, prep, repack. Now, with fewer and rather different events, there is a much greater shift in the doings for the next.
This current shift is from summer straw millinery and fun Ag Fair sample pieces to winter wear and holiday shop pieces. (The catch being I still have some straw pieces to make)
Usually, I prefer to have one type of project going at a time. This is a matter of space and materials management. Straw in straw time. Wool in wool time. Silks in silk time. Nice. Neat. Orderly. When Straw and wool and silks and all the little bits are out on the work surface at the same time chaos ensues.
Thank goodness for pretty stackable band boxes.
One for pincushions. One for penwipers. One for ribbons…..
Holiday Season
It may seem early to most, but, today begins what I am calling my “Holiday Season” to prepare for a trio of: the Domestic Skills Symposium with my straw surgery workshop, “Preparing for the Holidays” also at GCVM, and filling my Etsy shop with gift goodies.
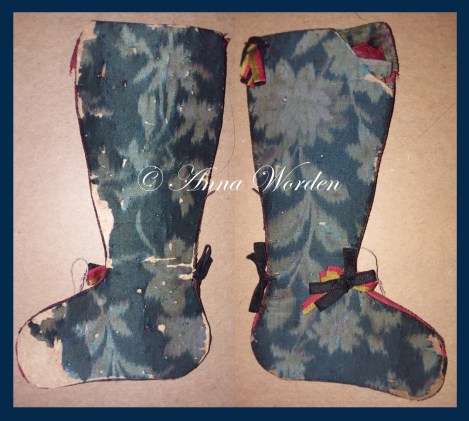
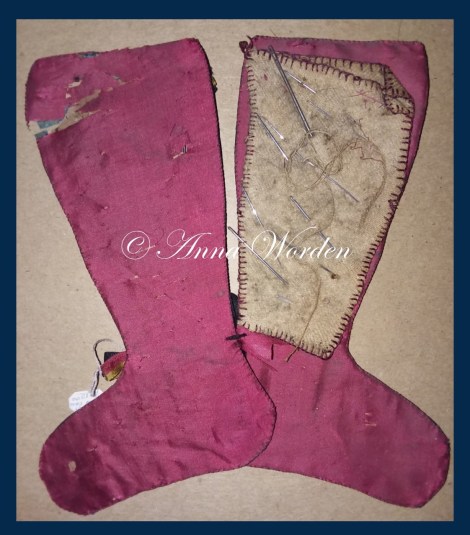
I picked up the cutest stocking shaped needle-book to take a pattern from and make into this season’s holiday project for you. I will put together directions to make it up as the needle-book but also as a pin-keep and ornament.
I plan to “open” the Etsy Holiday Shop right after the Domestic Skills Symposium, just like I did last year. I currently plan to make pin cushions, pin-keeps, and some special gift sets.
By request, I will make a point to have straw millinery available. In past years, I’ve had husbands and boyfriends send messages in mid-December asking about straw hats and bonnets to give as gifts. Please let your loved ones know well in advance if there is a piece you want.
I have also been asked to offer some of my pen wipers. While initially I had planned just to make these for fun, it turns out they are a bit too much fun to make. So, I will offer a few. I won’t be able to offer the parasol pen wipers or needle-keeps until I find or make new handles.
Oh! Ornaments! Do people want an ornament this year?
Winter Millinery
I have had a great many questions about winter millinery in the past few weeks. I figure I should talk about that for a little while.
I still haven’t completely decided whether to make winter hoods this season or how to pull that off. I find it very difficult to work with both types of millinery at the same time. This is a space issue, a mind-set issue, and a type of sewing issue. To make winter hoods, I need to have cutting and basting space to work with the layers. This is the space currently occupied by the big big basket of straw and assorted trims that currently have my attention. The sewing is different – Straw takes long, strong stitches with a heavy, sharp needle that I hold one way. Quilting silk needs small, even stitches with a fine, sharp needle that I hold a different way. One I can do while watching tv in varied light. One needs to be watched while listening in bright light.
That said, I do have a beautiful array of silks in a tote marked “silks for hoods’ and another tote filled with local wool batting for hoods.
I also hear those wanting a third winter hood pattern. I have picked out which one I want to do next. I just have to do it.


.jpeg")


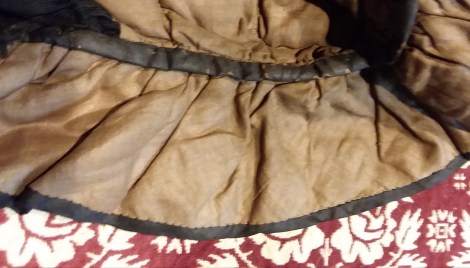
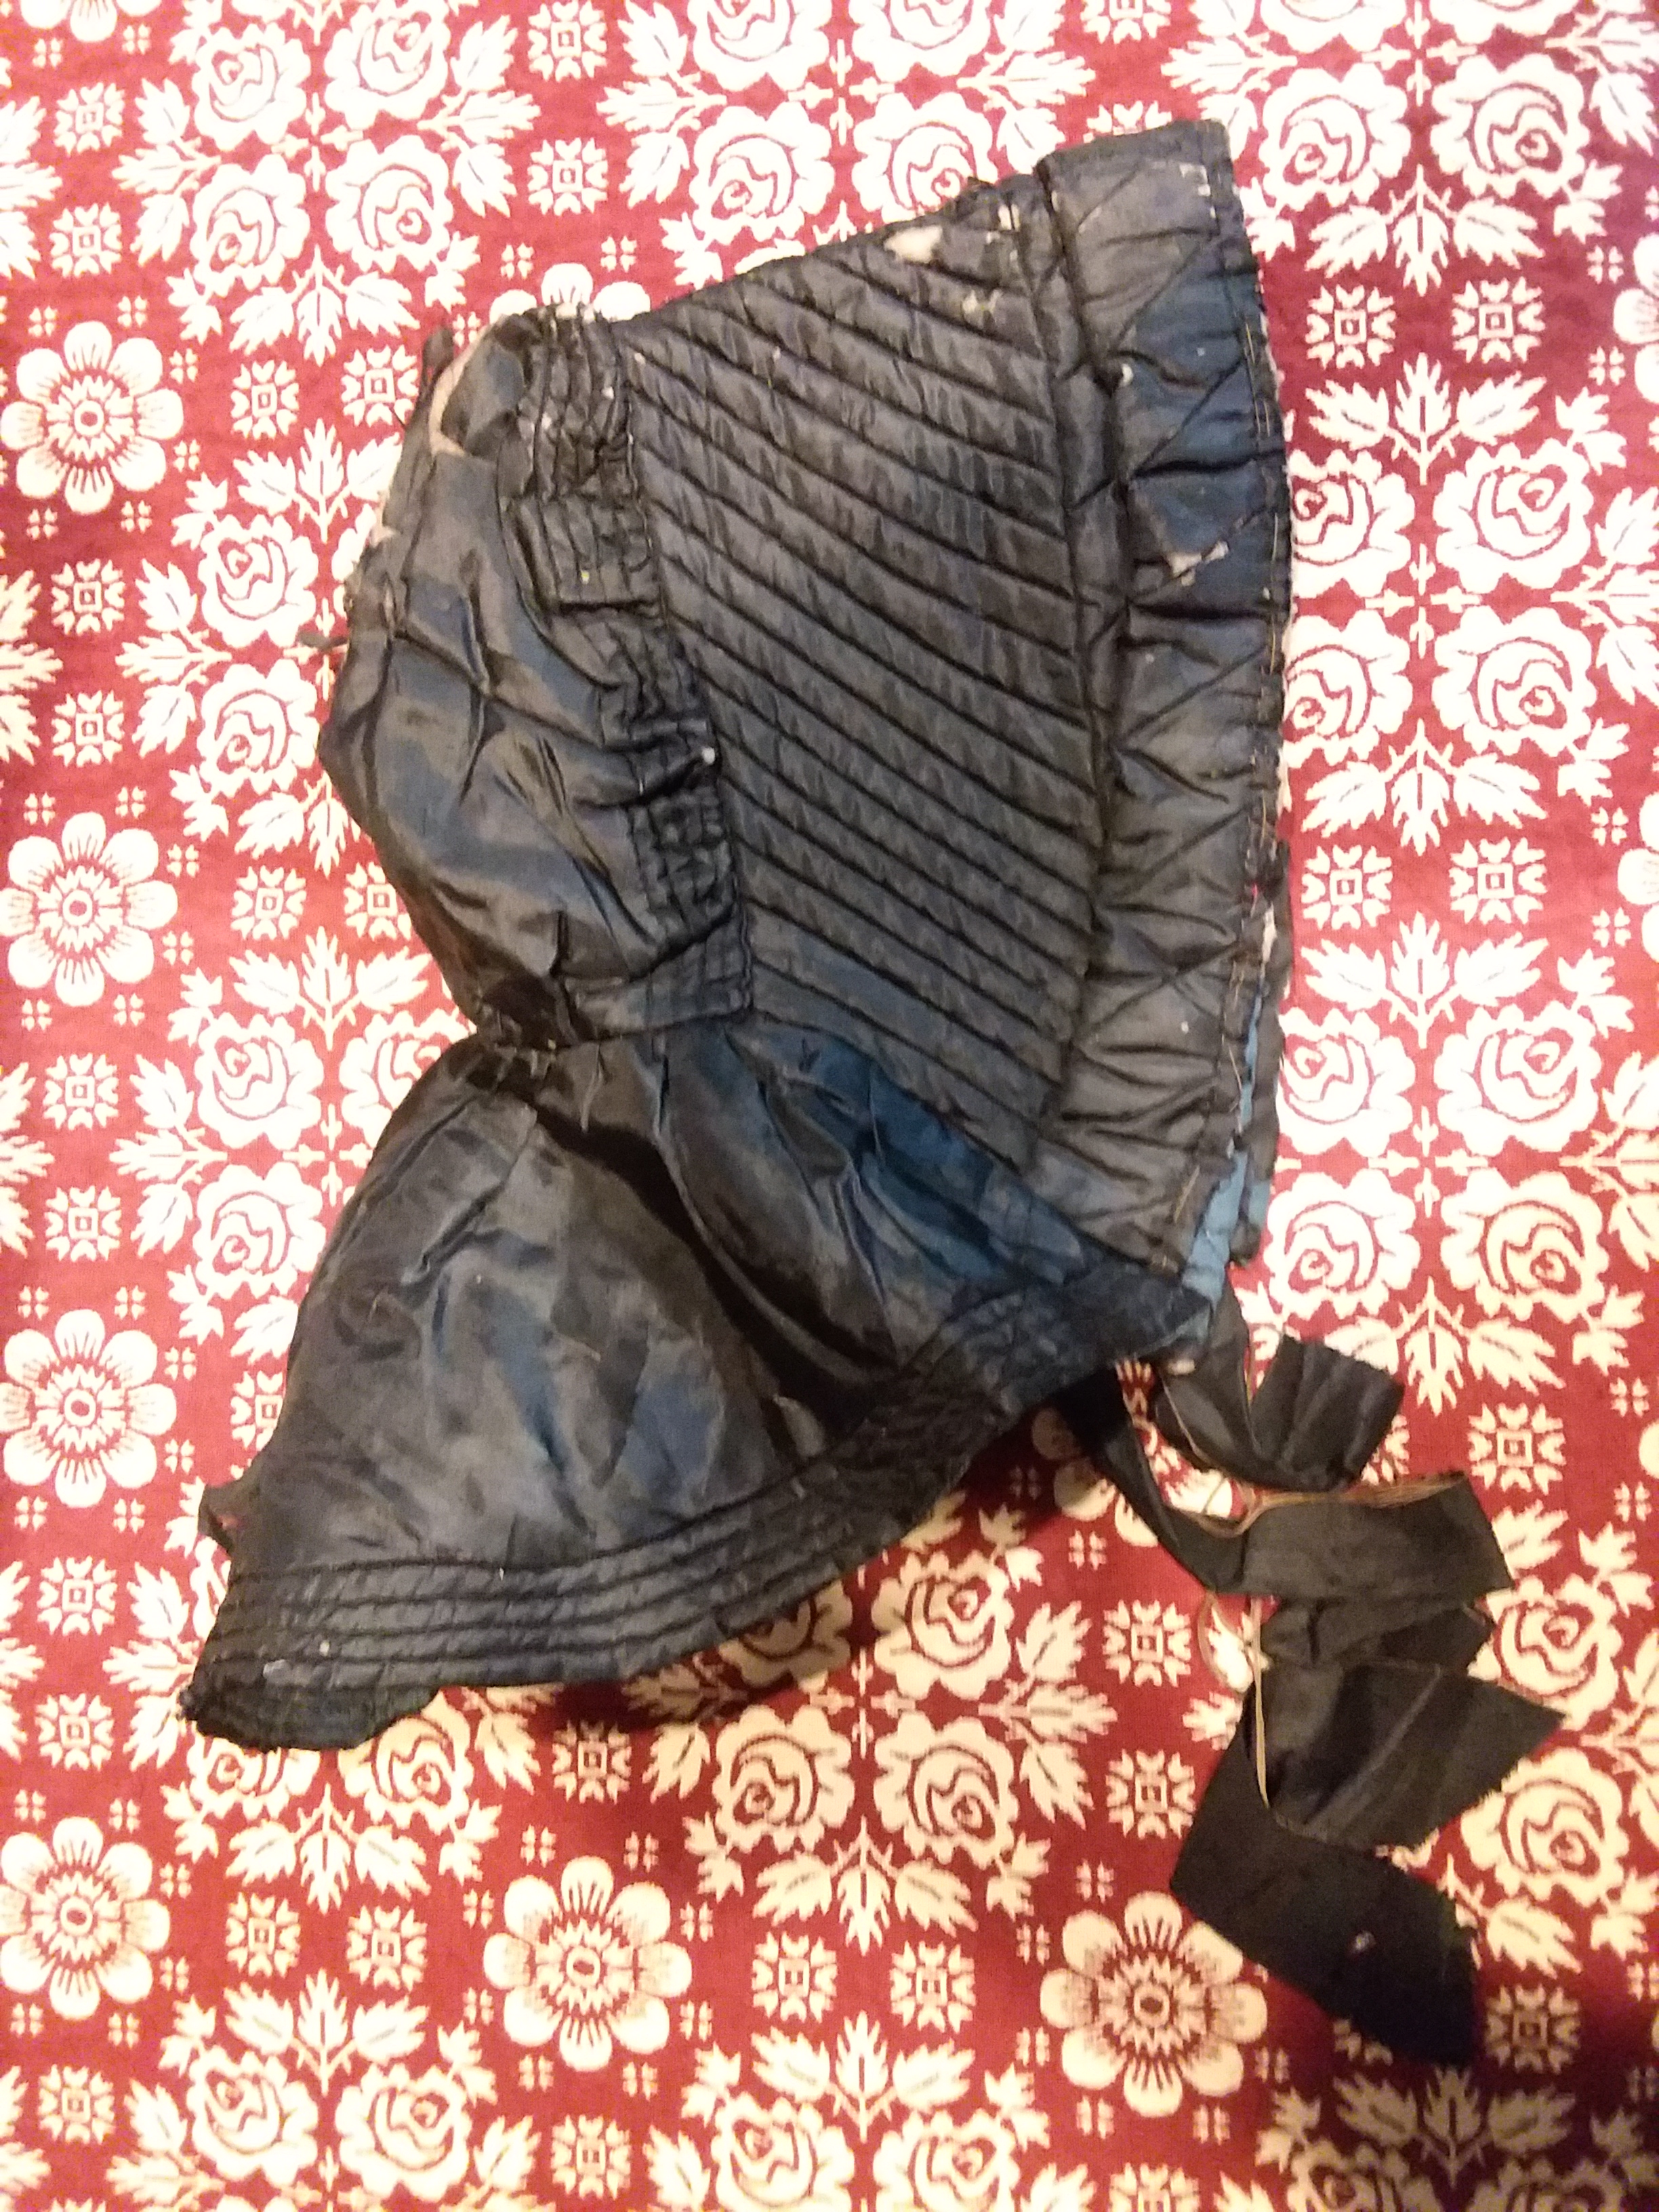
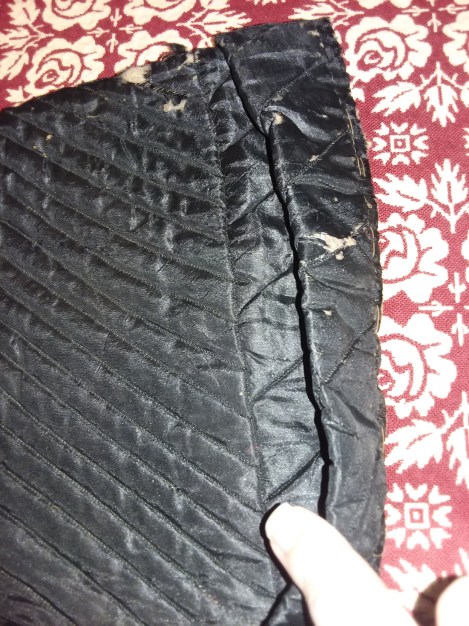

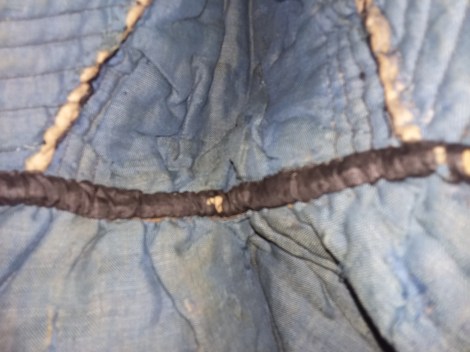
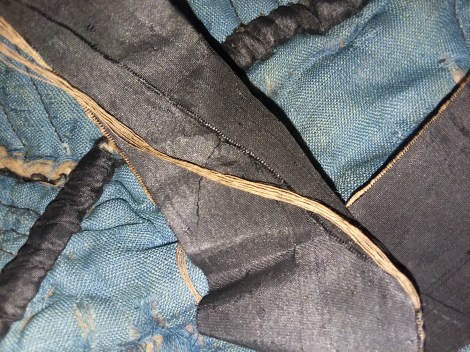
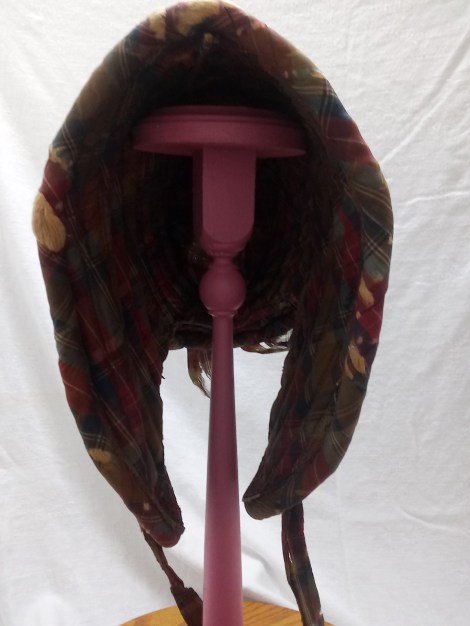
 A single plaid silk fabric is used throughout for the exterior as well as the interior and for ties. The plaid is asymmetrical in one direction and symmetrical in the other. The entire bonnet is handsewn. Channels of puffs and cord alternate through the brim. While the majority of these are evenly spaced, a couple alter slightly to follow the shape of the bonnet. One in particular, the eighth from the front, widens at the bottom to accommodate the curve transition from the cheektab to the neck edge.

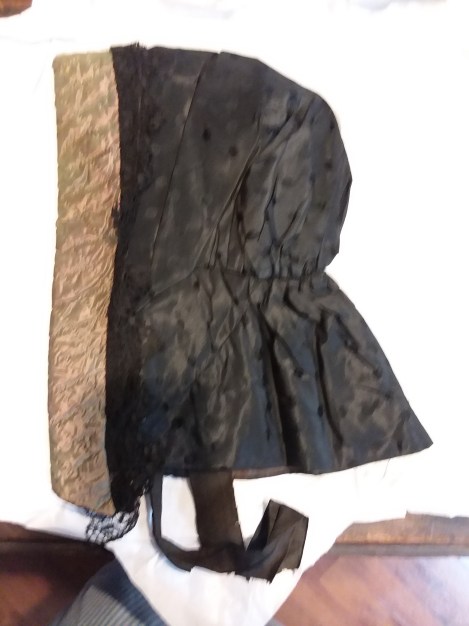
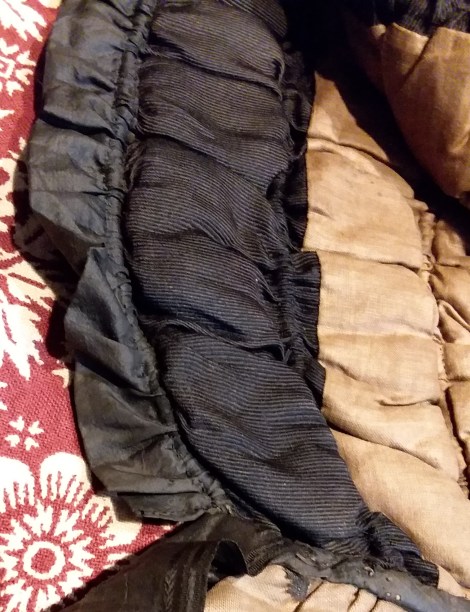
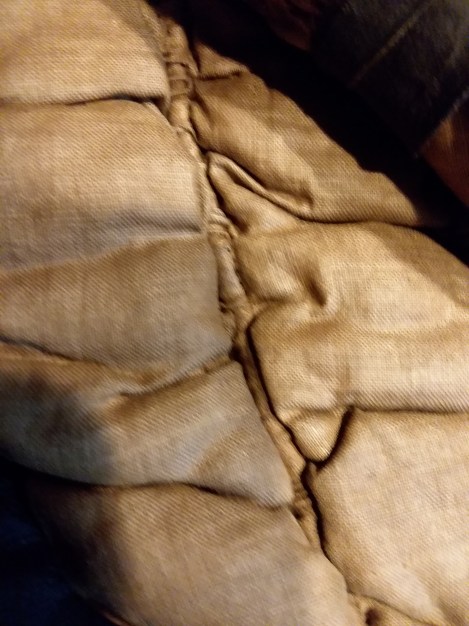
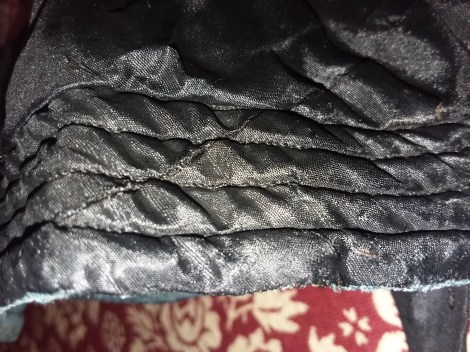
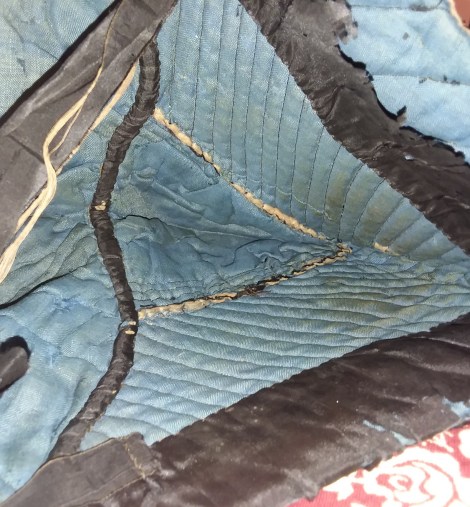
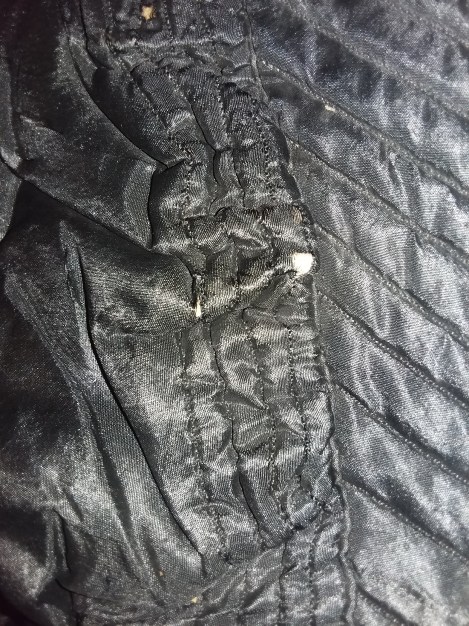
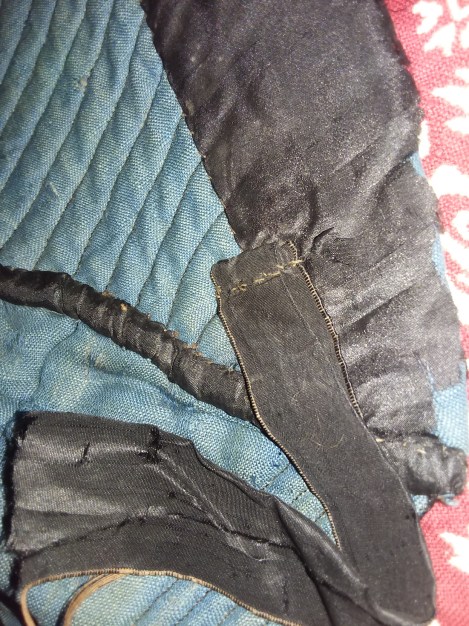
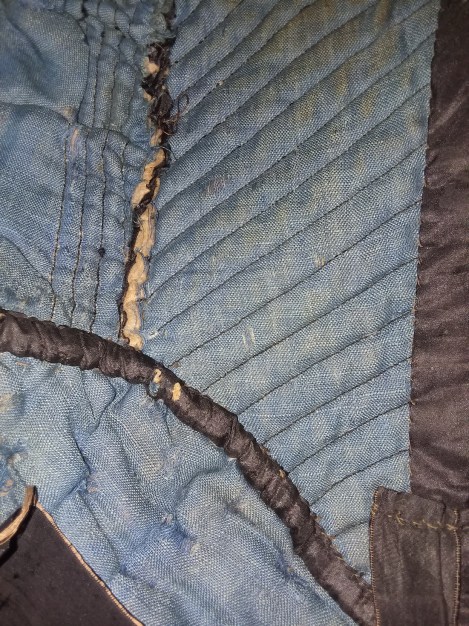
 This brings me to the interior. Normally, I use words like “batting” or “wadding” to discuss what is inside a bonnet or hood. Instead of using wool batting, this bonnet is filled with what appears to be bundles of cotton/wool* string. This area where the silk has worn away shows just how densely the string has been packed inside. This is Not something I see commonly. The bavolet is filled as fully as the brim of the bonnet creating a triple tier bavolet rippling around the neck. (Notice you can see the cane, wire, and buckram (which may be willow) in this photo. The back bow is made from the same silk as the bonnet.)