This was going to be a quick reminder that I have several e-publications available in my Etsy shop. But, then I realized that isn’t really what I want to say. I want to remind people to read and do research before diving into a project or spending money.
This past weekend, I saw a post going around with a YouTube video link. The video was nicely made with a lovely exploration of a particular project. The problem is the video had the incorrect date attached to the video and item; incorrect by over a decade. The person who created the video shared the information they were given, including the incorrect date. There was no citation in the video information. Tracking back the image shared, I found the illustration and directions on Etsy with a more likely date but still no citation. When I watched the video, it had over 21,000 views with a long thread of comments from people eager to make their own. I envisioned oodles of people with this item, over a decade out of place, made with materials and techniques inconsistent with the era prompted in the video.
Sadness.
That brings us back to please read before you spend time or money.
I would love for you to read on of my publications (available in my Etsy shop.)
From Field to Fashion: The Straw Bonnet looks at the types of straw and plait used to make mid-nineteeth century straw bonnets and hats. FFtF is available in my Etsy Shop as an eBook.
Paisley, Plaid, and Purled discusses shawls of the mid-Victorian era, including the styles, sizes, and how they were worn. It also has directions for making your own accurate shawls. PP&P is available in my Etsy Shop as an eBook.
The Wadded Hood Workbook takes a close up look at these winter hoods sometimes called Pumpkin Hoods. This E-publication includes directions for making your own.
To Net, or Not to Net: Revisited is my newest book, diving deep into the hair nets of the Civil War era. This book looks at the types of hair nets, how they were made, and how they were worn. TNNtN is available in my Etsy Shop as an eBook.
This week is a casual Hat Q&A talking about the questions I am asked most often. The focus is on American Civil War hats. I will talk about bonnets in a future video. How do I wear my hat? Which is the front? How do I measure my head? Where do I put the flowers and ribbon? How do I keep my hat on my head?
If you have more questions about straw hats or bonnets in the nineteenth century, put them in the comments below. I will do more millinery Q&As in the future.
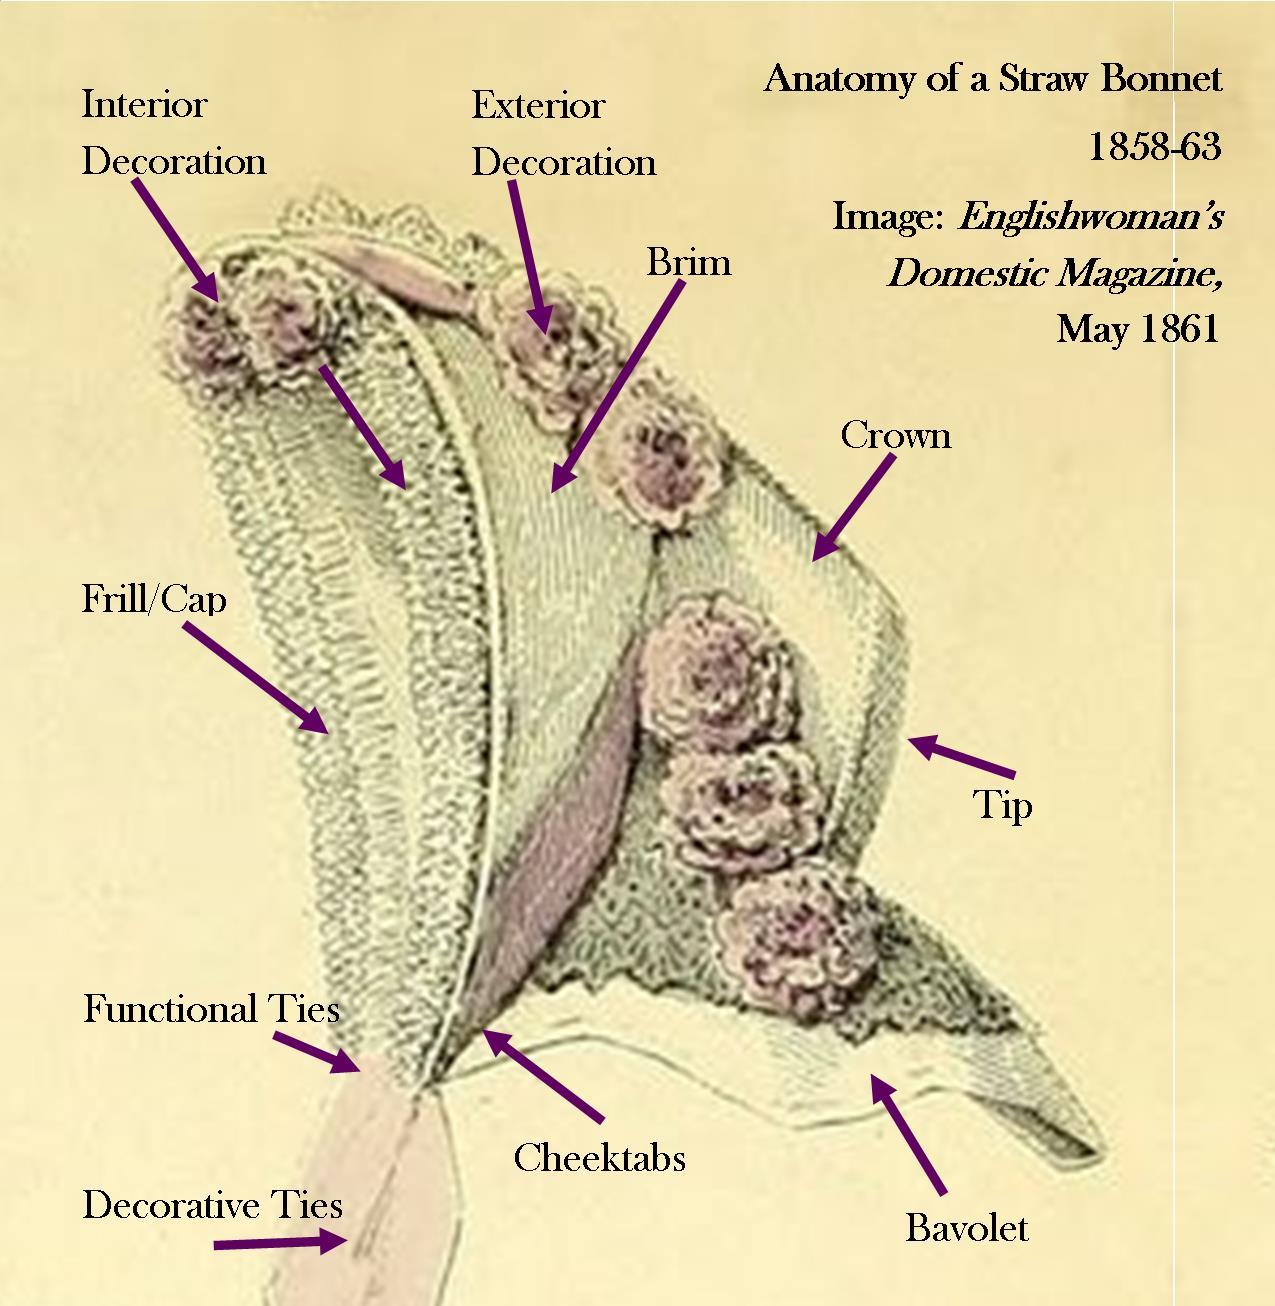
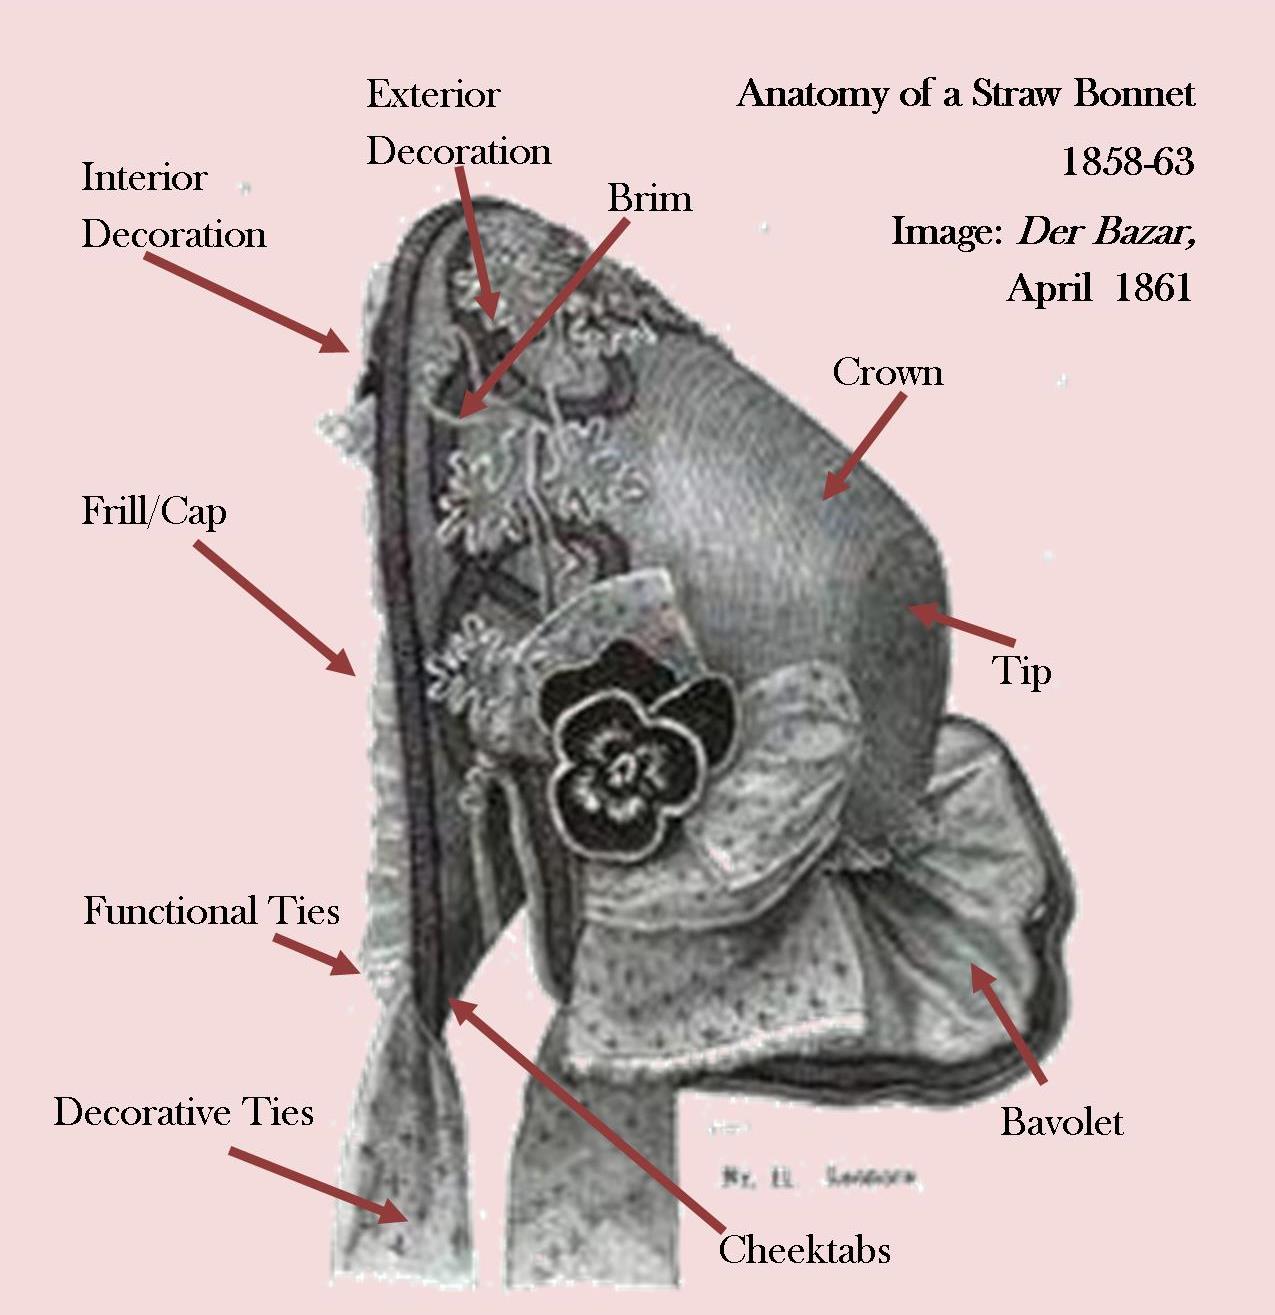
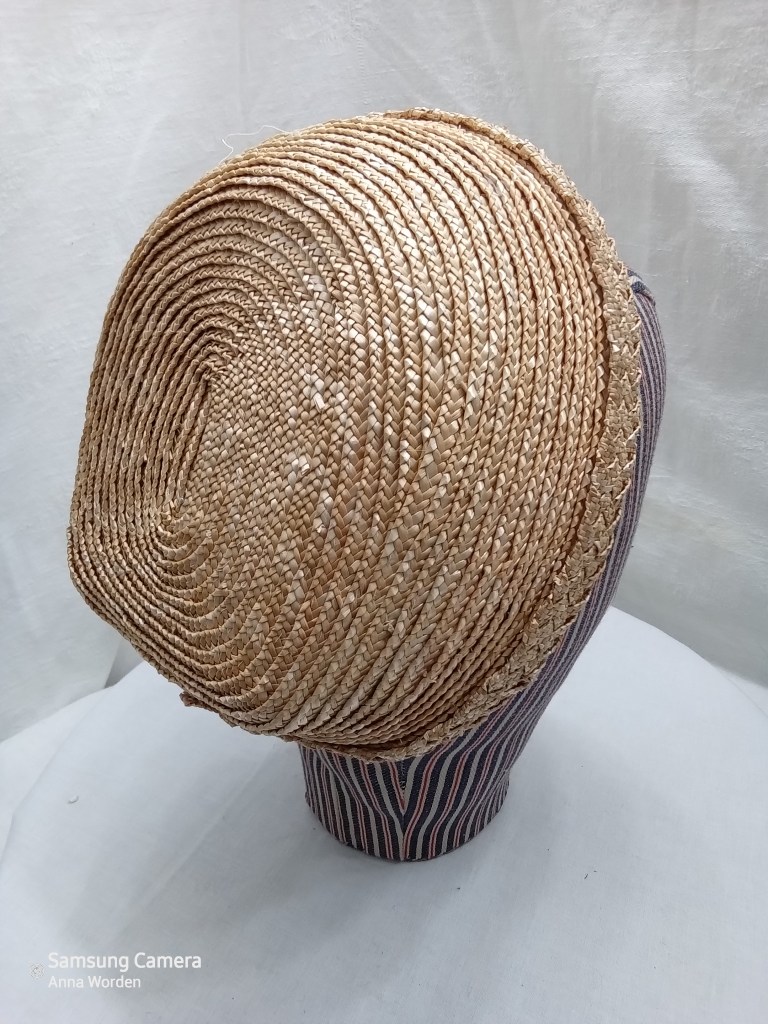
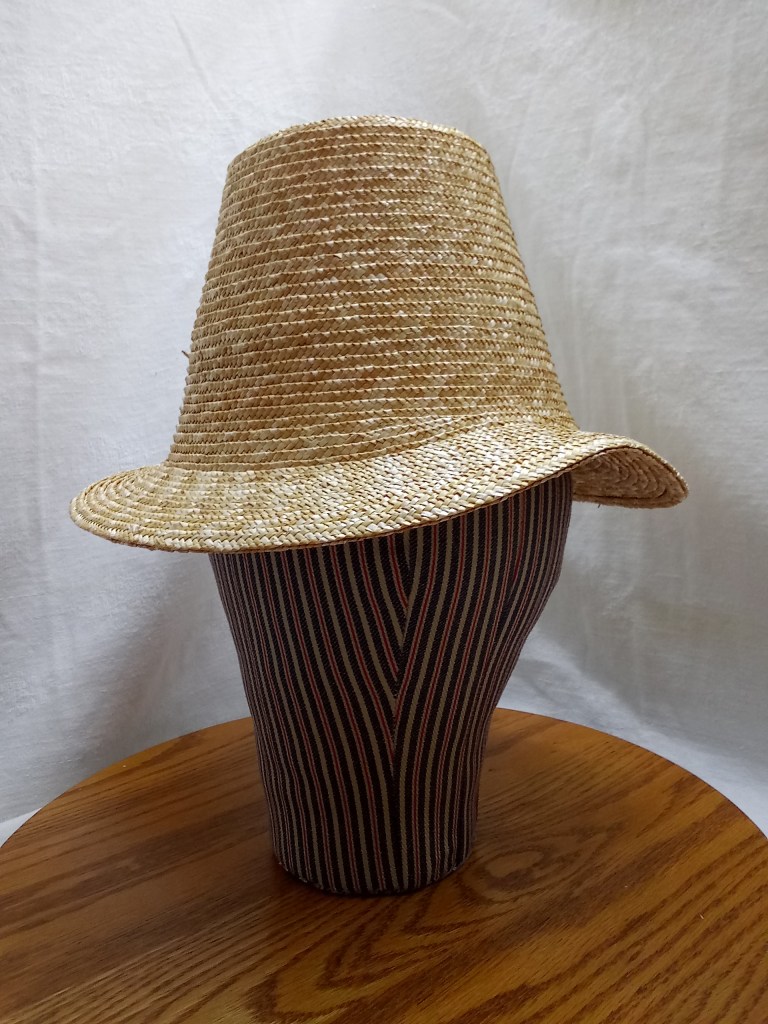
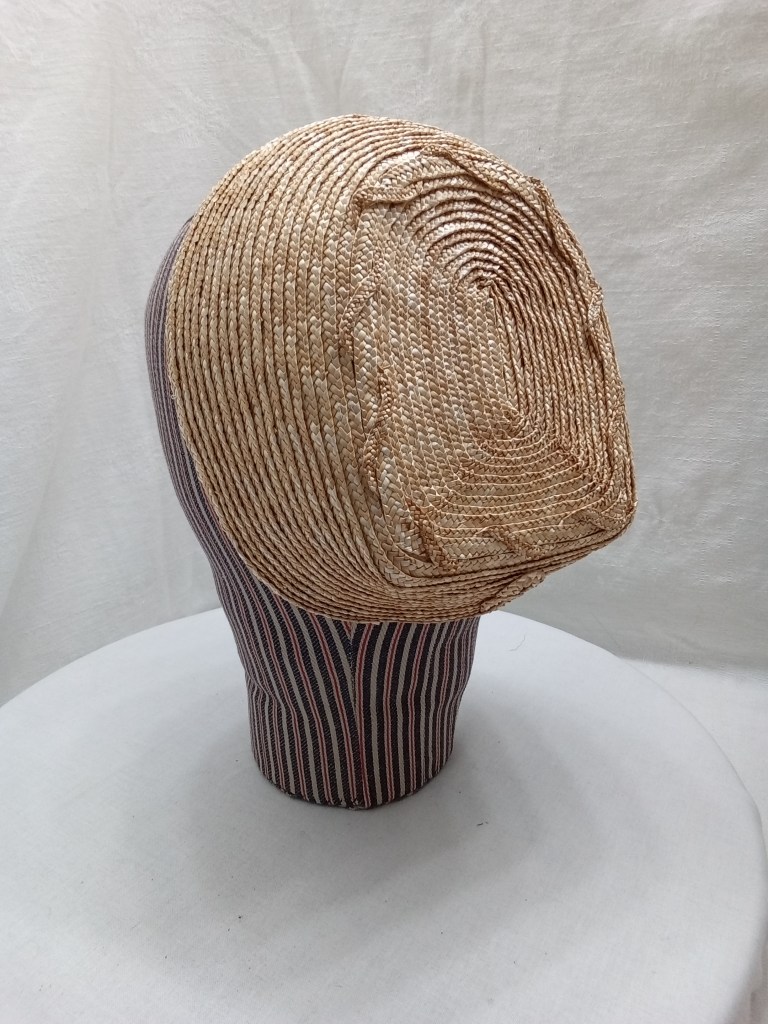
Each of these points are general for fashionable bonnets made of straw, primarily straw plait, from approx 1858 through 1863. Finer points adjust with each season’s prevailing fashion.
General Construction – Straw bonnets were sewn by hand in the round. Plaits ranged from 1/8″ split straw to wider whole straw and fancy plaits. Woven straw was also used.
Tip – The back section of the crown in the tip. On a straw bonnet this can either be domed, flattened at the back curving to the side of the crown. It should not have a sharp angular transition from the back to the sides.
Crown – The crown of a straw bonnet should create a smooth transition from the crown to the brim. Much of the shaping in the bonnet will be created in this transition area.
Brim – The brim of a straw bonnet will vary according to fashion. The brim’s edge should be a single or double row of straw plait. It should not have raw edges needing to be bound.
Cheek-tabs – The cheek-tabs should have a gentle curve coming from the neck edge of the crown along the side of the bonnet dropping down to roughly your jaw line meeting the brim edge. This is a graceful line, not a straight edge or angular transition. There is a variation in the twist of the cheek-tab from the fifties into the sixties. The cheek-tab is part of what helps hold a bonnet in place.
Binding – The binding on a straw bonnet should be straw plait. Raw edges were covered on the exterior and sometimes the interior along the back of the cheektabs, sides and tip. Multiple rows were used as well.
Lining – A lining is a functional layer of light weight, open-weave cotton covering most of the interior of the bonnet. It aids in keeping the straw from snagging the hair while worn. The lining can not be seen when the bonnet is worn.
Frill/Cap/Ruche –This decorative layer of gathered cotton or silk covers fills the inside of the brim. This is very fine most often net, lace or organza. The full frill aides in holding the bonnet in place.
Facing – Some bonnets have a facing of silk from the edge of the brim through the first couple inches of the interior brim.
Bavolet/Curtain – The bavolet is attached to the binding edge on a straw bonnet along the sides and crown. This silk piece should be lined with net to give it more body. The bavolet may be a single piece of fabric, most often on the bias and occasionally on the grain, or pieced from bias cuts of ribbon. The bavolet may also be decorated.
Functional Ties – The functional ties are attached to the interior of the cheek-tabs or under the decorative ties. These are narrower ribbon to hold the bonnet in place.
Decorative Ties – Decorative ribbons are wide, 3″-8″ based on a wide survey I did years ago. They are on the grain, not bias. Tied, they do not take the support of the bonnet.
Interior Decoration – Interior decoration also helps hold the bonnet in place.
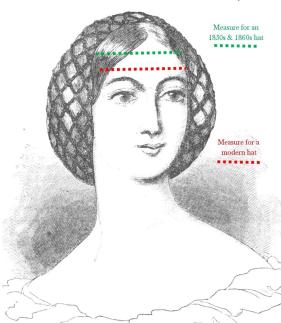
There are two factors for finding a comfortable fit: Size and shape.
Size
The difference in wear or placement means we measure for a mid-nineteenth century had differently than we do for a twentieth or twenty-first century hat. The modern hat is measured just above the eyebrow. (This is also where many of us measure for bonnets. We want to keep you on your toes.) For mid-nineteenth century, we measure higher, at the hair line. In this illustration, we can see the difference between where the two measurements would be.
These higher, hairline measurements are often smaller than those taken at the eyebrow. A hat worn at this point can be slightly smaller to slightly larger for comfort. So, add and subtract an inch to your hairline measure.
For example: I am 22.5″ around at my eyebrows and21.5″ at my hairline. The vast land of the internet tells me that the average woman’s head measures 22.5″ to 22 5/8″ around at the modern measuring point. So, I am about average. I comfortably wear a mid-nineteenth century hat that is 19.5″ to 21.5″
Here is my head with the tape showing where to measure. This is where I wear most CW era hats. This is the circumference of my head. My measurement is 21 1/2″. (Note: this is a full inch smaller than the modern measurement take lower.)
General guidelines I use:
Small = Less than 21″ at the hairline (crown less than 20″)
Average = 21″-22.5″ at the hairline (crown 20-21.5″)
Large = Greater than 22.5″ at the hairline (crown greater than 22″)
Shape
It is helpful to know whether your head is more round or more oval.When looking from above, some people have rounder heads while other have more oval heads. I have an average oval head. Very round hats don’t work for me without adding to the lining.
Hat blocks can be more round or more oval with the same circumference. To illustrate: Both of these shapes to the right can have a circumference of 22.5″. Yet, the same hat would fit each head differently.
After writing yesterday’s post and a mid-day meeting, I spent the afternoon trying to back track the sources behind the BBC/Netflix corset ban story.
To the right is a sample of the search results. While I am not familiar with many of the UK publications, I do recognize several of the results as tabloid style publications. Each references an undisclosed “source.” I find this frustrating because I like documentation. I want to read official written announcements or, in this case, the equivalent of an inter-office memo.
I haven’t found such.
So, this makes me wonder… Who is the “source”? Is there really a “source”?
Or… Is this just another one of the quasi-annual “corsets are awful” PR stunts?
As I continued looking through the search results, I found several 2021 articles of a similar tone – actresses being quoted as saying corsets are awful, uncomfortable, etc.. The articles are filled with claims propagating the myth of the evil corset.
I can’t help but wonder: Just how many actresses actually complain about period support garments? How many are pushed into saying negative things about their experiences? How many have snip-its of their statements spun to dramatize corset wearing as awful?
Corsets as awful, painful, unhealthy, degrading is news. The headlines get shared and make money.
After all, who wants to read about how comfortable a corset is to wear?
ADDITION: This article from Jezabel takes a different look, also seeing this as a PR move, and contacted the BBC that denies the foundation of the story.
As I sit here listening to the thick layer of ice being scraped to safety outside and waiting for my weather induced migraine to subside, I am thinking about how I want to respond to the BBC/Netflix corset “ban” news floating around social media this week. The articles talk about the various statements made by actresses wearing corsets describing their experiences. In contrast, newer articles include statements made by costumers, corsetiers, and fashion historians regarding the proper fit and purpose of the corset as a support garment.
What can I offer?
The same thing I have always offered – My honest experiences.
I have been wearing a corset and/or stays for going on 30 years of wearing a corset. Okay, pause. This is a bit of a shocking statement, in a couple ways, even for myself. First, I counted and recounted. I have to accept it really has been that long and that is really how old I am now. That totally feels weird. Second, I have not been wearing a corset everyday for these years. It is the 21st century after all and I live in it; I have a “day job”, I wear modern clothes most of the time. I have worn a corset in different capacities and for different lengths of time through the past thirty years. In my early twenties, I wore a corset for work and hobby, 1810s, 1850s and 1860s. At this time, I generally was in a corset 6 or 7 days a week, 8 to 20 hours a day. I drove, ate, worked, played, and danced in a corset. In my later 20s and early 30s, I wore a corset more for hobby and volunteering; generally 2 to 3 days a week for various lengths of time and activities, for most weeks from spring through fall. Now, in my forties, I wear a corset far less than I would like as I currently only do a speckling of volunteering, ca 1800-1860s.
So, let’s start again.
I have worn corsets for going on 30 years – well fitted corsets and poorly fitted corsets….
Let’s start with the poorly fitted corsets. When I first started working at my local museum and doing reenacting, I bought the corset I was told to buy at the time – the Fredericks of Hollywood corset. This was a polyester, gored construction corset offered in sizes based on bust measurements (if I remember correctly.) At the time, they came with thin spring steel boning. Later, these came with poly boning. Wearing this style corset lasted a few years for me, until the story below quickly pushed me towards better corsetry.
I moved on to making corsets fit to my body. At first, I drafted patterns using my measurements and period diagrams using white denim and thicker spring steel boning. During this time, my mid-20s to early 30s, my body changed constantly. I was making a new corset each or every other year. I moved into using the duck-tape method of fitting and making my corset with coutil and the heavier spring steel. This has been my preferred method for over a decade. Only recently, out of curiosity, I decided to try the RedThreaded patterns, which I am quite pleased with.
Now, let’s talk about these experiences…..
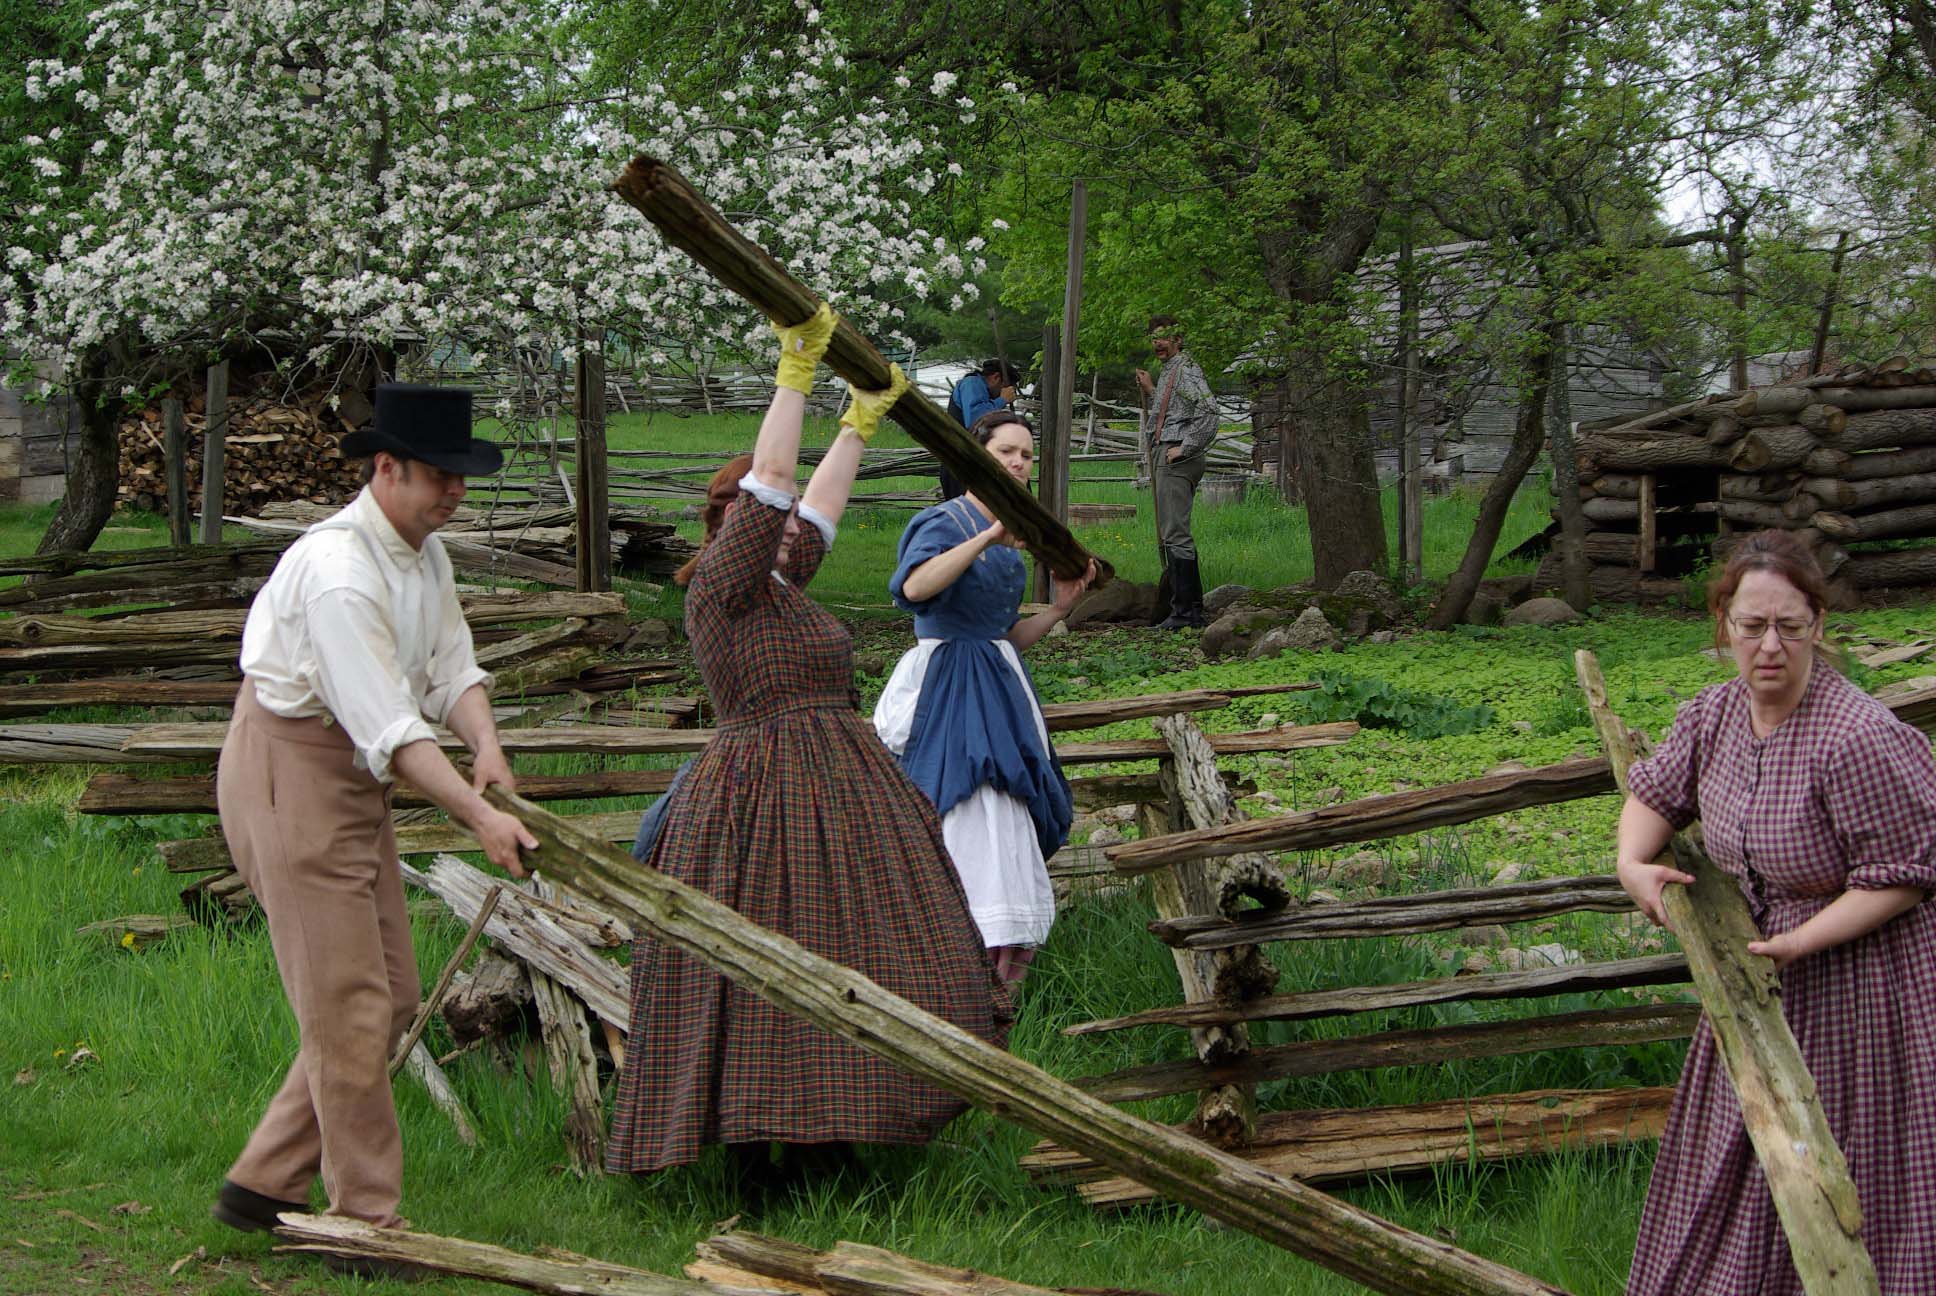
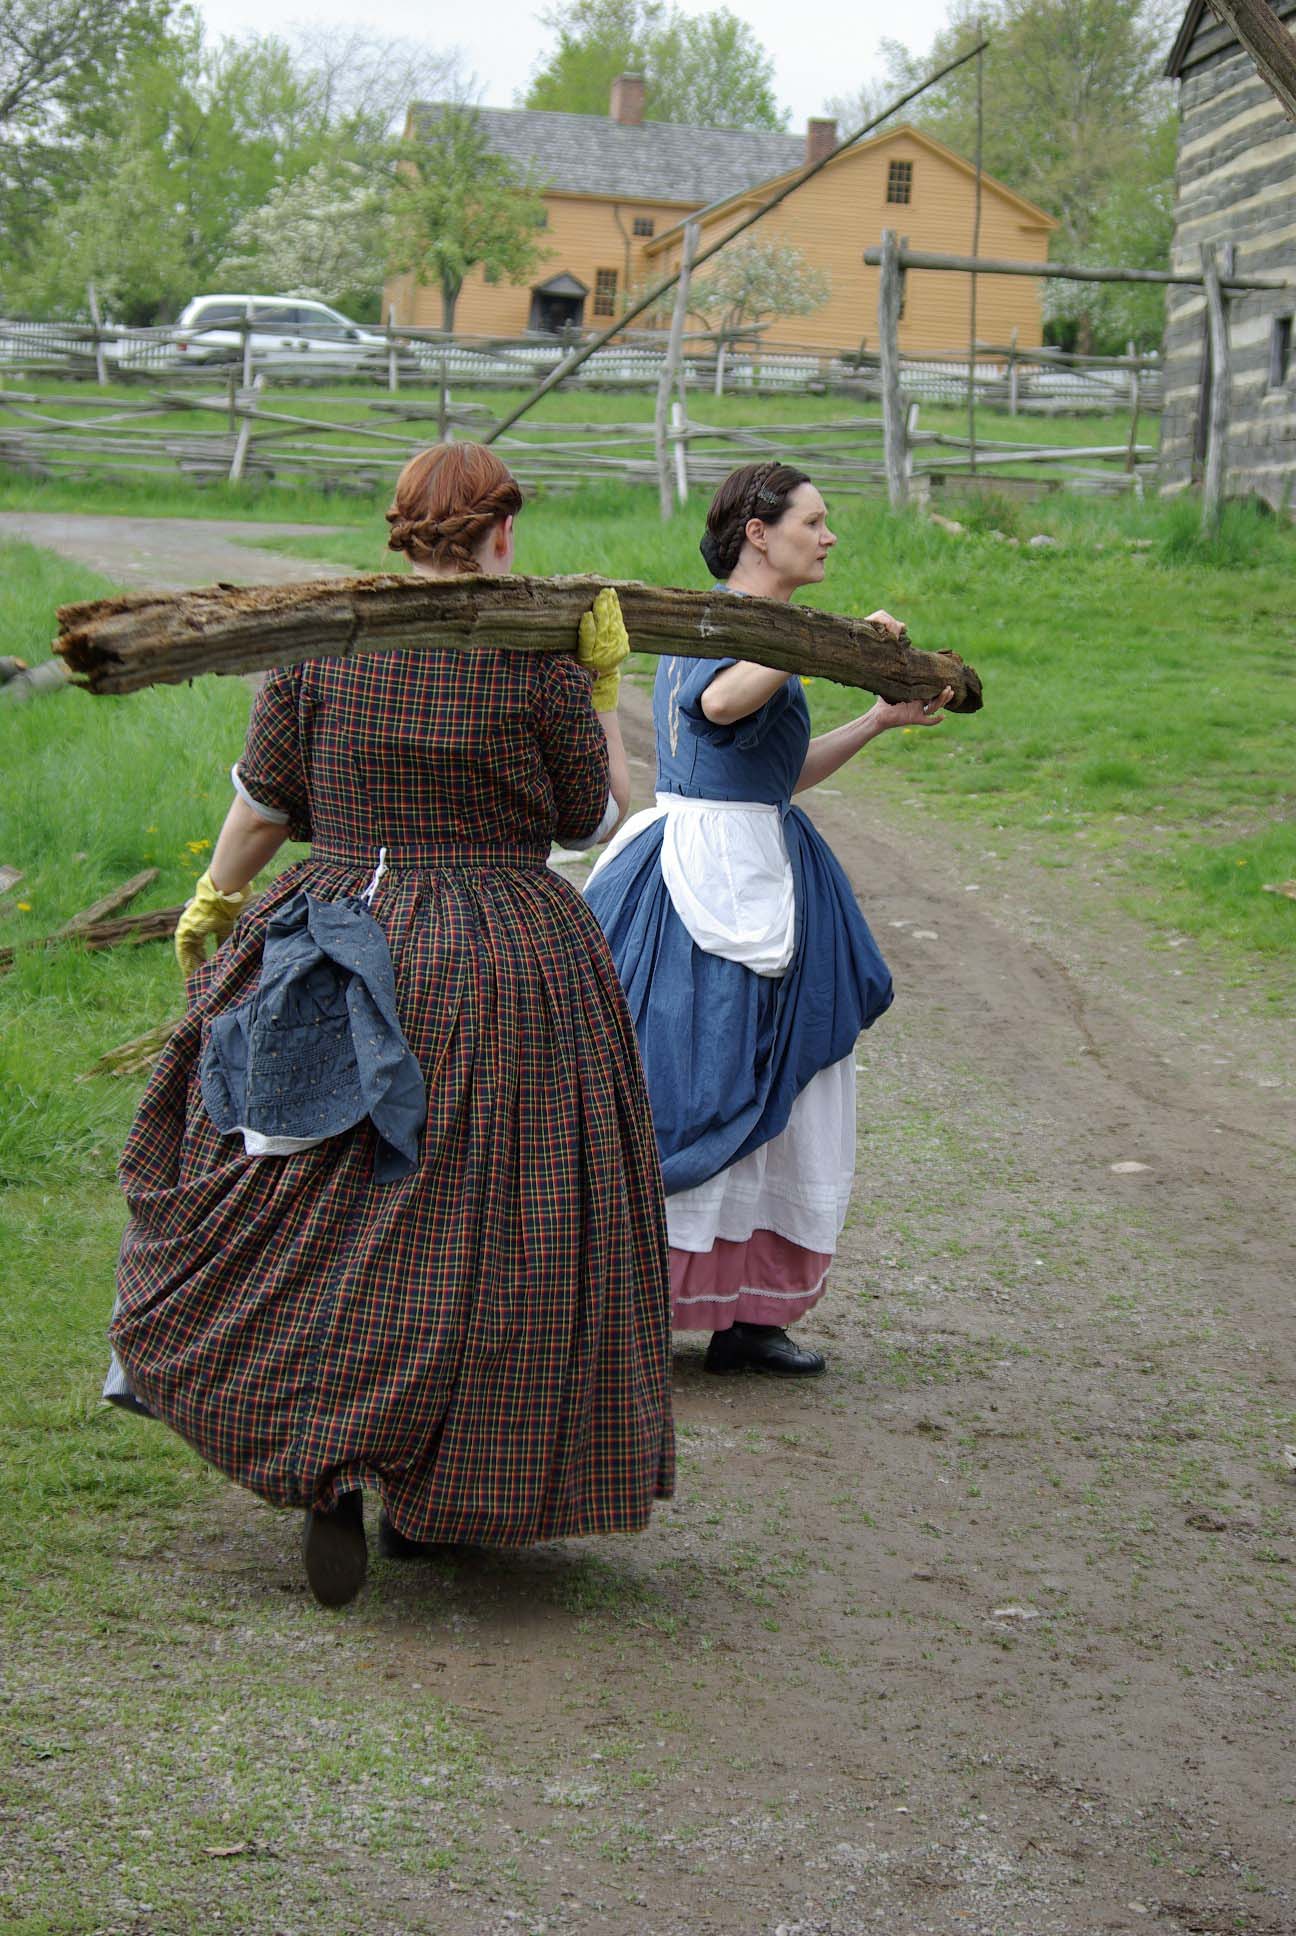
The current articles talk about corsets limiting mobility, of being “famously restricting.” My experience does not find this to be the case. I find, when wearing a properly fitted of the right size, the garment is supportive and allows for quite a bit of movement. The best way for me to explain this is through images. These photos are from a work day at GCVM some year ago. I wore both a corset and a cage while doing a full day of manual labor. We tore down and rebuilt a fence moving rails & stones, and hauled corn to the crib. I was in no way restricted by my corset. Rather, my corset helped me as a support garment protecting my back.
Restriction happens when a corset is not the right size or does not have enough ease in the hips. This became screamingly obvious to me when I gained a bunch of weight during a health issue and tried wearing my pre-weight gain corset. I was not comfortable and could not move actively as I should.
There are a couple mentions of bruising and marks from corsets in the current articles. I would love to say I don’t get marks from my corsets. I do. I am a curvy woman who works her butt off in hot and cold weather wearing a corset. My chemise wrinkles underneath leaving wrinkles on my skin. Some of the designs are pretty cool. Sometimes they itch and take an hour or so to relax out in the evening. My bras on the other hand, have left deep red marks under my breasts and even have broken the skin if I work hard in one.
I will admit I even have a scar from one of my corsets. Earlier on in my history “career,” I was performing in Legend of Sleepy Hollow in the historic village. This was when I was wearing one of those poly Freddy’s corsets. This was in the fall, after a full spring/summer season. The performance was on the front porch and lawn of the Ladies Seminary, with a few hundred people gathered as the audience spilled out onto the village square. During one of the dances, I stepped in, stepped out, turned to put my left hand in, and snap! One of the spring steel bones in the back of my corset snapped. I finished the dance, finished the performance, fleeing and crouching in fear of the headless horsemen as the broken ends of the metal bone dug into my bloody skin. After the final bow, we exited “stage” into the town hall. I stripped to my chemise in the few steps from front door to inner door. Under the corset, my chemise soaked up the blood. The cut left a scar that was easily visible until my late 30s when it only showed itself if I got dehydrated or had a very long day in nineteenth century dress. Since then, I only use thicker, not wider, spring steel boning.
This brings us to “she ‘couldn’t f**ing breathe'” and accounts of feeling faint. Well, in nearly 30 years, my now overweight, out of shape self only recalls almost fainting once* due to my corset. Again, this was in my early 20s. I did an 18th century fashion show for a friend. For the show, I was dressed entirely in her clothing, stays included. The stays I wore were made for a woman with a longer waist and smaller bust than I was/am. I did the show. Then quickly drove to meet up with a friend, with plans to change there. Okay, maybe I wanted to show off this rather sexy look to my particularly handsome friend. Once there, I got a bit light headed and faint. I can not say for sure how much was the incorrect stays or the swoon-worthy man.
Yes, breathing in a corset can be a little different. I tend to breathe up and down in my chest more than out and in with my diaphragm. It is far from a “can’t breathe.”
I keep changing my mind about whether to include this last part. If you have been reading for some time, you may recall this photo. This photo was taken just a couple weeks after getting out of the hospital. I was very proud of figuring out how to wear mid-nineteenth century clothing post surgery. The other reality of this image is that the corset I was wearing saved me from a trip back to the hospital. I was good though the event. Then I over did it during packing up. I tore open my incision from the inside out. My corset kept my skin and tissue together on the outside. (Okay, a little woozy again thinking about that.)
I need to cut this “short” to get ready for a meeting. I hope this gives a better understanding of what it is like for an average, 20th turn 21st century person wearing a corset, whether for work, volunteer, or hobby. Let me know if you have any questions.
*The time I did pass out from heat exhaustion does not count as I already had unhooked my corset and was exhausted from going from working at a resident camp program to a history event on next to no sleep for the prior week. I also don’t count the time I did pass out during a Yuletide performance because that was more a matter of dancing back to back day with little time to eat.
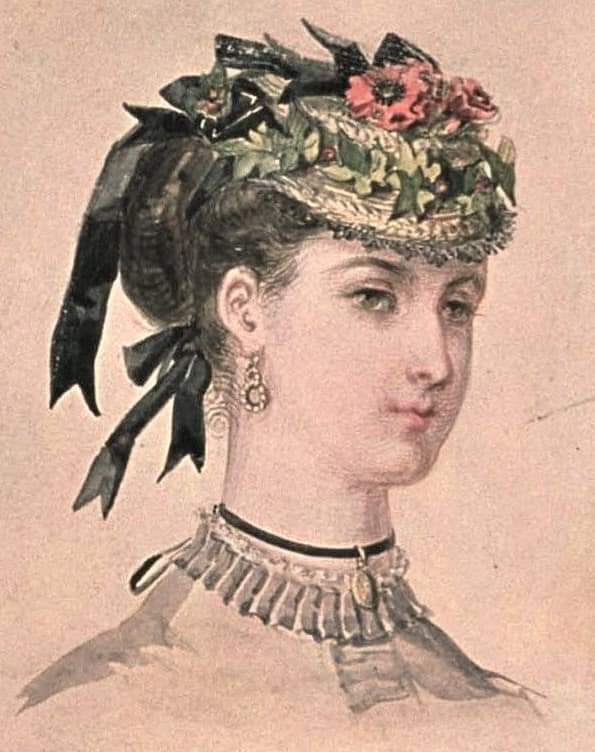
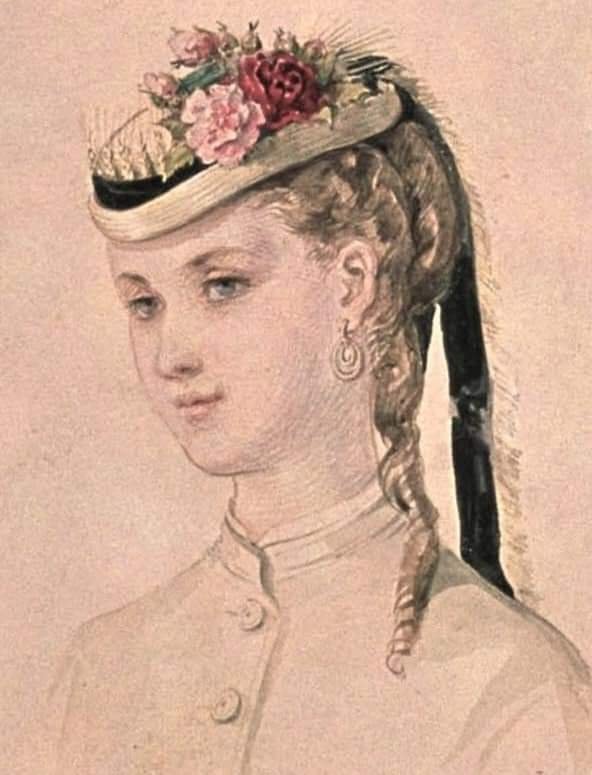
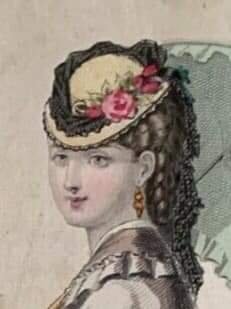
I spent the last week focusing on making a selection of 1870s petite hats and 1880s pieces. The 1870s pieces are fashionable hats worn perched forward on the head. I focused on these illustrations from 1870 and 1871 for my inspiration. You can see them below. The 1880s pieces include two Capote bonnets and a hight crown, “flowerpot” hat. (I am not fond of that name.)
Special Announcement: Each day during February Recess, I will select one piece in my shop to offer at a special price of $111!!!!!
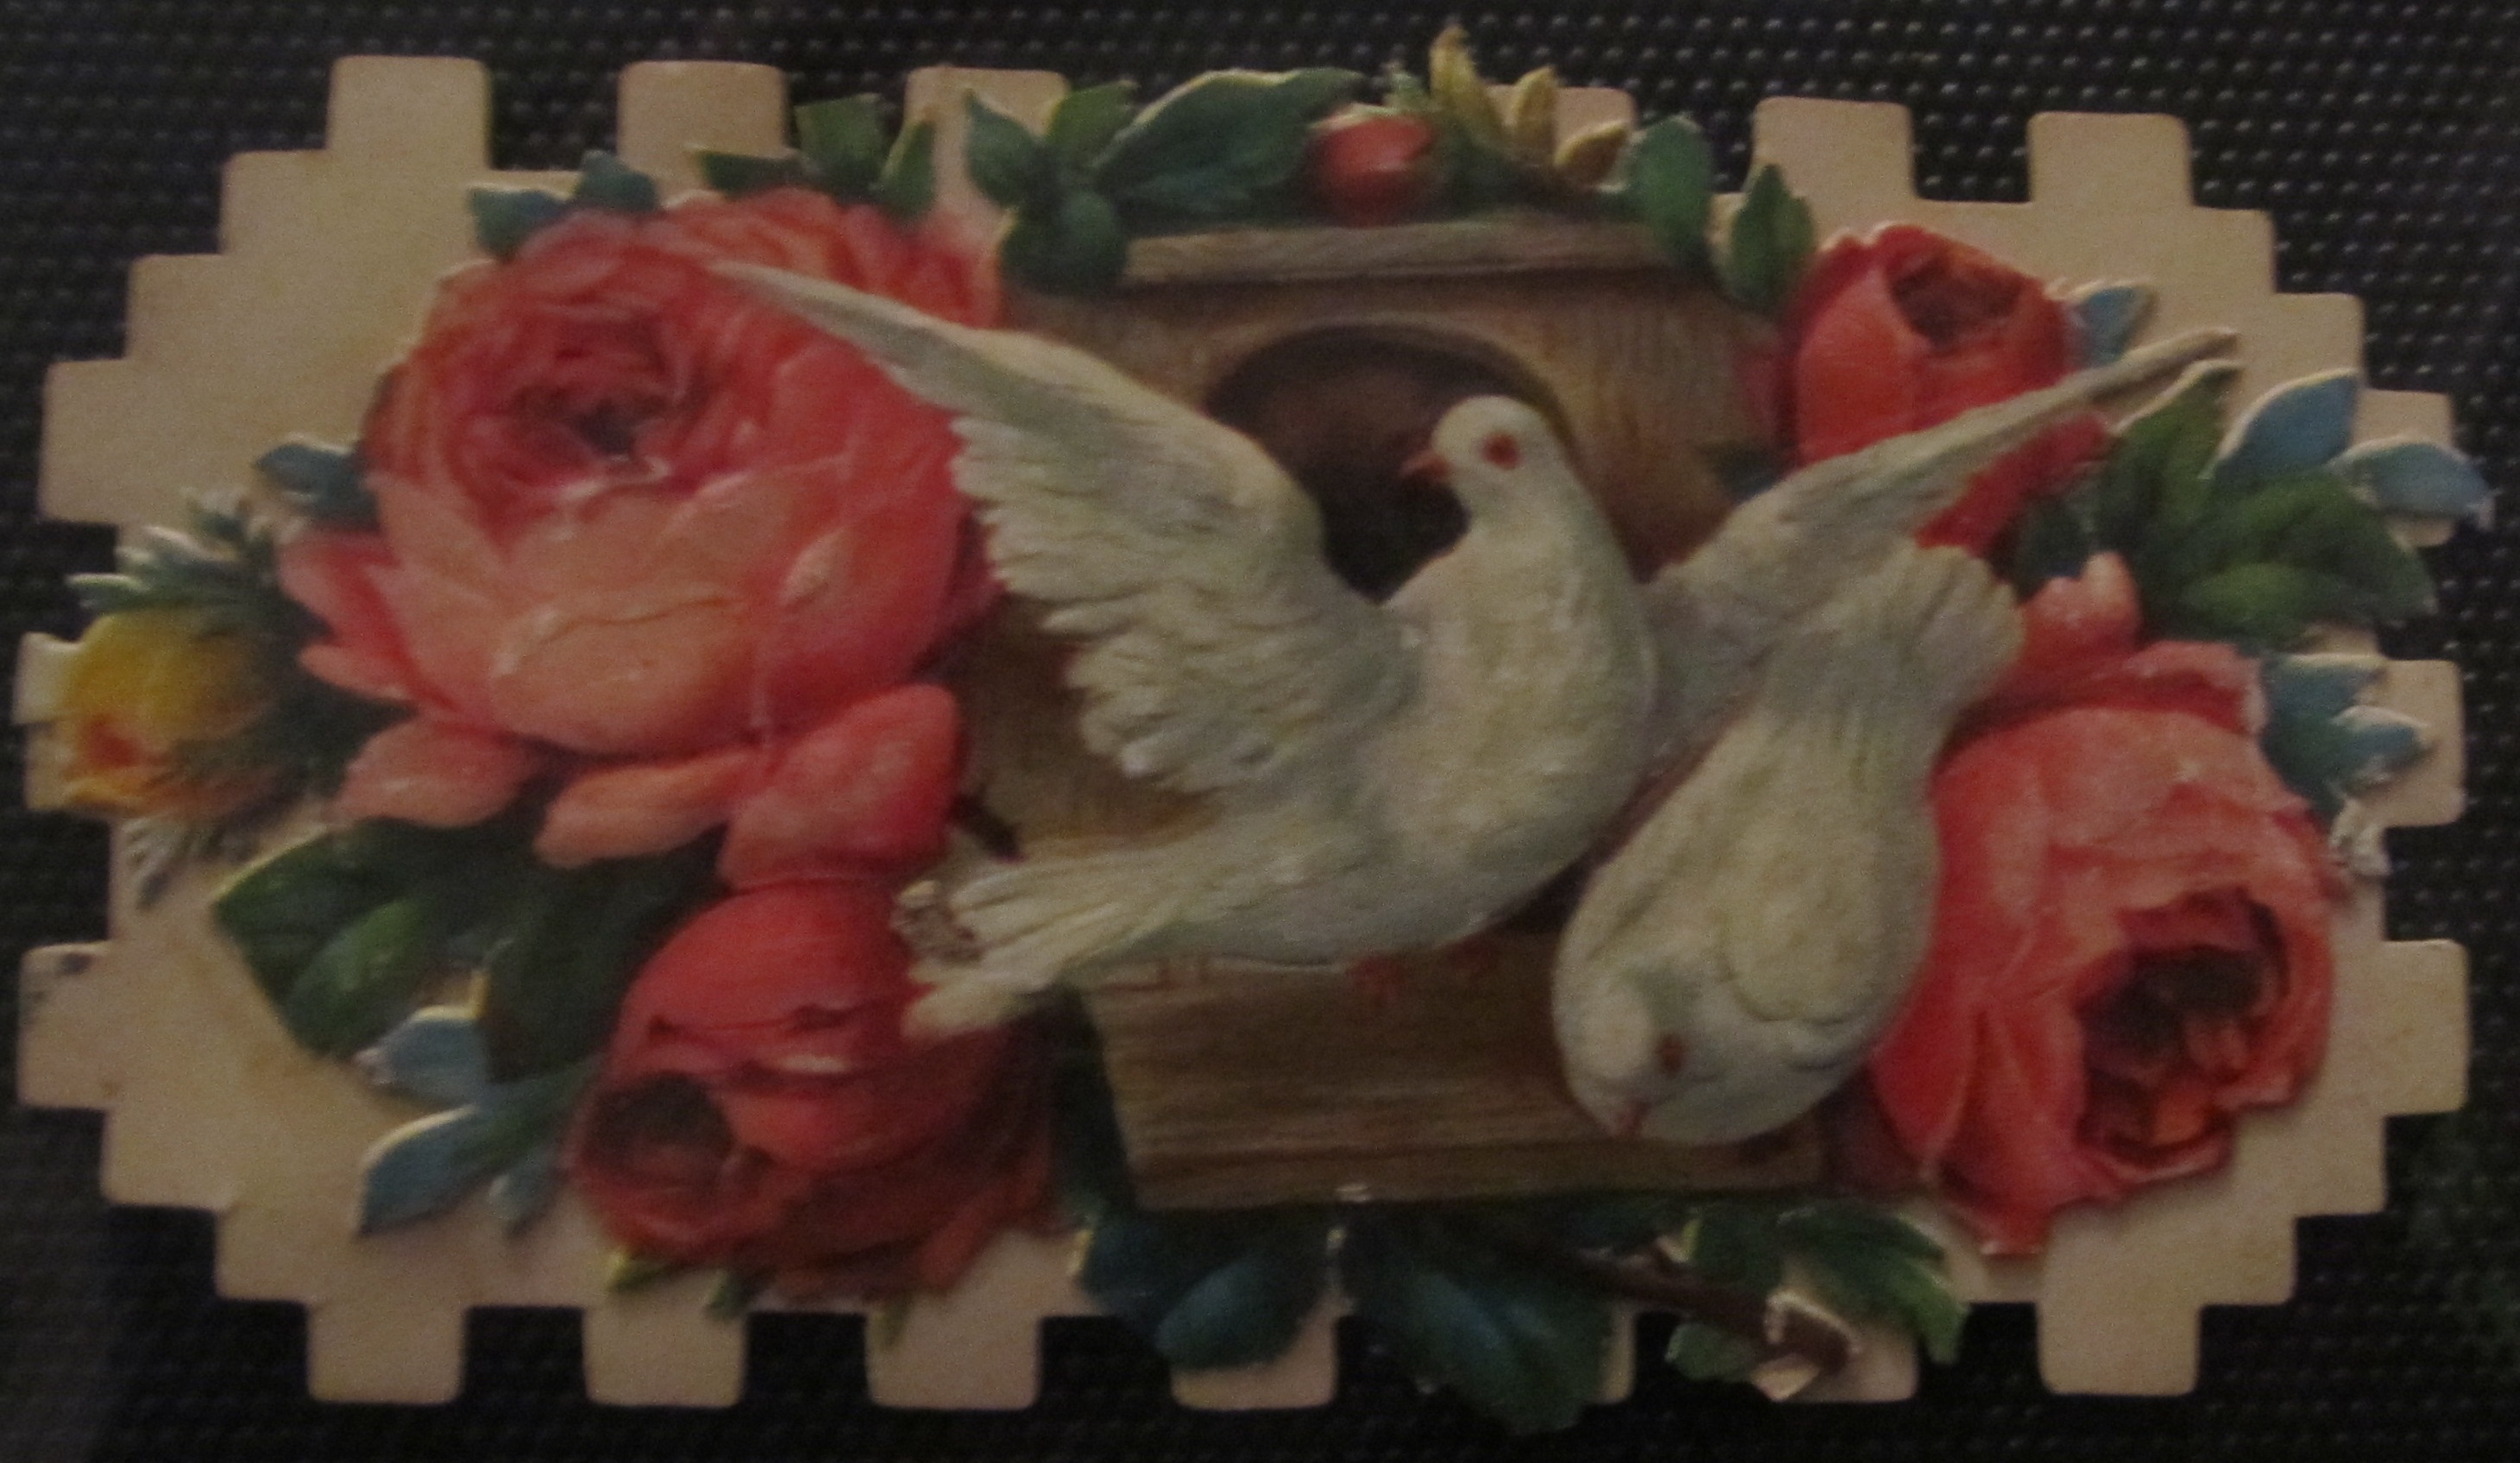
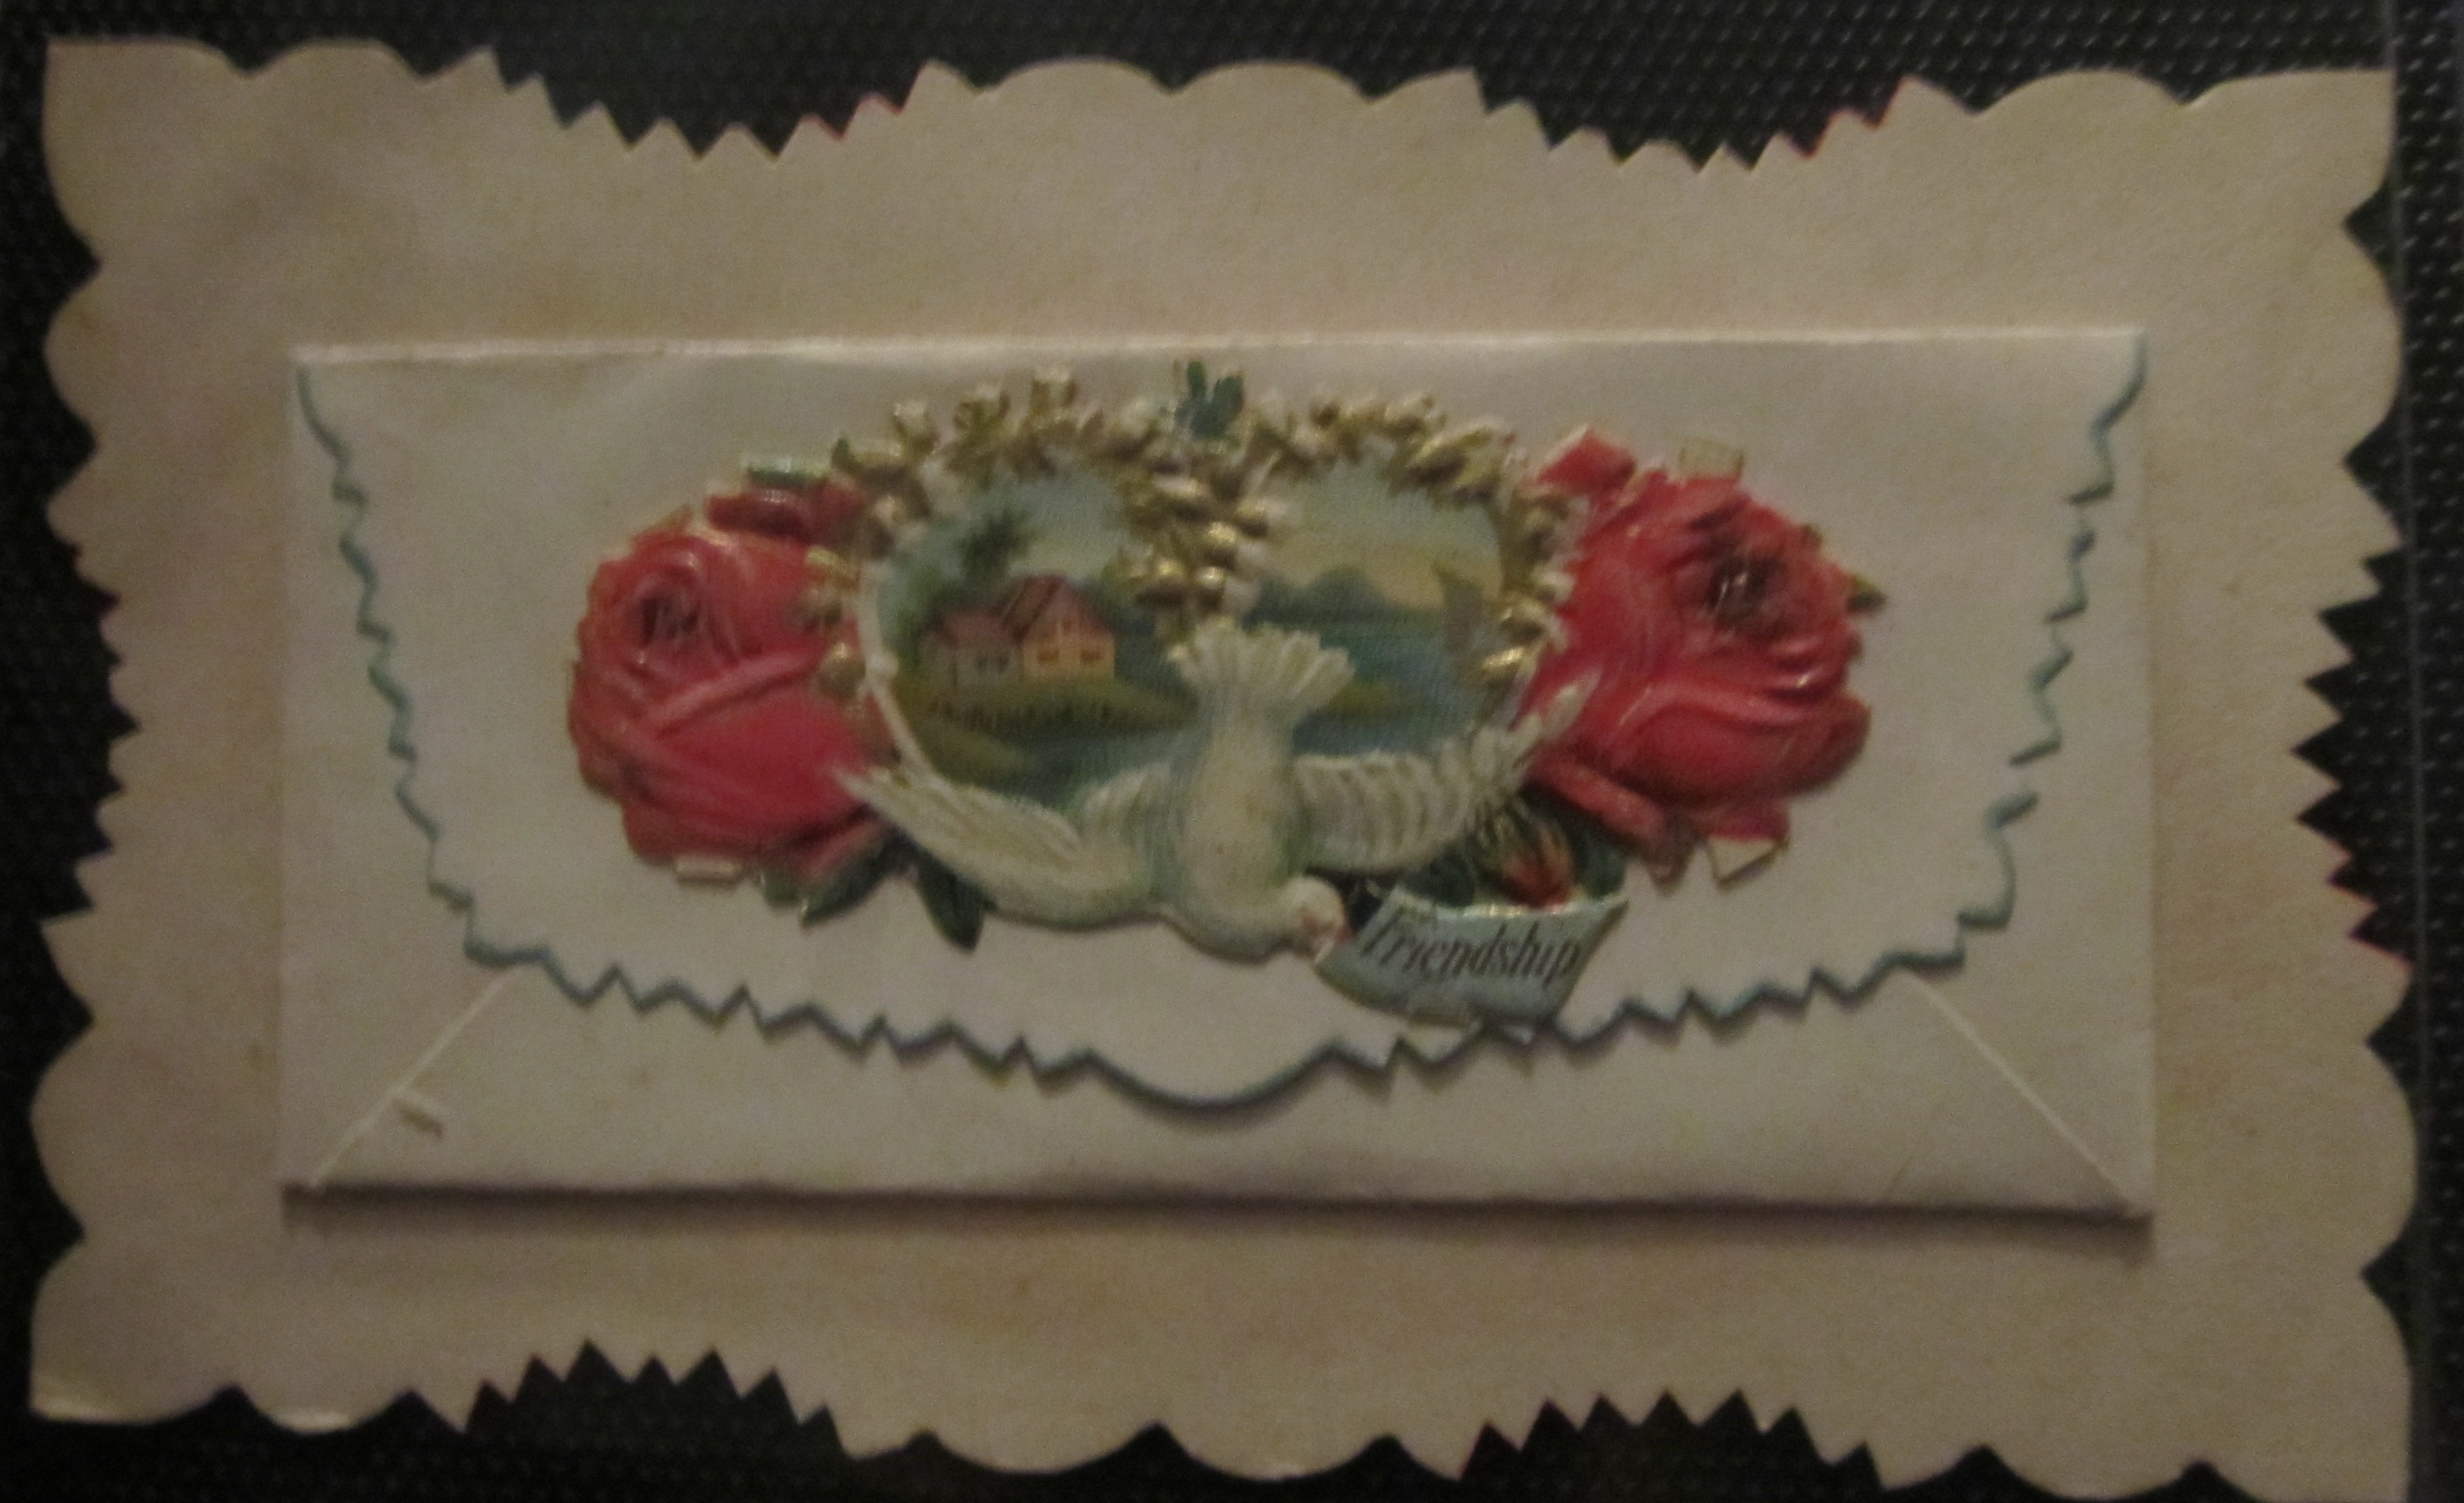
These antique Valentines have been lucky a few times over. First the recipient saved them. Then, they survived a flood in Dad’s basement. While everything else in the box they were in was sadly soaked and ruined, these were tucked safely in a water-tight plastic bag. I’ve been wanting to share these pretties for a while. They’ve spent the last few years packed away, just waiting to be seen. Here is a small sampling (and, yes, I took photos instead of scanning for a reason)…..
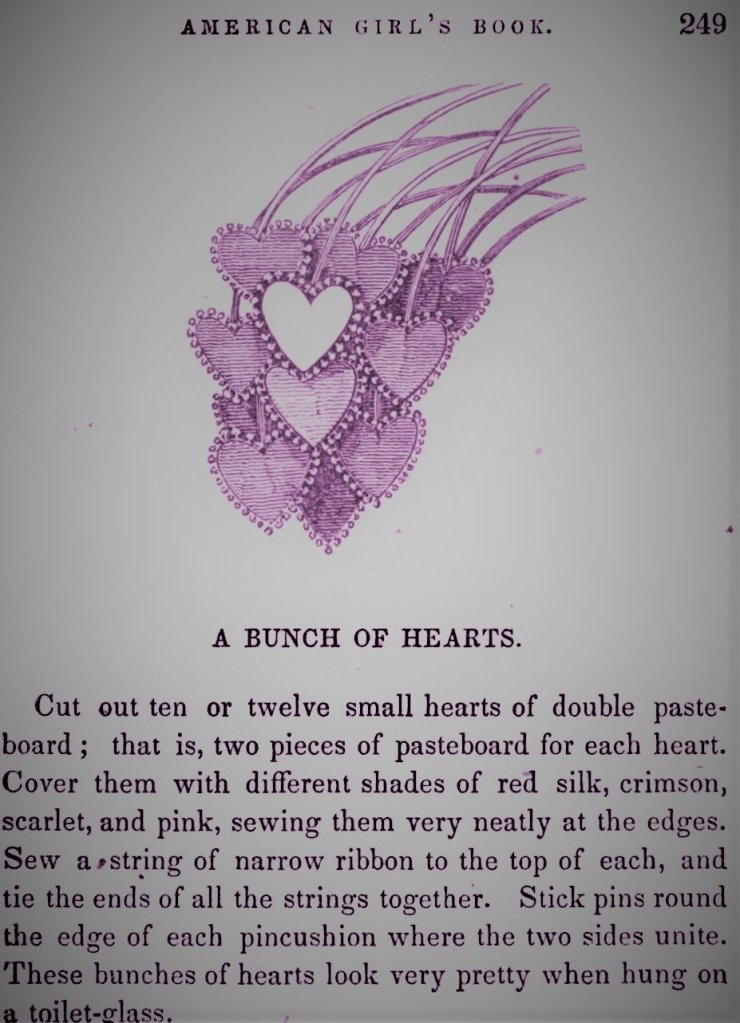
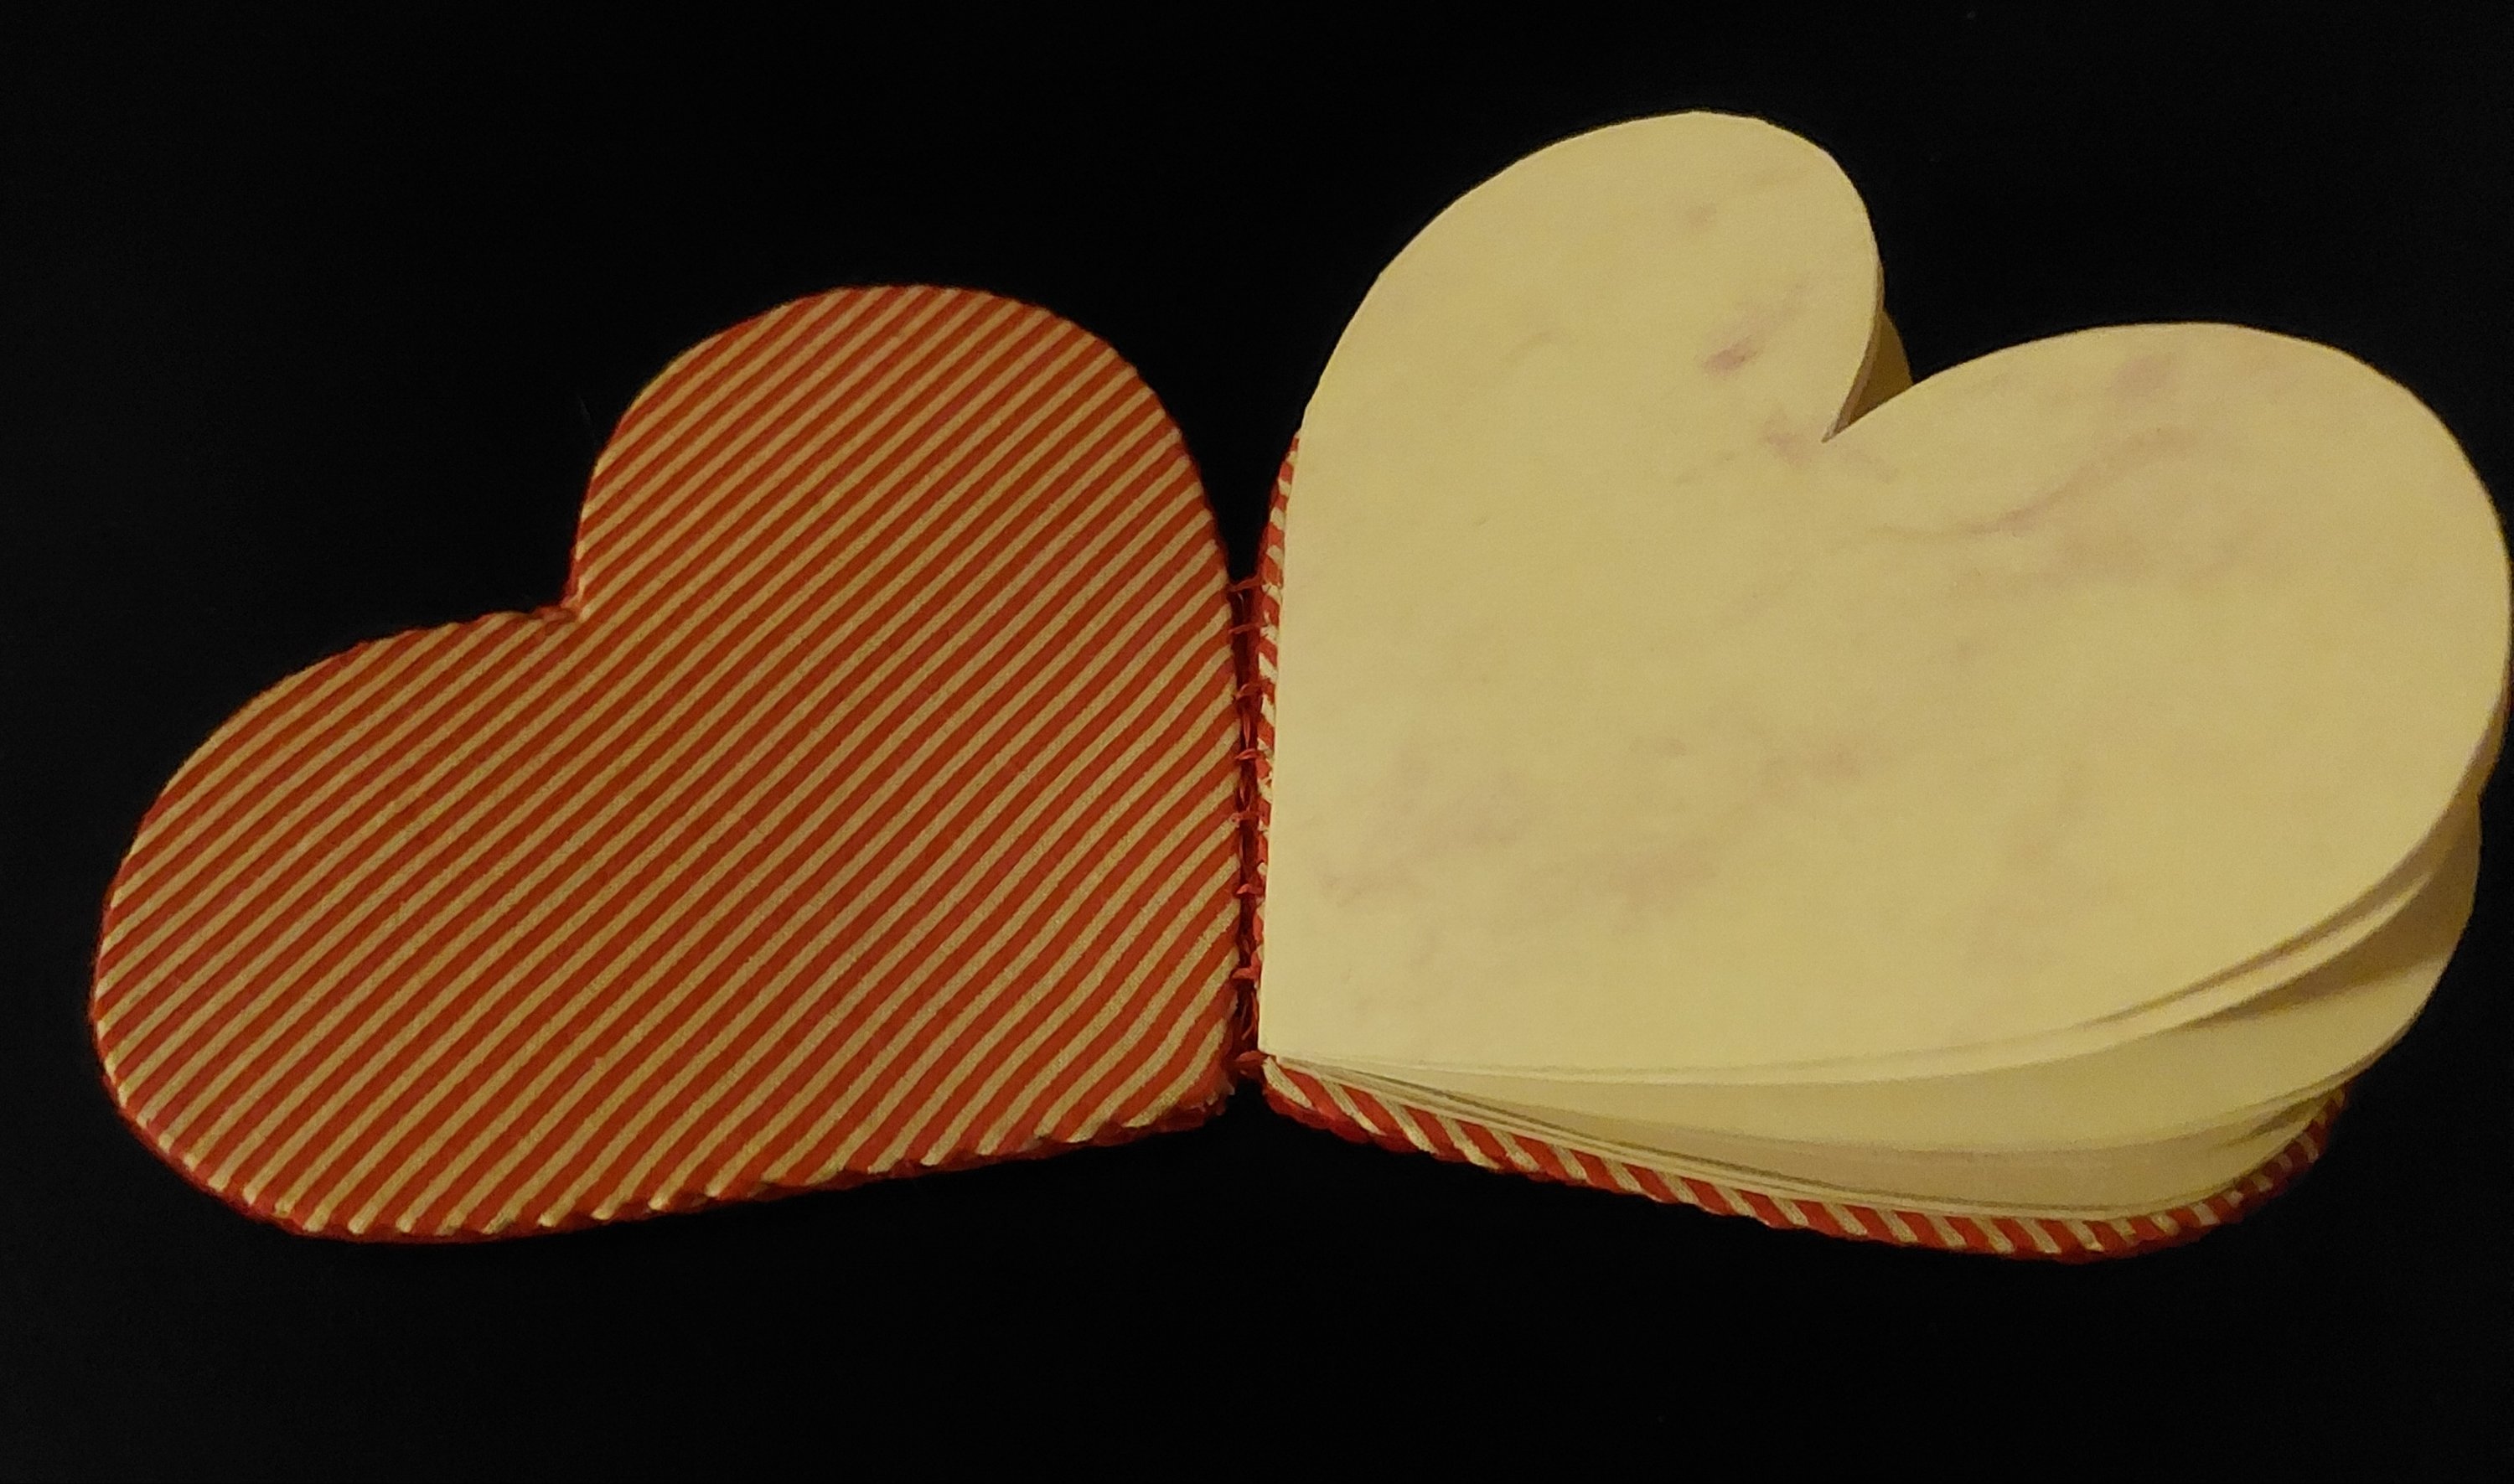
Today’s Heart filled post is a history inspired project, a little heart shaped book. This sweet book can be made using techniques from Fanciful Utility, with paper pages inside instead of wool.
To make this book, you will need pasteboard, outer fabric, inner fabric, and several sheets paper for pages.
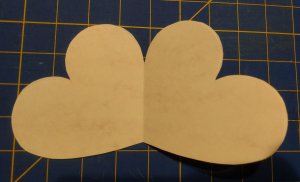
Start by cutting a heart shape you like. This can be a fat heart, a lean heart, even and asymmetrical heart. Just be sure one side is flat enough to become the spine. This will become your template for cutting. You may find it helpful to mark which side or spot is your spine.
Using your template, cut 4 pieces of pasteboard the size of your template. Cut 2 exterior fabric hearts and 2 interior fabric hearts, adding a generous 1/2″ seam allowance. Using your favorite FanU technique, cover two with your outer fabric and two with your inner fabric. Whip stitch the cover layers together.
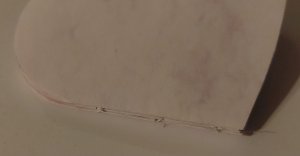
Fold your sheets of paper in half. Do this individually or in pairs rather than as one stack. Place your template with the spine along the fold. Trace your template and cut. Double check that your placement and pages are as you expect. If so, trace and cut the rest of your pages.
Open each pair of pages and stack them. With a strong needle, pierce at least 3 holes in the fold. Try to make them equidistant with the middle one centered on the spin. Refold the pages in pairs of triples. For each grouping, sew through the holes. Stack your folded pages on top of each other with the folds and holes lined up. Sew through the threads snugging the pages together. I recommend watching a video or two on simple booklet binding for this as I know my description is clear as mud.
Place the paper pages on the back cover. Center as desired. Secure the paper spine to the cover at the edge or just in from the edge.
Place the front cover on top of the paper pages. Bind the covers together using your favorite FanU technique.
You can embellish as desired. Consider a ribbon to tie the book closed, embroidery on the cover, or beading around the edge.
Are you one of the many readers enjoying my millinery blog posts? Consider becoming a Patreon patron. Doing so helps support my work and helps me write more useful articles. https://www.patreon.com/AMillinersWhimsy