I hope you’ve enjoyed the past two weeks of heart theme posts. Here is a review of the projects so you don’t miss any.
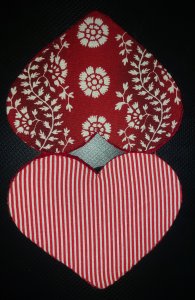
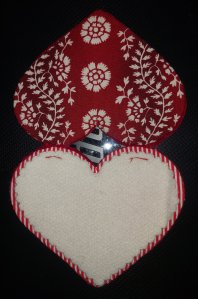
But first….. here is a special treat. This is an exclusive In Detail looking at an original heart pin cushion.
Heart Projects:


I hope you’ve enjoyed the past two weeks of heart theme posts. Here is a review of the projects so you don’t miss any.
But first….. here is a special treat. This is an exclusive In Detail looking at an original heart pin cushion.

Today’s Heart filled post is a history inspired project, a little heart shaped book. This sweet book can be made using techniques from Fanciful Utility, with paper pages inside instead of wool.
To make this book, you will need pasteboard, outer fabric, inner fabric, and several sheets paper for pages.
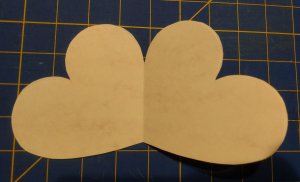
Start by cutting a heart shape you like. This can be a fat heart, a lean heart, even and asymmetrical heart. Just be sure one side is flat enough to become the spine. This will become your template for cutting. You may find it helpful to mark which side or spot is your spine.

Using your template, cut 4 pieces of pasteboard the size of your template. Cut 2 exterior fabric hearts and 2 interior fabric hearts, adding a generous 1/2″ seam allowance. Using your favorite FanU technique, cover two with your outer fabric and two with your inner fabric. Whip stitch the cover layers together.

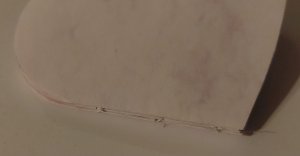
Fold your sheets of paper in half. Do this individually or in pairs rather than as one stack. Place your template with the spine along the fold. Trace your template and cut. Double check that your placement and pages are as you expect. If so, trace and cut the rest of your pages.
Open each pair of pages and stack them. With a strong needle, pierce at least 3 holes in the fold. Try to make them equidistant with the middle one centered on the spin. Refold the pages in pairs of triples. For each grouping, sew through the holes. Stack your folded pages on top of each other with the folds and holes lined up. Sew through the threads snugging the pages together. I recommend watching a video or two on simple booklet binding for this as I know my description is clear as mud.
Place the paper pages on the back cover. Center as desired. Secure the paper spine to the cover at the edge or just in from the edge.
Place the front cover on top of the paper pages. Bind the covers together using your favorite FanU technique.
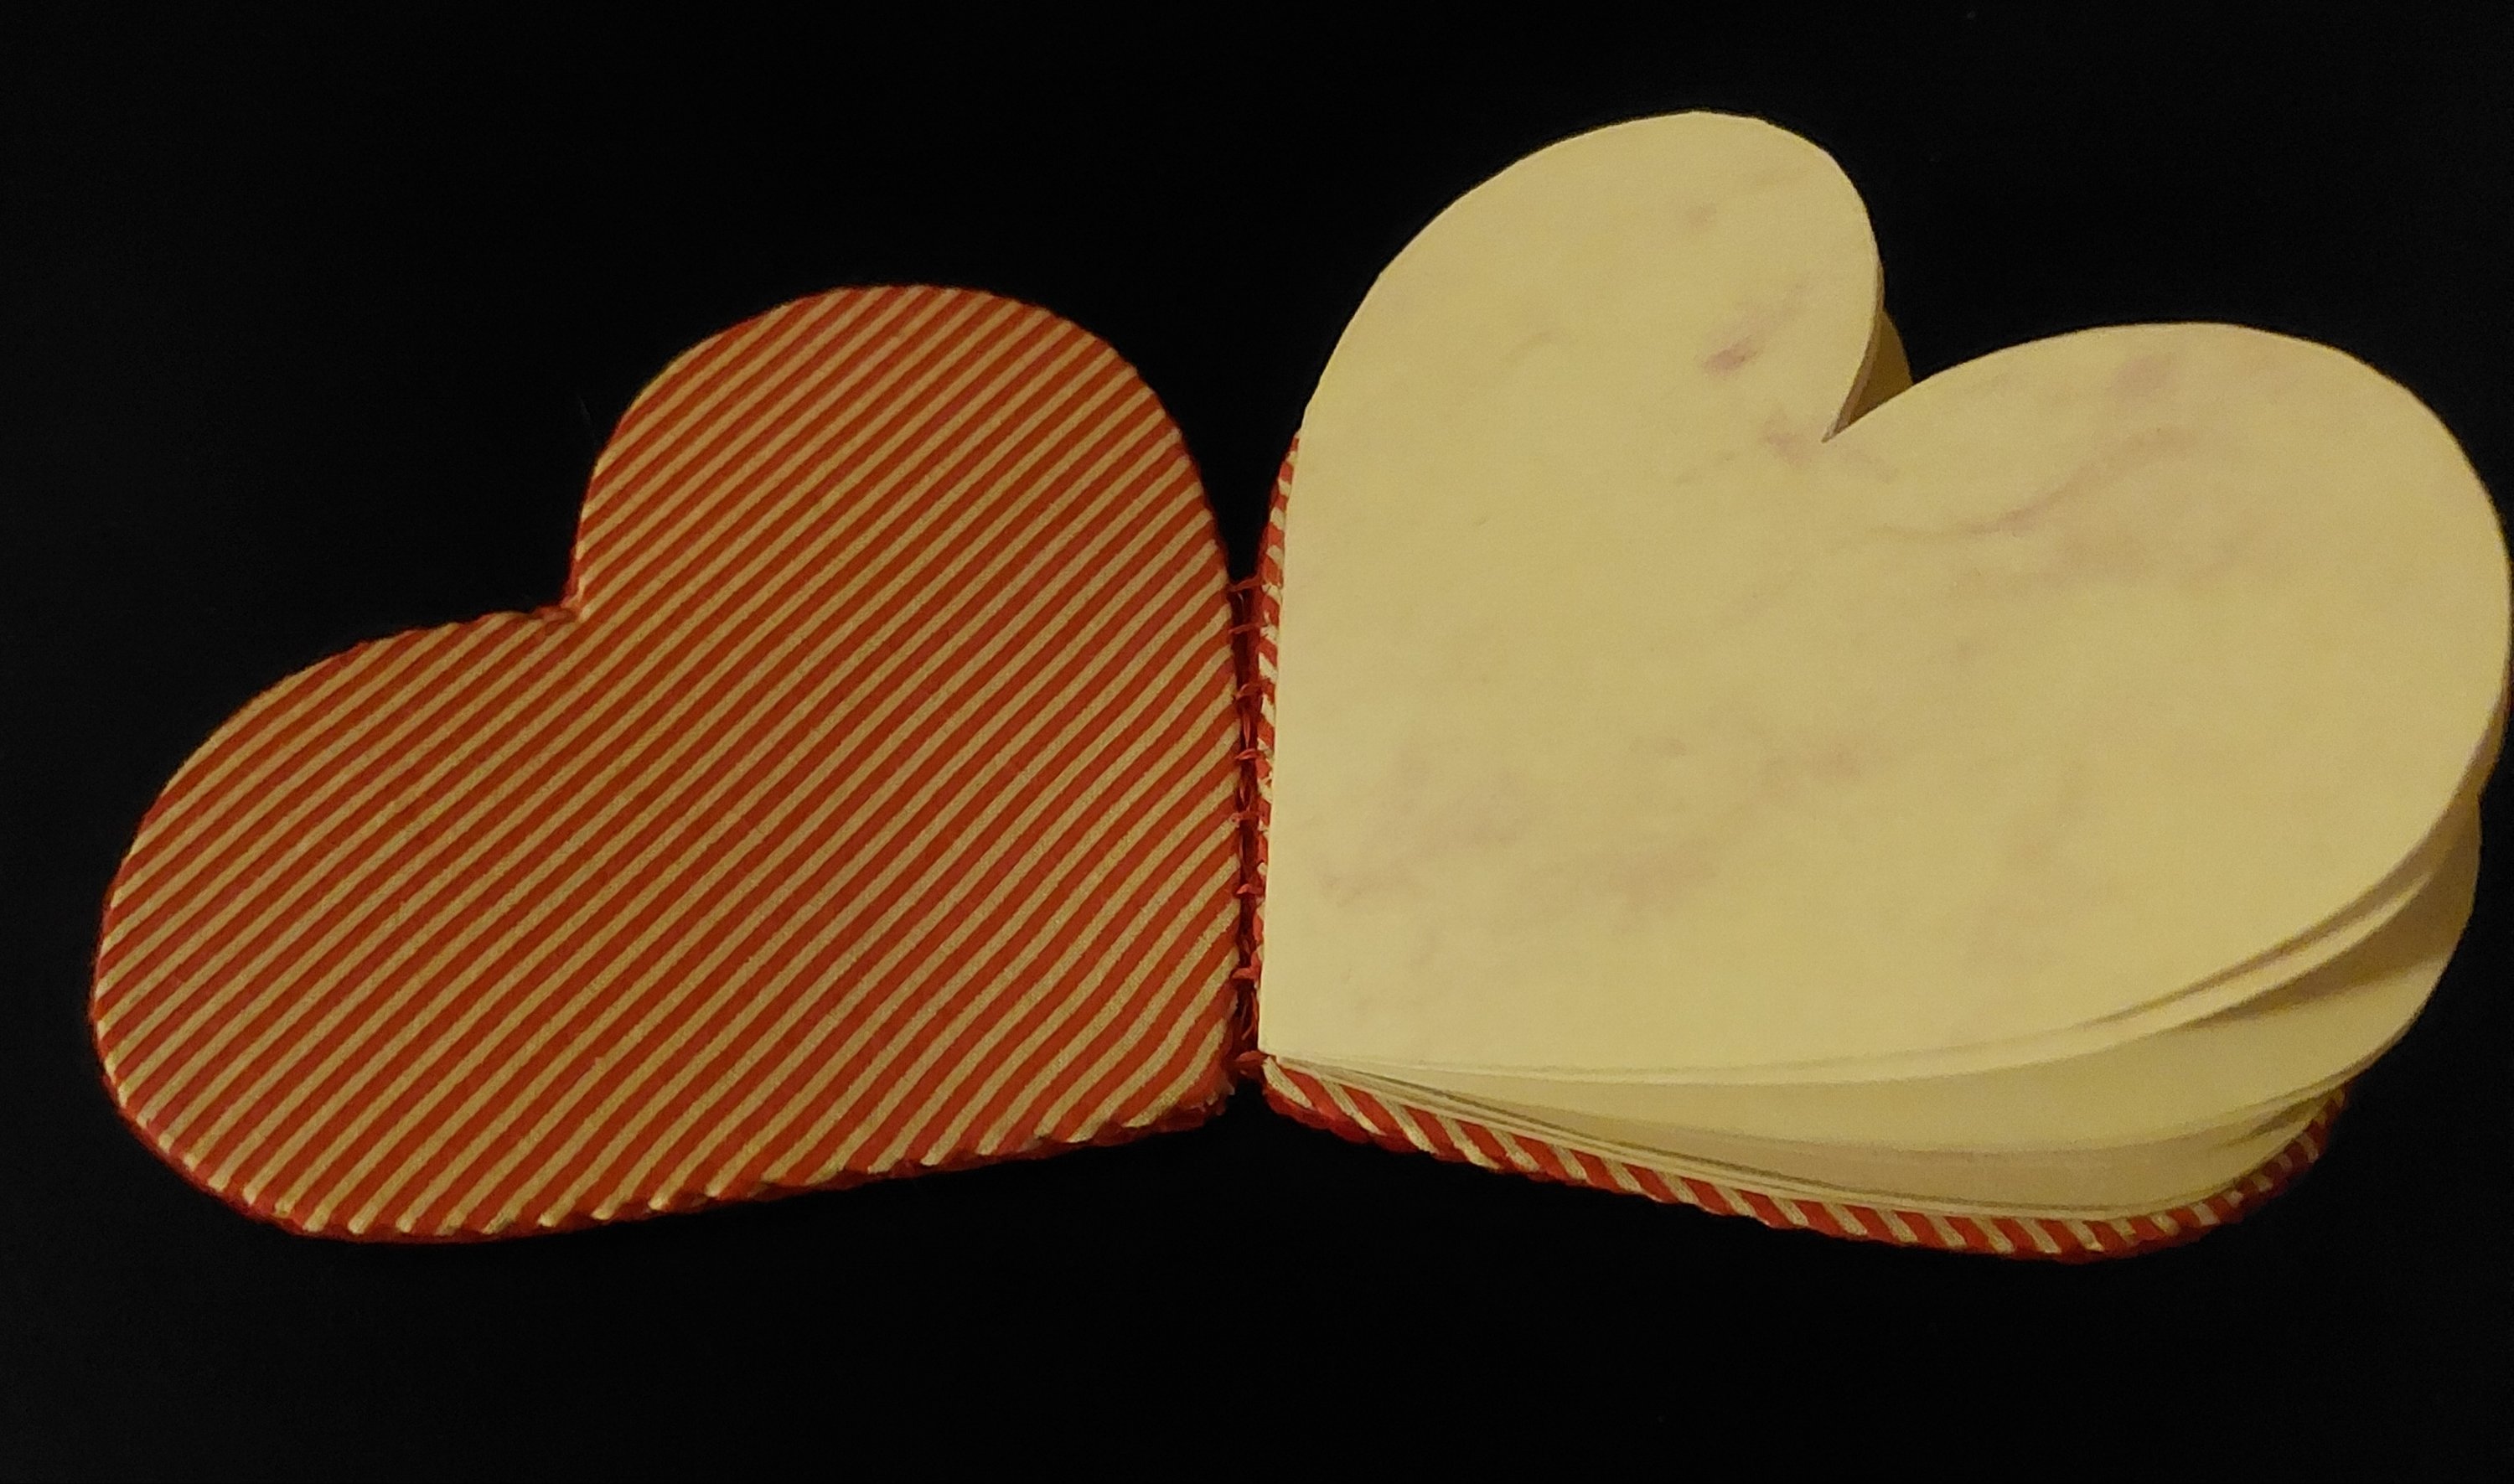

You can embellish as desired. Consider a ribbon to tie the book closed, embroidery on the cover, or beading around the edge.
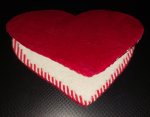
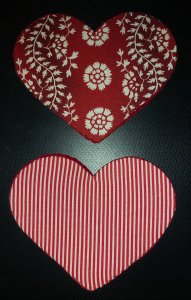
To make a heart shaped needle-book you will need: pasteboard, exterior fabric (silk, wool, velvet, cotton), interior fabric (silk, cotton), and thin wool for pages.
Begin by creating your own heart template. The extant examples I have observed are symmetrical hearts roughly the same width as height.
Using your template, cut 4 pieces of pasteboard the size of your template. Cut 2 exterior fabric hearts and 2 interior fabric hearts, adding a generous 1/2″ seam allowance. Fold your wool and place the top curves of your heart template on the fold, edges just meeting the curve. Trace the template on the wool. Using pinking scissors or a pinking machine, cut just inside the line. Repeat if you prefer 4 pages.
Cover 2 pasteboard hearts with exterior fabric and 2 pasteboard hearts with interior fabric using your favorite Fanciful Utility technique. Pair the front and back covers. Whip stitch around the edge.

Place the covers together. Create two hinges at the top curves of the hearts.
Place the wool pages inside the covered hearts, lining up the fold with the hinges. Stitch in place. (Embroider the pages prior to inserting if you wish.)
Embellish your heart needle-book with a ribbon closure and/or embroidery if you wish.

I feel like I’ve lost touch with where history minded people are at with their plans for the coming year, both museum interpreters and reenactors. I have been focused lately on some rebalancing for myself and some projects for myself. So, this out-of-touch feeling is both a good and a bad thing.
I would love to hear what you have in mind for your coming season…. What are you looking forward to? What are you working on? What are your goals? Are you working on something important to you?
Also… Are there any new, local projects or exhibits you would like me and/or readers to know about? Any trends you are noticing?
Please share in the blog comments.
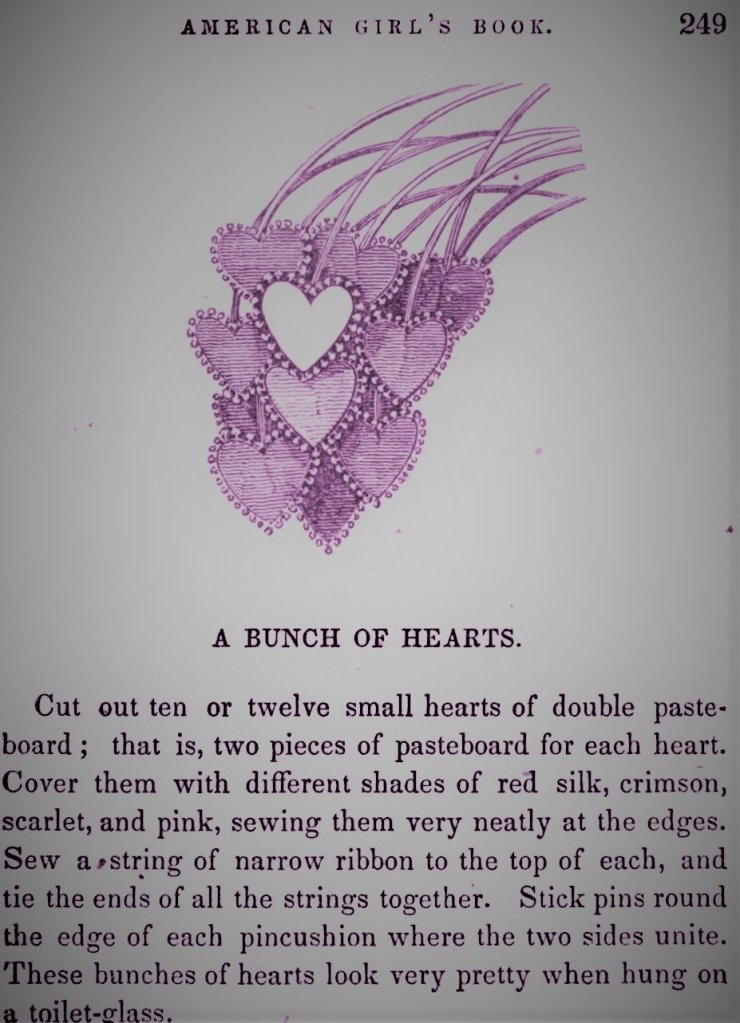
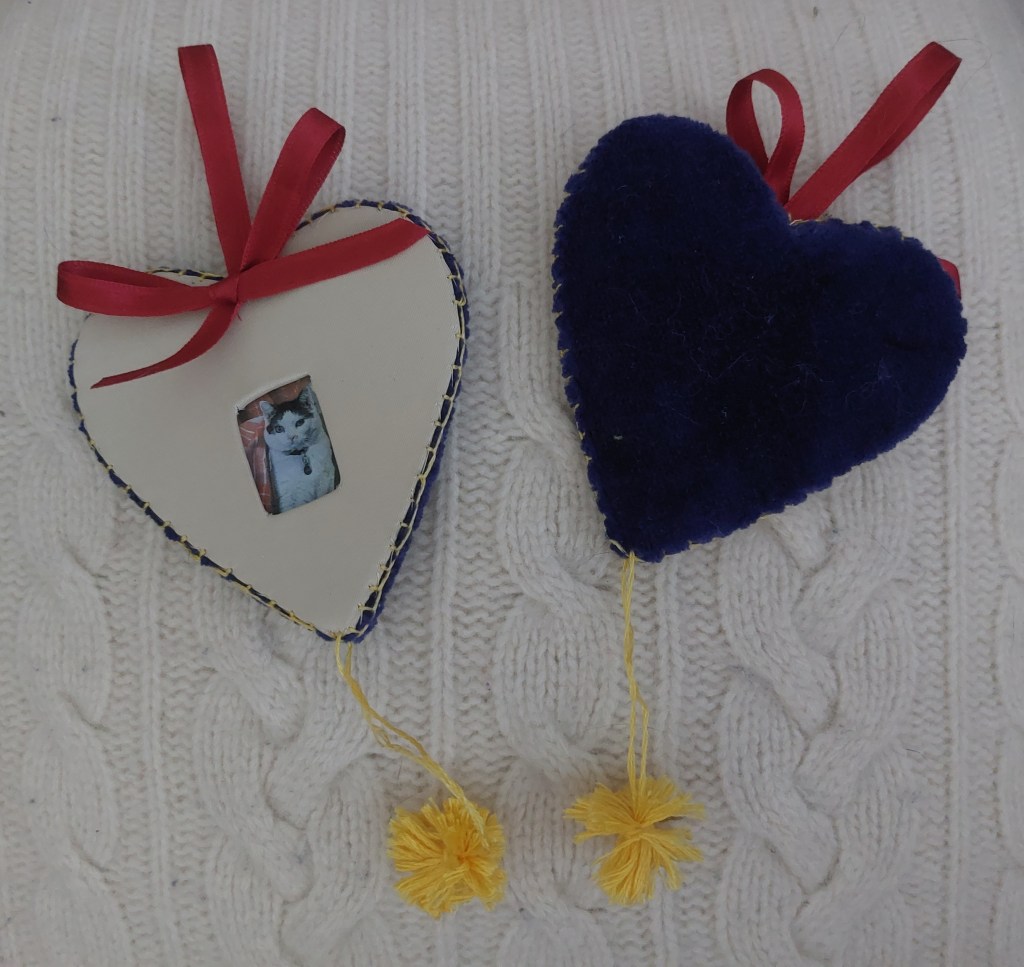
Today’s Heart filled post is a twist on a playful Bunch of Hearts from An American Girl’s Book and a book marker from Peterson’s Magazine.

In this sweet project, Leslie originally calls for covering a bunch of small pasteboard hearts to be hung as a decoration. The illustration screams “bookmark” to me.

This book marker comes from Peterson’s Magazine. It is made of two lengths of ribbons decorated to taste.

To make my version, take a length of ribbon, approx 2 feet, and cut it into two pieces one slightly shorter than the other. Fold each ribbon in ‘half’ so you have four different lengths at the ends. Lay the folded ribbons on top of each other with the folds together. Tightly whip the folds together with tiny stitches. Embroider the ribbons to taste. Use pieces of fabric to make the crosses (in Peterson’s or hearts in the case of mine) at the ends of the ribbon.
(Sorry, this is a super short post today because my Monday didn’t go as planned. I ended up getting home too late to finish & photograph the pieces for the post I planned.)
Today’s Heart filled post is a twist on a playful Bunch of Hearts from An American Girl’s Book. In this sweet project, Leslie originally calls for covering a bunch of small pasteboard hearts to be hung as a decoration.

This (right)

illustration screams “bookmark” to me.
This book marker comes from Peterson’s Magazine. It is made of two lengths of ribbons decorated to taste.
Take a length of ribbon, approx 2 feet, and cut it into two pieces one slightly shorter than the other. Fold each ribbon in ‘half’ so you have four different lengths at the ends. Lay the folded ribbons on top of each other with the folds together. Tightly whip the folds together with tiny stitches. Embroider the ribbons to taste. Use pieces of fabric to make the crosses (in Peterson’s or hearts in the case of mine) at the ends of the ribbon.
(Sorry, this is a super short post today because my Monday didn’t go as planned. I ended up getting home too late to finish & photograph the pieces for the post I planned.)
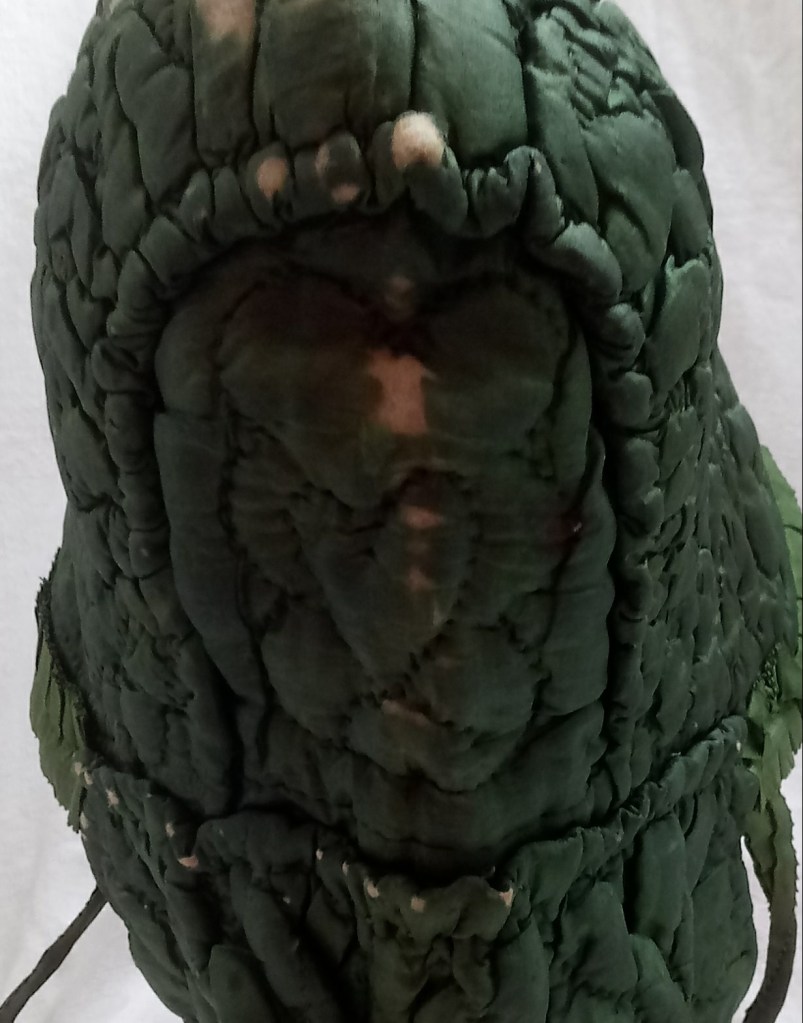
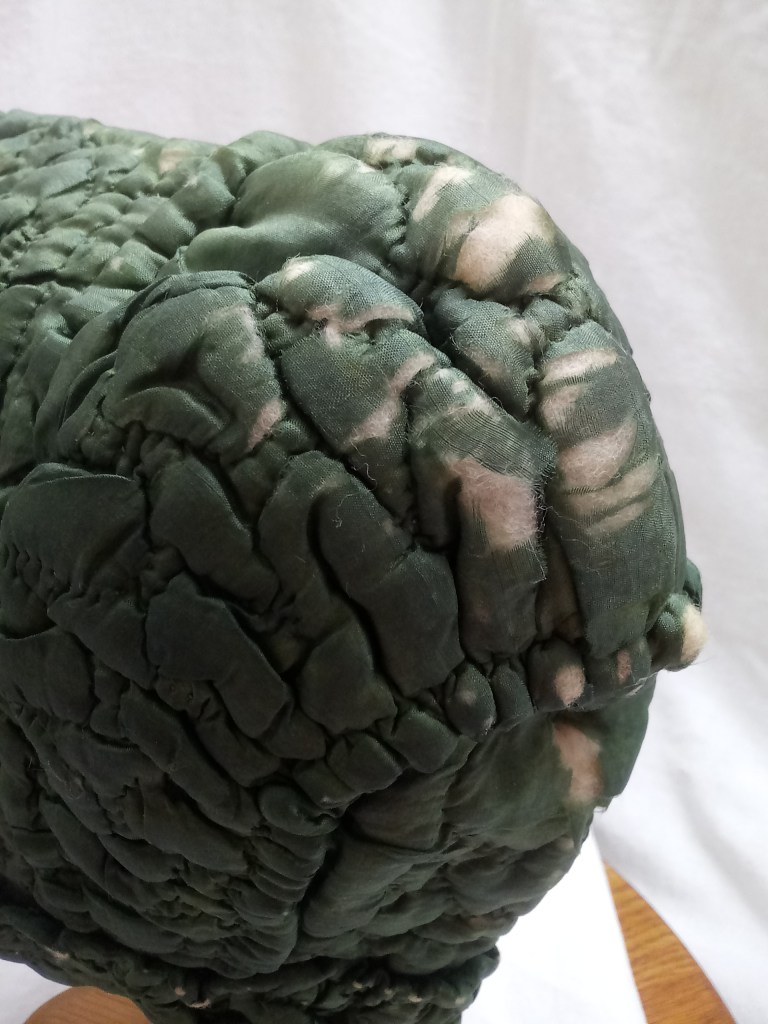
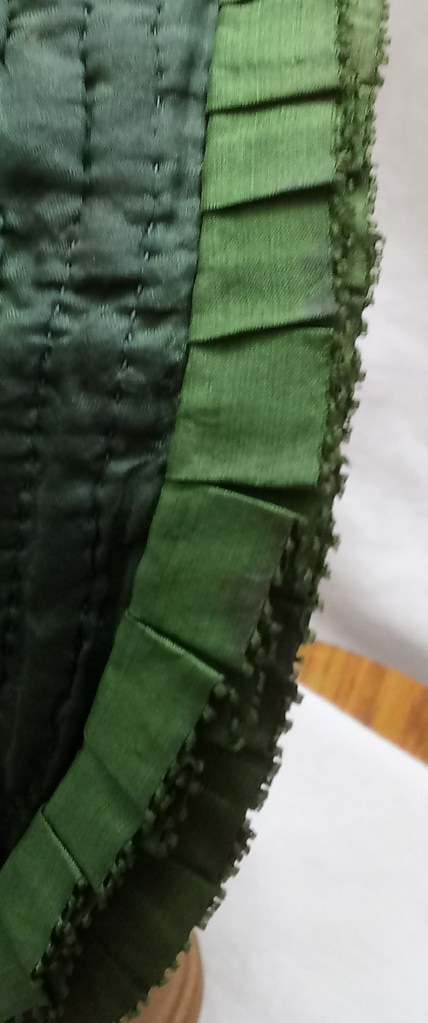
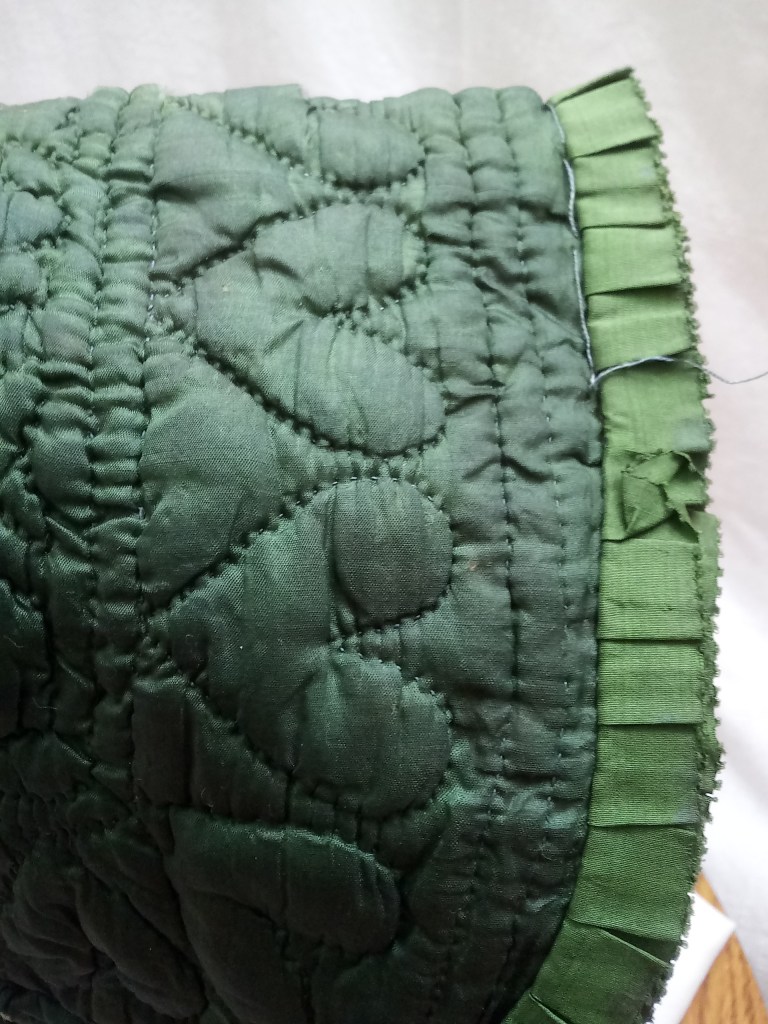
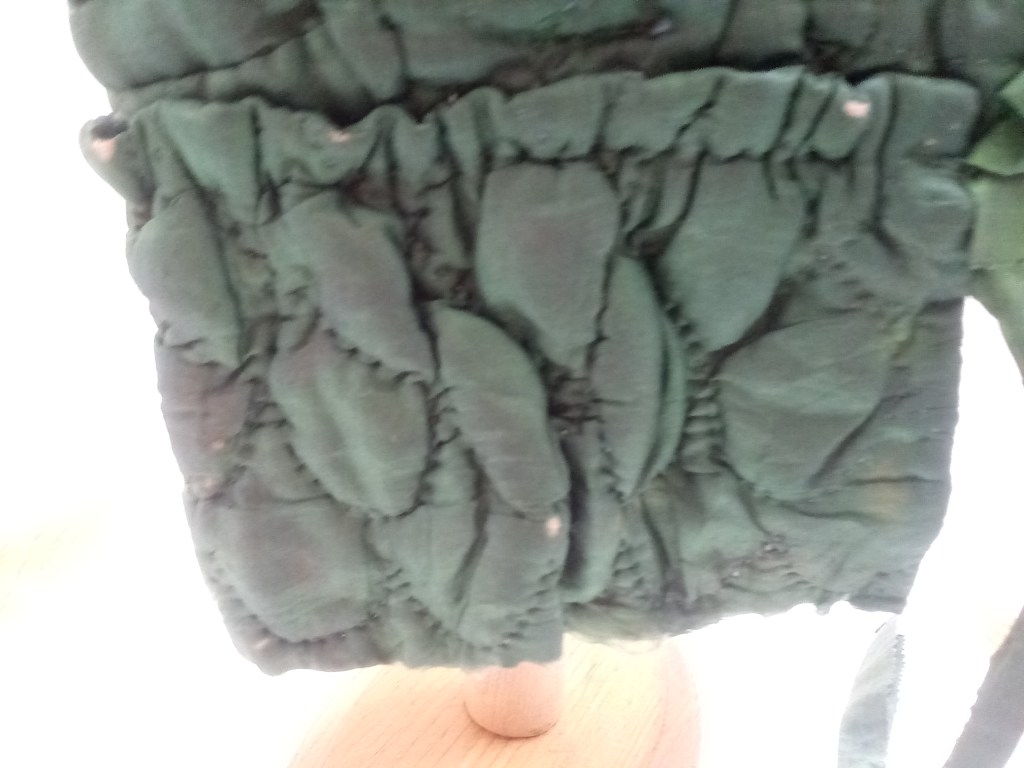
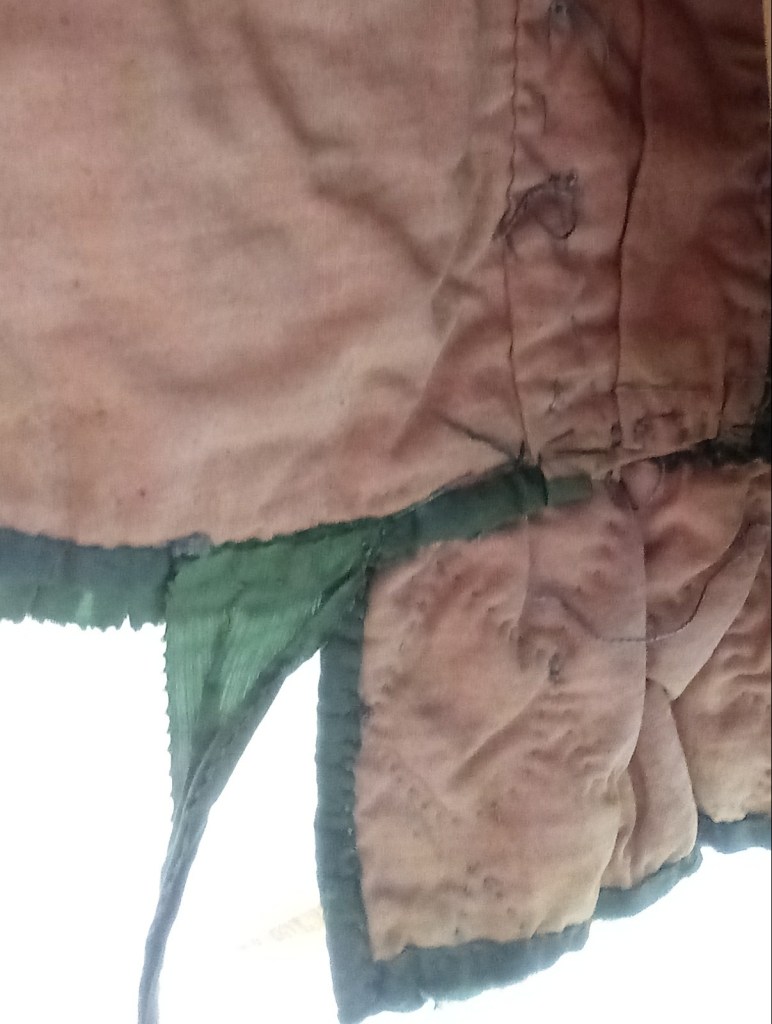
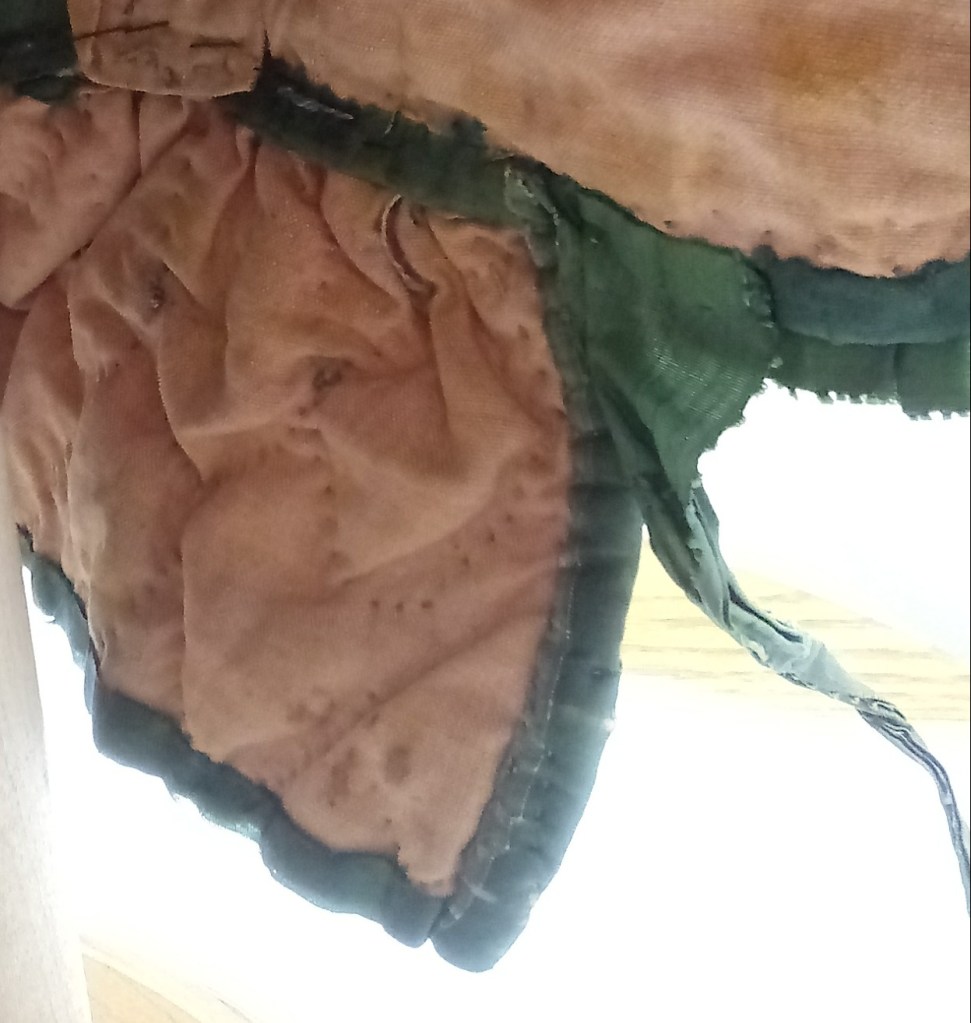
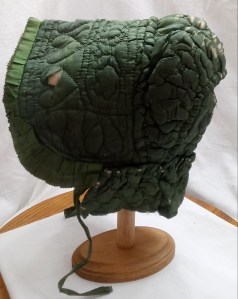
Today’s heart filled post looks at a silk winter hood quilted with hearts.
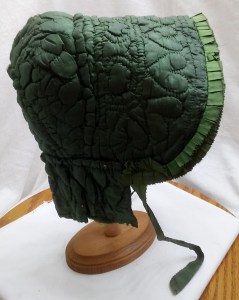
This child’s winter hood is quilted is a sweet heart motif. Hearts circle the brim and center the back of the crown, while scallops fill the bavolet and a double circle motif finish the brim. The green silk taffeta is nearly tissue taffeta soft. While not being overly dry, it has numerous wear spots from storage the pink interior is a medium weight solid cotton.
Construction deviates from the most common brim, crown, and bavolet by using a two piece crown considting of a central horseshoe shape and a crescent arch connecting it to the brim. This creates a nicely shaped crown with less bulk. This also shows off the quilted hearts in the back.
…
…

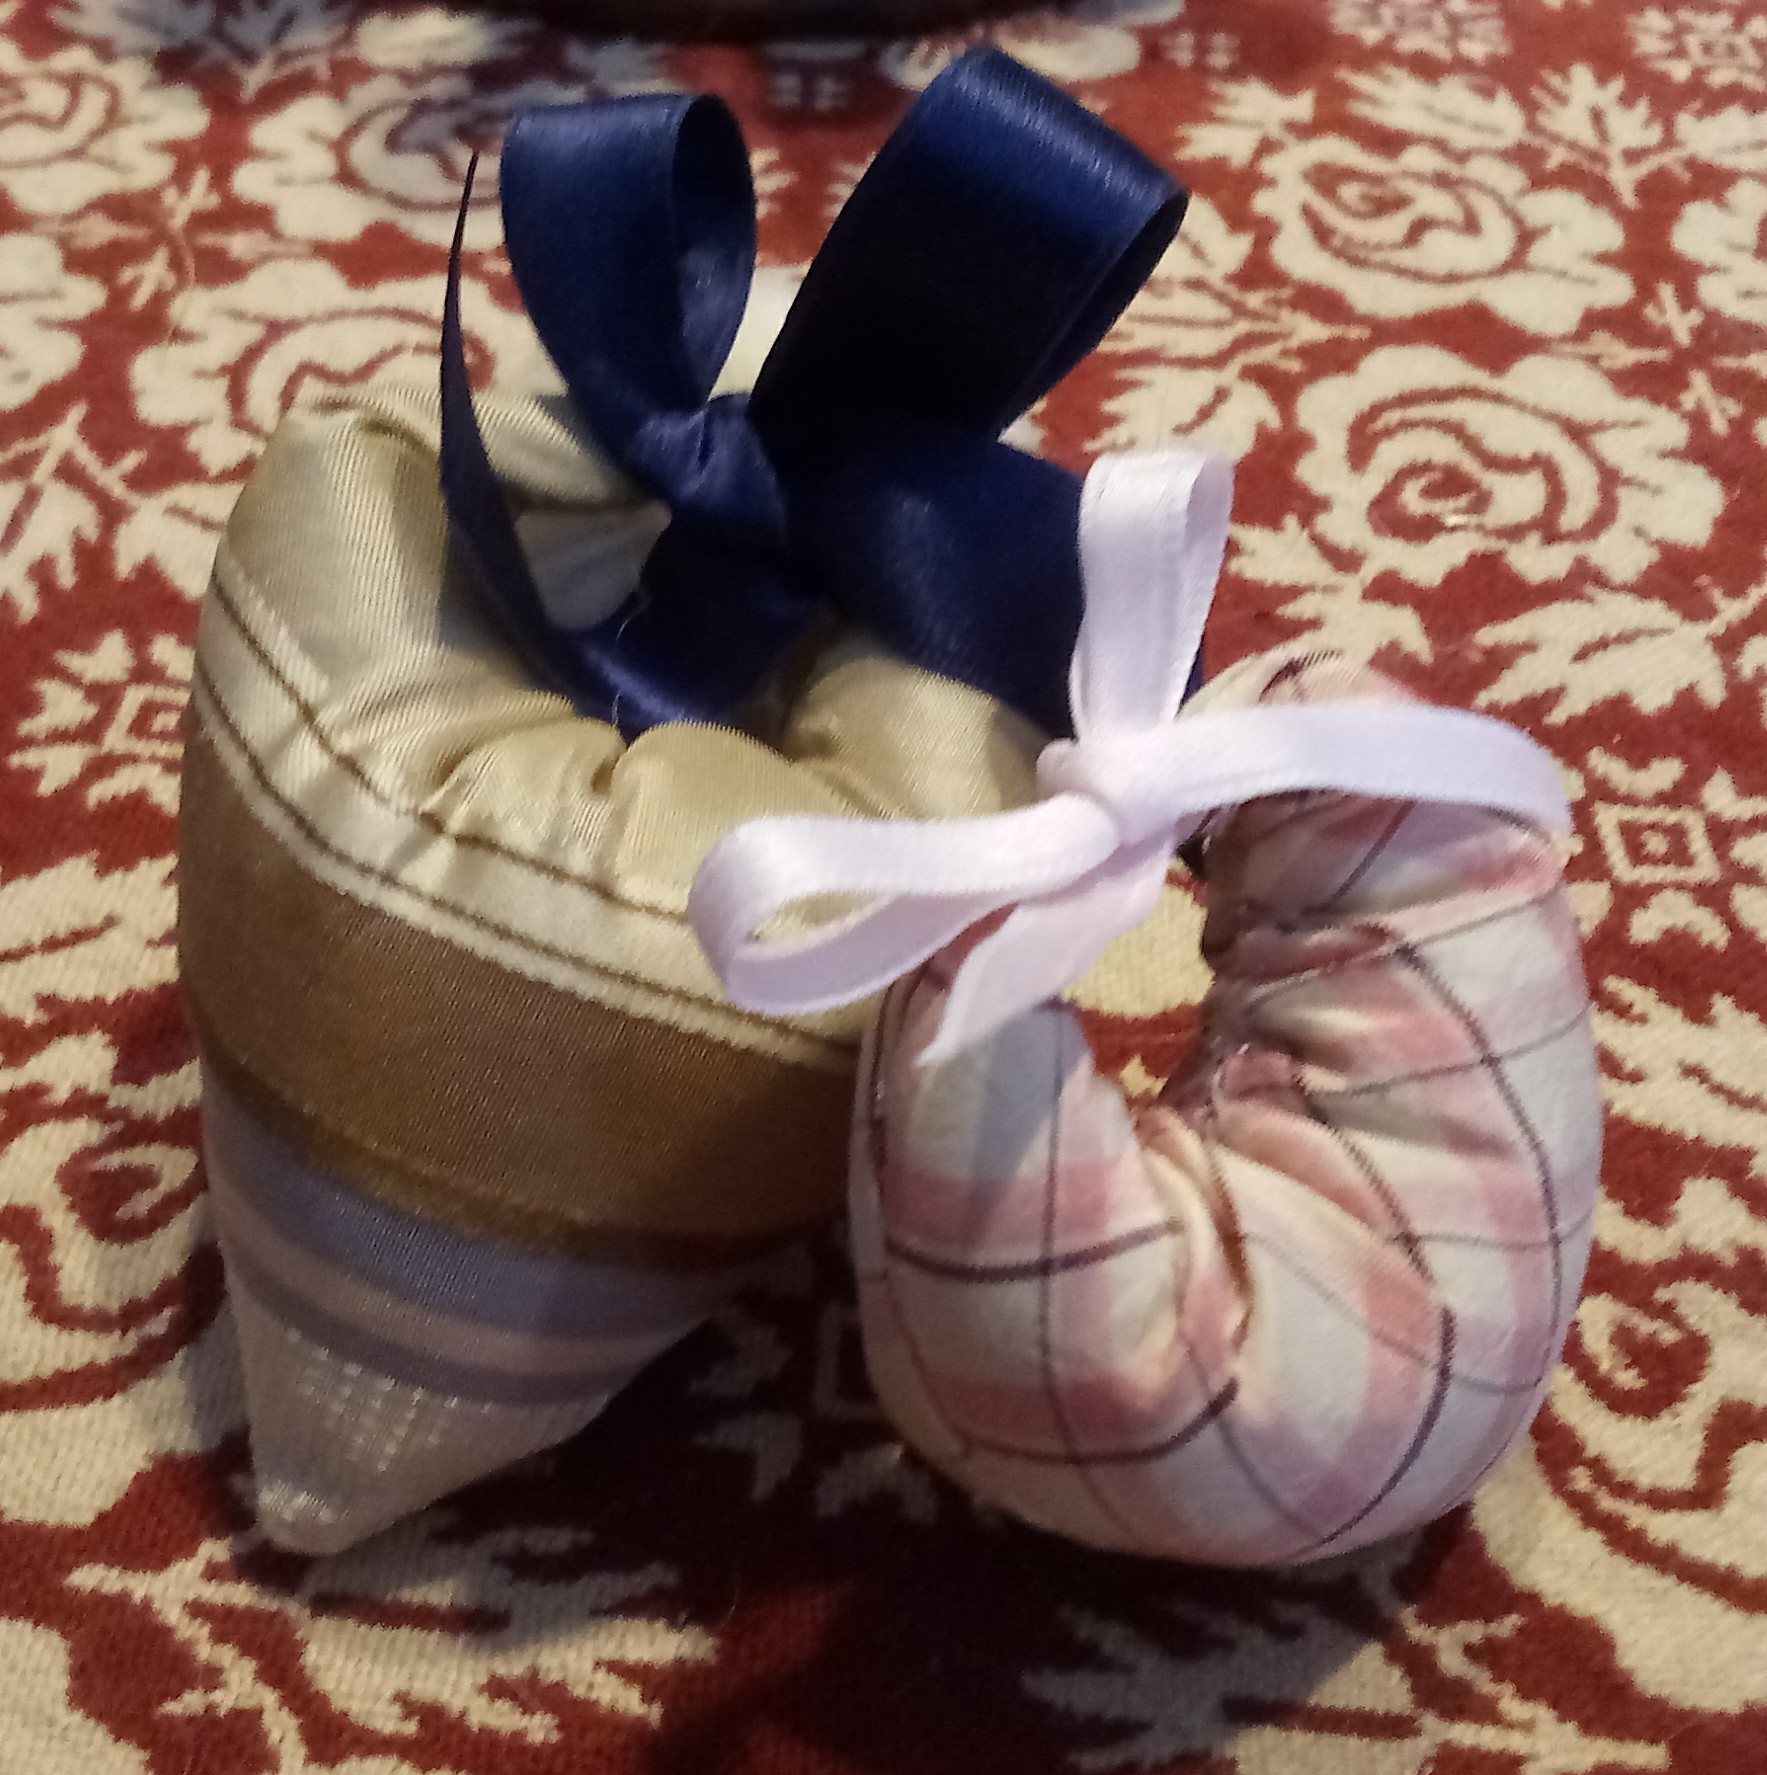
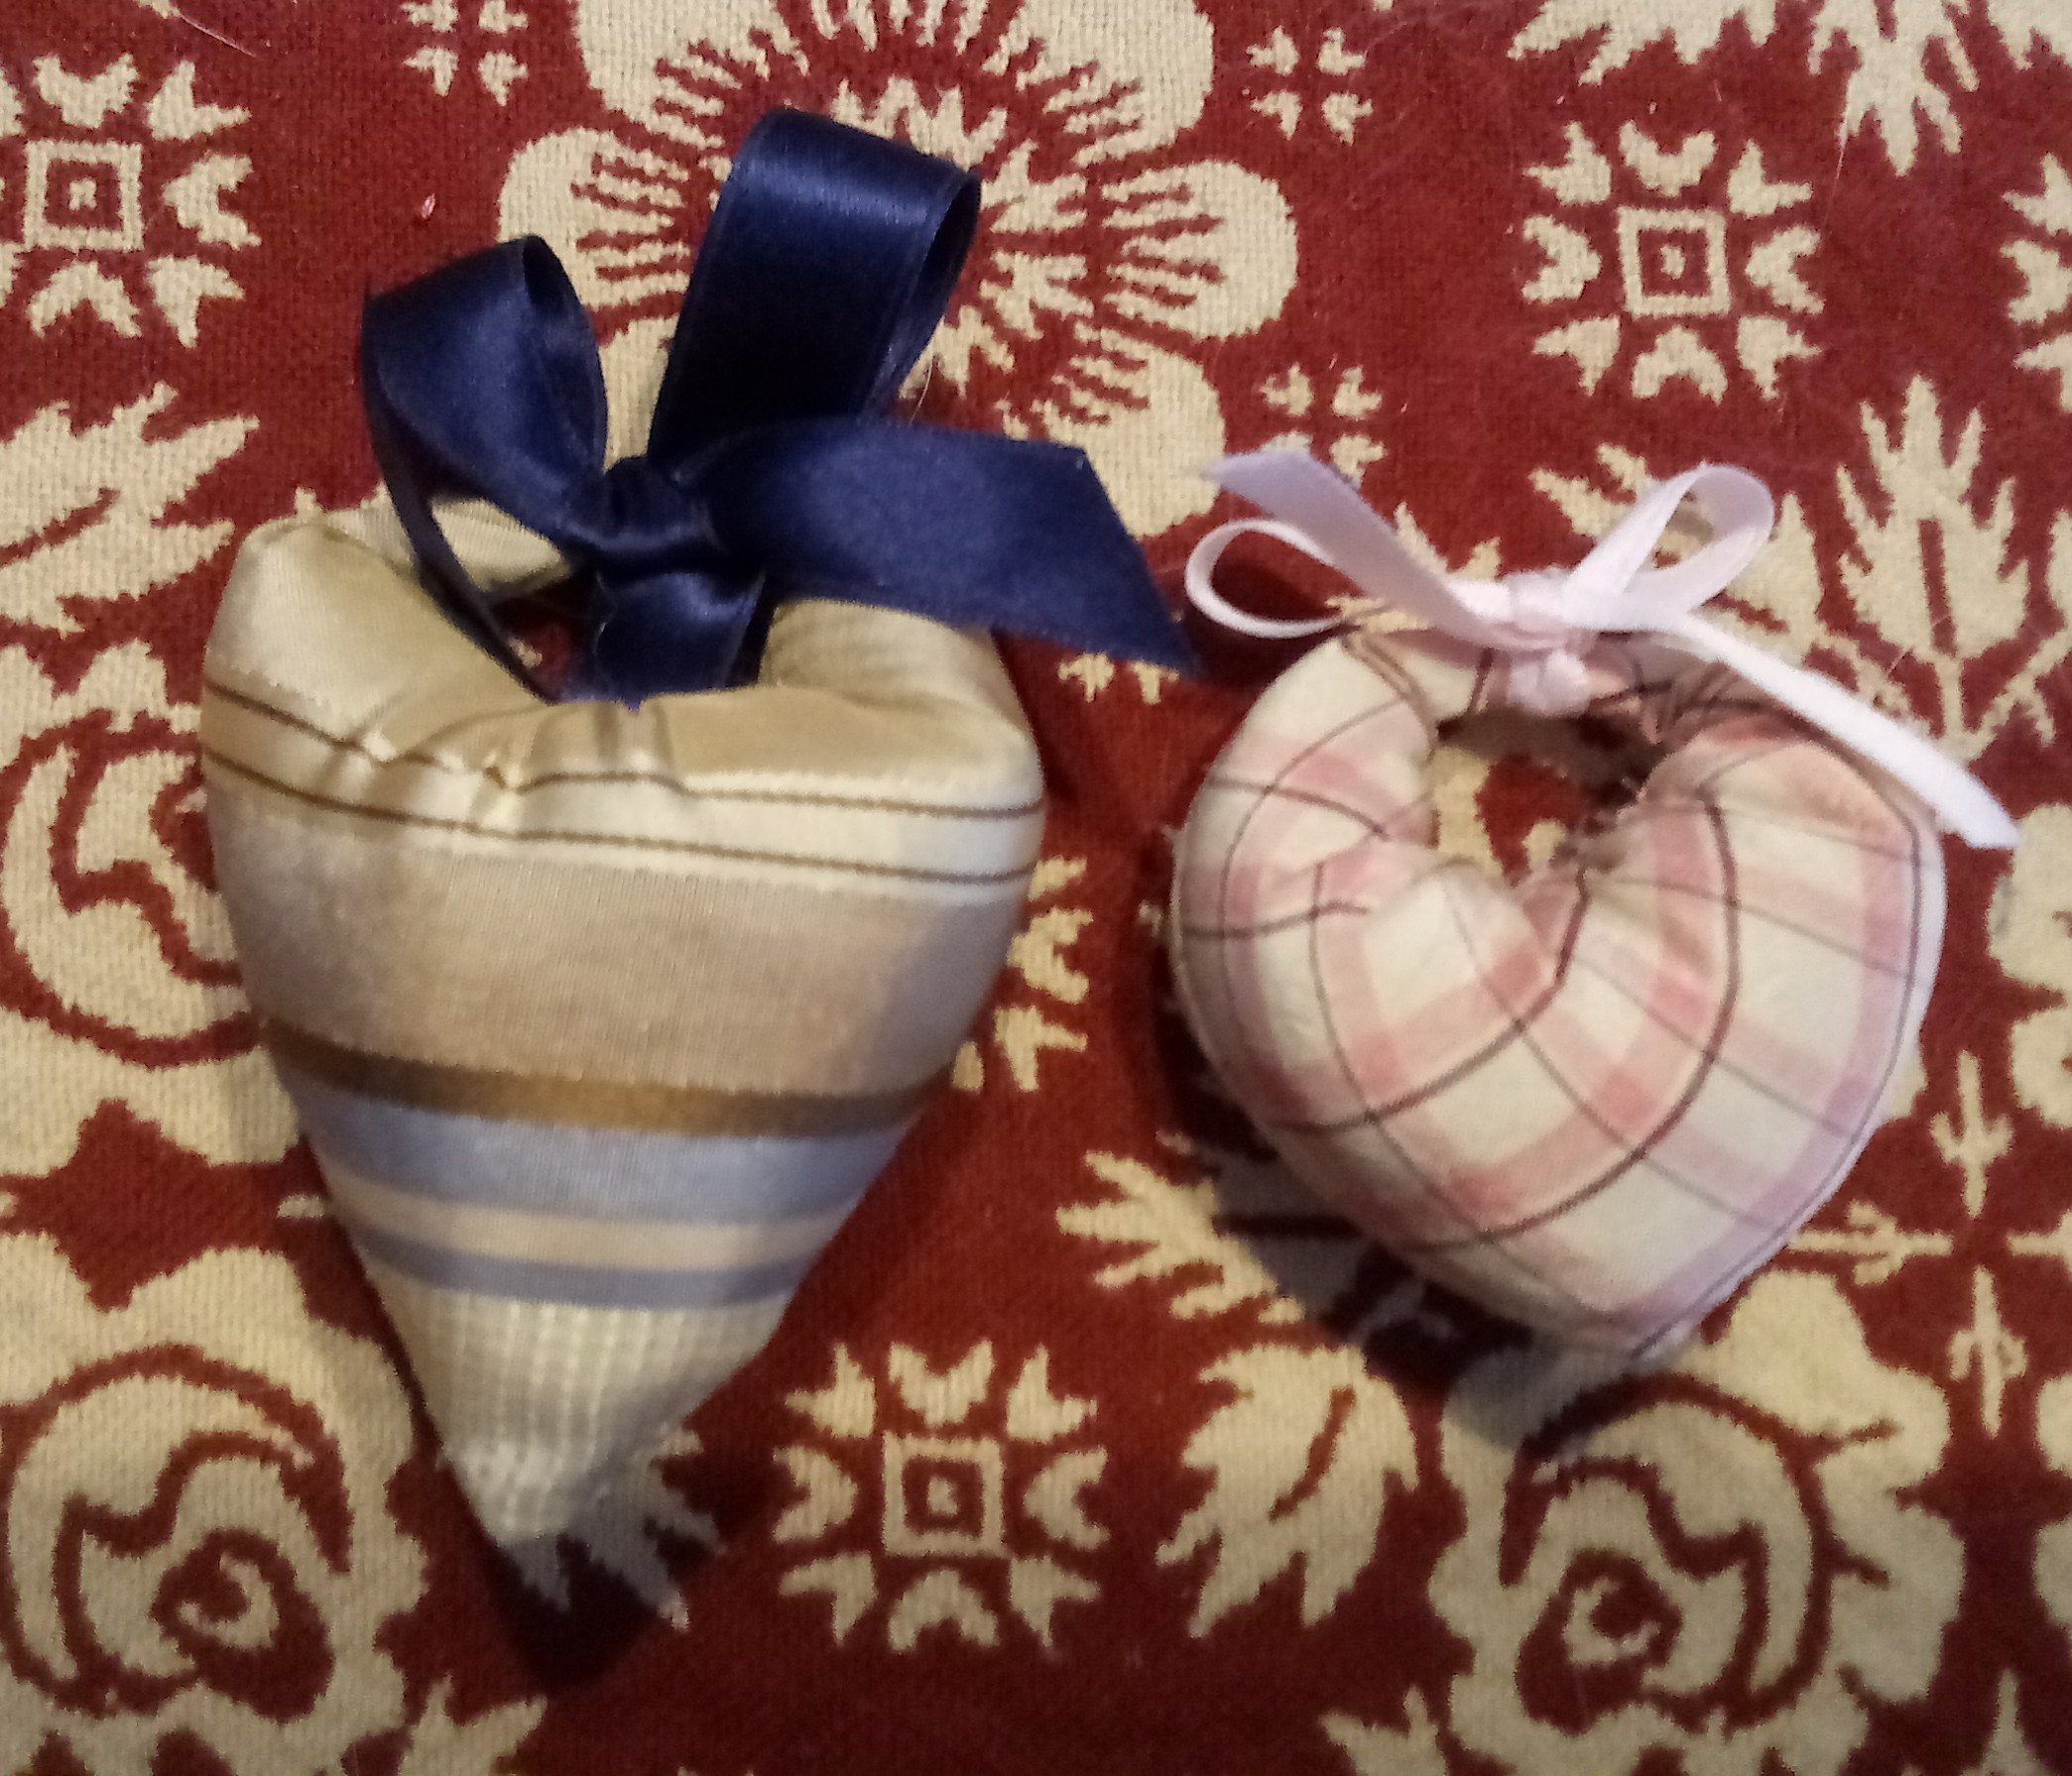
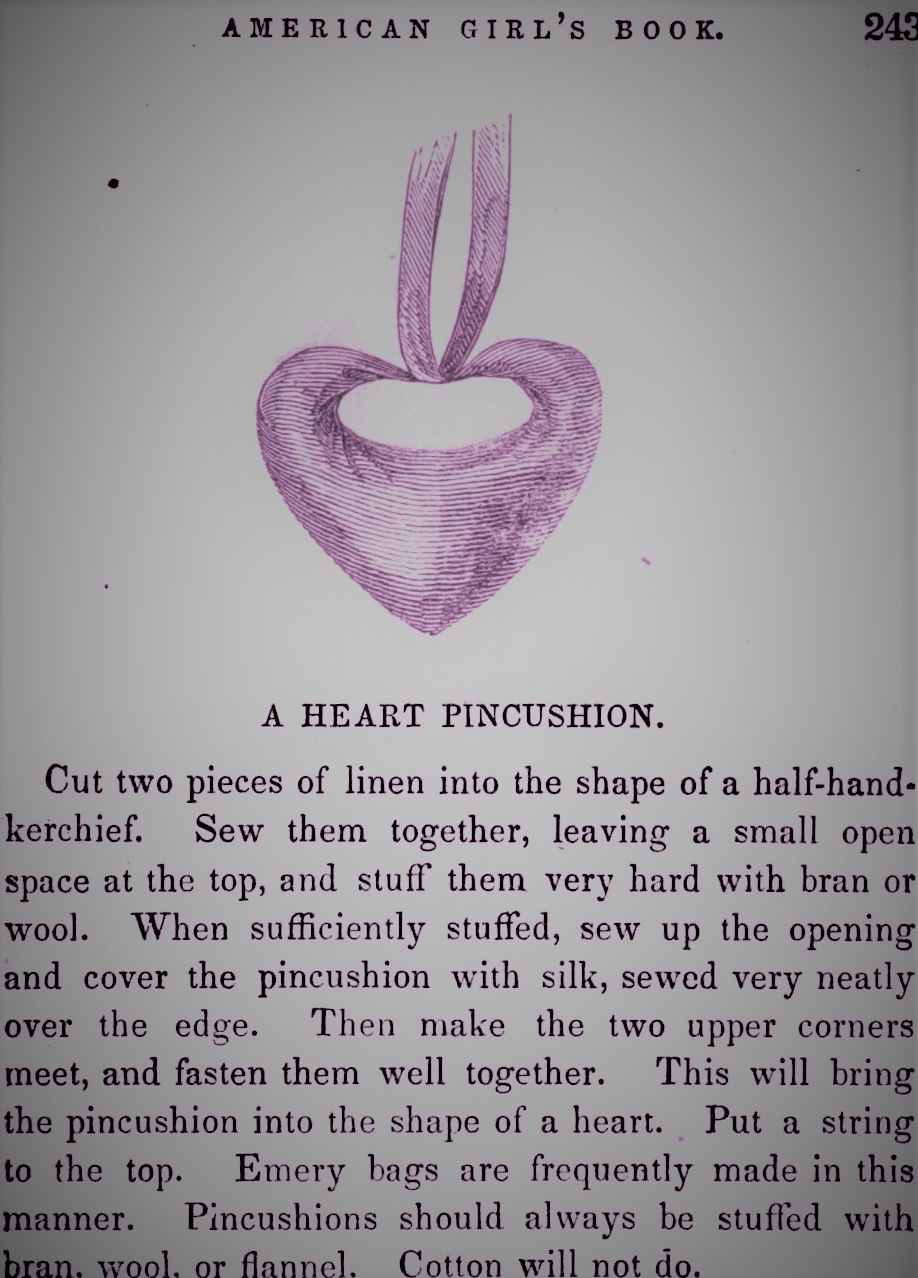
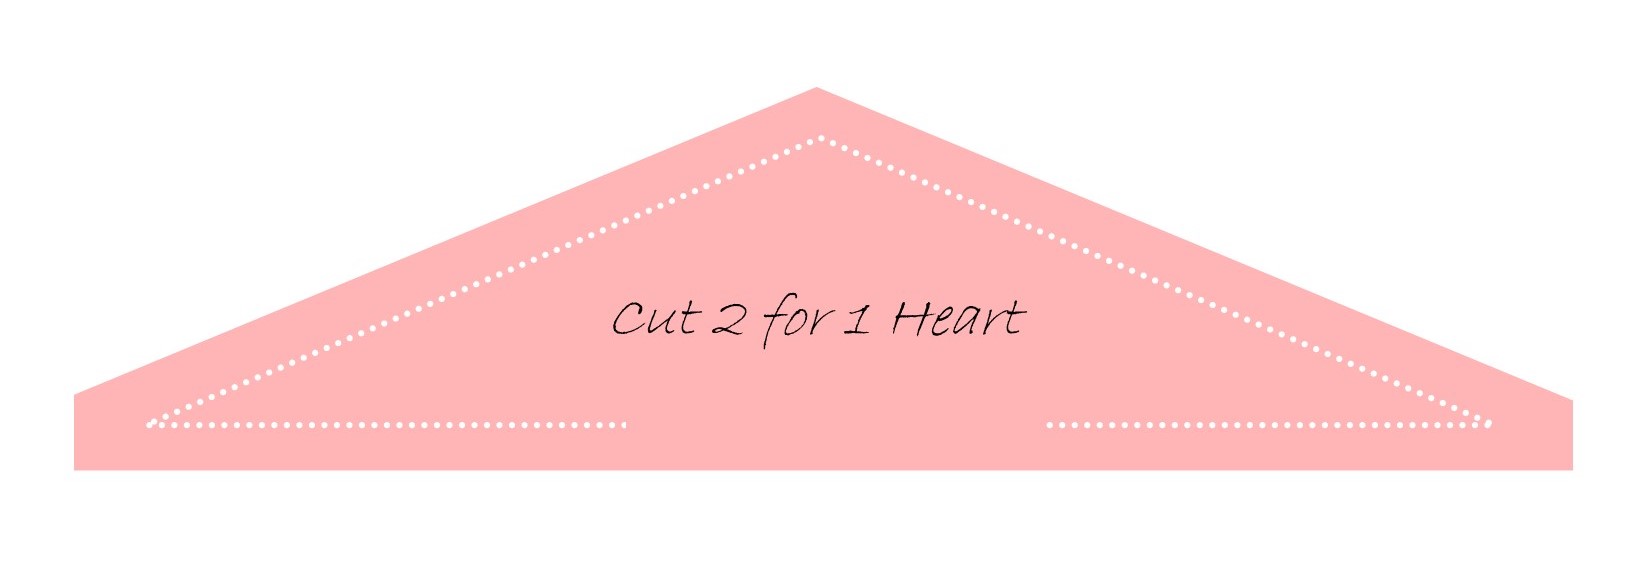
Today’s Heart filled post flashes back to my 2020 Community Cast Series with a video on how to make a favorite pin cushion from An American Girl’s Book.
Materials:
My hearts from the video:
The original directions:
Guide for your triangles:
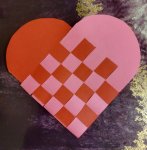
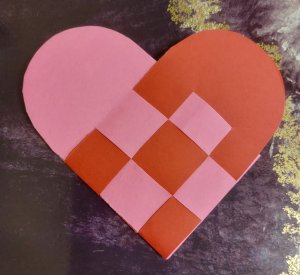
In high school we learned to make heart shaped paper baskets by weaving two rounded rectangles together. They were a fun little craft that played with geometry. Some time later, I used the same principle with wool to make woven heart ornaments. The internet now tells me these woven paper heart baskets have Danish origins.
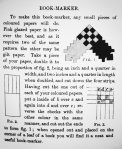
While reading The Girl’s Own Toy-Maker, 1860, I saw this illustration (top right) and couldn’t help but notice the similar construction. This book marker is made by weaving two folded rectangles together. The ends of these rectangles are cut with notches or angles rather than a curve. The pocket created slides over the corner of a page. If the book marker was rotated point down, I still see a heart.
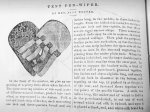
Marna found this pen wiper (right) from eleven years later Peterson’s Magazines. The shape is very much that of the paper baskets from high school. This time the wove heart is made of red and black leather, then filled with leaves of double muslin.
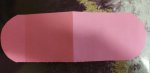
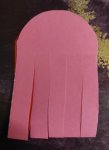
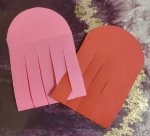
You need 2 pieces of paper in different colors. Standard printer weight or scrapbook paper work well. Firmer paper is harder to weave. Lighter, delicate paper tears while weaving. Two 8.5×11 sheets of paper can make 4 hearts by dividing each sheet into 4 pieces 8.5″x2.75″.
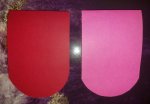
Fold each piece in half length wise. Round the ends as such:
Take one of each piece folded.
Lay them together, on top or inside each other. Cut strips up from the fold about 2.75″. Cutting a smidgen too far works better than too short.
Starting with the inner most strips, weave them in and out of each other. Note, this is weaving them as loops not just as folded strips.
Continue weaving the loops until finished. Tuck in your book.
Look what a friend found! This exca ple has an 1867 date. https://www.etsy.com/listing/1284976805/antique-woven-paper-heart-friendship
Are you one of the many readers enjoying my millinery blog posts?
Consider becoming a Patreon patron. Doing so helps support my work and helps me write more useful articles.
https://www.patreon.com/AMillinersWhimsy


