Fiber Arts Week at GCVM – Demos

What does one do with a four day weekend in the midst of high stress exam planning?

Escape to the 19th century of course!

When I was asked if I was interested in doing a demonstration for Fiber Arts Week, I don’t think the person asking had a clue just how much the answer was “Yes. Please!”

I spent Friday and Saturday in the diningroom, aka old kitchen, of Jones Farm.

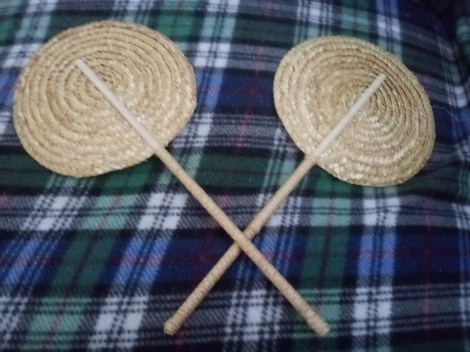
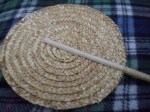
My workspace turned out to be ideal, especially for Friday when there were a few school groups in attendance. I discovered the room can functionally fit not one, not two, but three field trip groups from different schools. At one point there shy of 30 fourth graders encircling the table. I am somewhere between surpised and quite pleased with myself that I captured the attention of that may minds with straw hats and women’s work.

decided to focus on Regency era pieces because this left me prepare for the coming 1812/Jane event in June, and allowed me to wear my uber-comfy sacque/petti combo.

I made friends, sorta, with one of the more people curious chickens.

I rather enjoyed watching the chickens between visitors.

On the walk in Saturday morning, I met Ms. Sparrow of Oxbow Lane.

As you can see, it was quite sunny just prior to 10 am. Shortly after 10, it looked more like this:

This continued for about 2 hours, ending around noon. It was about 11 when I did this next video.

At this point my arms hurt. I really wasn’t sure if I was going to be able to sew through the day. I was wishing I had brought my wristlets so I could have hid my Salanpas pain patches underneith. I eventually figured a way to wrap my shawl ends around my my forearms/wrists. Then noon came. Sun came. Warmth came. And, I realized my arms didn’t hurt any more. I don’t know if I have a new weather forecaster, or if they have become that cold and damp sensitive. But, wow!

I do have to say, the rain was perfect napping weather.

If only I was good at napping.

Instead, there was sewing to be done.

By the end of Saturday, I sewed two 1818 bonnets. These need to be blocked and wired at home. In the 19th century this would have happened at the factory.

Stay tuned” for two more posts from this weekend looking at cheese making and quilting interpretation.

Published in: on May 25, 2019 at 7:38 pm  Leave a Comment  

Straw Fan Experiment

Several weeks back, a friend posted links to hand fans made out of palm and straw. These were each found in the in the American Civil War Museum. They appear to each be homemade with a disk of straw or palm woven or sewn and a spindle handle. Details of each construction varied as did finishing.

Of course the straw aspect intrigued me. I wanted to know how functional this design would be and how comfortable one would be to use.

I created a straw focused mock-up using coarse while plait straw, a quarter inch dowel, and 4mm fine straw plait.

Each of my disks are 7″ in diameter. There is definitely a right side and a wrong side. The handles are slightly longer than the originals, being 12″ for the full dowel length.

I do not like the look of the plain dowel, which was split in half lengthwise. The turned spindle handles oc the originals are much prettier. The dowel is what I had in hand for this experiment. If I do another, I will be looking for a prettier handle.

I do like the look and feel of the straw wrapped dowel. One is wrapped from the disk down. The other is wrapped from the end up. This area has an extra strong layer of sizing applied. I do think I need to stitch down the end of the one wrapped down as those ends did not have a place to secure them.

Summer use will be telling for these handles. I anticipate sweaty hands will soften the sizing and straw causing them to loosen.

I tested out the fanning factor on Sunday when it was warmer out. I was surprised to find the relatively small disk creates a good breeze when combined with the long handle.

ADDITION: This is just an experiment to understand the straw aspect of these. I do not plan to make more of these for sale.

Published in: on May 20, 2019 at 4:08 pm  Comments (2)  

Unboxing

After missing my chances previously, I am so excited I finally got to order on of Family Heirloom Weaver’s fabric bundles.

I have a few ideas about what I might make: I could make a pair of runners, one for the dolls shelf and one for the coffee table trunk. I could make a couple big strawberries. I could make some really pretty pin cushions. I could have a nice set of pillows. A pretty pair of Christmas stocking would be an option. If I was really feeling creative, I could make a pretty bear from my birthday bear pattern.

What would you make?

Published in: on May 13, 2019 at 5:13 pm  Leave a Comment  

Wardrobe Essentials

I indulged in purchasing myself some wardrobe essentials.

First…. I learned something recently. There are things I am good at. There are things other people are good at. I don’t have to be good at everything. It is okay for me to have others make the things I am not good at making.

Things I do not make for myself:

  • Collars
  • Stockings
  • Shoes/boots
  • Knit goods

Collars are the newest addition to this list. Going from the sewing need for straw to the fine sewing for a rolled hem just doesn’t work well. I end up with the wrong tension and a wonky collar.

I gave myself permission to let someone else make my collars. To my delight, and sanity, Marie makes the most lovely collars. These are beautifully sewn. The material choice is just lovely. And…. I am smitten with the lace! The plain collar is for my red plaid cotton dress. The lace edge collar is for my yet to be made pink silk dress.

Second….. You’ll have to follow me on this one. I started noticing last fall that my white side lacer boots were starting to wear along the lacing area. Upon closer inspection, I discovered the material binding the lacing opening was not leather. I was rather disappointed to find this because I find these boots to be very comfortable and enjoy wearing them. My concern is that if this sub-par material was used, what will happen with the rest of the boots? (Don’t worry, this is not a seller you can mistakenly buy from. While I don’t recall the name, I know I bought one of the last pairs before they closed their store.) While, I probably will just rebind this area with ribbon, I knew new boots would be needed.

Ideally, I could replace them with a well made side lacer. My dream wish boot has long been Robert Land’s green side lacers made many years ago. But, considering he has retired and those were coveted boots, there is next to no chance of finding them. Let alone finding them in size 7.5 for my crazy wide feet. I decide balmorals would be nice as well. After all, I do love the wool balmorals that Land made me years ago before my feet got wider. So, winter crawls on by. I see people posting sizes too small. I see people posting sizes too big. I see some pretty worn boots posted as well. I join another costume group that has lots of shoes. Oh. The. Prices.

No luck.

Then last week, a pair of nice, never worn Sekala balmorals in a size 8 pop up. These would be made by my friend Samantha. I’ve tried on her shoes. They fit. They are well made. They are correct. Horray!!!!! Mine!!!

And then….

Just a couple days later…. what pops up in a costume trading group?

You have got to be kidding me….

My dream wish boots in my size….

Green, side lacer never worn Robert Lands!!!

For a fabulously low price!

I actually hesitated.

Am I crazy? 2 pairs of boots in the same year? I can’t do that!

But, I did….

The reality is both of these pairs will last me years as I most often wear them in a building and to/from buildings. I have other boots reserved for wet or mud.

(Pardon the partial lacing)

Now, Clara would like you all to know she finds the box and packaging to be far more interesting than the boots…

Published in: on May 10, 2019 at 4:58 pm  Comments (2)  

April Reflections

I started off April with some new ribbon and new CDVs. At least, I think that was still April. With winter lingering on, I am not quite sure where March ended and April began. But anyway, Ribbon… I lucked upon some very pretty vintage ribbons. Pinks, purple, blue, green, black…. and stunning stripe. The purple is oh-so-close, but not quite an exact match to some of the mourning pieces at the Wehle Gallery in the Victoria’s Closet Exhibit:

20190413_101047-1.jpg

Speaking of the Victoria’s Closet Exhibit, I was able to spend the day in the exhibit during the Sneak Peek. While guests got an early look at the collection of 1850s garments and accessories, I showed them how straw plait was sewn into hats and bonnets.

20190413_172453.jpg

This demonstration kicked off my “Spring Break” from school. I decided to challenge myself to offer a hat or bonnet each day of break. I did pretty well until I ran out of straw.

After I ran out of straw, I decided to make a velvet ribbon hairnet. After starting said velvet ribbon hairnet, I decided I don’t like making velvet ribbon hairnets anymore. Sigh…..

and then straw was delayed…

and then straw was delayed some more…..

I decided in the meantime to make velvet ribbon hairnets. Promptly, as I wove the first net’s ribbon and began stitching each of the 122 intersections together, I recalled how much I dislike making ribbon hairnets. Said hairnet has worked its way to the edge of the coffee table trunk, where it is occasionally glanced at with disdain. At some point, the net must be finished; the only motivations being the need for the clips holding it to the board and the want to not have another random UFO, let alone one comprised of 10 yards of vintage velvet ribbon.

I added a few CDVs to my collection. Some of these are still traveling according to the USPS tracking….

Finally straw arrived on Friday evening… One last hat for April… Which I am finishing as I write.

Be sure to catch the post where the mystery hat block is matched up with the hat it likely makes.

I almost forgot. I was going to do a numbers things. 9 pieces plus 3 decoratings….. That is about 105 sewing hours.

Published in: on April 29, 2019 at 4:00 pm  Leave a Comment  

Millinery Connections: Unusual Hat

A friend just sent me a photo I forgot about. I had looked at this photo years ago when preparing for a candle-light tour scene. That was well before focusing on straw millinery.

Jackson’s Grave, circa 1864-1865

She thought of me when seeing two hats in the photo decorated similarly to the hat I currently have listed. screen shots:

But, when looking at these two hats, I couldn’t help but notice the unusual hats nearby. Three of the hats have wavey brims making them sorta fram the face like bonnets while still being hats. Each has two large waves with a dip in the center for the front. It is unclear what the back has.

This caused quite the mental pause…. As I though of one of the trio of bonnet blocks delivered to me two summers ago.

This hat block has been a mystery to me with its shallow crown and soft transition to a very unusual brim. Here, it is seen from the side. To the left is the front with two wider waves creating a dip center front. To the right is the back with three narrower waves. The sides turn down enabling a ribbon to attach over the outside of the brim and tie under the wearer’s chin, as in the photo.

I love when blocks connect with originals or photos. Thank you friend.

Published in: on April 28, 2019 at 4:53 pm  Comments (1)  

Toilet Envelope

This useful little project comes from Godey’s Lady’s Book, 1868. (Note: this is post war for those sticking to Civil War years.) This Nifty little folding case seems quite useful. But once again the short directions are as clear as mud.

Toilet envelope.

The object of this cover is to preserve the dressing table while combing the hair, and to keep the articles wanted in that operation, such as combs, brushes, etc. Fig. 1 shows the envelope folded; fig. 2 the same open. It is formed of piqué 22in square, and edged all round with a cross strip of piqué, 1 inch wide sewn with seam stitch. This strip hides the beginning of the Van Dyke’s which edge of the cover. These Vandykes are made of double piqué; each is made separately. On one side the cover has a smaller covering of cloth, which is bound with silk ribbon, and buttoned on the four corners. Tape is sewn for the strings, as can be seen from the illustration.

Published in: on April 22, 2019 at 6:00 am  Leave a Comment  

Common Hat Styles (1860-65)

Common hat shapes during the American Civil War era.

There are 2 main componants to a hat from this era: the crown and the brim. Both thd crown and brim were particularly shaped to reflect the styles of the time.

When selecting hat for an 1860-1865 impression, please keep in mind the situation you are in as well as your impression. In many cases hats had specific purposes and places. These include those for the seaside, watercures, the garden*, and recreation. There are seperate posts for these. I welcome you to explore these. There are also hats appropriate to those of poorer situations, institutionalized or previously so situations, and blockaded situations. (*note: a garden hat is different than one for gardening.)

common 1

common 2

common 3

common 4

This next style is called a “Mousquetaire” hat or a “Postilion” hat.
Mousquetaire hats have tapered crowns that rise about four to five inches, not quite double the height of other fashion hats of the early 1860s. The brim is shaped, with a curve dipping front and back. This brim is narrow, only a few inches wide. The decorations are primarily at the center front, reaching the height of the crown. A ribbon may or may not circle the crown with a bow or arrangement in the back.

Additional variations (I have yet to make graphics for):

  • Smaller hats including Torque and porkpie
Published in: on April 18, 2019 at 12:18 pm  Comments (1)  

Straw Sewing Demo

Today was the Genesee Country Village and Museum’s annual Antique Show & Sale featuring a special sneak peak of Victoria’s Closet, display original garments and accessories from the 1850s. I was invited to demonstrate sewing straw bonnets and hats for guests.

My hands did get tired around one o’clock. I took a walk around with the camera to show you the exhibit.

Here are just a few of the beautiful pieces on display for the exhibit:

When I saw the photos of this mourning display, I immediately thought of the purple ribbon that just arrived. I wanted to see how close the color was. I find, in person under the gallery lights, mine is a touch more blue.

*note: Ive decided I hate my collar. I should have taken a friend up on the offer to make one. But, no, I did this in a rush, badly. As I rolled the hem, I stretched the edge creating flying hem. Then as I basted it on, I did something to draw up the neck edge poorly. Lesson learned: Do what I do well. Let others do what they do well.

Published in: on April 13, 2019 at 5:48 pm  Comments (1)  

Velvet Ribbon Hairnets

I have found I have an over abundance of narrow velvet ribbon left from last November’s workshop. I figure, I can either make a bunch of the headdresses with the side poofs or a bunch of ribbon hairnets… Or a few of each.

Way back in 2007, I wrote up some quick directions for the Sewing Academy Forum. I know several people have used these directions over the years, writing about them on their blogs or other social media. But, I realized I hadn’t ever put them here. So, here you are…

Ribbon Hairnet Directions ala 2007:
A quick 7 am modern method of making an easy ribbon net….. Let’s see if I can make any sense this morning.
This is for a simple, basic ribbon net with no decorations, made with silk or velvet ribbon cut while woven. There is a way to do it with one long piece of ribbon. I don’t think I am awake enough to describe that clearly. It really is better with pictures.
You are going to want a surface to work on, either something to pin the ribbons to or to hold the ribbon ends. For the first ribbon net I made, I used a large 12 or 14 inch embroidery hoop. A large pillow will work nicely as will a piece of cardboard. Draw a circle 12 to 14 inches in diameter depending on the size of your head and the amount of hair you have when done up. Use a compass or a dinner plate. Now decide how close you want your ribbons to sit. If you have 1/2″ wide ribbon, 1/4″ space is good. If you have 3/4″ ribbon 1/4″ to 1/2″ is good.
Cut two ribbons 2 inches longer than you circle is wide (14″ or 16″). Center them in a + on your circle. Pin each end at the edge of the circle. This marks the center of your net. If you need to mark out a grid for your ribbon placement, just measure your spaces and ribbon width away from center on all 4 sides. Or, you can just eye it. Measure 4 lengths of ribbon for above, below, right and left of the center +. Cut them and lay them down in place, the decided distance from the previous ribbons. Repeat in sets of 4 until you reach the edge of the circle.
Weave the ribbons over & under each other as you would a basket bottom. I like to work from the center out. Adjust your ribbons so they are set your chosen distance apart. Pin each end on the circle. With a matching thread, tack each + point with thread. When all the + points are stitched, work on the edges. Unpin one ribbon end. Turn the end under creating a half inch loop. Stitch the loop securely. Repeat this for every ribbon end.
When all the ends are looped, take a length of ribbon or plain elastic and run it through all of the loops. The elastic will need to be roughly 3 times the diameter (less than the real circle’s circumference) to bring the sides of the net in once the elastic is tied. The ribbon can be 3 to 4 times the width depending on how much ribbon you want to tie the net with.
That would be so much better with pictures.

Published in: on April 12, 2019 at 7:41 pm  Leave a Comment