This is one of the hardest questions for me to answer. Why? Because I don’t fully know.
Ideally, I would have a big pool of bills/receipts, an assortment of ledgers from many different milliners, and a few dozen diary entries to create a database of prices based on year, region, area, time of year, type of piece, etc.. Then, I would feel like I had a hint of an answer.
But, I don’t have that. I don’t think anyone has that.
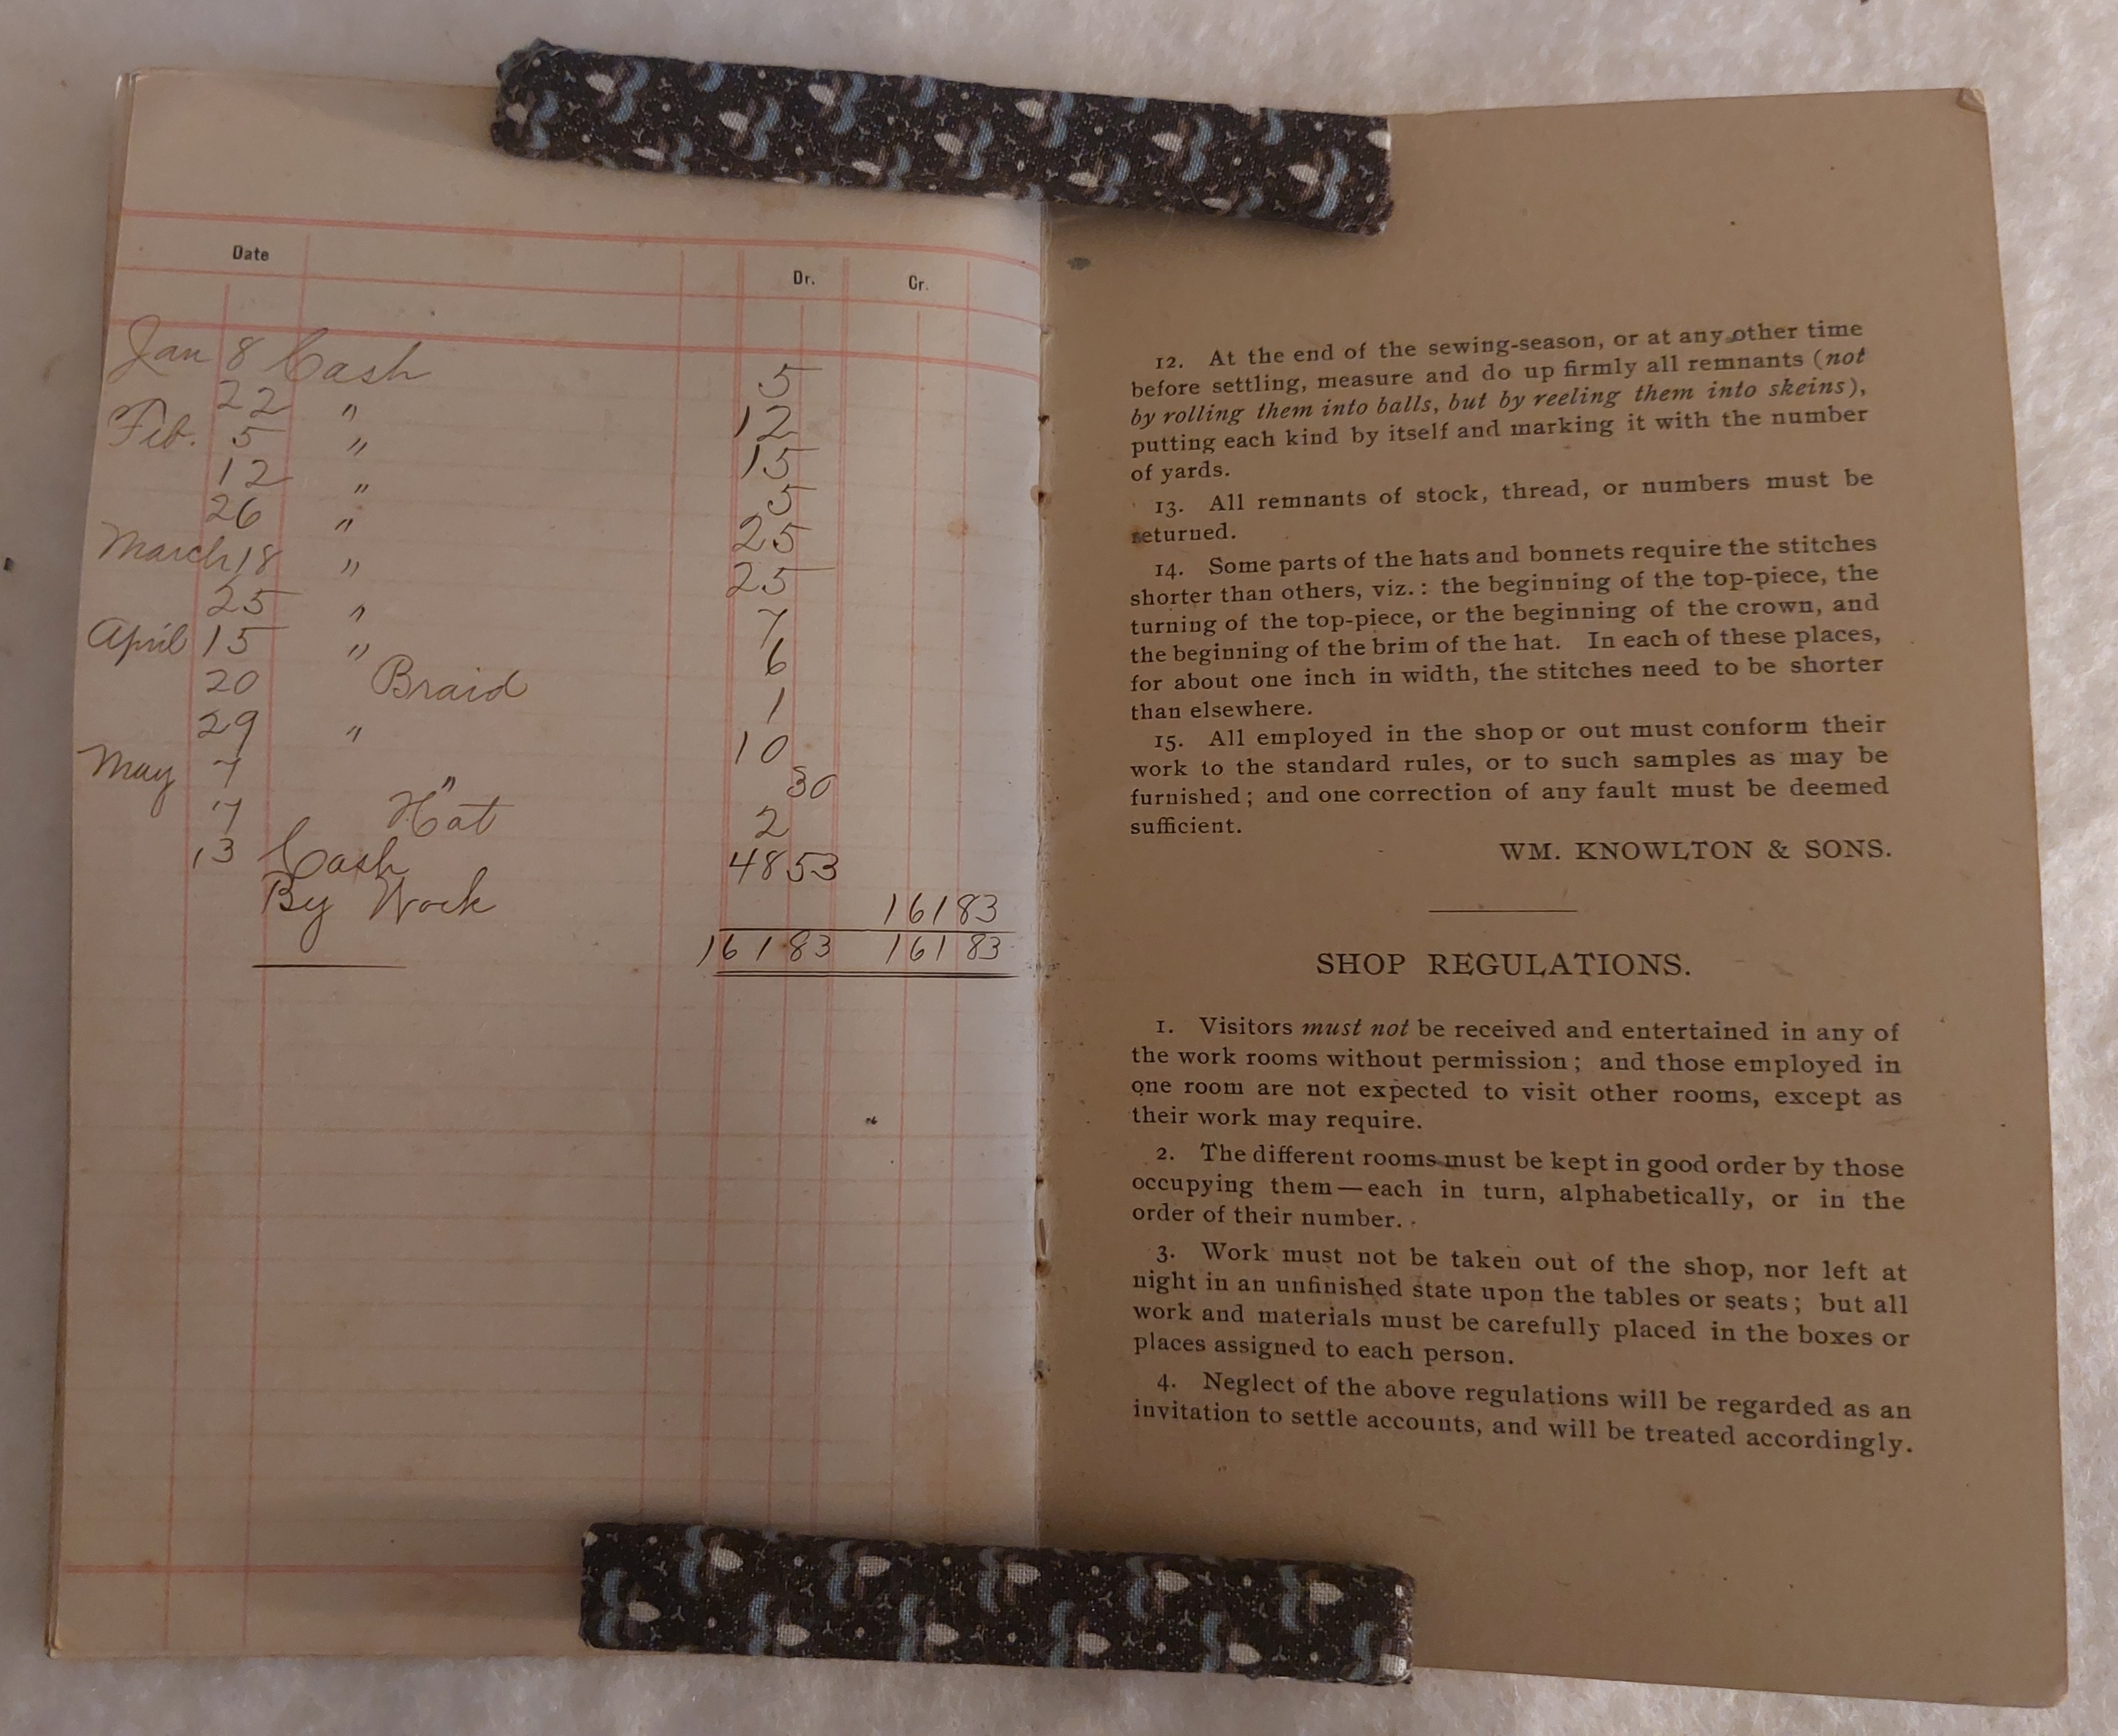
I save every 19th century bill/receipt that comes up for sale. I have even bought a few. I note every diary entry.
I try really really hard not to cry at the auction in front of all those people when a dealer out bids me on the stack of ledgers with a milliner’s ledger in it.
Take a moment.
Yes. It happened. I saw them go out the door.
….
Diary entries like these from Caroline Richards of Canandaigua, NY give us a look at the prices she paid for her millinery:
Wednesday, 1854 – Ann Eliza is going down street with us this afternoon to buy us some new summer bonnets;. They are to be trimmed with blue and white and are to come to five dollars. We are going to Mr Stannard’s store also, to buy us some stockings.
April 12, 1856 — We went down town this morning and bought us some shaker bonnets; to wear to school. They cost $1 apiece and we got some green silk for capes to put on them. We fixed them ourselves and wore them to school and some of the girls liked them and some did not, but it makes no difference to me what they like, for I shall wear mine till it is worn out. …
Saturday, 1854 – We got our new summer hats; from Mrs Freshour’s millinery and we wore them over to show to Aunt Ann and she said they were the very handsomest bonnets she had seen this year.
Bills or receipts can show the price of items from particular stores. They can also show the variety of store types as well as methods of keeping track of sales. This bill from 1849 lists several items purchased:
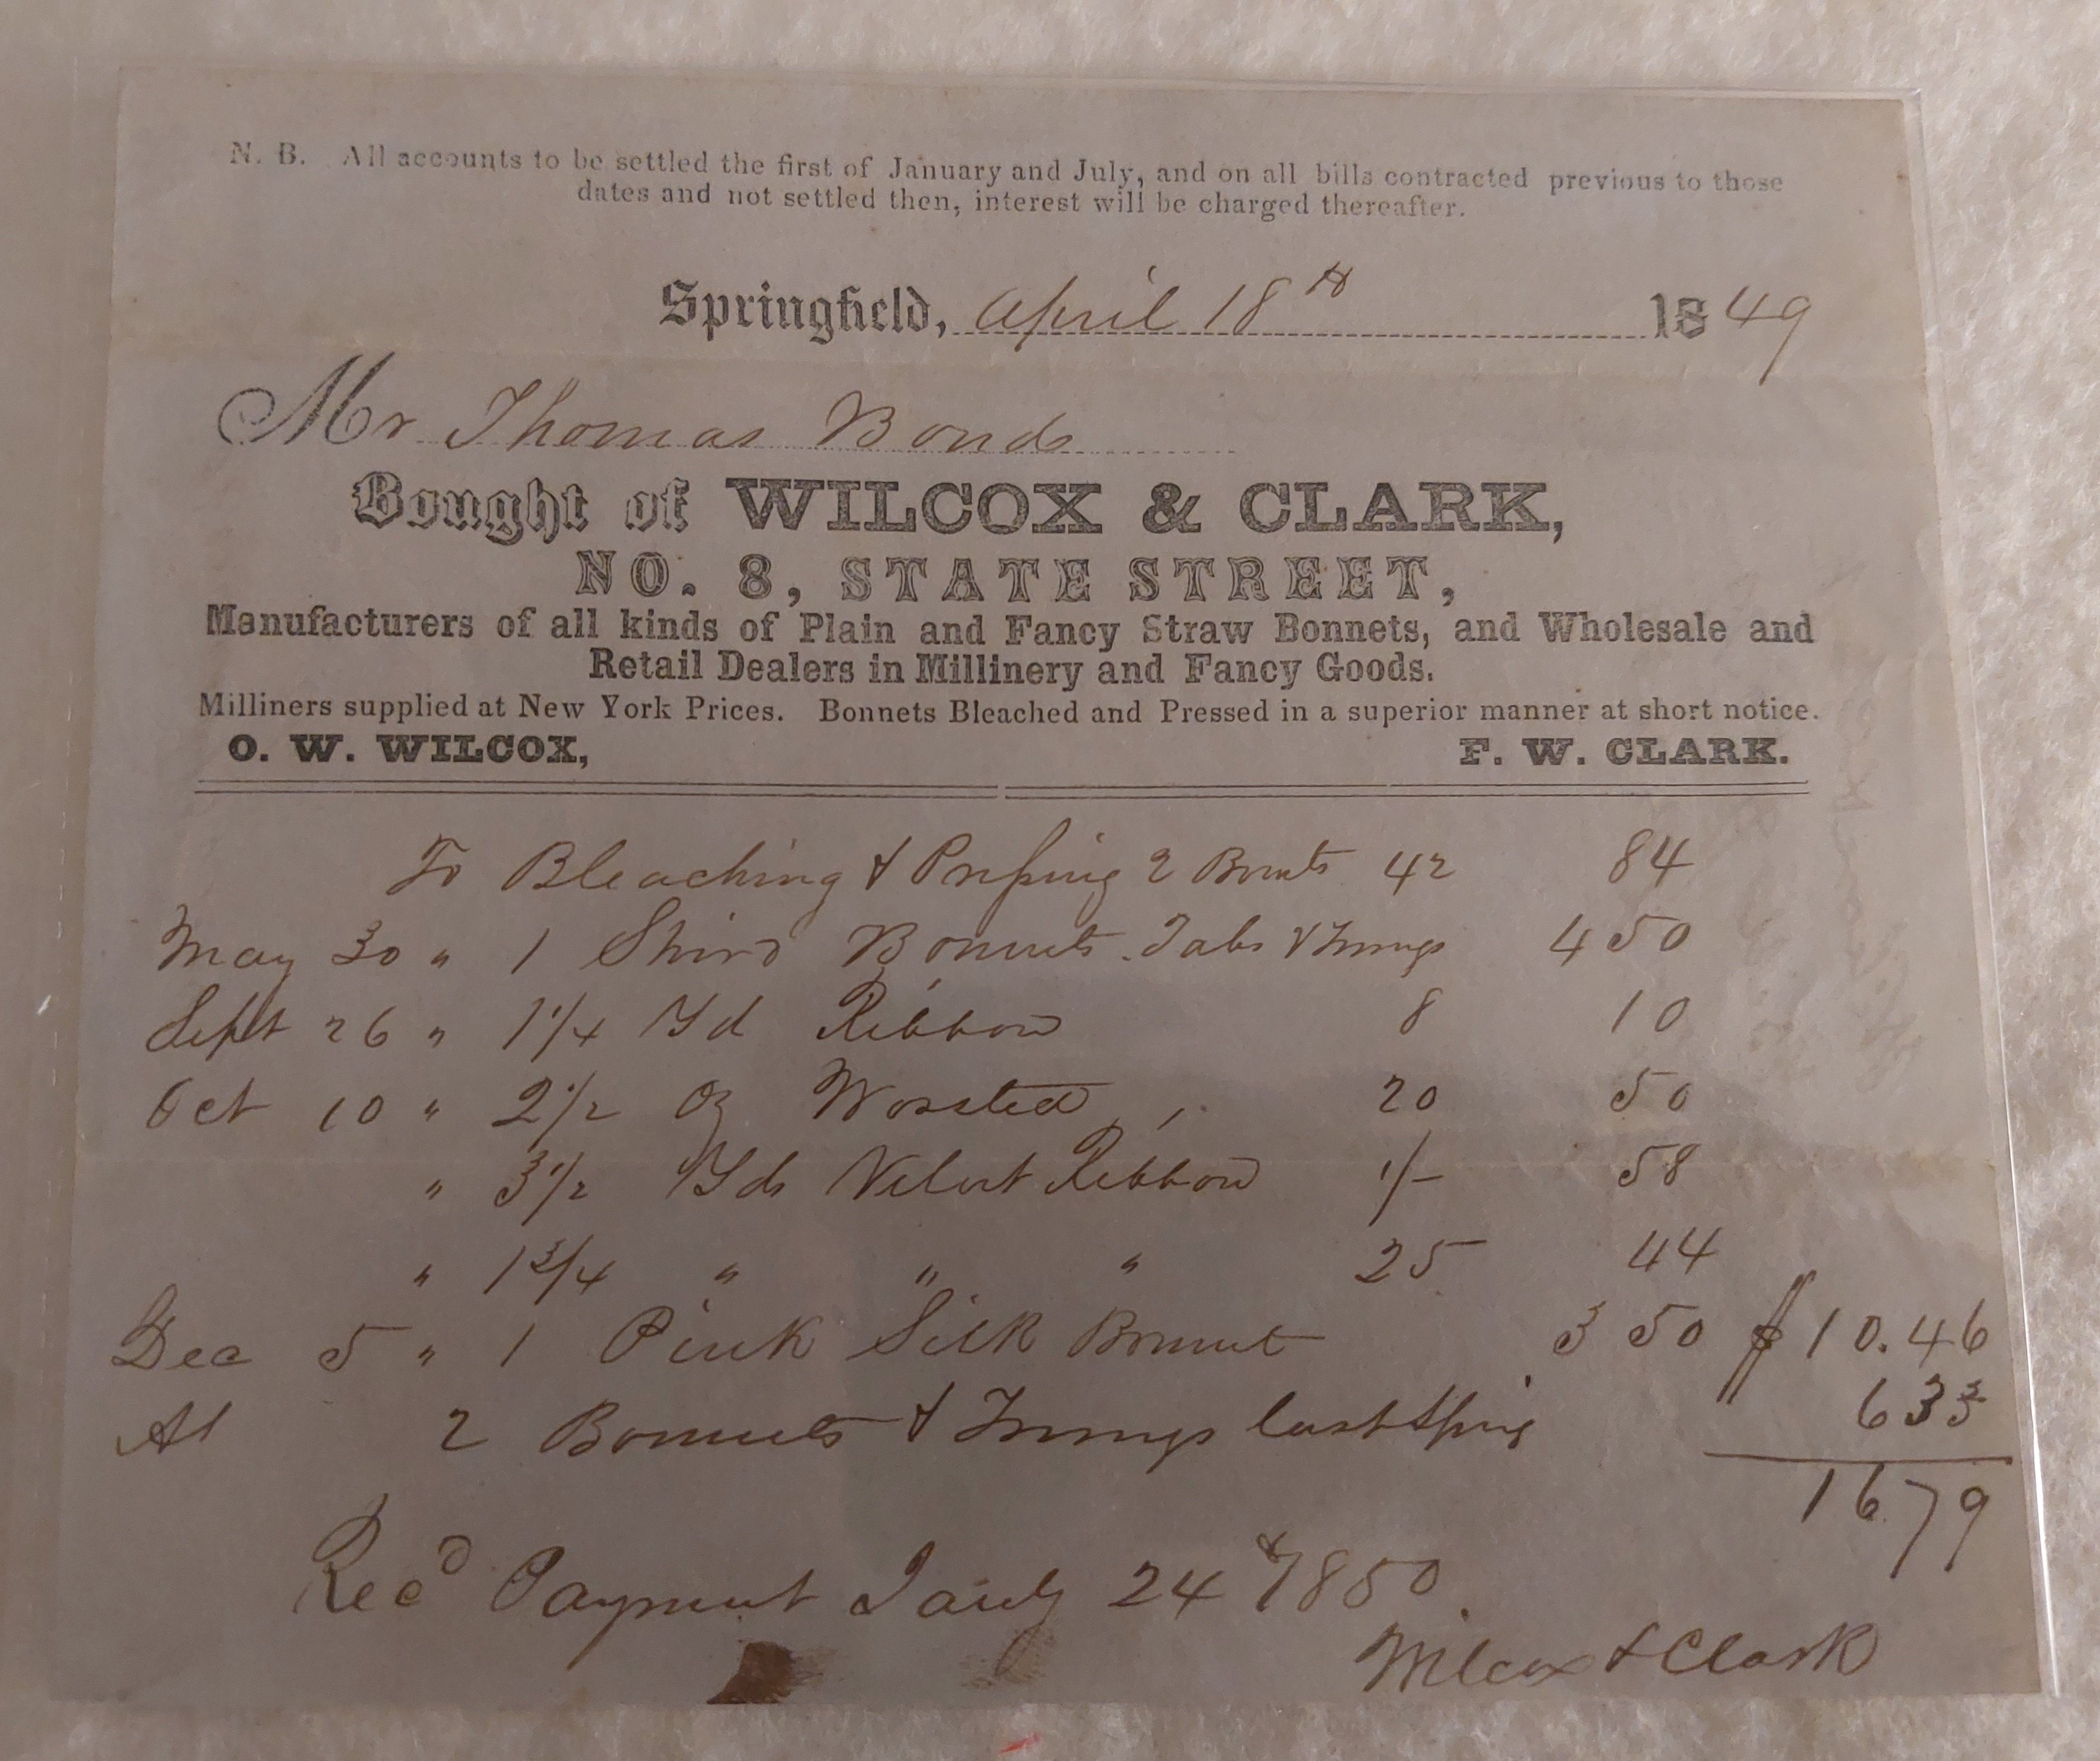
One trimmed bonnet cost $4.50 in May. A pink silk bonnet cost 43.50 in December. Two bonnets and trimmings “last spring” cost $6.35. (This bill also tells us the products and services this shop in Springfield provides, the frequency in which this family of an unknown number of women purchases bonnets, and the delay in payment from “last spring” to April, 1849 for this bill to January, 1850 for the payment.)
If I have to give a price, I can give a window for the mid century of as low as $1 for Shaker bonnets for school to $4.50 for a decorated silk bonnet. But, my answer has holes in that these examples span two different geographic regions and come from two different size cities.
So, the exploration continues…….
Do you enjoy reading my blog? Do you find it helpful? Please consider supporting through Patreon or Sending a Tip.


 Hat blocks can be more round or more oval with the same circumference. To illustrate: Both of these shapes to the right can have a circumference of 22.5″. Yet, the same hat would fit each head differently.