Today begins a series on Dress Reform. This will primarily be original articles. 
Sewing on the Go
As interpreters and/or reenactors, we are most often sewing in temporary locations be it a house or shop we are in for a short time, an outdoor demonstration area or a pleasant gathering to catch up on ufos with friends. Having a sewing case that has all the essential tools is, well, essential.
Here are some of the mobile sewing cases, boxes and baskets we find to be our favorites:
 Long time readers know how much I like sewing boxes. This is one I made for someone years ago. (I am hoping she will share a current photo of it with her pretty tools inside.) This box has a good size compartment with pincushion, decorated needle pages and a scissors case. (You can find the directions for this case in Fanciful Utility.)
 Bevin recreated the same case, just a bit bigger. Her box holds just about everything you can imagine. She also has decorated needle pages and a scissors case, plus a pocket for a straight measure.

I have come to love pockets of pockets or pocket rolls. Originals are found in silks as this one and in cottons of mixed colors as well as variations of the same color set, such as a selection of turkey reds. Pockets can be the same or varied sizes, flat or full. Some are found with needle pages, some with small pincushions. The pockets easily hold thread winders, flat tools, small scissors, buttons, a cloth measure and still have plenty of room for more. This one ties closed with silk ribbons.
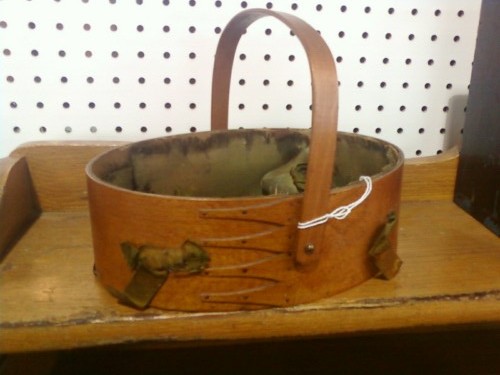
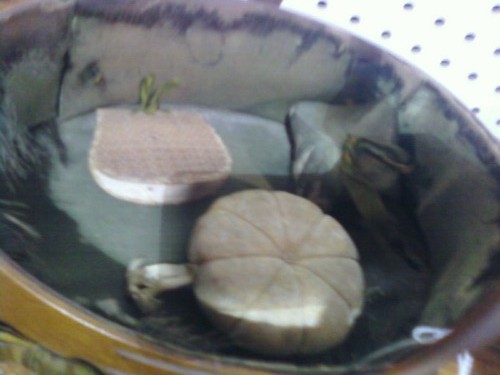
 For small containers that you can turn into sewing boxes, here are a few to consider. Each of these can be used as is or can have a lining with pockets added. The top left is a small oval Shaker box. (ignore the price sticker that I still need to get off the top.) Some examples can be found with a pincushion set into the exterior of the lid. In the upper right is a small basket. This one happens to look like an apple. A basket with a tight weave is nice because you are less likely to have a pin or needle fall through the cracks. In the front is a small pasteboard box covered with paper. You want a durable box. I suggest a squeeze test. If it gives, pass on it. In all of these cases, it is important to have a snug lid that won’t fall off in transit.
What is in Your Sewing Box?
I was planning to talk about what tools to have in a sewing box/case/basket later this year in the fall. But, there are a few conversations happening now. So, let’s take a look now at what the original cast keeps in their work-box and what we keep in ours.
When looking at what they kept in their work-boxes we can look at extant cases, advice manuals, personal & descriptive literature and paintings. Virginia Mescher has already done a very nice job discussing recommendations from advice manuals and descriptions, while sampling originals in her article “The Case of the Lost Thimble.” I strongly recommend reading that first, before assembling a sewing kit of your own. Interestingly, we don’t see a sewing box or basket in “The Seamstress“, 1858. Bloch’s “The Artist’s Parents, Mr. and Mrs. Bloch in Their Sitting Room“, 1855 shows a nice knitting basket. (Knitters may also be interested in this painting.)
 This is my basic simple sewing box for going to day events where small sewing jobs may come up or I may have a little back-up cloth project such as making a sewing case, sewing a quilt block or making a set of under-sleeves. In the box from left to right is a bone bodkin, bone stiletto, a metal bodkin, small pair of scissors, thimble, two thread winders and a case of needles. These easily fit into my 4″ box or a rolled sewing case.
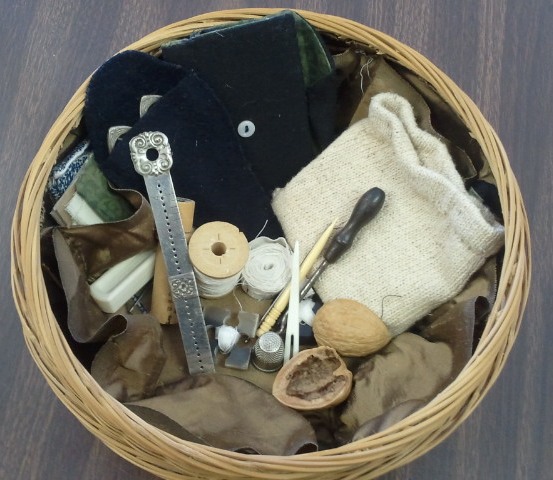 For events where I plan to be sewing most of the day, I have a basket as well. This basket tends to become a collect-all at events. I like to have:
- The above items in a rolled case
- Two pairs of scissors that are also good for cutting fabric, each in their own cases (I tend to loan or bury a pair.)
- Spools of thread I know I’ll be using. Usually, this is white, natural, black and a couple colors plus a heavier white and maybe a heavier black.
- Paper and pencil
- Measures (My fabric one is next to the spool. The metal one is one I still need to date.
- A few spare buttons (side pockets)
- Pinball with pins (bouncing around tables at the time of the photo)
- A small ball of crochet cotton (missing)
- A small ball of wool (missing)
- Scrap bits of fabric (pulled for sorting. You can see a couple small pieces and some paste board in a pocket)
- A Magnet for finding lost needles and pins (missing)
- Wax
- Assorted ribbons
- My emery if I can ever find it again.
- If I’m going to be working with straw, I bring those scissors, those needles and a cloth for my lap.
- Yes, those are walnut shells
 This is Bevin Lynn’s Shaker box dressed as a sewing box. We live in an area where there were multiple Shaker communities. GCV has and interprets a Shaker building. These oval boxes were available in our area. Trish Watrous Hasenmeuller took time to contact South Union Shaker Village regarding some conflicting views as to the availability of these oval boxes to the public rather than being kept in the Shaker community. Trish writes “They said that the oval boxes were often sold to the public but were usually made in the northern Shaker settlements. They have catalogs of items for sale from the 1870’s that have them. Evidently they didn’t print a catalog in the 1860’s. Tommy Hines, the Executive Director at South Union said: “The northern Shakers both marketed and used the sewing boxes. The oval variety is more common and probably more prevalent in the period.”” (Thank you, Trish)
I would say this is 8″-10″ on the longest side. (Suddenly wishing I would have measure these.) Bevin has lined the box as well as the lid. In her box, we find a pincushion, measure rolled in a bag, thimble in a pocket, wax, thread winders, tailor’s chalk, a bodkin, small container and little bits of thread. In the lid she has a pincushion, scissors pocket and needle pages.
 This next box, also Bevin’s, is a pasteboard box covered in period decorative paper and lined with period printed paper. This box has multiple levels. Inside the lid fits a large pincushion, decoratively embroidered. This has ribbon loops to make removal easy.
  Inside the box, a blue velvet covered tray holds a number of tools with ribbon loops. We see a fish needle-case, a bone bodkin, a bone stiletto and a seam-ripper. This tray sits inside the base of the box on top of divided compartments inside. As with the lid, ribbon loops help to lift the tray out. In the compartments we can see a small balloon bag, tailor’s chalk, a thimble, bees wax, a shell case, thread, rigs, a pencil, a measure in a bag and a thread winder.
I’m hoping to have one more sewing kit to share soon.
I am also adding a post for Sewing on the Go.
Edit to add: Be sure to catch Liz’s “Fitting Out a Sewing Box”
“The Shopping Itch” carry along
Some years ago, I wrote a quick piece called “The Shopping Itch” as a guide for newer reenactors and interpreters who enjoy shopping at events. Here is a nifty carry along version:

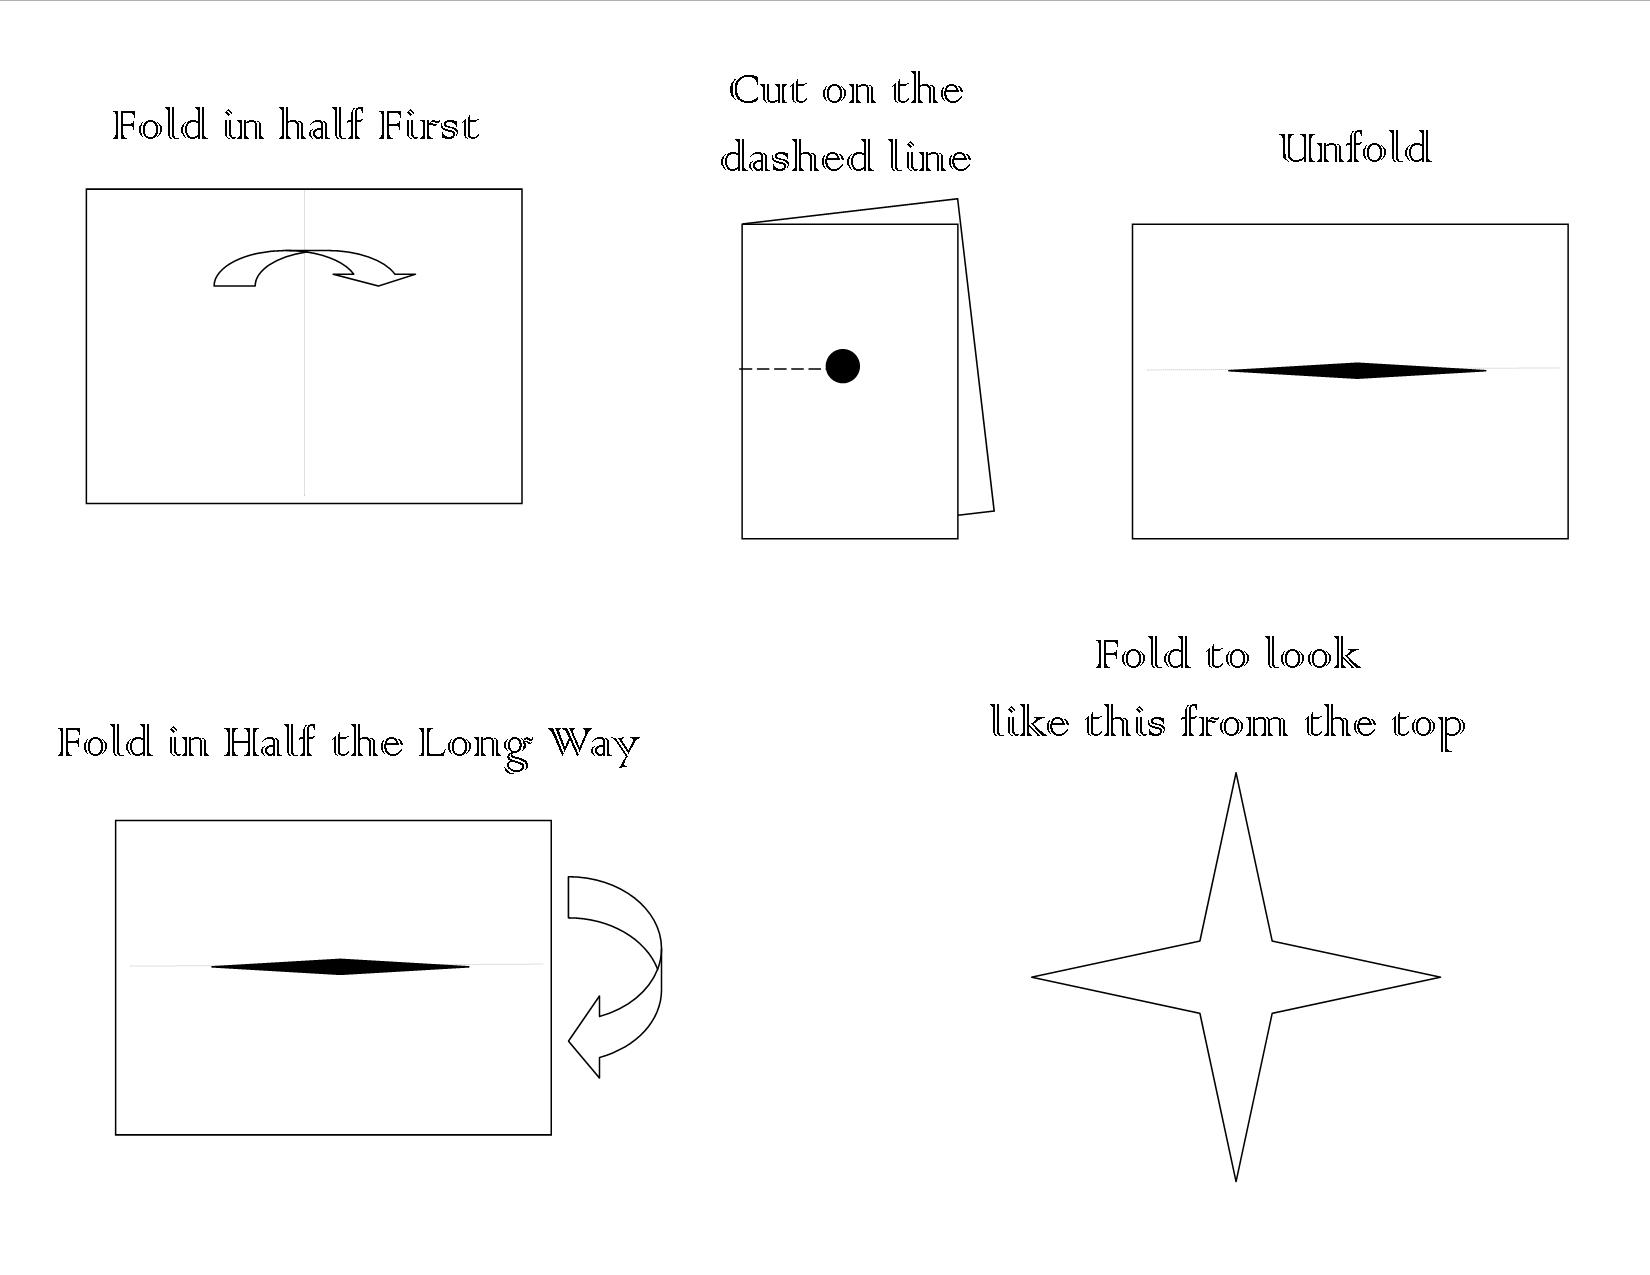
Follow these directions to create a small booklet:
- Fold in half the short way, putting the dashed line on one side.
- Cut along the dash line being sure to stop at the end.
- Unfold and lay face down.
- Fold in half the long way.
- Fold the right hand side in along the dotted gray line. Then fold backwards.
- Fold the left hand side in along the dotted grey line. Then fold backwards.
- Turn the booklet up on end. Pull the sides along the cut out wards to form a star.
- Fold into a booklet with the front on the outside.
Listen – The Milliners
Something to listen to…
Audio Program “Glance at the Past: The Milliners”
There will be a box with a play button in the upper right. Click play.
A Box for Everything
Rolling thoughts….. We all know I love little sewing boxes. I love making them and I love using them.
But, some times you need a box for Everything. I rather like Lydia Jane’s nickname for this type of sewing box, the “mothership.” This is the sewing box that holds just about everything you might need, every tool, every thread, every “just incase”. For some, this might contain a small project or two. (Before going further, there are a couple must read pages from Miss Leslie I think would be nice to tuck into a sewing box for occasional reference for mind set. READ ME.)
The women of the mid-nineteenth century certainly had their “box for everything” sewing boxes, aka “Work-boxes”, “sewing chests”….
Some were downright Amazing such as this stunning inlaid box in England. This example is lined with red and white silk and velvet, inlaid with flowers, birds and butterflies, filled with silver tools for every need. Just beautiful. Just as costly then as it would be now. More my style of drool-worthy is this ca 1830s rosewood and bird’s eye maple chest with incredible flowers worked into the wood. It has delicate mother of pearl inlay and a blue velvet interior. This too would have been a sewing chest for a lady with a more comfortable position. (While the 1830s date would put many items out of the 50s-60s bracket for most, in my opinion a piece like this is a life-long piece that could have been acquired in one’s 20s.) She has long since lost her sewing tools. This prompts me to wonder how many such sewing chests which have lost or been stripped of their contents over the years have been dubbed jewelry boxes instead. If you have an impression for which such a sewing chest is suitable, I highly suggest reading up on furniture styles of the 1830s, 40s and 50s before making a selection. Keep in mind, these highly decorative boxes might not be the proper goal for every impression. (Pricing thoughts to ponder further- We can find them listed in exhibition catalogs (ex1851) along with other very high end goods. This gives a hint.)
If you particularly love the chest style box but have an impression more towards upper working class, a simpler box with simple decoration may suit. These examples fall on the upper end of what I am trying to describe. Example 1, Example 2, Example 3. The MOP inlay on example 1 and the interior decoration in example 2 are the parts I am iffy on in terms of where the pricing would have landed for some one. Example 2 is also post-war. That said, these are boxes that could be carefully mimicked sans inlay. Notice how the interior compartments are actually a separately constructed piece that sets inside the box itself? This could be done with velvet or silk covered pasteboard or covered wood. (Guess who has just realized she has given herself another project???)
I do need to look into how much imported sewing boxes, such as this one at the MFA, actually cost in the mid-century and who would, or would not, have owned them. This page makes me wonder even more since this shows two girls being gifted sewing boxes, un-described sewing boxes.
What about the sewing box an everyday, middle of the working class women?
 In areas where Shaker goods could be purchased (paragraph 6), a Shaker sewing box is an option. Here are two examples of Shaker boxes made into sewing boxes from a show I was at a few years back. When properly made, these boxes are quite sturdy. They have nicely fitted lids usually. They range in size as well, giving you several options. (I thought way in the back of my head thinks there may be standard sizes.) In the examples to the right, the box is lined on the bottom and around the wall with pockets for items. Matching pieces such as pincushions, needle-book and scissors holder are often seen. If this type of box is what appeals, find a well made Shaker box. I suggest doing the lining by covering a pasteboard or cardstock paper with the fabric, pockets already set in. This, slid in snuggly, will allow you to use minimum adhesive while giving a clean edge. This also allows you to change the interior later. (note – This is what I know in this area growing up to be Shaker boxes. I’m anxious to hear what T.L. shares about the difference between the boxes Shakers had for themselves and those they sold.)
If you are interpreting at home, do not discount the sewing basket. We often see the sewing basket, cloth or projects draping out of it, in paintings. While these may not be the idea for mobile impression, they are practical and correct for stationary ones. Do keep in mind that baskets have holes while tools and needles are small. Plan to have smaller storage pieces, such as a sewing box, inside.
And, then there are sewing stands. In my opinion, a whole other subject that very few mobile impressions would need.
Possibly more to come….
Related reads:
Examples of which I am fond:
Things to look up:
- Imported sewing boxes, prices
- Find price lists of Shaker goods
Seaside, Gardening, Resort and Other Shape Straw Hats
Now that I’ve talked about Fashion Straw Hats, there will of course be people saying “but what about this one”. One word:
Context.
Yes, there were other shape hats…. They all have their place. It is very important to understand the context of these other shapes before you wear one.
 Hat shapes are time sensitive, such as the promenade hats to the left from June of 1850, age sensitive, such as hats for youth, year sensitive, such as hats from late in the war, and situation sensitive.
Garden Hats:

longislandmuseum.pastperfect-online.com
William Sidney Mount’s Returning from the Orchard shows a good example of a garden hat. She wears a hat with a shallow crown and a round, full brim.

Lily Martin Spencer gives us a very nice look at a garden hat in her painting The Artist and Her Family at a Fourth of July Picnic, ca1864. On the right, you can see the hat held just behind the woman in pink. It is an almost circular hat, though still an oval crown, with a wide brim.
To give us even more perspective on the garden hat, take a look at this story snip-it:
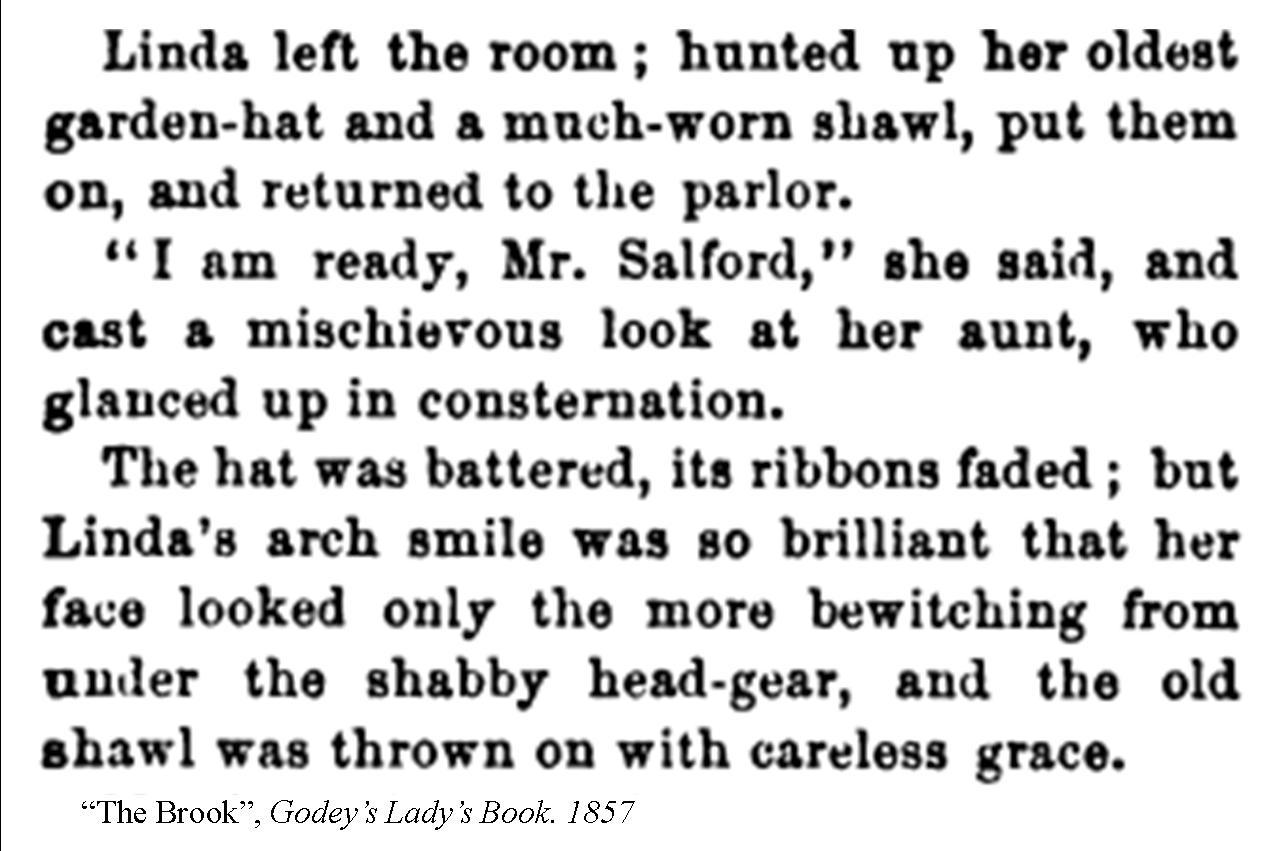
Seaside and Resorts:
One of the first things you will notice when looking at seaside/resort images is that the range of millinery is in addition to rather than instead of. We see round, wide brim hats in addition to fashionable hats, in addition to bonnets. This 1859, Harper’s Weekly image demonstrates this.
 Notice – Charles Wynne Nicolls paints several of his seaside women with hats that don’t fit the norm we see seaside. This is important to note because these pieces were painted on the other side of the pond in England. These were also painted late or just after our Civil War eras. A further detail of how important context is.
Reform Dress Hats:
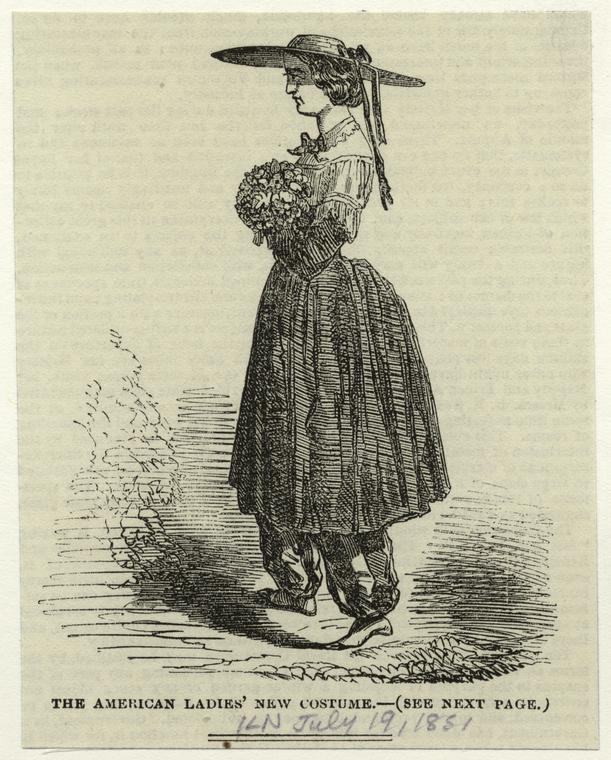
The American ladies’ new costume. (1851)
Many 1840s – 1860s illustrations of reform dress show a wide brim, shallow crown hat as part of the attire. This shape of hat was seen a practical, shading the face and eyes from the sun.
More coming. I just wanted to get this much up….
The Shape of Straw Fashion Hats
I may be on a (cranky) roll. But, I’m sick of incorrect shapes when there are some very nice ones available.
First and far-most, 1850s and 60s fashionable straw hats were rarely circular. (This does not count seaside hats, garden hats, hats for the watercure and such. Those are not fashion hats.) Fashionable hats were ovular. Fashionable hats had curves. I can’t get any more simple that this: (That should say “The Basic Shape of CW Era Straw Hats”)

This is not new news. Take a look at this nice blog post from Crown Heads Millinery from 2013. Don’t miss her example either. We also took some time to look at shapes here back in 2009.
This hat that was up for auction some years ago is excellent for seeing the shape from above. Notice how the crown is oval as well as the brim. The front and back reach much further than the sides.
Here is a page from the September, 1857 Godey’s Lady’s Book. Notice the general shapes.
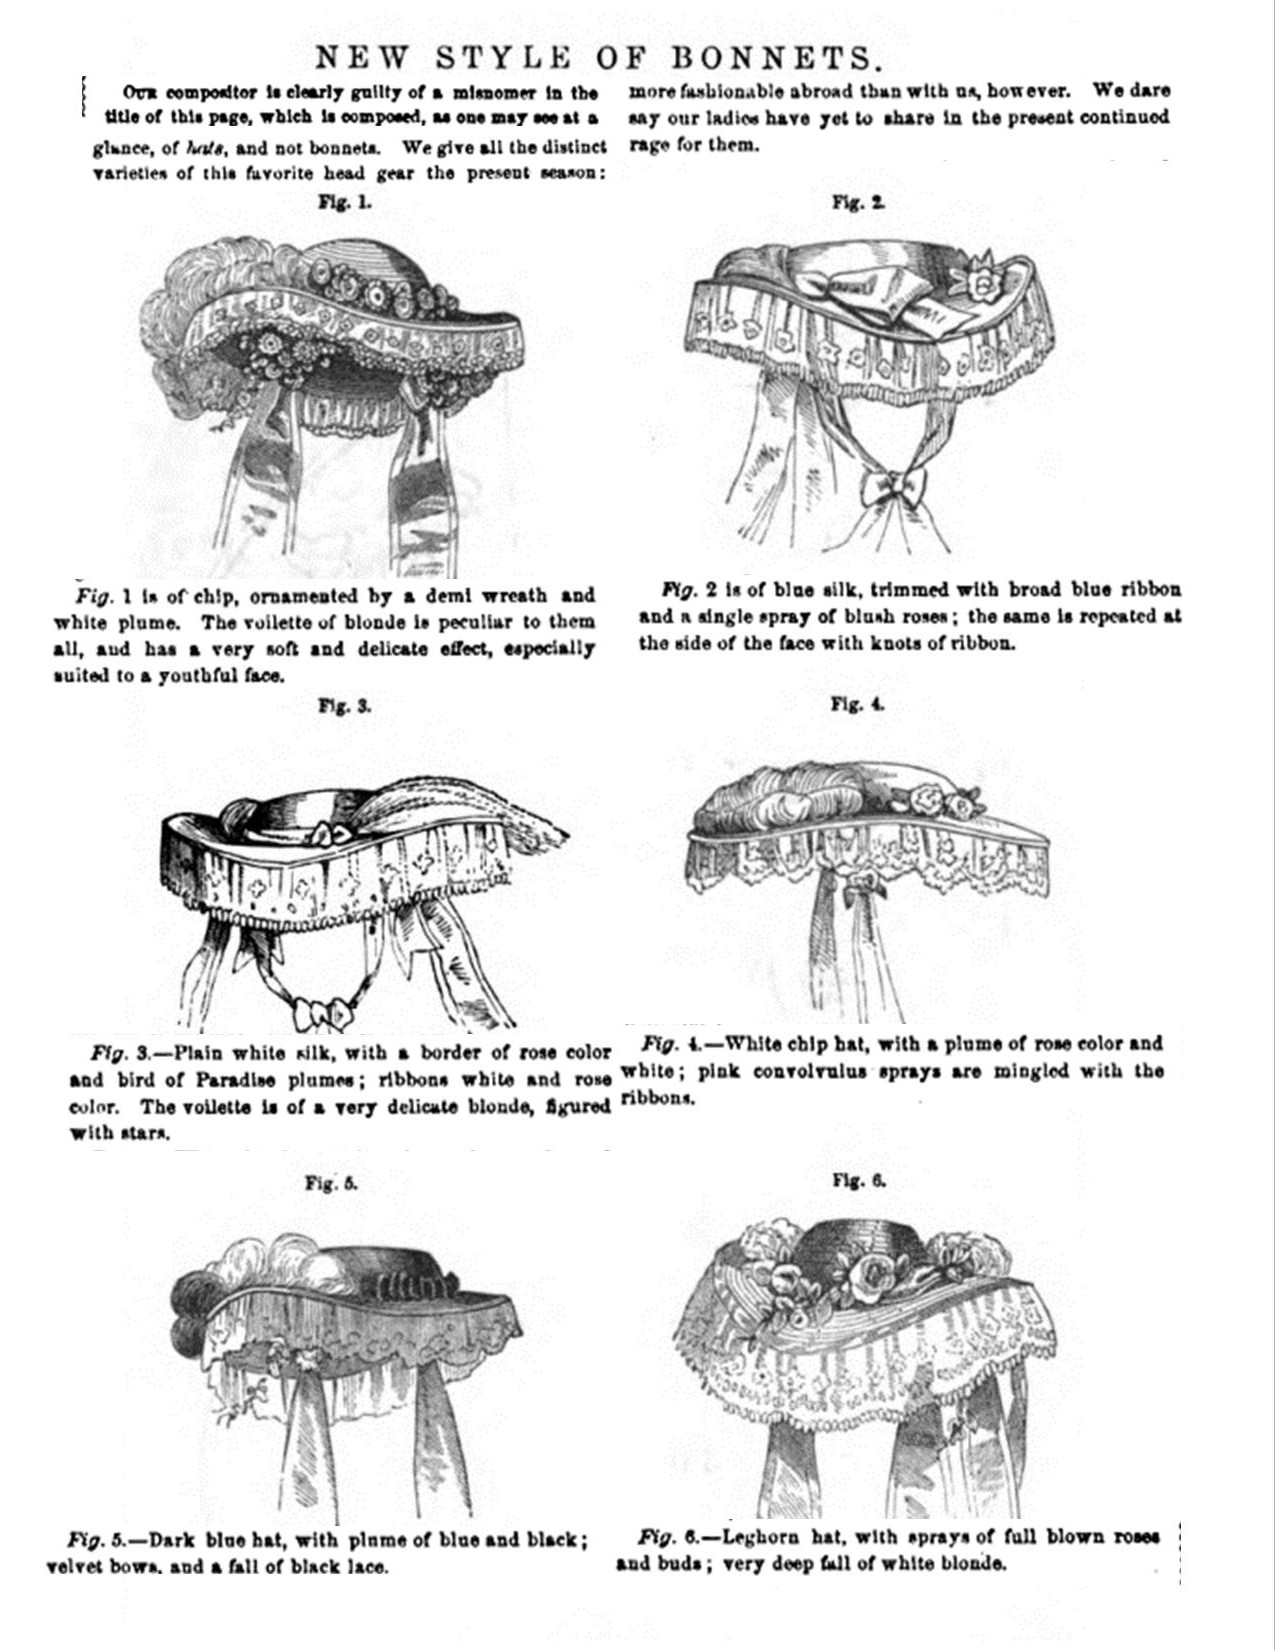

From http://www.thegracefullady.com (click link for full image)
The images to the right show ladies holding hats that obviously show the shape of the crown and brim.
his painting, Portrait of Mary French, 1862, shows how a shaped, fashionable hat sits on the head. Notice how the brim dips in front of her eyes and in the back. If her head was level, part of her vision was likely blocked.
Looking for a CW era straw fashion hat? The first place you should look is on Pam Robles site. She spent a very, very long time getting her woven straw shapes right. I will also hand make hats on occasion.
I strongly caution you to get a solid second opinion on any hat under $75. Take a close look at the type of straw, the sewing, the thread used and of course the shaping. Handsewing a straw plait hat will take at least 6 hours. They then need to be wired and blocked. Woven straws need extra special attention to the details of shaping in the blocking and wiring process taking time.
Coming soon in another post:
Now that I’ve talked about Fashion Straw Hats, there will of course be people saying “but what about this one”. One word:
Context.
Yes, there were other shape hats…. They all have their place. It is very important to understand the context of these other shapes before you wear one.
Why I am Not Sharing
I am quite convinced that certain issues come up in a cycle rotating almost every two years or so.
This post has to deal with one of those issues. I will try to get through it as nicely and politely as possible. 
Lately, there have been some issues with violating Intellectual Property Rights. As such, we will start there.
What is Intellectual Property?
“Intellectual property refers to creations of the mind: inventions; literary and artistic works; and symbols, names and images used in commerce.” (World Intellectual Property Organization.)
What are Intellectual Property Rights?
Intellectual property rights are the rights given to persons over the creations of their minds. They usually give the creator an exclusive right over the use of his/her creation for a certain period of time. (World Trade Organization)
and
Article 27. Section 2 “Everyone has the right to the protection of the moral and material interests resulting from any scientific, literary or artistic production of which he is the author.” (The Universal Declaration of Human Rights.)
Copying and distributing someone’s research without permission violates Intellectual Property Rights. Using someone’s photos from the internet without their written permission violates Intellectual Property Rights. Taking photos of someone’s slideshow and sharing them violates Intellectual Property Rights. This is as much a moral issue as it is a legal issue.
Now, I am not going to address other instances of late as those are other people’s business. I will address part of my end.
I feel I share quite generously that which I am happy to share. This past year, I shared transcribed primary information weekly for millinery and in a variety of series for other social and material culture topics. I have shared a number of how-tos and directions over the years. Besides my blog, I have shared a notable amount of research and information in printed publications.
Frankly, I put a great deal of my time, thought, energy and money into my research and writing. I know there is some delusion oou there that those of us who work in the public school system live a comfortable lifestyle. I assure you, this is not the case. I do not have oodles of extra time and extra cash laying around to toss at a fun little hobby. I take my research seriously and choose to cut other parts of my budget to get what I need to do my research.
I have been asked for particular pieces of research lately.
- I have been asked for up-close photos of the techniques I use in my winter millinery.
- I have been asked for step-by-step images of how I do my straw millinery.
- I have been asked for up-close images of originals in my collection.
- I have been asked for construction details from originals in my collection.
I want to be happy to share these. My gut reaction actually is to share. But, the reality is I have had my millinery work copied and sold. I have had my directions copied and distributed.
There is no way for me to tell if someone asking is doing so for honest reasons of personal enrichment, curiosity and improvement, or if they are looking for some pre-done research they can make a quick profit off of.
I acknowledge some people may not realize they have done this; they may not have malicious intent.
But, it happens.
And, frankly it sucks.
This said…. Yes, I am working on a couple projects. I have one pet one in particular. You will see some of the products resulting from some of the work during this project. You, meaning the general internet public, will not see the details of this project until I have decided the format and venue to properly introduce it.
Please, as take time to consider how you can protect Intellectual Property Rights whether your’s or someone else’s.
About Mourning Bonnets
The question of mourning bonnets came up twice this week. 
In the past couple years, I have been asked to make mourning bonnets for times of real mourning, for a family member who has just passed or who is expected to pass soon. The requests were each uniquely genuine and heartfelt in their own ways. I was honored to be asked to make such a meaningful piece for such a sorrowful occasion.
Making these pieces was very important to me. I did not know the deceased at all. Nor, did I know the wearers well at all. But, I have lost many beloved family members. I have mourned in both centuries. I know what it is like to put on the external symbols of mourning so prominent in the nineteenth century and so lacking in the twenty-first.
To me, these pieces are incredibly meaningful, personal and heavy.
I have decided not to make mourning millinery for faux mourning or mourning impressions. I feel, for me, this will lessen the importance of when I make real mourning pieces. I feel I need to be able to put the full importance each of those pieces.
I will consider making “light mourning” or “half mourning” pieces as those are notably under-interpreted and I think I can approach them from the artistic and historic directions.
Thank you for understanding,
Anna
For a view on interpreted mourning, please take a moment to read Beth Connolly’s blog post. She has very good insight on the weight of such an impression.
For additional information on mourning attire, please see Garments of Mourning.
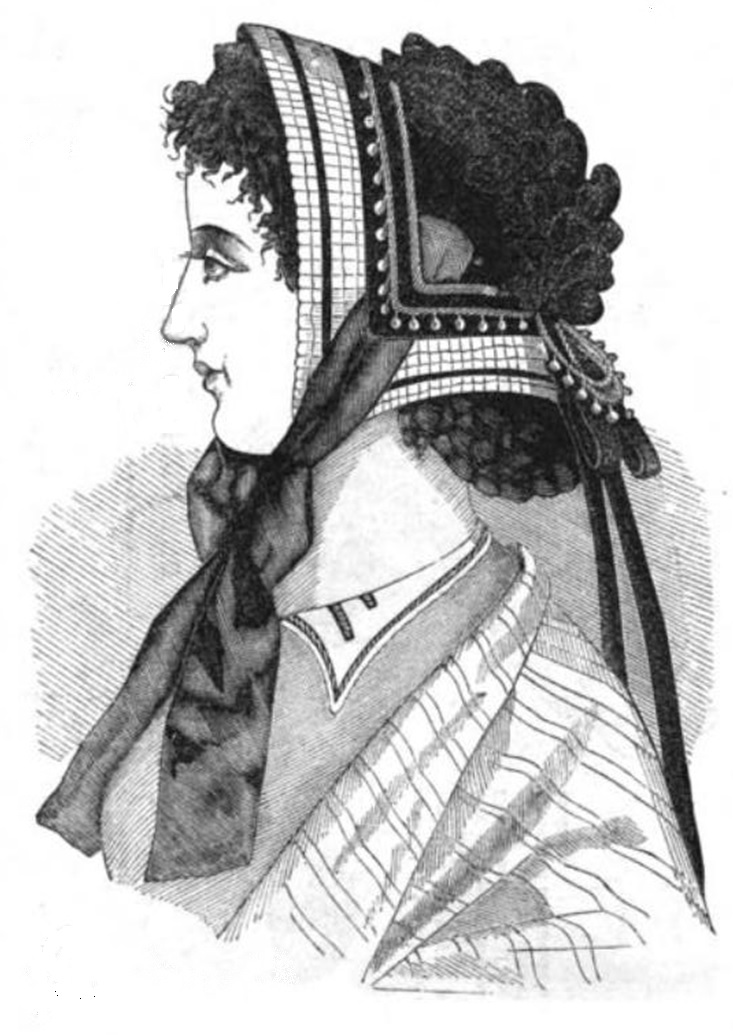
(*Note about the image. I have discovered that a post is more likely to be read if there is an image attached.)


