A Winter Hood Story

Except from “The Romance of a Tassel” (The Christmas Annual, 1860)

We were to have a sleigh-ride, and the principal topic of conversation was, the delightful morning and the promise of pleasure; I was olde enough to feel all the enthusiasm of the occasion, and yet to temper my feelings with quietness. My Cousin Kate and I had been knitting some new hoods, beautiful we thought them, and of a new pattern. As my fingers had toiled through the countless loops, I had only thought what a delight it would be to wear it, and a little vanity was mingled with my feeling, for truly I looked like another person in its scarlet and white border than in the faded silk of my old hood.

All the young girls and boys of the village were to go to this ride, and I knew very well that Kate and I would have the most dashing head-gear of the party and I remembered with pleasure, that Esquire Thomas’s son Chester had come from the city and was to be one of the party.

I presume I tried my hood on twenty times the day before, because, I said, it felt so comfortable, but I had to look in the glass each time to see just how comfortable it felt.

After our breakfast was over, my Uncle Oliver rode up with his daughter Nancy, who had been sent to join in the day’s pleasure. She lived several miles back in the country, and I must acknowledge that I felt too little interest in her pale face and quiet manners, because I thought she was not quite so smart in her ways and dress as we village girls; but I had not an unkind heart, and so I ran to meet her with a hearty welcome, saying “Why, how cold you are; your cheeks at least are red as roses; come to the fire.” My mother with gentle manner took off her straw bonnet, trimmed with its light faded ribbon, and gave her some coffee, and I ran to get ready for the ride. It took me an hour. I twisted my curls over and over again. I asked Kate if I looked well enough. Then I put on my hood – too it off – re-arranged my curls. “There,” said Kate at last, “you look like father’s beautiful scarlet and white carnation pinks, and if Chester does not say so, I will box his ears.” – And what will Chester say of you?” I asked “Oh what he always does. “you most beauchiful butcherfly.” “But is not Chester handsome, Susy? And he is really so good, so manly, so noble, father says, none of your fops – but come, let’s go down.”

Just then my mother with her gentle touch opened the door. I remembered the look she cast on me – it was one of mingled pride and trust – her eye was bright and cheerful, but there was a look so ful of hope for me and trust in me, that I ran up to her with a kiss as hearty as when I was five instead of fifteen.

“Susy,” said she, in her animated but gentle manner, “Nancy has nothing to wear but her straw bonnet. She will be ill if she thus exposes herself to the cold wind. She says sh will stay with me rather than suffer as she did coming here this morning.” “Well I think it’s queer how some people live,” said I, “Never having anything to wear that is appropriate.” But Susy, she says her mother has been so sick, and you know her father is rather afraid of pennies.” “Afraid! I should should think he was anything but afraid the way he hugs them. Well, Nancy can have my old hood, thought it don’t look very well, but it is better than that old straw bonnet.”

My mother’s look changed instantaneously; there was a sad, half reproachful, half hopeful look on her face as she opened the door, saying, “Would you like to have her wear the old one?” She shut the door and went out. What a commotion was in my heart. I knew my mother had expected me to offer my new hood to Nancy, and wear the old one myself; but what visions were before me of Chester and the effect of my hood on him; of the general look of the whole party as they saw me again in that old Silk. Then came to my ear the sweet tones of my Mother’s voice. I heard all she felt, but more powerful was the thought of what would they say to see me looking like an “old dud.”

I believe I should yielded to the selfishness of my heart if Kate had not spoken.

“I think it is absurd for your mother to ask it; of course you will wear your own things.” Her tone and manner brought to me my Mother’s hopeful trust in me, for she had called her absurd and I knew she was anything but that.

“Of course I shall,” said I, and I ran from the room with swift step. I tore my hood from my head on the way. “Here Nancy,” said I, “You must wear my hood this once, it is so warm and perhaps your father will get you worsted to knit one – Wont you Uncle Oliver? It only costs a dollar., and just see how fine it looks.”

Continue reading on page 100…

Published in: on October 5, 2016 at 6:00 am  Comments (1)  

A Closer Look at My Winter Bonnets

IMG_7764I have been meaning to write about how I make my winter bonnets for a while now, a while being over a year. I really want to share with you what goes into each of the bonnets I make.

Why do I love working on winter bonnets?

As you know, with my straw bonnets it is all about the art, the lines and curves that make up each style. For the winter bonnets, it is equally as much about the why and how of the construction, they layers and the materials. I love figuring out why a bonnet was constructed in a specific way, what the material choices were for, why this little area was done this way, etc. There is also something about the visual texture the quilting or wadding creates. I find it pleasant.

I also get very, very cold in the winter. The soft, snuggly warmth of a wadded or quilted bonnet is comforting. I often want one of my 19th century bonnets for everyday wear during my frigid, pre-dawn morning commute.

Where do the patterns come from?
Each of the bonnets I am now making come directly from original bonnets in my collection. I have slowly been collecting winter bonnets with a variety of shapes and construction techniques. Each piece goes through my version of a conservation process (how I wish I had the resources to do everything I would like), ensuring there are no buggy nasties, helping the all too often crushed, scrunched, flattened fibers back into shape and stabilizing. Once I think a piece is ready and I am ready to focus on a piece, I have a note taking process that I am sure would make some people’s heads turn sideways in puzzlement. Hey, it works for me. From my notes, I draft a pattern. These patterns are what I use for creating my winter bonnets.

What materials do I use?

I try to use the same types of materials I find in original winter bonnets. Sadly, as with many things, we simply do not have the same silks they did in the 19th century. Of the fabrics we do have, I use silk taffeta, tight weave silk twill, silk faille, some special weave silks and tight weave smooth wool. For linings, again, I use what originals bonnets show – polished cotton, cotton prints, cotton weaves, silk and tropical wools.

For the batting and wadding, I use 100% wool batting. Occasionally, I will layer 100% wool batting with 100% cotton batting to get the right loft and firmness. Depending on the bonnet, I use a variety of lofts and layering. I refuse to use polyester batting. I do not think it is warm enough or gives the look of original bonnets. Due to allergy issues, I will consider using just 100% cotton or alpaca/cotton batting.

How do you know which bonnet will be right for you?

When choosing the right winter bonnet for you, I suggest thinking about the type of weather you have in your area and/or where you will attend events. Picture when you were out in the snow last winter, did the snow stick to your coat and hat? Was the snow wet? If you are in an area with sticky snow, I suggest a very smooth fabric like a silk taffeta. If you have wet snow, the tighter weaver the better. For wet snow, you really want a wool batting, I’d even consider silk interlined with a light wool fabric.

How do you trim your bonnets?

I look to originals to determine what kinds of trim I will use. While period fashion columns do suggest some additional trims, I have yet to determine to what extent these trims were actually used. So far, I have stuck to ribbon and silk trim. I may venture into tassels and beading. Maybe.

For the functional ties, I have found I love cotton sateen. This is entirely Eileen Hook’s fault since she showed me the cotton sateen she picked up at Needle and Thread. Cotton sateen is durable and ties nicely. I anticipate it doing very well in the wet of winter. For decoration, I do prefer silk ribbon, but will also use high quality modern ribbons such as Hyman Hendler’s. 

How do you quilt your bonnets?

Far prefer doing quilting by hand. I like the look of hand quilting more than that of machine quilting. That said, hand quilting can take a long time, a very long time in some cases. Yes, this has to be reflected in the price.  I understand machine can be faster, making a bonnet more affordable. In addition to the time/cost factor of machine quilting, there are occasions when a piece wants a tighter quilting than I can currently get with my hand quilting. I often end up arguing with myself over which approach to take, that of the tighter machine quilting and that of hand quilting.

How long g does it take to make one?

It takes about an hour to cut and mark/chalk most winter bonnets. It takes from as little as 8 hours to quilt and sew an easy bonnet to 16 hours for a more complex quilt design or a wadded bonnet with cording or a unique construction. 

What is the deal with wired and unwired?

From an interpretive perspective, this often comes down to two factors: Do you need to pack your bonnet flat? and How do you want it to frame your face? But, in terms of historical construction techniques, wiring is just one of several structural materials found in originals. (I’m going to hold on to the list of those materials for a certain something special.)

Why do I show photos of the insides?

I want to show you how I finished the insides because I know some people like pretty finished seams. As with originals, sometimes I make the seams pretty and sometimes I leave them.

Do I have an Etsy shop?

Yes! A Milliner’s Whimsy by Anna Worden Bauersmith

Published in: on October 4, 2016 at 6:00 am  Comments (1)  

The First of This Season’s Winter Millinery 

Both of this weekend’s blue ribbon winning winter bonnets are available. Find them in my shop – pumpkin and quilted.


Published in: on October 2, 2016 at 6:44 pm  Comments (1)  

Ag Fair 2016

We just got back from the year’s Agricultural Society Fair. I am rather cold and tired. So, this will be brief. Be sure to see my post on Velvet Vegetables, my whimsical entry that I find of. 

Several of my entries did not fit in categories. 

My play on a horticulture category.

My beaded crochet purse.

A sampling of millinery in miniature.

I also entered a couple millinery pieces. Here is a simple quilted bonnet made with a brightly colored silk. 

My batwing soft crown bonnet, which bows to Anneliese’s incredible cap.

A corded pumpkin bonnet in a mini check silk. 

I made lavender wands for the first time since Grandma died.

Mom entered an assortment, again not as many. 

I took a couple videos this year. (I added a YouTube channel.)

Horticulture tent part 1: https://youtu.be/40wVaKxB33g

Horticulture tent part 2:https://www.youtube.com/watch?v=In0JBLqWn3g

Domestic Skills entries: https://www.youtube.com/watch?v=X8iA56fIu3U

Published in: on October 1, 2016 at 5:31 pm  Comments (1)  

Vegetables in Velvet

When I first thought about making my “Basket of Vegetables Artfully Arranged” it was a quirky amusement. As I started making them, I felt a little silly. When I really got into it, they became just too much fun to make.

There are two kinds of vegetables in my basket, those made with already dyed cotton velvet and those made with white silk velvet colored with chalk pastels. Each are topped with wool leaves and stems. In a couple pieces, I used the pastels over the cotton velvet.  As with original Victorian velvet pin cushions, I did not keep scale as a rule, though I did adhere a little better to real life. This trio from Christie’s shows scale was not a hard fast rule, with the strawberry that is larger than the carrot and apple.


While tomatoes and strawberries are the velvet pin cushions we most commonly think of, I found as I worked, I was most smitten with the carrots and the eggplant.

 The carrots captured my attention because it was such a simple shape, yet a complex coloring. The shape is simply a triangle, sewn up the side and gathered in on the top. The coloring though is layers of yellows and oranges accented with stripes. Original velvet carrots show beautiful coloring recalling the carrots of many colors. This original carrot shows a variegation of orange with short brown stripes and a small crown of greens.

The eggplant on the other hand is all about the shape with the green leaves wrapping around the top. There is just something about that combination that I love. This is true for each of the varieties I made. I also quite like the combination of the deep purple velvet and the green wool. (I think I will make a couple all wool eggplants too.) The original velvet eggplants have a beautiful depth of color, a level I have yet to be able to achieve with the colors I used.

Anther favorite is the assortment of chili peppers. This may be that they are already a favorite, or it may be that beautiful red color, or it may be that I can see them dangling together in a group. This is the one vegetable I do not have a solid original example of (yet.)

The squashes and gourds allowed for a great variety of heirlooms to choose from. These are each smaller than life, with the pumpkin being the most so. I want to look into whether or not actual stems were or were not used in nineteenth century examples. There is a fun modern trend of making decorative velvet pumpkins in a variety of fun colors with real stems. This auction example with an original stem is said to be from the early 19th century.

Returning to the popular tomatoes, I wanted an assortment of varieties from deep red, to orange red and green. Luckily, I was able to find several shades of red scraps to work with. I did a little coloring to play with how the colors change as they ripen.

I almost forgot my cucumbers. They are a little under ripe or were in too moist of a garden based on their rather light green tone.

Published in: on October 1, 2016 at 4:25 pm  Comments (2)  

CWDD Overview of Winter Headwear

The Civil War Digital Digest offers a short overview of winter head wear this morning. They show pumpkin bonnets, quilted bonnets, and some children’s bonnets.


I will be offering an exclusive pattern taken from my original collection in the next couple months. Following the pattern, I will introduce my next book detailing the construction and materials of domestically sewn winter bonnets. This book will be packed full of annotated photographs from my personal collection.

Published in: on September 29, 2016 at 6:45 am  Leave a Comment  

I am really bad about keeping secrets. I’m rather pleased and amazed with myself that I have not blurted the details of my projects for Ag Fair all over the place. I’ve been really, really good. But, I really, really want to share what I’ve been working on. So, I am going to share my materials list, all of them lumped together.

This year’s projects needed:

  • Silk taffeta 
  • Silk velvet
  • Silk thread
  • Silk organza 
  • Silk ribbons 
  • Wool felted
  • Wool batting 
  • Cotton sateen ribbon
  • Cotton velvet 
  • Cotton cording
  • Polished cotton
  • Cotton net
  • Cotton thread
  • Calk pastels
  • Cut steel beads 
  • Straw plait 
  • Wire 
Published in: on September 25, 2016 at 8:05 pm  Comments (1)  

Conversations with Chairs

“Well aren’t you…..”

I spent much of the summer wandering estate sales, yard sales and such looking at chairs, taking pictures of chairs, and, yes, talking with chairs*~. If you ask my husband, he will likely roll his eyes and tell you it was annoying.

Let me first introduce you to the two chairs that have accompanied me to events for the past two decades. They are like old friends.

20160920_173248.jpg

This plain, somewhat paint splattered chair is quite loved, especially by my bottom. It is essential a chair’s seat be pleasing to the bottom, whether it is layered with petticoats and a wiry cage or lightly draped in minimal layers.  The nearly perfectly shaped seat fits my bottom just right. The front of the seat has a nice curve so it doesn’t cut into the back of my legs when I sit there for an extended period of time.

You may say “but there is a crack down the center!?” Yes, that crack goes all the way through, front to back. Yet, it is quite solid thanks to someone’s supportive work at some point in the past.

This chair sat at my bedroom sewing machine for about a decade, making trips to events when ever needed. Dad used to refer to this as one of my farm chairs. It is quite similar to this side chair, ca 1840-1880, at the Henry Ford Museum. It has a hint of a fan back, though it isn’t really. The seat is much like the shaped solid seats in this pair of thumb back chairs, from 1825. (I am not sure it can be called a thumb back because the top goes all the way across the spindles, rather than having the two shaped sides com all the way up.)

20160920_173501.jpg

For two decades, this next chair has been the companion to the one above. This is likely the least nineteenth century appropriate of my chairs based on the seat itself. The plain lines just are not quite it. The back is almost a bowback, but not quite.

That said, this chair has some nice advantages. This back, with the center splat, is a nice back for sitting in a corset, with just the right angle and support. One can sit pleasantly in this chair for quite some time.

Until the winters in our very dry carriage house, this was a solid chair. I even stood on it regularly to decorate and hang curtains. As you can see by the bungee cords, the rungs have dried loose. They are being encouraged back into place. I am trying to avoid gluing until it has a more settled environment. As such, this chair may be retired to at home life.

A few chairs were conversational enough to find their way into my car and on their way home with me this summer.

20160920_173338.jpg

In the last room of a beautiful old barn, that clearly missed having horses*, sat this chair a stylish misfit among later twentieth century companions.  The Hitchock*^ style shape is quite similar to this chair from Harvard’s General Artemas Ward House Museum. Being quite sturdy, giving the illusion of being light weight due to nice balance, and a silly little price tag, it found its way to my car. It has a rope seat that has been treated with some white substance I have yet to identify.This will likely become my painted chair. (It would be great to find a second, similar chair to paint as well for Lily.)

This chair is much like the chair I sat on while demonstrating in the Foster-Tuffs house during the War of 1812 straw demonstration. The height is just about perfect for my quasi-average 5’4″ height, while the back is at a supportive angle. I can comfortably sit, knees at a proper angle without sliding forward/down, nor cutting off good flow to my lower legs. Let me tell you, there is nothing so silly feeling as not being able to keep ones butt in the right spot in a chair, and there is nothing so miserable as the swelling in the feet from sitting three days in a chair that cuts.

20160920_173819.jpg
This ladder back or slat chair sat at the edge of an estate sale tent, the tent where they placed all the ‘special’ items. When I inquired, I was quoted just the right price. The whole length of the driveway, I had every intention of passing it along. By the time I made it across the road and it was loaded into the car, we had bonded. By the time we were home, I became attached.

The wood is just beautiful with such a nice patina. Do you see the seat?!?! It is done so nicely. I highly doubt it is original. Whoever rewove the seat did an amazing job. The funny thing is, it is shorter than my other chairs by just a few inches. So, it isn’t even ideal for sitting for me. This may end up being an at home chair.

I am looking to learn more  about the back of this chair. The vertical pieces curve/splay out slightly. They also have just a bit of shaping, rather than going straight up like we see in Shaker ladder back chairs.

Several chairs I talked with did not come home with me. I simply do not need that many chairs, nor do we have space for chairs not in use.


Q&A:

What does a collector of patent folding chairs take to living history events to sit on?

Not patent folding chairs. These are to look pretty and fill an obsession (as well as an over full storage closet.) In our house there are chairs you sit on and chairs you look at. Never the two shall intermix.

Why?

Of the spectrum of patent folding chairs, only a small number were produced during the Civil War. Of those, even fewer were made for the civilian market. That small selection was intended for use in the parlor (some were produced specifically as deck chairs), making them highly unlikely to be the chair a refugee or fleeing family would choose to take with them. In the instances of civilian, domestic recreation where a civilian marketed pre-1864 design would be appropriate , I feel accurately constructed reproductions are a better choice over an original folding chair.

What do I look for in a chair?

  • The visual/artistic lines of the first half of the nineteenth century. I rather love federal lines.
  • Construction appropriate to the first half of the century.
  • Solid wood and construction. A chair that does not wiggle.
  • A seat that is not going to split. It is an unusual and somewhat disorienting feeling when a seat splits beneath you. It is a swaying as though the earth has given way.
  • A price tag under $20.


Recommended Library Requests:

Primary References

Notes:

*~ I want to say I have not spent much time thinking about or reading up on furniture details since Dad died. Furniture was very much his area. Therefore this is very much a dabbled only, daughter of a furniture lover’s perspective, not a well researched furniture perspective.

* I later found out my mother’s horse, Goldie, came from this barn before I was born.

*^A note about Hitchock style chairs – There are original chairs of the first half of the nineteenth century and revival chairs of the mid twentieth century. The latter are good options for events as they are not antiques, yet closely resemble the originals in style and construction.

Published in: on September 21, 2016 at 6:20 pm  Comments (1)  

When Strawberries become Radishes


Generally, we like to share our pretty successes, to show off our most recent beautiful creations, to fill our posts with fabulous photos of fabulous work.

This post….. not so much.

A couple weeks back, I was looking at the Premium Book for the Agricultural Society Fair. I thought it would be nice to enter a simple needlework pincushion, set in one of the silver rings I have. I had the wool left from the now missing spring pin ball.I wanted a design that would play off of the round cushion. This pin ball, with its four faded strawberries caught my eye. I thought with my blue and grey threads, the berries would look more like raspberries. I rather like raspberries.


The needlework took a couple nights, sewing before bed. I worked each quadrant separately to get the shape of the berries right. The embroidery was the easy part. Getting the depth and fullness of the core was the fussy part. 4 times fussy.

In the end, the pincushion stuffed….. I was not happy. The berries looked more like radishes. I found that rather humorous. That was not the problem. The problem was how white showed through the black stitches. I hadn’t figured for the stitches pulling away from each other when wrapped around the dome of the pincushion. I just do not like the look.


I think I want to find a different ring, a wider one that will allow the needlework to lay flatter, not pulling the stitches apart. I will be keeping my eye out for a 3″ wide, 1-1.5″ deep ring to make the change.

https://www.etsy.com/listing/246327094/vintage-wide-faux-silver-bangle-bracelet?ga_order=most_relevant&ga_search_type=vintage&ga_view_type=gallery&ga_search_query=wide%20metal%20bangle&ref=sr_gallery_29


Published in: on September 20, 2016 at 5:42 pm  Leave a Comment  

Corded Pin Ball

Every now and then, we need a whee little project. This corded pin ball was just that. 

A Corded Pincushionimg_20160915_135422.jpg

Cut out two round pieces of linen. Sew them together, and stuff them with bran, so as to form a round ball. Begin on the very center of each side, and with a large needle lay coarse thread or cotton all across down to the middle of the pincushion where the binding is to come. These threads must spread out from the centre in every direction like rays; the space between them widening of course as it descends. Make them very even, and do not allow them to be loose or slack. Then take a needle threaded with sewing silk or fine crewel, and, beginning at the centre from which all the coarse cotton threads diverge, (they may be called cords) work the pincushion all round by passing the needle twice under each cord, taking the stitches very close, even, and regular, and completely covering with the sewing silk both the cords and the space between them. The stitches, of course, become gradually longer as you go down towards the seam that divides the two sides of the pincushion. Supposing that you begin with pink silk, you may, after a few rounds, take another colour, for instance green, then yellow, then blue, and then brown. In this manner your pincushion will be handsomely striped, and the cords will give it a very pretty appearance, if evenly laid and well0covered. When both sides are finished, cover the seam with a binding of dark-coloured ribbon, and put on a strin and bow of the same. Always begin and fasten off in a place that is afterwards to be worked over. (The American Girl’s Book, 1831)

A close example to the directions is this original corded pin ball on Pinterest from Ebay,  made with three colors of silk thread. The center top appears to have seven or eight rows circling. The following rings look to have three to five rows of threads.The middle is covered with a decorated silk ribbon like many other pin balls.

A play on the ball shape, the only corded pin cushion I have found so far in a museum collection, is this pin cushion from the Hudson River Valley Heritage collection. This colorful ball is made with at least seven silk colors. Instead of being a true ball shape, the equator cinches in with a simple green silk ribbon around it.

This pinned pin ball may or may not be a corded ball. It may just be woven. Disappointingly, the listing was removed from Ruby Lane. So, we can not see other photos. I have a couple addition examples, including reproductions, on a pin board.

My first corded pin ball or pincushion came at the end of the summer when a set of silk threads popped up on one of the FB sales sites. It had two different color blues in two different thicknesses. I chose the thinner thread, alternating between colors over a ball made petals, not circles.

20160826_112808.jpg
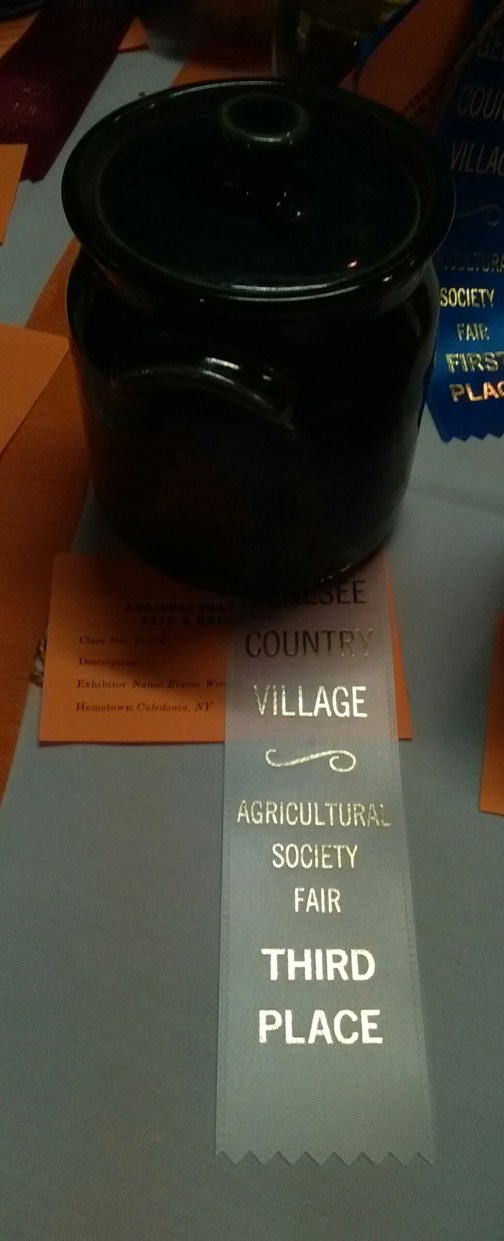
The petal construction had the advantage of marking the sections of the ball, helping keep the cords straight and spaced. It would have been good to mark the center of each segment. The wool stuffing felt firm when I was working on it. But, it seems to have softened over the weeks. I like the thin threads. They make a nice smooth line. I like the wider sections of color, but do not like the middle where I alternated colors. Keeping the rows even as I decreased was difficult. I think it would be better to start at each pole and work towards the equator. I suspect, that is the true reason some have ribbons.


Published in: on September 18, 2016 at 8:15 pm  Comments (1)