Alas, no home
These poor bonnets never did find a home last year. Each is waiting for the right time and person.
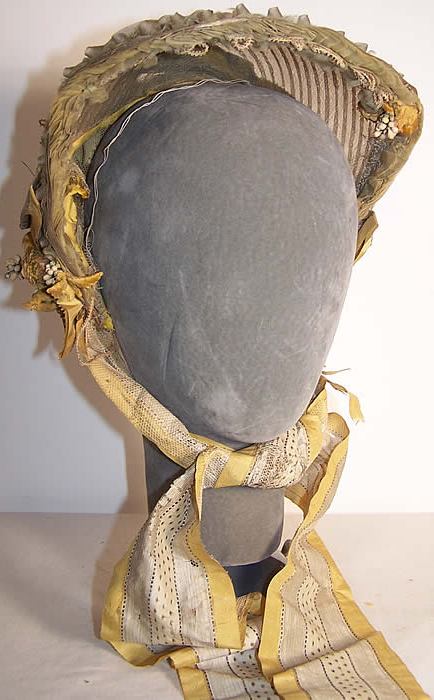
The first is one of my favorites from last year. I just love the combination of the velvet calla lilies and pink & green silk.
This is a smaller straw hat. (It fits my head perching forward.) It would be good for an adult with a smaller to average head or a child. Find it on Etsy.


This little hat is ideal for a late war to post war impression. Light weight, made of fine hemp-straw and silk, it sits back over the hair as it begins to rise. The inspiration for this bonnet comes from this 1865 wedding bonnet at the National Trust Collections (below) Find it on Etsy.


**Note: I am going to make a point to share my millinery work here first as the listings are complete. This means, to get the first look and chance at pieces, subscribe to my blog. You can opt to have the new posts go to a feed or your email.**
Shattering Silk – Why Not to Use Antique Silk Ribbon
Since our 21st century selection of silk ribbon is a teeny, tiny fraction of what it was in the 19th century, all to often we look to antique and vintage ribbon for embellishing our millinery. The silk florals, stripes, plaids, damasks, moires, pretty colors…. are all too tempting. They are just so pretty.
Well…. there can be a huge drawback to using antique or vintage ribbon for reproduction millinery.
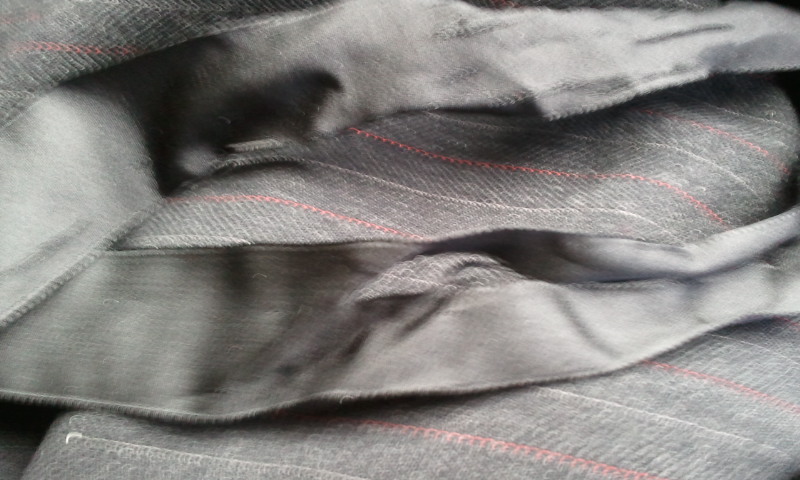 Antique and vintage silk ribbons can be fragile. Even if they appear to be in strong shape, they can still be easily damaged. This black ribbon to the right is an example of this. This is 1″ ribbon on one of my personal winter bonnets. This is after the first wearing. The ribbon was tied in the morning when I left the house. It was not untied/retied at all through the day. This is how it looked when I took it off in the afternoon. This ribbon was part of an order of several black ribbons when I was out of my regular silk ribbon and my ribbon supplier was also out of ribbon. The ribbon appeared strong, being soft and supple. Obviously, this was not the case.
Bad for me. Good for you because this is a good chance to show what can happen.
The fractures or splits on this ribbon run the length of the ribbon. This means the weft threads are what broke. The weft threads, those running across the ribbon, are usually less strong than the weft threads that run the length of the ribbon. These fractures are along the lines where the ribbon folded/wrinkled in the bow. So, these fractures make sense. (This is also good to see because it can be compared to future observations of silk fractures. These would occur from the wearing. Other fractures can occur during the storing.)
Now, imagine this happening with a wider ribbon. This narrow ribbon only cost a few dollars a yard. A wider ribbon can cost $10, $20, even $50 a yard. Multiplied out by 2 to 5 yards going on a bonnet…. there would be lots of tears. I had a client who loved this wide green silk ribbon. It looked quite lovely. When it arrived, it was obviously quite dry and brittle. Using the ribbon would have been a disaster.
~
 Here is another example I picked up at an estate sale for the ribbon collection. It is a brilliant green silk in a five inch width. This ribbon appears to be in nice shape on the roll. But, just the pressure of a finger nail can break the fibers like a razor blade. Notice how this break is across the ribbon. This means I am breaking the warp threads, which should be the stronger fibers.
  This ribbon, assuming it survived being attached to the bonnet (which I doubt it would) would shatter in the wearer’s hands.
~

This pale blue silk is another example. this two inch wide ribbon appears to have a nice sheen. It is soft to the touch. It does not feel dry or have that weird crisped feel some aged ribbons can have.

Yet, it is still quite fragile. This break cuts across both the warp and weft threads.The break formed just from pressure in that area.
~
Of course, not using antique and vintage silk ribbons leaves us with vintage blends, narrower modern silk ribbons and wider ribbons in modern fibers. I highly recommend feeling some orginal ribbons when you can. Also, feel the different qualities of modern an newer vintage ribbons so you can have a tactile knowledge of what is available and how it compares to originals.
A Closer Look at My Winter Bonnets
 I have been meaning to write about how I make my winter bonnets for a while now, a while being over a year. I really want to share with you what goes into each of the bonnets I make.
Why do I love working on winter bonnets?
As you know, with my straw bonnets it is all about the art, the lines and curves that make up each style. For the winter bonnets, it is equally as much about the why and how of the construction, they layers and the materials. I love figuring out why a bonnet was constructed in a specific way, what the material choices were for, why this little area was done this way, etc. There is also something about the visual texture the quilting or wadding creates. I find it pleasant.
I also get very, very cold in the winter. The soft, snuggly warmth of a wadded or quilted bonnet is comforting. I often want one of my 19th century bonnets for everyday wear during my frigid, pre-dawn morning commute.
Where do the patterns come from?
Each of the bonnets I am now making come directly from original bonnets in my collection. I have slowly been collecting winter bonnets with a variety of shapes and construction techniques. Each piece goes through my version of a conservation process (how I wish I had the resources to do everything I would like), ensuring there are no buggy nasties, helping the all too often crushed, scrunched, flattened fibers back into shape and stabilizing. Once I think a piece is ready and I am ready to focus on a piece, I have a note taking process that I am sure would make some people’s heads turn sideways in puzzlement. Hey, it works for me. From my notes, I draft a pattern. These patterns are what I use for creating my winter bonnets.
What materials do I use?
I try to use the same types of materials I find in original winter bonnets. Sadly, as with many things, we simply do not have the same silks they did in the 19th century. Of the fabrics we do have, I use silk taffeta, tight weave silk twill, silk faille, some special weave silks and tight weave smooth wool. For linings, again, I use what originals bonnets show – polished cotton, cotton prints, cotton weaves, silk and tropical wools.
For the batting and wadding, I use 100% wool batting. Occasionally, I will layer 100% wool batting with 100% cotton batting to get the right loft and firmness. Depending on the bonnet, I use a variety of lofts and layering. I refuse to use polyester batting. I do not think it is warm enough or gives the look of original bonnets. Due to allergy issues, I will consider using just 100% cotton or alpaca/cotton batting.
How do you know which bonnet will be right for you?
When choosing the right winter bonnet for you, I suggest thinking about the type of weather you have in your area and/or where you will attend events. Picture when you were out in the snow last winter, did the snow stick to your coat and hat? Was the snow wet? If you are in an area with sticky snow, I suggest a very smooth fabric like a silk taffeta. If you have wet snow, the tighter weaver the better. For wet snow, you really want a wool batting, I’d even consider silk interlined with a light wool fabric.
How do you trim your bonnets?
I look to originals to determine what kinds of trim I will use. While period fashion columns do suggest some additional trims, I have yet to determine to what extent these trims were actually used. So far, I have stuck to ribbon and silk trim. I may venture into tassels and beading. Maybe.
For the functional ties, I have found I love cotton sateen. This is entirely Eileen Hook’s fault since she showed me the cotton sateen she picked up at Needle and Thread. Cotton sateen is durable and ties nicely. I anticipate it doing very well in the wet of winter. For decoration, I do prefer silk ribbon, but will also use high quality modern ribbons such as Hyman Hendler’s.
How do you quilt your bonnets?
Far prefer doing quilting by hand. I like the look of hand quilting more than that of machine quilting. That said, hand quilting can take a long time, a very long time in some cases. Yes, this has to be reflected in the price. I understand machine can be faster, making a bonnet more affordable. In addition to the time/cost factor of machine quilting, there are occasions when a piece wants a tighter quilting than I can currently get with my hand quilting. I often end up arguing with myself over which approach to take, that of the tighter machine quilting and that of hand quilting.
What is the deal with wired and unwired?
From an interpretive perspective, this often comes down to two factors: Do you need to pack your bonnet flat? and How do you want it to frame your face? But, in terms of historical construction techniques, wiring is just one of several structural materials found in originals. (I’m going to hold on to the list of those materials for a certain something special.)
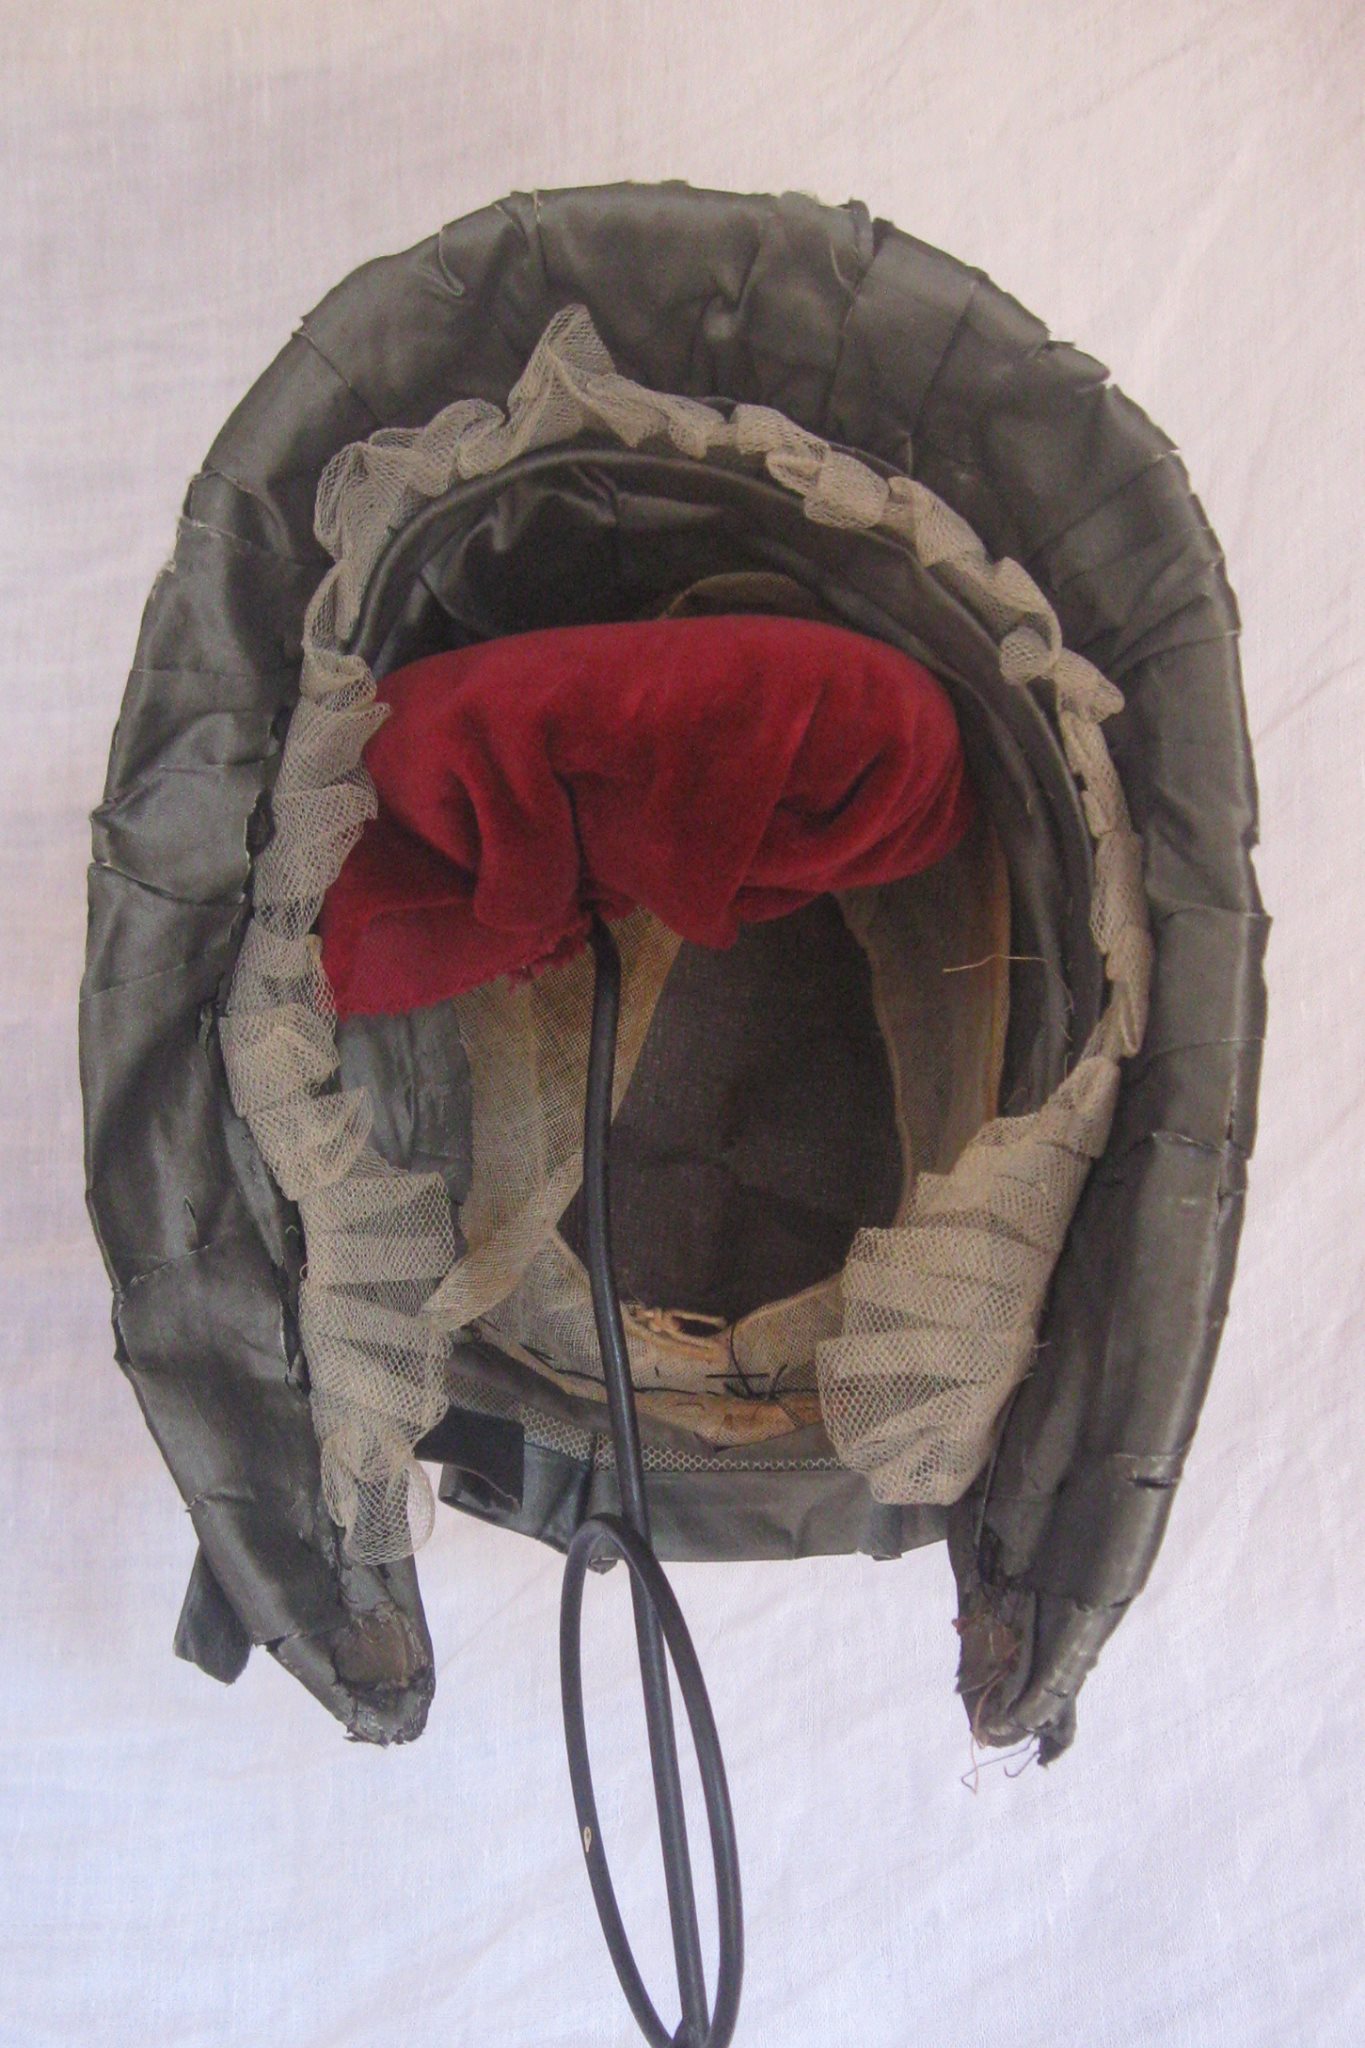
Why do I show photos of the insides?
I want to show you how I finished the insides because I know some people like pretty finished seams. As with originals, sometimes I make the seams pretty and sometimes I leave them.
EDIT TO ADD:
Do I have an Etsy shop?
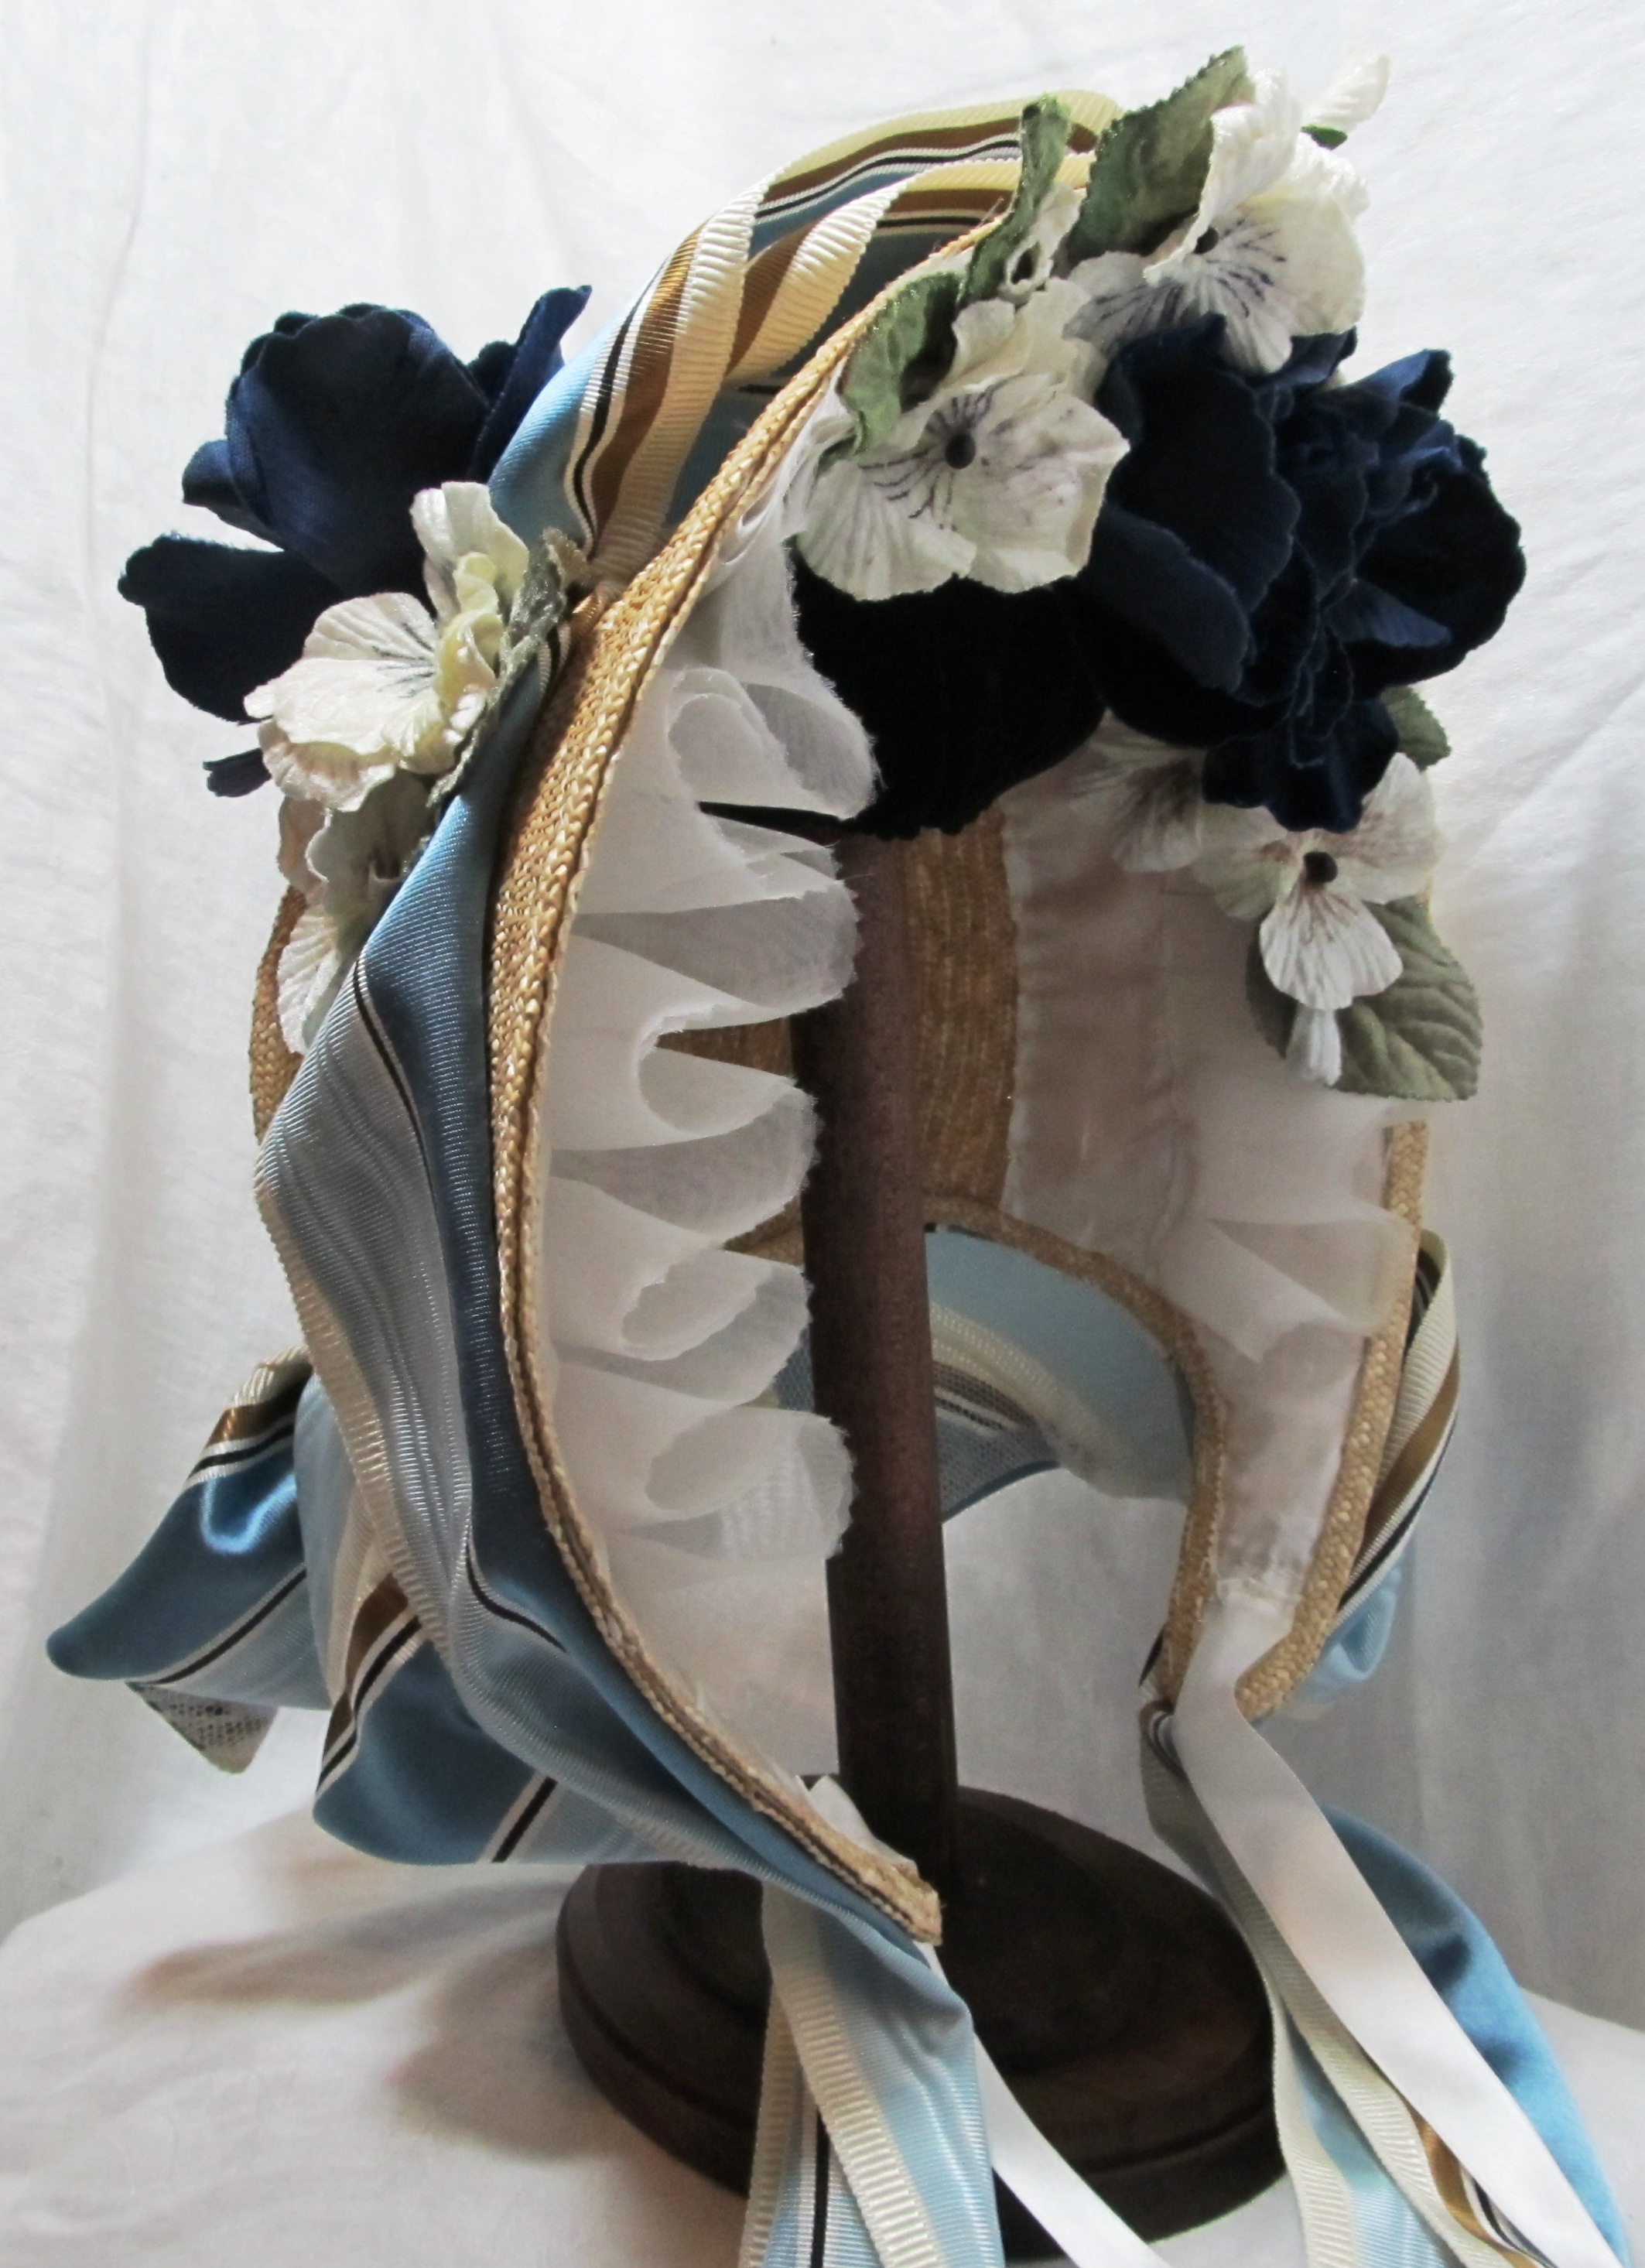
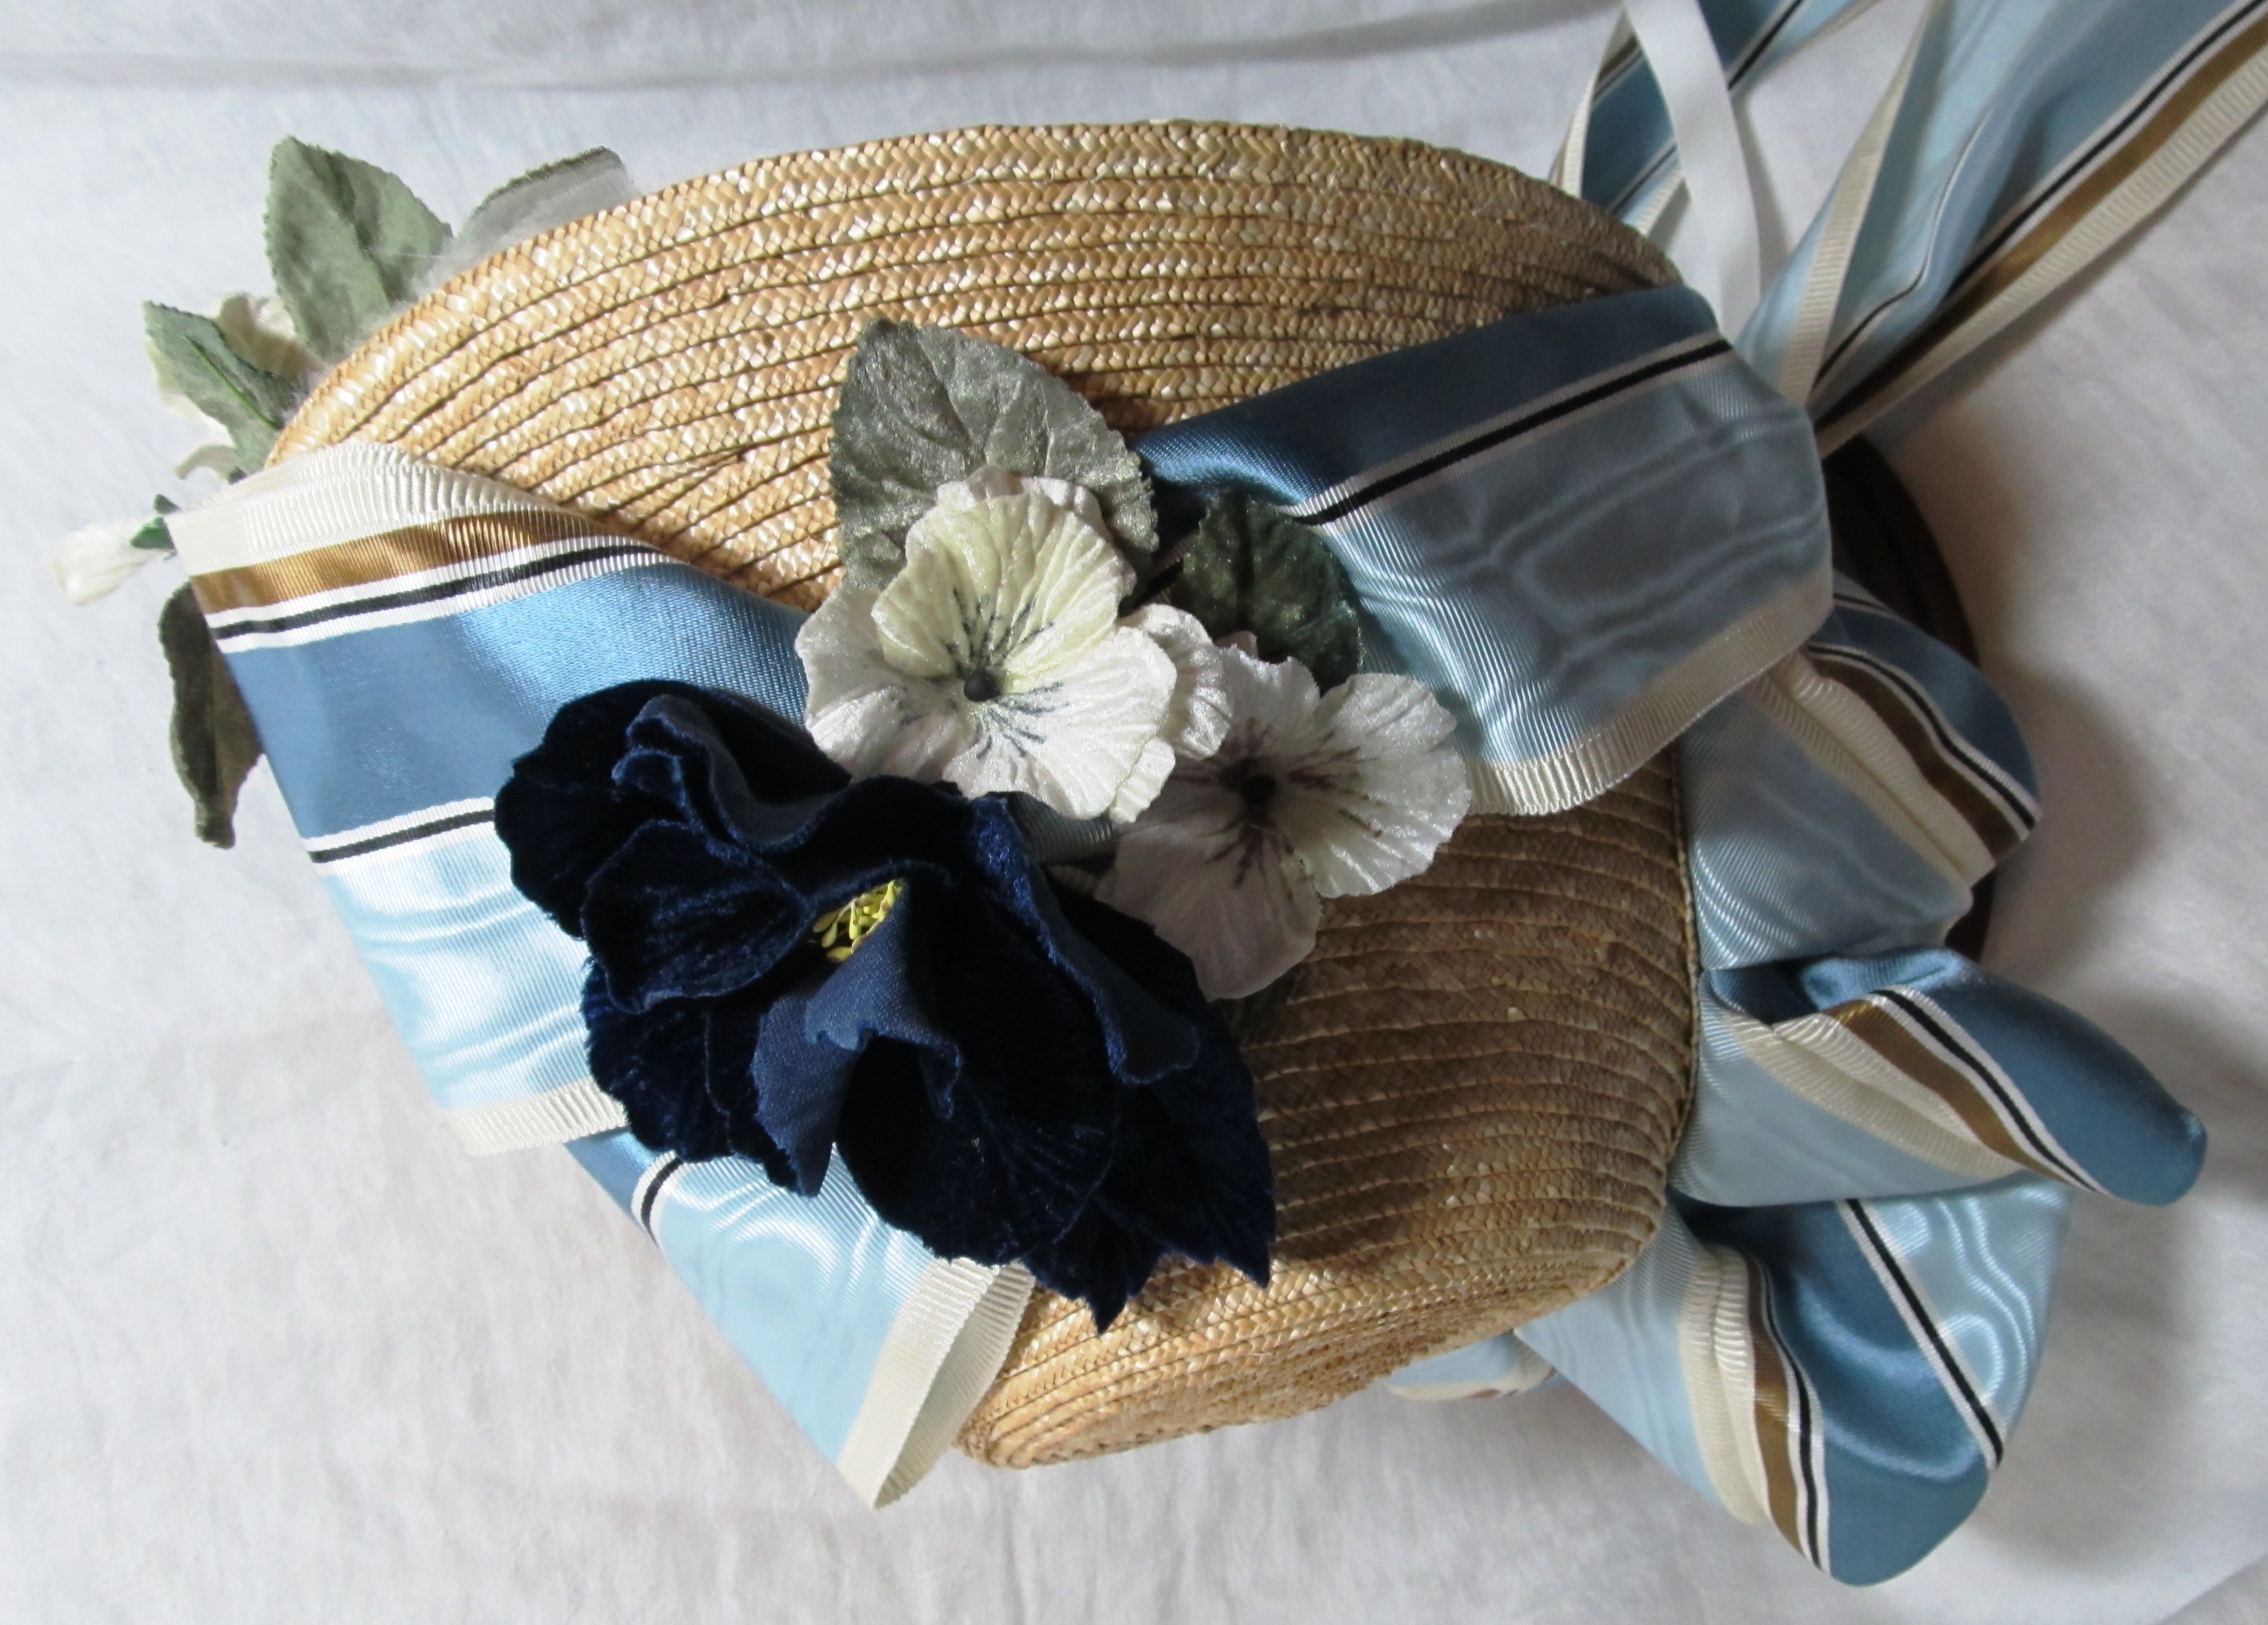
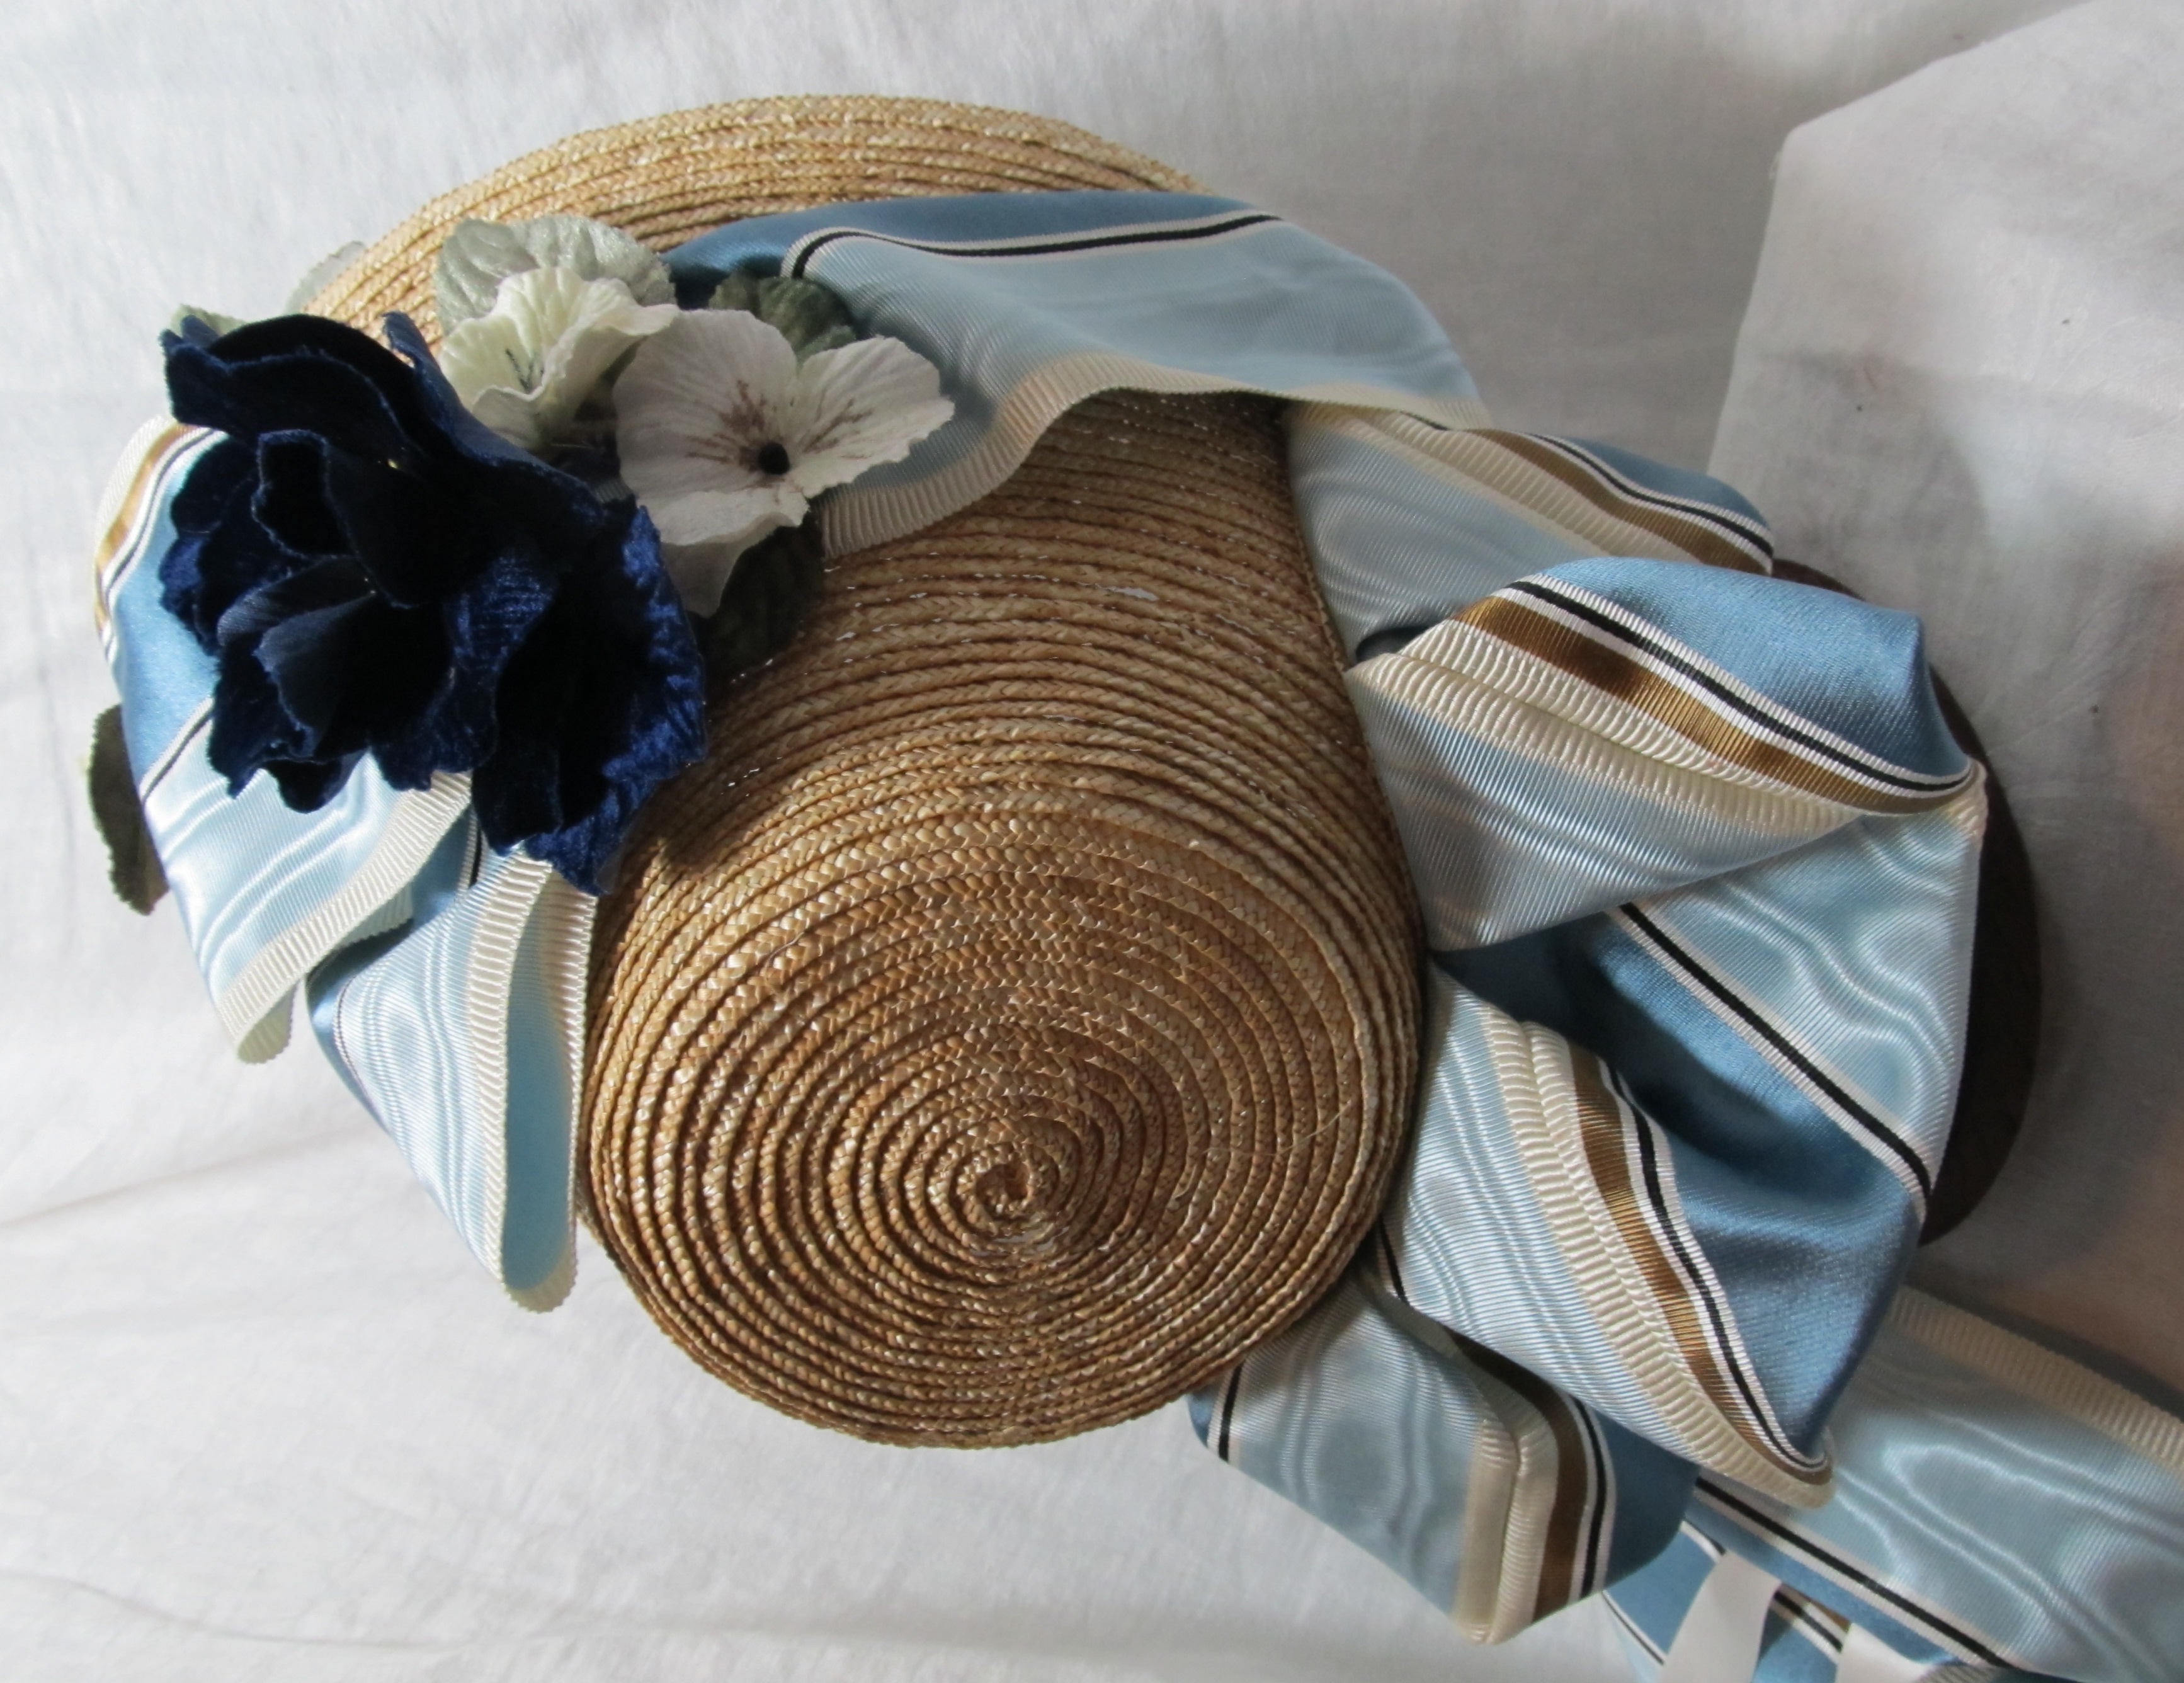
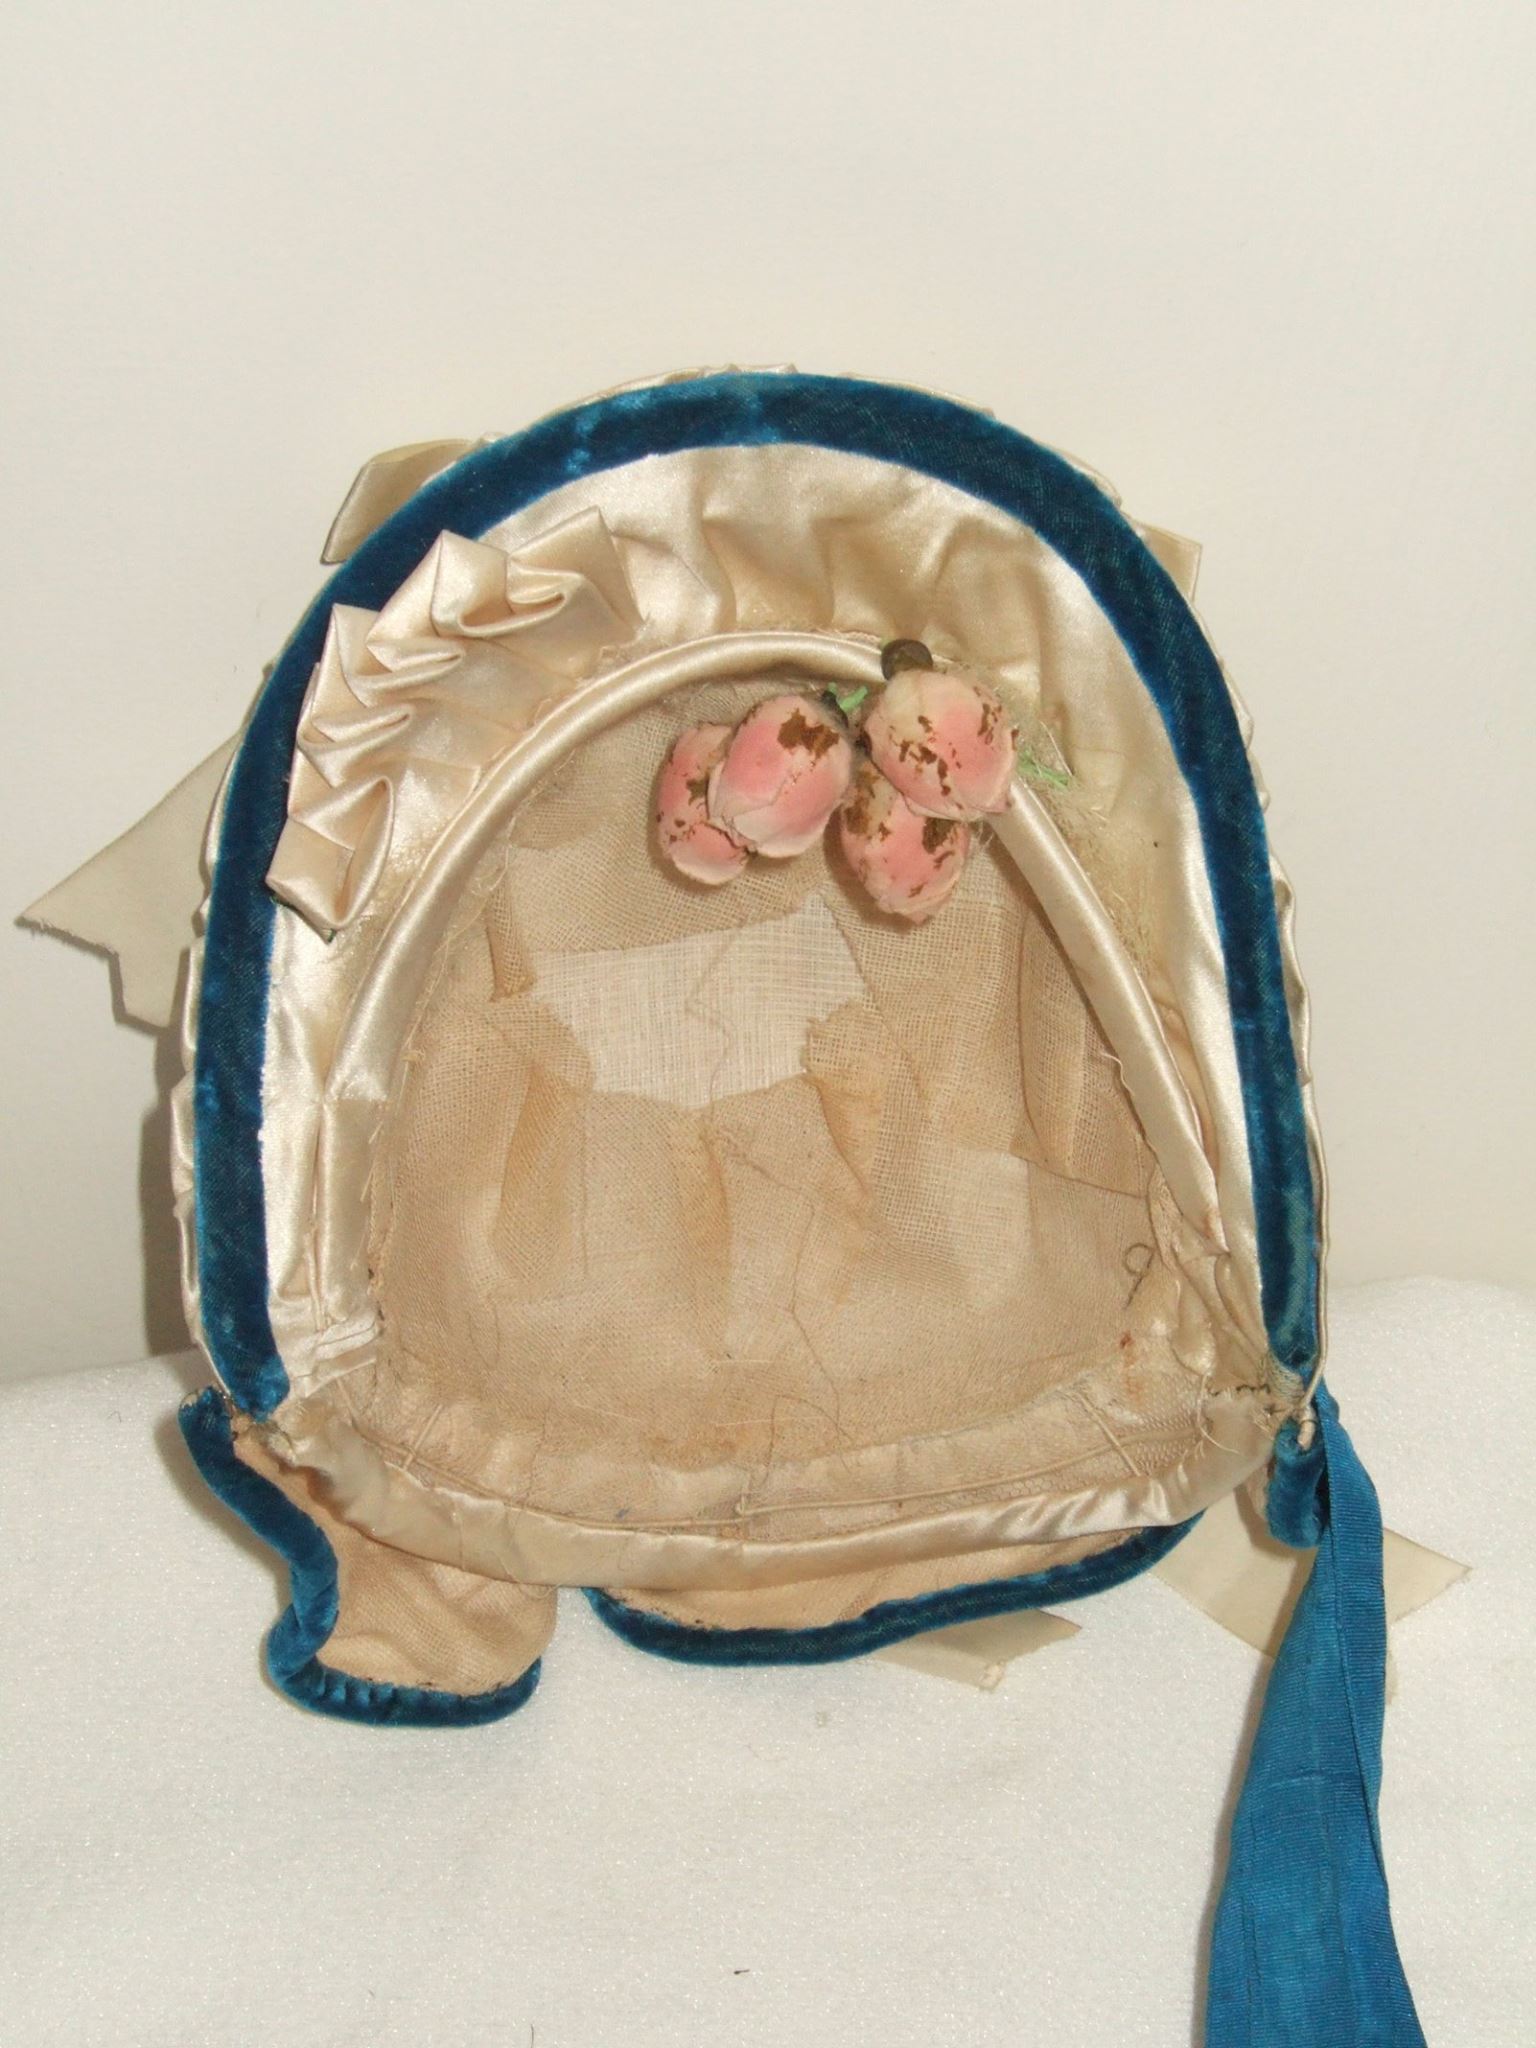
This Summer’s Millinery: Shades of Blue
I found it a little funny that when it finally got truly hot here and my head was screaming at me for it, that I was working on a bonnet whose trims reminded me of blue ice. I don’t know if anyone else sees the icy in the shades of blue or not.
The bonnet has a ribbon with satin, moire and grosgrain weaves – A nice find of the client. It made for a very, very cool bavolet with the diagonal stripes. It was so very full of body, I was tempted not to line it. But, couldn’t let myself do that. Take a look at those awesome deep blue velvet flowers. These are really stunning in person. I love the wild roses.


Why are Bonnets so Much?
[I wrote this around this time last year. It was just requested on a FB group. You may also be interested this chart “The Cost of Authenticity” from 2010.]
This is a question that comes up fairly regularly. Bonnets are expensive. This is because they require multiple materials and require time to make them.
To give you an idea, here are the materials that go into finished drawn bonnets and straw bonnets along with the price ranges for each item:
Straw Bonnets
- Straw plait ($20-$55 a skein depending on origin, plait and color)
- Millinery wire ($20/coil)
- Lining ($10-$15/yard)
- Facing ($10-$20/yard)
- Organza, net or lace for frill ($10-$30/yard)
- Bavolet net ($32/yard)
- Silk or Ribbon for Bavolet ($5/length to $30/length)
- Ribbon for functional ties ($2.80)
- Fashionable Ribbon ($4-$30/yard)
- Flowers ($10-$40)
- thread, sizing, etc
Drawn Bonnets
- Buckram ($4-$12/yard)
- Millinery Wire ($20/coil)
- Cane ($15 coil)
- Silk exterior fabric ($10-$30 yard)
- Lining ($10-$15/yard)
- Facing ($10-$20/yard)
- Organza, net or lace for frill ($10-$30/yard)
- Bavolet net ($32/yard)
- Ribbon for functional ties ($2.80)
- Fashionable Ribbon ($4-$30/yard)
- Flowers ($10-$40)
- thread, sizing, etc
To hand sew a straw form from straw plait, it takes between 6 and 10 hours depending on the type of plait and the shape of the bonnet or hat. Finishing and decorating varies.
Hats of Mine
I realized something today. I had a few people asking if I make hats for adults as well as children. I do. Of course I do. Oh, but they sell so fast, few people ever see the listings. Ooops
Here are some of the hats I’ve made. (These are just the photos I have on hand right now. I’ll add more asap.)


Bonnet Stays
This is the long, long, long since requested post on bonnet stays.
What is a bonnet stay? A bonnet stay is a band inside the mid-nineteenth century bonnet that helps hold the bonnet on the wearer’s head. In the nineteenth century, bonnet stays were also called “cross-bands”, “bandeau” or “traverse” (though these words could also mean other things.)
“A cross-band of black velvet that lies on the hair is trimmed on the right hand side with a group of rose-buds.” (Peterson’s Magazine, 1855)
“ A row of black lace covers the cross-band and forms a fanchon” (Peterson’s Magazine, 1864)
What were bonnet stays made from? Stays we have been able to identify have been made out of velvet ribbon, velvet fabric, cording and wire. This yellow trimmed horsehair &/or straw bonnet shows a wrapped wire stay. In the one image, you can get an idea of how the stay holds the bonnet on the head. The stay connects to both sides of the interior of the bonnet. Is sits on the head as a headband would, crossing over the head from ear to ear, actually above the ear.
From the Timely Tresses Collection featured in Fashionable Bonnets for the Introduction of the Ambrotype in 1854 through the end of the Civil War in 1865.

“From the Timely Tresses Collection featured in Fashionable Bonnets for the Introduction of the Ambrotype in 1854 through the end of the Civil War in 1865.
From the Timely Tresses Collection – Fanchon bonnet with covered cross-band. Notice the stitches used to attach the band that are visible on the left.
From the Timely Tresses Collection – An early 1860s bonnet with a cross-band.
From the Timely Tresses Collection – An Empire bonnet with a velvet stay/cross-band behind the cap/frill.
How do I make a bonnet stay?

This is a bonnet I had to very quickly make overnight from what straw I could find. The shape is very loose and flat. This stay holds it on rather well.
To add a stay to your bonnet, you will need velvet ribbon. I suggest purchasing half a yard, a half to three-quarters of an inch wide in a shade that will blend in well with your hair color or bonnet.
Hold the ribbon on your head with the velvet side down against your hair, running from ear to ear so you can feel where it is going to need to sit. Measure a couple finger widths up from the top of each ear and slide a pin in to mark that spot.
Put your bonnet on, positioned how it should fit. If you are nimble with your fingers, slide the pins that are in the ribbon into the inside of the bonnet. If that is too fiddly, pin the inside of the bonnet with separate pins just above the ears a couple finger widths.
Remove the ribbon and bonnet. Secure the ribbon into the bonnet with pins. Try the bonnet on for fit. You should be able to move your head without the bonnet shifting. (I was able to walk into 40mph parade winds without my bonnet coming off.) You may need to repeat the adjusting, pinning and trying on a few times before it is comfortable. Once you have the right fit, tack the ribbon in place securely. I suggest folding the end of the ribbon under and using a thread that matches the exterior of the bonnet.
What else keeps a bonnet in place?
Beside a bonnet stay other characteristics of a bonnet, a mid-century bonnet, helps keeps it in place. ~The combination of the frill and the interior flowers play a big, no, make that huge part in holding a bonnet in place. It is possible to take an early 60s bonnet that would want to slide right off the head un-adorned and arrange the frill and flowers such that the bonnet will perch in place as it should. The backside of the frill and flowers sort-of catch and hold the hair, keeping the bonnet in place. ~The overall balance front to back is a big help. If a bonnet is weighted towards the tip or the bavolet, the bonnet will want to slide backwards. If the flowers in the brim or on the top/side of a bonnet are heavy, the bonnet will shift forward or sideways. Keeping a balance is a matter of positioning as well as weight. ~ For some shapes, the cheektabs actually help hold the bonnet in place as they hug the side of the head, not the face, the head. ~Your hair placement and style can also be a factor in how a bonnet fits. For some years (more 50s) the hair arrangement goes inside the tip of the bonnet. For other years (more early 60s) the tip rest over or on the hair. In either case, the hair anchors the tip whether it is encasing or sitting on the hair. Another hair aspect to keep in mind is simply having too much or too deep of a hair arrangement for a shallow tipped bonnet. (If you naturally have a lot of hair and a large hair arrangement ask for a deeper tip.)
I will add some additional photos once I take them.
Show Your Millinery Give-Away!!!!
I’ve been a bit grumpy and stressed lately. Time to cheer things up!
It is time for a Give Away!!!
 The Prize: Making its debut this weekend… GCV is releasing its Centuries of Fashions Cards–!!! Each set includes 12 high quality photos of fashion from 1790 to 1912 worn by the museum’s models. The winner will receive one of these very first sets. Future sets will include pieces from the Greene Collection!
The Deadline: Friday, the 22nd of May
The Ways to Enter:
 First, Show Me Your Millinery! Take a photo of you wearing a piece of millinery I made and Share it on Facebook, Twitter or in the Comments below. Be sure link it back to this give-away and to tag me so I see it. (Don’t own a piece of my millinery yet? If you have a friend who will let you enter with her bonnet or hat, you can enter that way too.)
 Second, Inspire Me! I love the inspiration the world around me offers. The color, the texture, the beauty of the natural world provides a palette of inspiration for when I sit down to work. Take a photo of something you think will inspire a beautiful bonnet or hat. Share it on Facebook, Twitter or in the Comments below. Be sure link it back to this give-away and to tag me so I see it.
I will compile all the photos to share in a blog post that will announce the winner.
 Third, Buy Millinery! Stop by my Etsy shop. For each purchase, you will be entered.
The winner will be randomly selected on Friday, May 22nd!


Avoiding Millinery Mishaps
There were a few questions that came up when I asked for questions for the milliner that had to do with what not to do. I generally prefer to approach things from the positive. But then I saw this post “The Most Common Mistakes in Historical Costuming/Re-enactment- and how to avoid them“, which was written quite well and from a very helpful standpoint. So, I’m sorta stealing her format to look at the mishaps and mistakes that can happen with millinery.
The wrong shape or size for your face.
A great hat/bonnet in the wrong era.
While there are some pieces of millinery from one era that are very similar to that of another era, pieces that distinctly belong in another time period stand out when they are misplaced. I do understand how it can be so tempting to pick up a beautiful Georgian piece and wear it to a Victorian event, it simply does not work 98% of the time.
Wearing the wrong millinery for your social class or situation.
We tend to talk about bonnets in two categories: fashion and sun, which may accidentally cause us to compartmentalize fashion into an upper class garment and sun into a lower class garment. This is not the case. What we often call ‘fashion’ bonnets, those structurally made of wire & buckram/willow/net or those of straw, spanned up and down social strata. (We really need to figure out what they would have called their bonnets.) The same span also existed for sun bonnets.
Clunky materials.
There is something about clunky materials that stand out even more than synthetic materials to me. Now, I’m not approving of a poly-taffeta for your bonnet either. I’m saying clunky cotton or poly cotton laces scream at me, as do thickly spun or loosely woven silks. These are not the materials of the vast majority of 19th century millinery. Fabrics, laces and net were fine and light. Even the bonnets that were made from velvets or corded materials were still made with versions often lighter than those we commonly see today.
Trims that will bleed.
To great dismay, and often tears, ladies have found that some beautiful flowers or feathers are not color-fast. While most of us fear the rain when we have a pricey bonnet on, it is at times the slightest sprinkle or even heavy humidity that can cause the dye to run. The biggest culprits are brightly dyed feathers and paper flowers.
Bad advice.
I sorta feel like a jerk as a blog writer saying “don’t listen to that blog writer”. But, I am. There are several quick and cheap millinery advice posts out there. I plead with you – Do not follow them!
Do not make a bonnet out of a cereal box. Do not use duct tape on a bonnet. Do not use quilters templates nor plastic cross-stitch canvas to make a bonnet. Some of these may be okay for a Halloween costume or middle-school play. They are not correct for a historical site, nor are they healthy when you consider how much heat some of these materials can trap against your head.
- Favorite Topics - Millinery/Bonnets/Ribbons
on May 20, 2015 at 7:00 pm Leave a CommentTags: Millinery Commentary