One month ago I had a nasty stuck gallstone hunted down and my gallbladder removed. This weekend, I had my favorite event that pretty much works as my yearly mood lifter. I had heard that within two weeks others having their gallbladder out were wearing their corset and attending events. Me, not so much. As this weekend approached, it became very obvious that not all my incisions would be closed in time and my pancreas hasn’t fully recovered. Even with padding on the holes, my pancreas can not handle pressure.
Okay, skip the corset ….. Wait. Three holes are at my waist. No way can those handle the weight of petticoats and a skirt.
Grand sulk
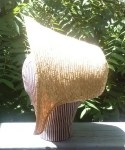
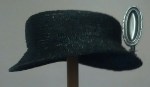
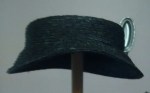
Then Terre shares this image from Godeys, December 1861. For the first time I felt excited about getting dressed and going to my favorite event.
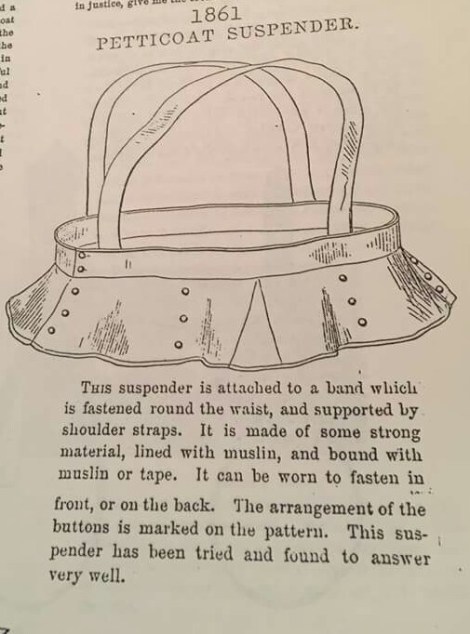
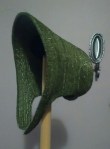
That night, I constructed my own skirt support based on this.
Construction
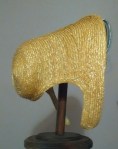
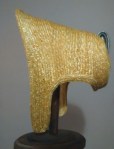
I used a heavy weight linen fabric from a friend’s destash. These were left over pieces. The fabric weight and weave resembles a good heavy denim.
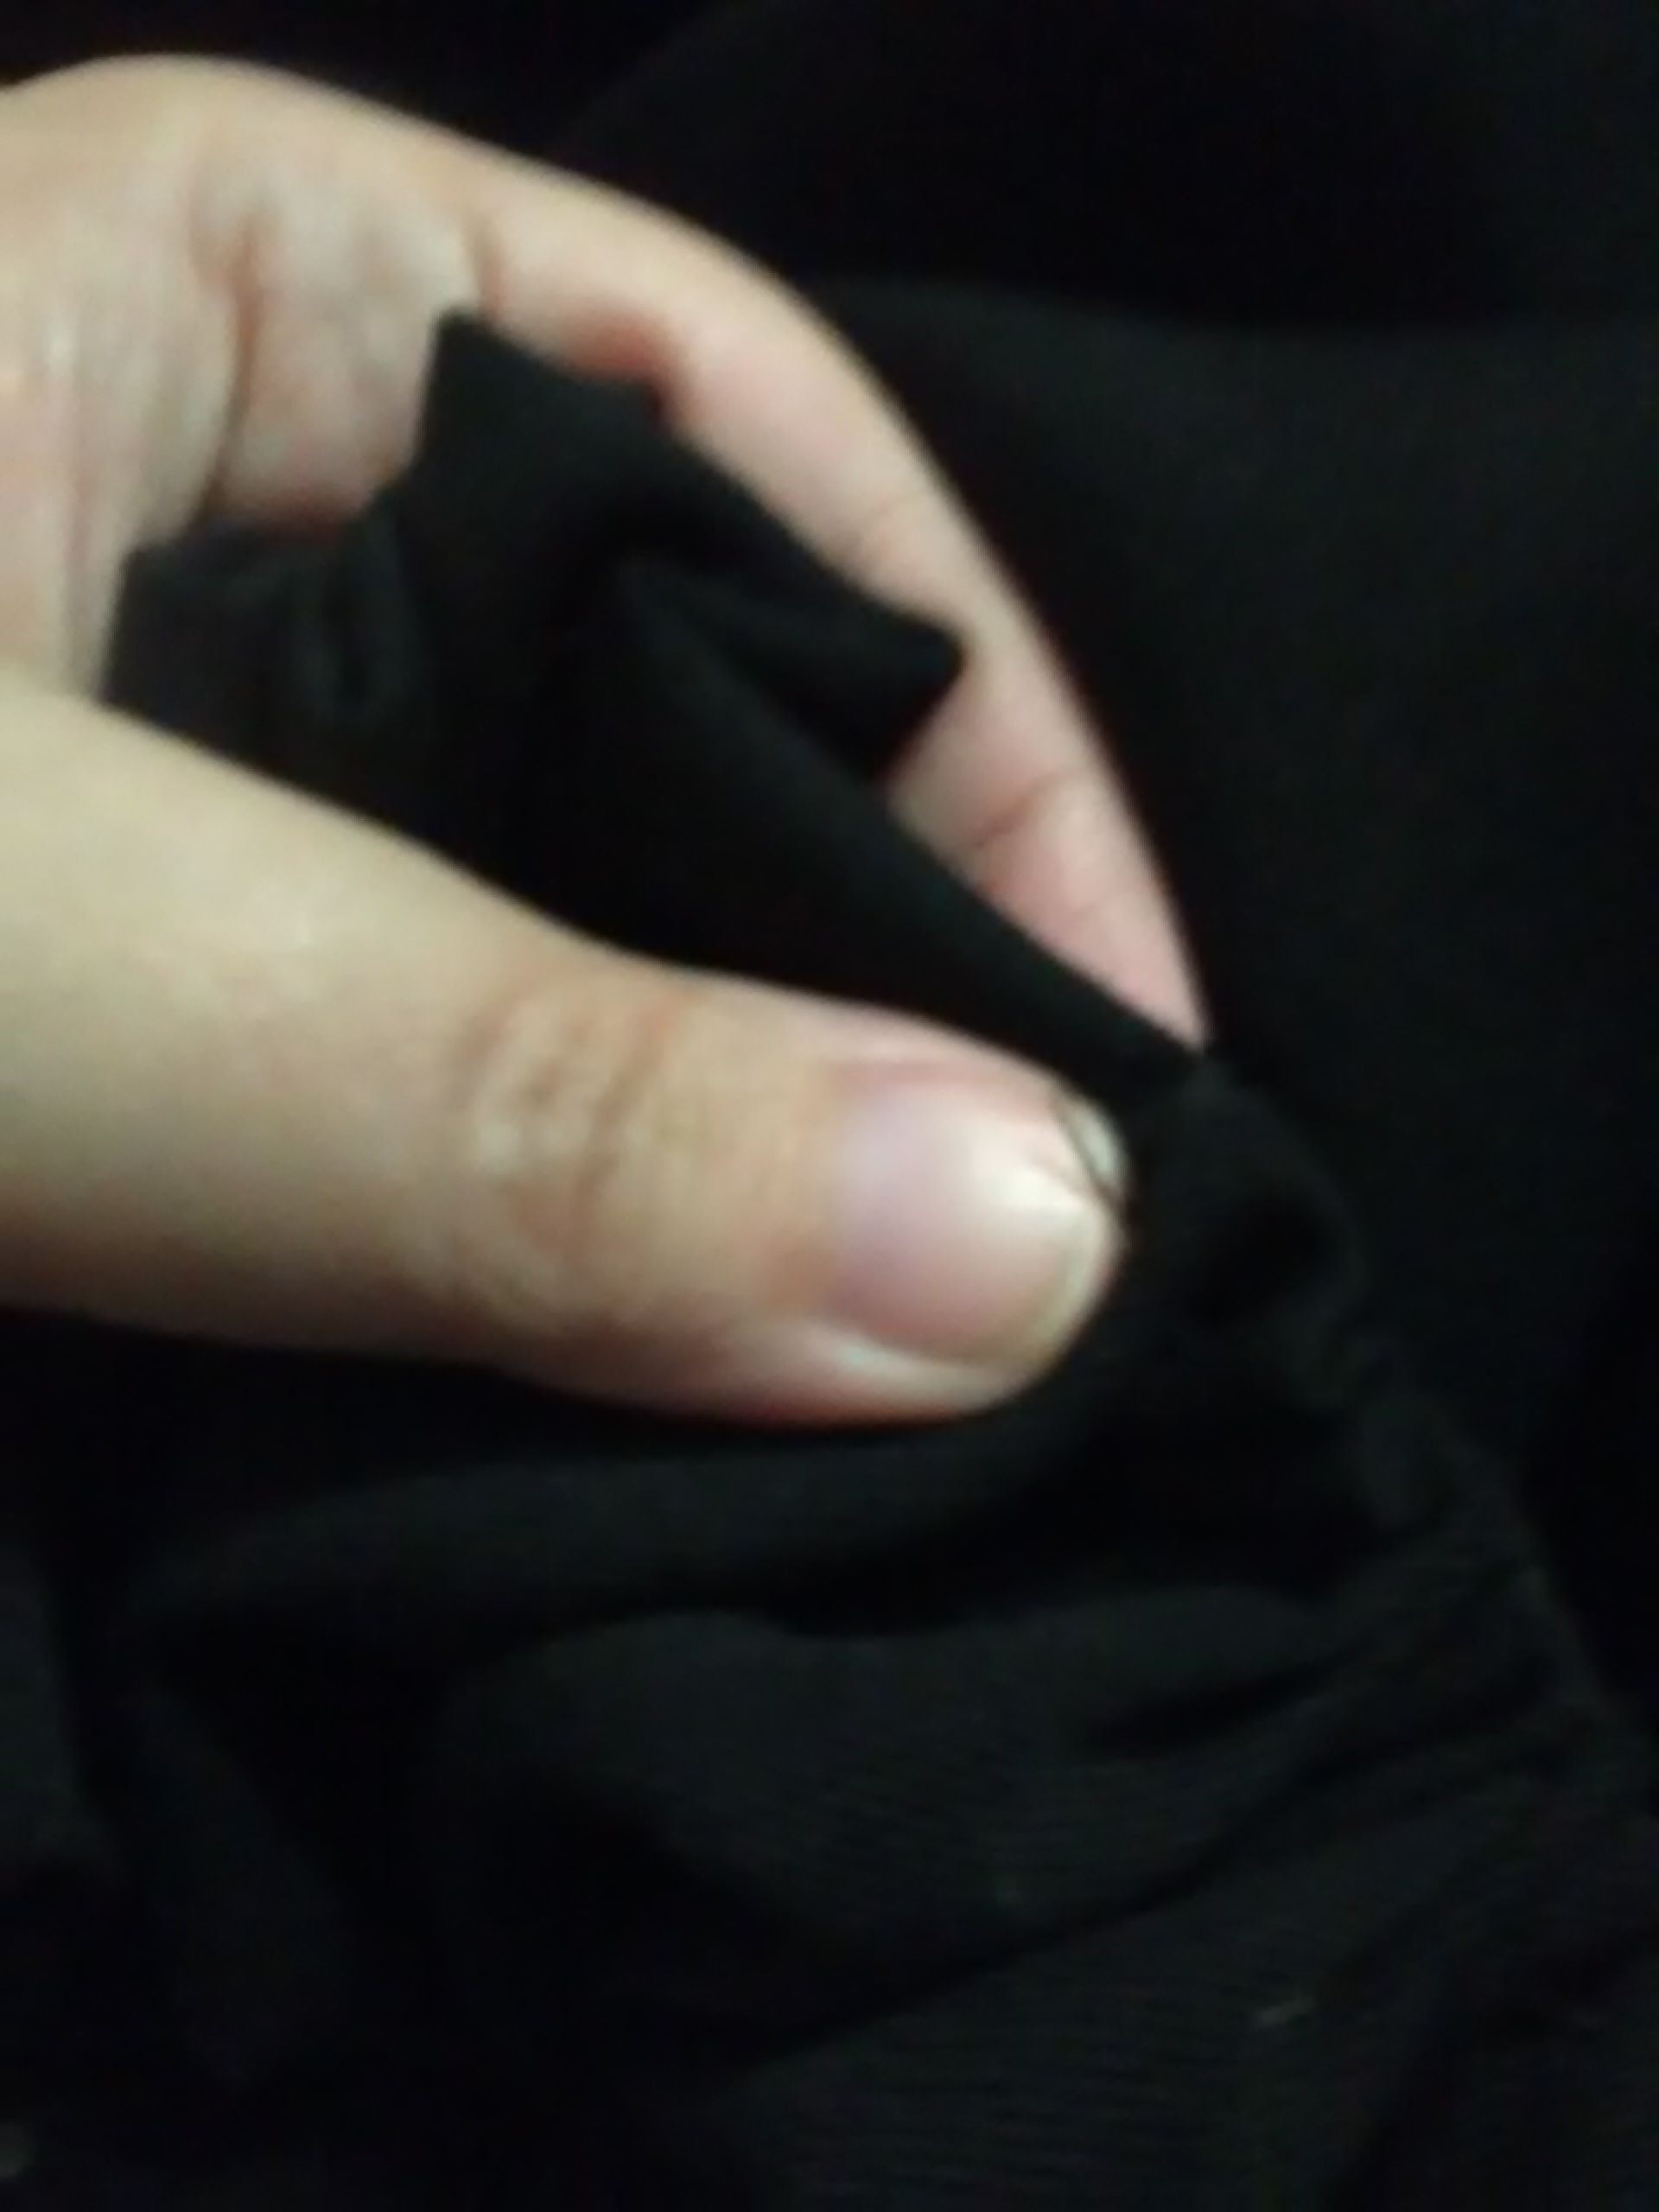
I had figured 4 sections with gussets based on the image. With the fabric I had, I made three trapezoidal panels. Each panel had the lower edge curved and a gusset set on the center.
The “waist” band actually sits around the upper abdomen. The day I made this, the pancreas was more swollen. This was good in that it insured the ability to make a loose fit for the waist band. It also meant that when I put it on yesterday it was at least 4″ looser than the evening I made it.
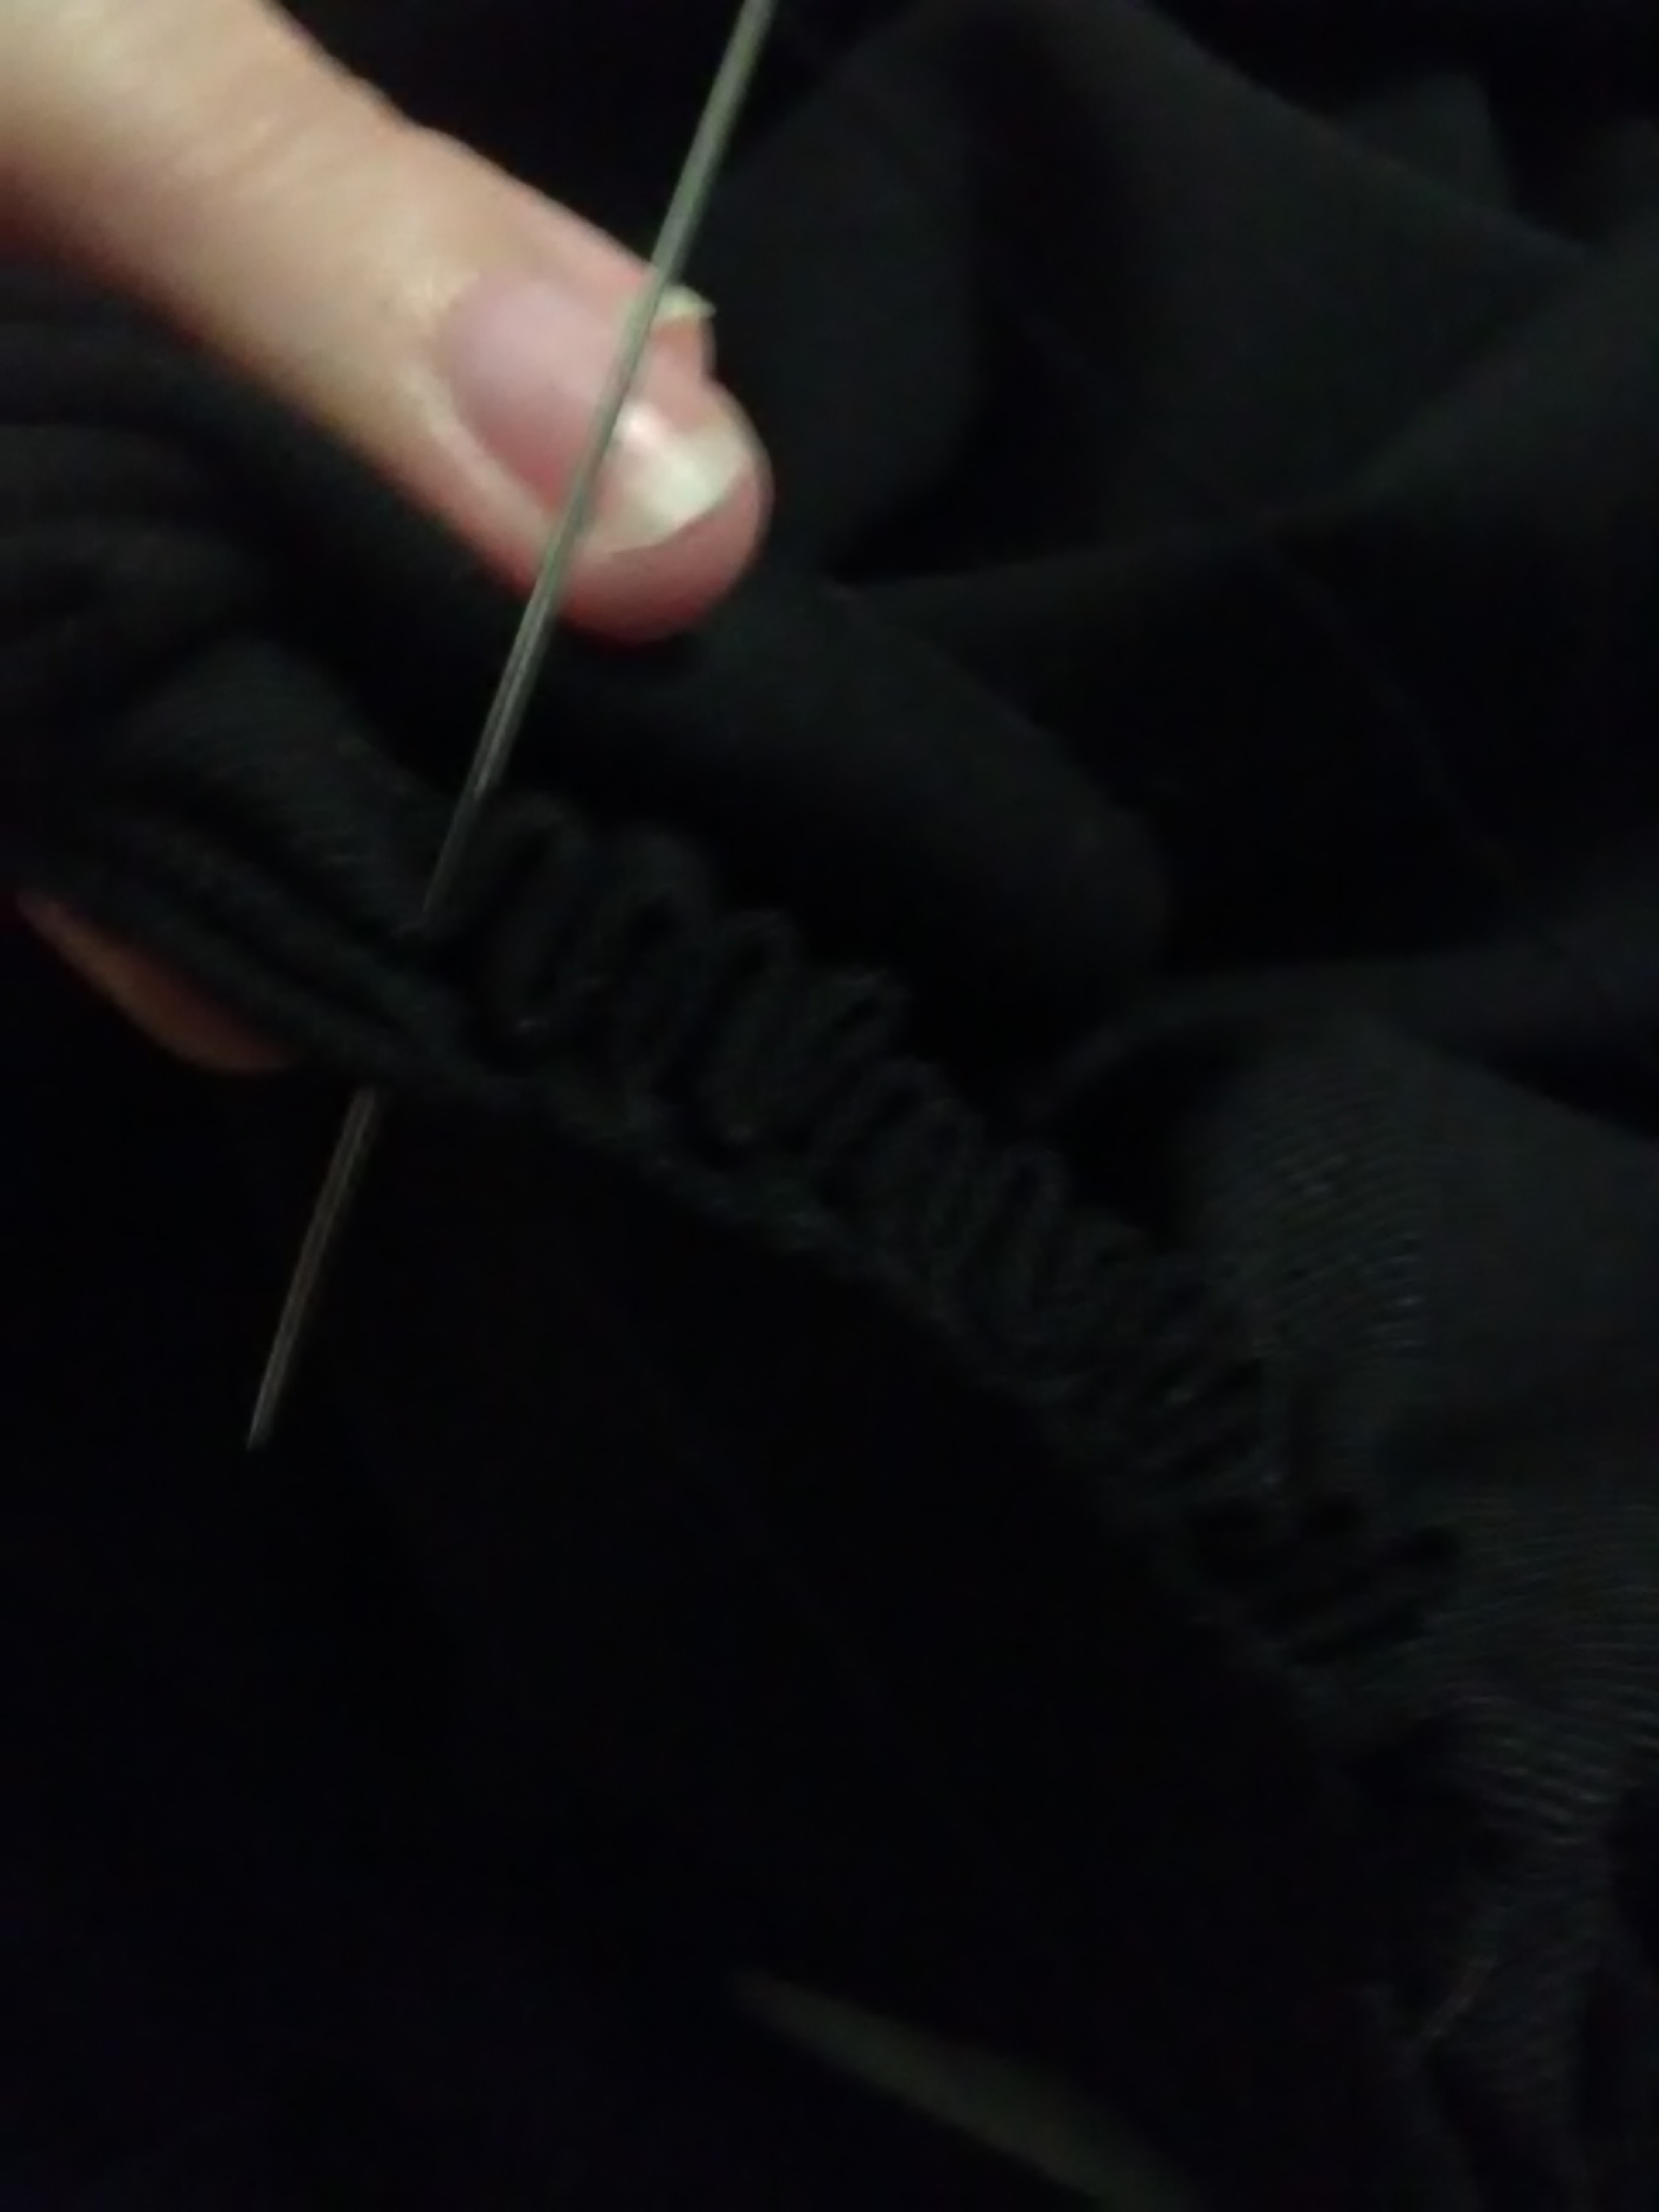
I added a small closure panel to the center front.
The bottom edge of the “skirt” got three rows of cording. I debated between cotton yarn I would use for a sunbonnet or a heavier clothesline cord. As I had the former and not the latter, cotton won. The heavier would have created more hip oomph.
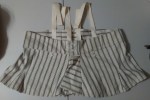
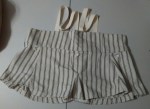
The buttons hold the petticoats and skirt. The illustration showed sets of three buttons in, I think, six placements. Those are shown on the skirt section. Given I had the waist band set much higher, I placed the buttons higher where the skirt attached to the band. I used I 5 sets of 2 buttons set just off of center front, just in front of the sides and center back. M y petticoats* each got 5 loops in the top edge of the waistband in the corresponding places.

I thought small buttons would be good because they would be least bulky. After attaching and unattaching them tired, I wish I used larger buttons.
The straps are shown placed in a way that just wouldn’t work for me. I have trouble enough with some modern bra straps. At first, I placed the back of the straps further apart in the back and nearly center front. Saturday night, i move the back ones in two inches each. This was much better with the straps staying put.
*Petticoats: My petticoats were not made to be worn corsetless. I had to add extensions to each.
Wearing
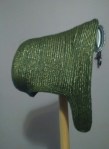
I combined this skirt support with my Regency short stays over a chemise and drawers. Luckily, I had a loose fitting pair of drawers. As you can see, they were also a whee short. On to the skirt support buttoned a corded petticoat, tucked petticoat and wool skirt.


As you can see, I have some body symmetry issues. Some is the heavy purse syndrome. Some is the gallbladder space being smaller while the pancreas side is bigger. I was incredibly asymmetrical the first weeks after surgery, even my bust.
After Thoughts
I was generally pleased with the comfort and the look. My worries were looking as fat as I am, not having the right lines, and the weight of my layers sitting on my shoulders. I was confident in the fit that I would not have pressure on my abdomen or rubbing on my waist holes. After two days, I found the weight on my shoulders was not an issue at all. Somehow I felt my petticoats and skirt less even though the wool skirt weighs much more than my sheer skirts. I was basically pleased with the lines. I don’t know how fat I looked. But, I don’t hate the one photo I have of full length me.
Medically, I could feel with my hands that I was a little fuller in the abdomen on Saturday. Some said they could see the difference. This was not uncomfortable at all. (It did not help that my stays string broke and my bust shirted.) Saturday the incisions were good. The only irritation was from the bandaging. Sunday, the upper incision, just below my breast bone, did get irritated and may have something going on. I suspect it was rubbing from my stays. It may have been a better option to go with the soft bra I have lived in since the surgery.
I wasn’t originally going to post about this. But, someone in one of the FB groups mentioned she was having surgery soon and some at the event mentioned a planned C-section. While I am not recommending anything because that is risky. I was encouraged to share my experience.