In Regards to Hats
Just moving over parts of an old PowerPoint and notes. Images – Hats Worn ca 1858-1865
Will You Become a Patreon Patron for the New Year
This past year, with the funds from Patreon I have paid for my WordPress platform & domains, two amazing collection additions, and a couple of Clara’s Chewy orders.
The shipping mishaps with the black straw mourning bonnet nudged me into trying my hand at repairing or stabilizing original straw bonnets. I already have several ideas and techniques I want to explore when time and funding allows.

In the coming year, I hope to find ways to share more of my research & collection, as well as spend more time writing both non-fiction & fiction. Your support through Patreon will continue to pay for both written content on WordPress & Patreon, as well as research & presentation endeavours.
I would love to add at least 3 supporters to each of my main Patreon tiers in 2026. Doing so would reduce my financial anxieties and allow me to give more focused attention to my work.
If you are able, please consider supporting me on Patreon: https://www.patreon.com/AMillinersWhimsy

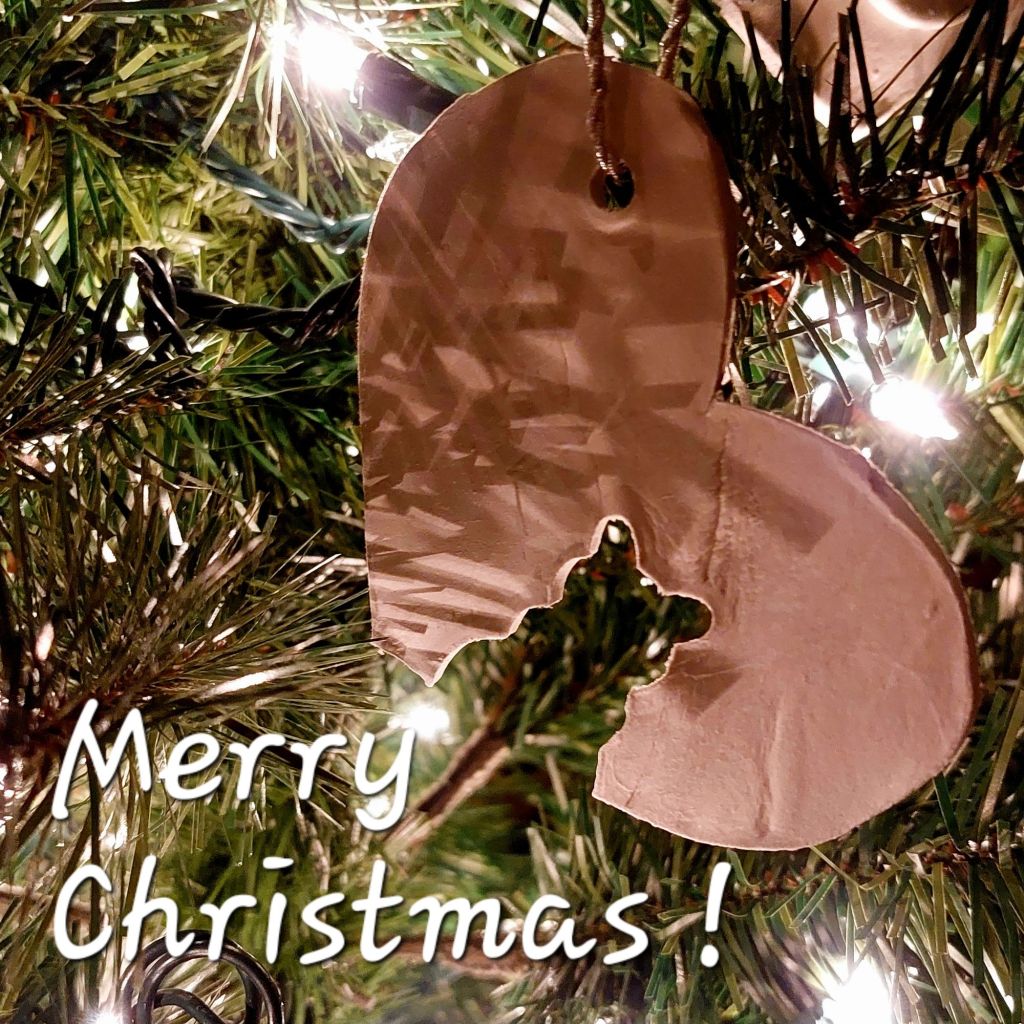
Holiday Open House with Cats & Dogs
32 degrees, light snow, and occasional sun. Could there be a more perfect winter day to visit a 19th-century village decorated for the holidays?

Based on the square filled with kids, young and old, building a snow family and playing in the snow, many found this to be the case.
In the MacKay House, we had a bit of fun as well. We pinned cats against dogs, encouraging visitors to vote for their favorites.

To help with the decision, or maybe make it harder, we displayed and discussed a variety of handmade cats and dogs. This assortment of Victorian fancy work and toys included pin cushions, needle-books, pen wipes, weaving designs, and early toys, all cat & dog themed. I even worked on an embroidered holiday cat pocket.
Several people inquired about making some of their own. Here are the directions or sources for most of them:
Dog Pin Cushion (also Good as a Toy)
This dog worked up well in soft, fulled wool, the type for rug hooking. I could see it made up in a wool felt or heavier cotton fabric as well. Thinner, softer fabrics would need an iron on stabilizer for more body. I discovered this pattern looks a little like a goat when cut & sewn according to the tempate. I made several changes to my second one, the plain brown one. I elongated the face, gave it a longer tail & ears, and made the body leaner. This PDF includes the original template and my alterations.

Cat Needle-book
I made the cat needle-book several years ago. Here are the original directions. I used thin pasteboard, 2 layers for the front and back, off-white wool on the outside, silk taffeta on the inside, and tropical wool for the needle pages inside.
Many people commented that the cat looked felted. I absolutely think this is a design someone could felt, particularly needle felt. I would love to see someone or multiple someones do so.

Patchwork Cat & Patchwork Dogs
The patchwork cat outline was taken directly from an original patchwork cat. The dogs are drawn from a photo of a lab. The dog in brown was made first, highlighting some problem spots with the design. Here are my outlines for these:
You will need siln or other fabric scraps, a cotton layer to sew the scraps to, a back fabric, and wool or poly-fill. I recommend tracing the cat or dog to the back side of your lining fabric. Do not cut the shape out until after you sew. Sew your silk or other fabric scraps to the front. Iron the front of your cat or dog smooth. Place your patchwork layer right sides together with the back fabric. Using the traced line as your sewing line, sew around your cat or dog. Leave a 2″ opening on the back to turn your cat or dog right side out. You will need to use a stick or pencil to help with small areas like the nose, ears, & tail. Fill with filling. Close the opening with a blind stitch.
Ithaca Cat – Ceasar & Friends
My full-size Ceasar Grimalkin, aka Ithaca Kitty, came from the History Center in Tompkins County. I intended to include a link to their shop but I do not see cats in the online shop currently. My small cats & dogs are courtesy of a friend. I also planned to include a link to a shop on Etsy where I’ve seen reproductions of the printed fabric available. That appears to be gone as well.
Cat Pen Wipe
Bad news first – My cat pen wipe was made years ago freehand looking at originals. I did not make a pattern or enough notes to make one.
Good news – I will be doing a program on Pen Wipes in February at the Wehle Gallery. Along with showing some original pen wipes and my reproduction pen wipes, visitors will have the opportunity to make your own simple pen wipe. More details to come.
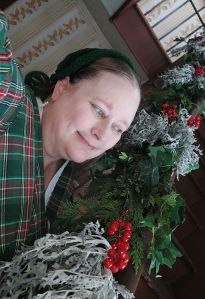
The Urgent Holiday Dress
Procrastination bit me hard this month. In early October, I told myself I should try on my clothes. As October became November, I told myself I really should try on my clothes. The first week rolled on and became the second. The weekend before Thanksgiving, I told myself I absolutely must try on my clothes. That is how two weeks before Holiday Open House I discovered my wool plaid winter dress didn’t close by a full 4 inches across the bodice.
This is how I found myself digging through my totes for an acceptable dress length and rush sewing a new dress during Thanksgiving break.

Luckily, I had a green & red plaid heavier cotton in my stash with 6 2/3 yards. While wool would have been preferable, the festive aspect had appeal. I debated between eras; fun with plaid battling speed.
While I drafted over the weekend, cutting commenced Wednesday morning. I sewed through from Wednesday to Sunday, with Thanksgiving, finalizing my divorce, and changing my name in between. The dressed was finished enough to wear Sunday evening with enough time for a relaxing movie before going to bed.
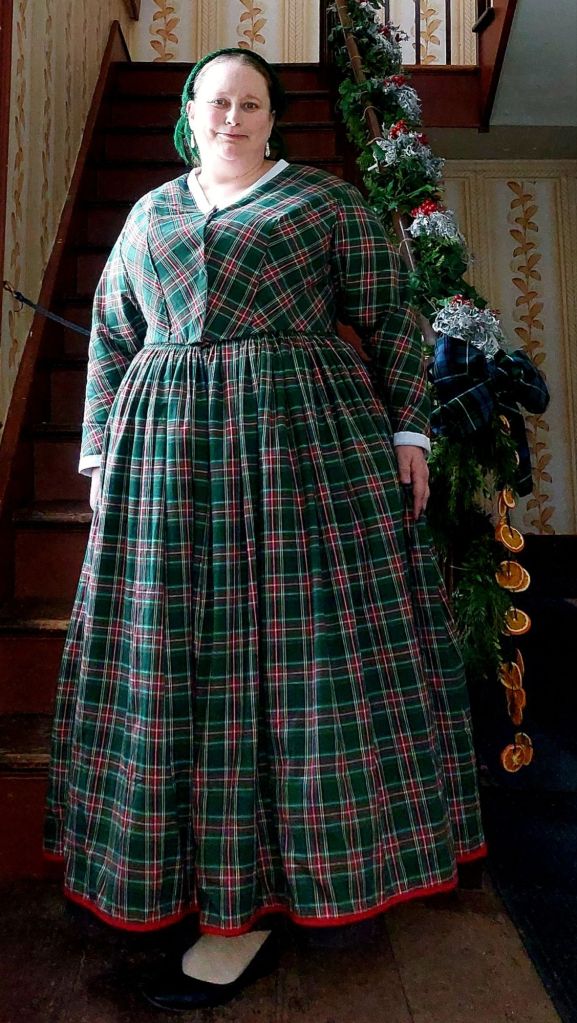
For such a rushed dress and having not made myself a garment in a long time, I am pleased with the fit. I opted to treat the fabric as if it were wool rather than cotton because of the weight and the winter purpose. Plus, the plaid wanted to. I went for a bit shorter skirt to save on fabric. Ironically, I have enough left that I may add some bias either to the skirt or sleeve or something. The skirt is 4 45″ panels, gauaged to the waistband. The hem is faced with a reproduction cotton print and bound with red cotton tape, as I did not have a wool hem tape on hand. The front bodice pieces are cut on the bias to create the Vs. Initially, I pleated the bodice, quickly discarding gathers as an option. Seeing the bodice set, I decided to top stitch these into darts to help the bodice lay. (At some point, I need to readjust one side as it lays funky with excess fullness sitting above the bust. I have torso asymmetry following the gallbladder surgeries.) I wanted to do something more involved with the sleeve, but I also want to be done in time. (With several other projects pending.) I opted for simple one-piece sleeves cut on the bias. These are fully lined with plain cotton. The fit is comfortable for my arms with hereditary wings. I finished it off with quick hooks, cuffs, and collar.
I picked my Moonstone broach and earrings, not wanting to wear black, which is primarily what I have. My knit cap definitely helps keep my head a tad bit warmer and cold migraines at bay. I consider wearing a red ribbon belt, which has a gold slide buckle. But, it just looked jarring and not quite right.
Oh, shoes. Because of the snow, ice, and a fear of falling, I wore snow boots and changed into house flats. It is what it is. I just don’t bounce as well as I used to.

This is now my Holiday dress.
I couldn’t find my red wool petticoat, which I what I pictured under this. I went with my dark grey, which is meant to be worn over a cage. It is too long for this skirt and sticks out. Adding to my hem drama, within 30 minutes of arriving I snagged my hem tape on a door frame and tore off about a foot. So, it needs repair be the next open house.
Engaging with Cats & Dogs
If you’ve followed me for some time, you know that, for me, one of the most important aspects of creating a program is connecting with and engaging visitors. I love when some aspect of what I am sharing with people sparks a conversation, stirs up a memory, or opens the door for a visitor to share their story as well.
Some times, the littlest thing can be what catches a visitor’s s attention, draws them in, and helps them connect with the aspects of history I am sharing with them. The most simple object can connect with a visitor, such as small strawberry pin cushions and emories. These tiny objects brought special smiles to visitors’ faces as they shared stories of little red strawberries. from visitors.
True connection with visitors can vary. A visitor may stand over my shoulder mesmerized by the turning of a pinking machine. A pair of siblings may pull over a bench to sit and ask questions. A young visitor may hop up and down as they make a connection with something they saw earlier elsewhere. Yet, engagement isn’t always active interaction. It can also be the quiet, elderly visitor in the corner staring at pen wipes, waiting for the room to clear so she can pull back her tears and tell me about watching her mother write with pen & ink as a child.
In developing my program for this month, I knew with all the stress in my life and likely in the life’s of the visitors I will see, I needed to do something fun that nearly everyone will be able to connect with on some level. This year’s 19th century handmade gifts for Holiday Open House are all about
Cats & Dogs

My hope is visitors will engage with the various pieces of cat & dog fancy work I’ve created. Maybe, they will share stories of the cat or dog, or similar projects or gifts they made. By doing so, I can help connect them with the history of handmade gifts and the educational aspects of fancy work for girls and women.
I also hope visitors will have a little fun with this and enjoy voting for cats or dogs.
New Patreon Level
I added a new supporting tier to Patreon called Workshop Benefactor. This is something I’ve wrestled with for quite a while. It’s never easy for me to open a space where people can offer more support, and truthfully, I’m uncomfortable even allowing it. But to continue the research and writing I do, particularly with millinery and fancy work, I have reached a point where I need to carve out more time and resources to keep going.
If you’ve been following my work for years, you know how much care I put into every project and how much joy I take in sharing it. The Workshop Benefactor tier is simply a way for those who feel strongly about sustaining this work to do so in a more substantial way. It’s never expected. It’s never assumed. But it does make a real difference.
As always, I’m grateful for every kind of support, be it reading, commenting, sharing, or simply being here. Thank you for walking with me through this evolving creative life.
Happy Thanksgiving!
Happy Thanksgiving, friends & followers!
Whether you’ve been reading along with me for years or just recently found your way here, I’m grateful for the small community we’ve built together. Today can be joyful, messy, complicated, or all of the above, and however it meets you, I hope you find a pocket of calm, a good story to hold onto, or a moment that feels like warmth.
Horsehair Bonnet

What happens when I break my “no buying” rule and put in an offer on a dreamy little bonnet when I really, really shouldn’t?
The most well packaged box arrives on my doorstep when I am in the midst of a curl in a ball migraine. I brought the box in, set it on the table, took my meds, and layed on the couch in misery.
Eventually, I talked myself into going to bed. Or, maybe that was the cat. Against all sensibility, recalling the last straw bonnet I bought, I decided to just open the top to make sure the inside looked okay.
I cut open the tape on the 14″ cube. Looked inside to see the cute sticker attached to the newspaper. And curiosity won. I removed the layers of paper to find an air filled, clear plastic bag. Inside the bag was a vintage hat box. As I untied the bag, I thought, “Of course, this would have made a great unboxing, and I’m not filming.” The vintage hat box was darling, with a handwritten note on top. I was so grateful the seller took the time to take such care in packaging.
I allowed myself a peek inside. This is where I knew I needed to stop. I could not trust myself to touch the bonnet while I had a migraine.
Fast forward 2 days. Yes, it took that long for the migraine to fully pass before I trusted myself to look at this bonnet.

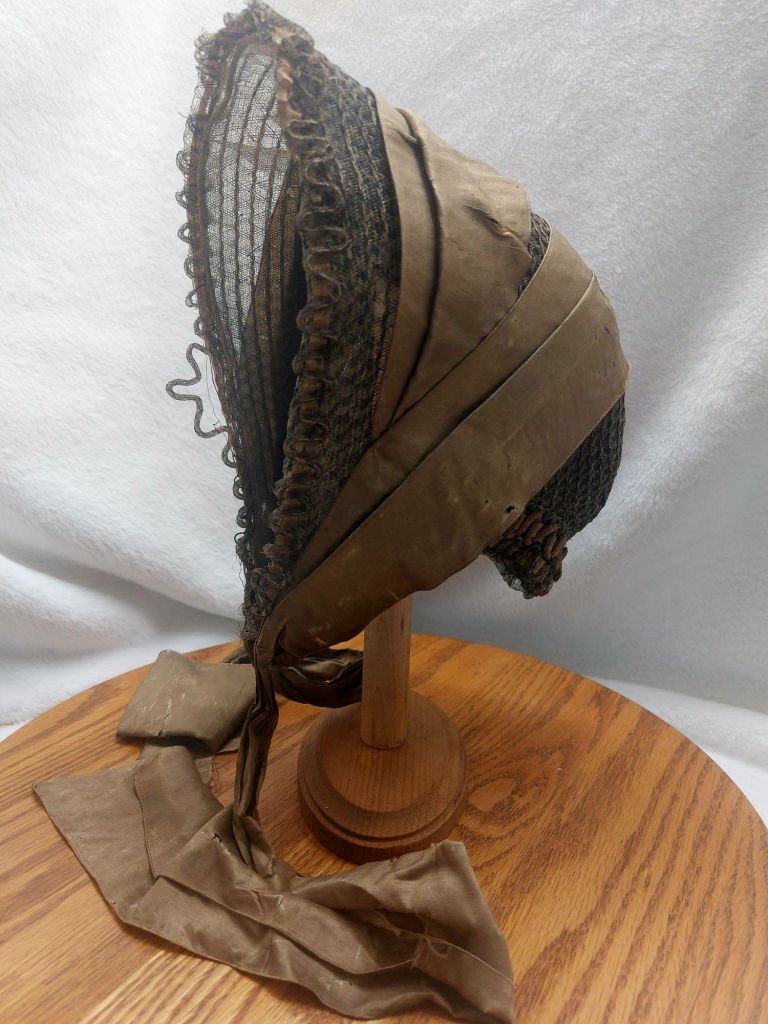


This bonnet is almost entirely horse hair. There are multiple braids or weaves used. The main bonnet is a plait of black or dark grey and white, which is nearly clear. The plait sewn as straw plait would. The thread used is thicker than the hair used in the plait and accounts for the slight hue of light brown in the body of the bonnet.
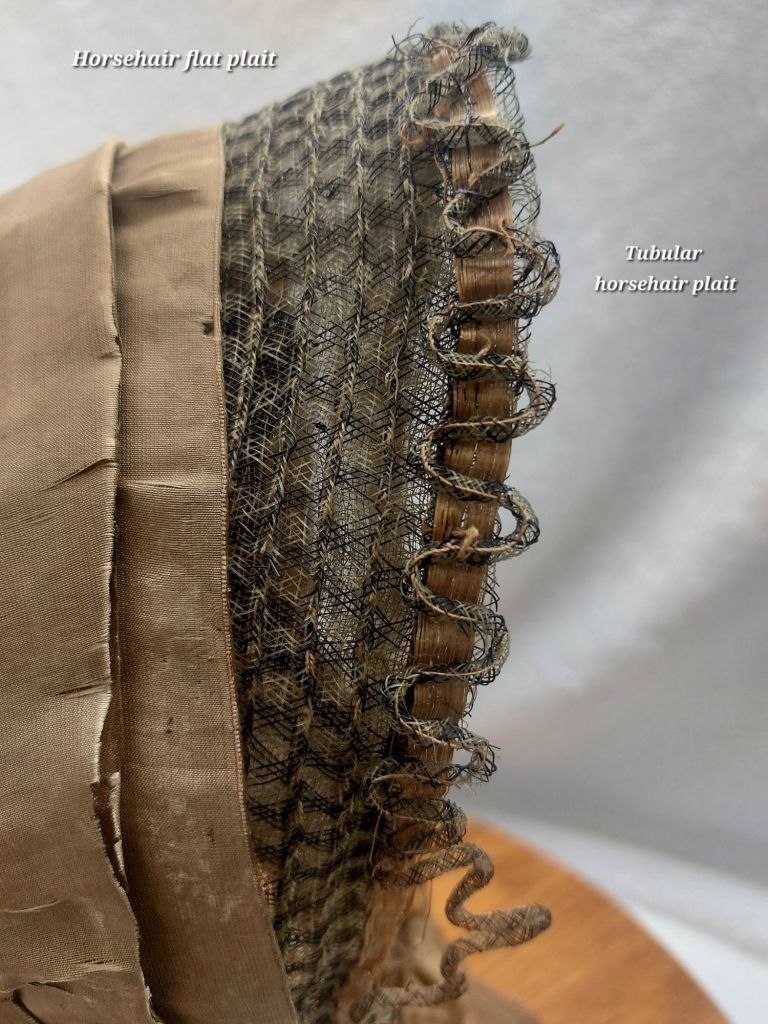
A tubular braid/weave edges the front of the brim. It is set in a wavey pattern over a flat light brown tbd. The tubular braid is made with the same colors as the body plait, but of slightly finer hairs. The flat tbd is a width of light brown fibers that aren’t straw, look more hair-like but looks flat to the eye. The fibers are layed side by side and sewn across.

The neck edge has a narrow bavolet created from rows of plait, the same used in the body of the bonnet, and two rows of tubular plait over the flat tbd. The lower tubular plait is the same as what is used on the brim edge. The upper row of tubular plait is a brown fiber that is not straw and thicker than horse hair.

The bonnet is wired around the inside. This wire is intact. (Often bonnets stored flat have broken wire. The seller indicated this bonnet was stored flat.) It is lined with two layers of an open weave material. There is some firmness or stiffness to this material. (Visually, this material is similar to what I’ve found in straw bonnets.) The bonnet is simply trimmed with a brown silk ribbon. There is thread evidence of ties previously on the inside of the cheektabs.
I almost forgot to write about its time frame. I prefer to loosely date, particularly when it comes to bonnets or hoods that have become misshapen over time or have lost their fullness. Loosely, this bonnet is ca 1860s to 1865. With what I think I see in the lines from crown to brim and the tabs, it is likely 1864-1865. It may even match up with one of my blocks.
I need to find my magnifying glass to get a better look at the unknown fibers in this bonnet. These are not something I will be able to put under a microscope, though. I would also like to do some side by side fiber comparison in photographs for people to see.
Holiday Sale
Whether you want to call it a Black Friday Sale, which is no longer on black Friday, or a Cyber Week Sale, I’ve decided to start it early.
Why?
I’m bored.
Students start their break today.
I bought an original bonnet I shouldn’t.
The Holiday Sale
25% off e-patterns, e-books, & e-workbooks.
15% off Holiday Exclusives, Patchwork Pin Cushions, & Straw Baskets.
15% off Straw Millinery.
Sale ends November 30th.


