The base of the cone motif which will get more texture & color added then get covered with floral vines and leaves. Or such is the plan. (I have an idea for a second one too.)

The base of the cone motif which will get more texture & color added then get covered with floral vines and leaves. Or such is the plan. (I have an idea for a second one too.)

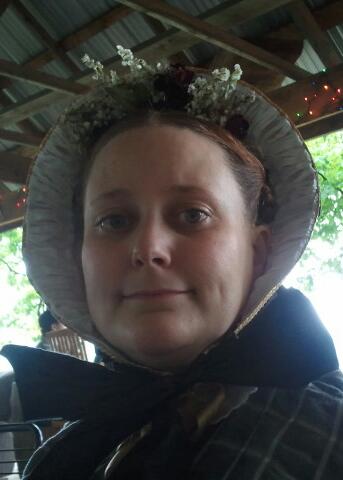
As I promised, here is a critique of one of my bonnets. I’m going to try to honestly cover the good, the bad and the ugly.
A little background first- This is a straw bonnet I made while in New Mexico. We were invited to an event at Ft Sheldon by some local friends. We had just a short time to pull everything together. I realized I didn’t have any millinary with me that was appropriate for the very sandy, red-dusty terrain I saw in photos. This bonnet was made in a few days out of materials I found in Alamogordo since there wasn’t time to order anything.
Now, a look at the materials.
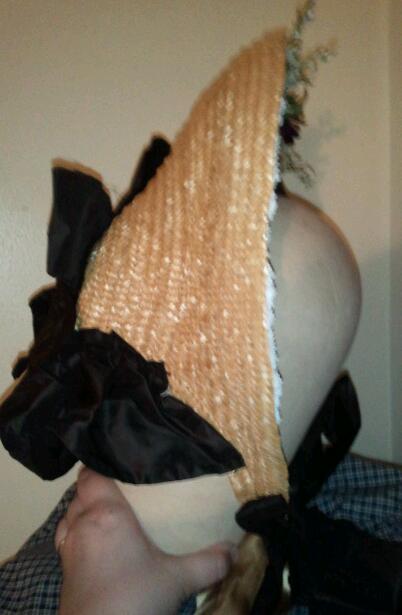
The straw came from a vintage hat from a thrift shop. It is just about 3/8ths of an inch thick and rather smooth. This is about as wide as I would suggest for a fashion straw bonnet. The width of the plait and the width of the split straw borders on what would have been considered ‘coarse’ in the 1850s and 1860s. The coarser the straw and plait, the cheaper. The finer the split straw the finer the plaits or other straw work can be and thus the more expensive. The straw plait was completely unsew from its original state, soaked to let the sewing holes fill back in then let to dry to an almost dry state. Then it was sewn back together into the bonnet.
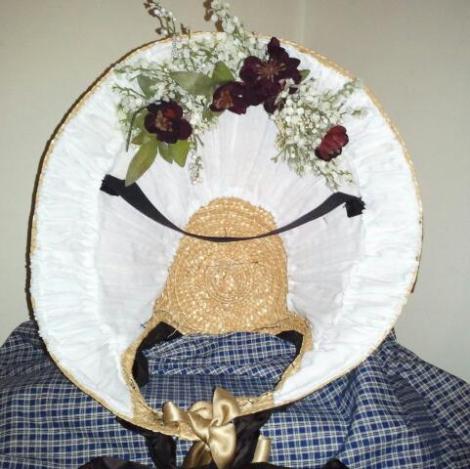
The white lining is made of white cotton voile I had on hand. I stiffened this with lots of my husband’s uniform spray starch despite it already having a fairly full body for a cotton sheer. (I’ll talk a little more about this later.) The spray starch method is not one I would normally use preferring a material with more body and stiffness already.
The flowers came from the local floral shop. They were the closest to natural looking I could find. These are rather sparse/thin for my preferences and what appears to be the level of fullness in period images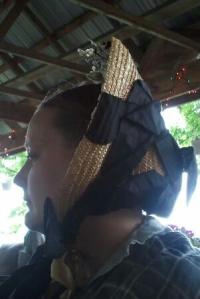
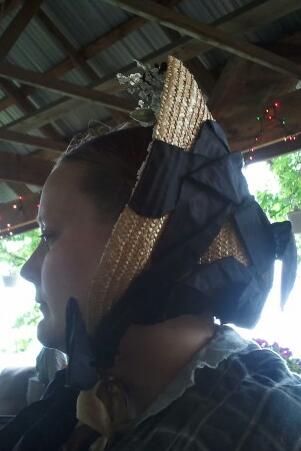
The ribbon and bavolet, or curtain, are silk taffeta I had in my stash. The ribbons are cut straight on the grain. The edges are frayed on the body of the bonnet and sized with a glue mixture to keep the silk from fraying more. While this can be seen in a few examples of extant bonnet, it is less common than ribbon which has a selvage edge. You would not see the ribbon fashion ties set on the bias. The width, about 4″, is common for mid-century fashion bonnets. The ribbons are an adequate length. I would not suggest going any shorter. The ribbon does stand fairly well despite spending the mid-day out in the rain and thoroughly damp.The bavolet is cut and pieced on the bias. The bias in the bavolet helps with the fullness. As you can see in the side view of me wearing the bonnet the bavolet is rather limp. This is because I do not have any net backing the silk. If I had net, I would hem the net into the silk or tack it to the silk. Then I would pleat the top of the silk and net as one.
Just under the taffeta ties, is the silk functional ties. This is 1″ wide silk ribbon
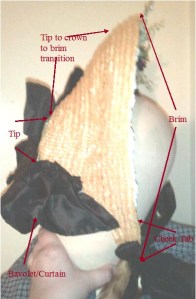 Now, let us look at shape and parts.
Looking at the side view of me wearing the bonnet, this is what happens when I put on a bonnet without a mirror, using the side of the car instead. The bonnet is angled backwards more than I would like. While it doesn’t need to be perfectly vertical, it certainly should be more vertical than this. To adjust what I see, I would sit the tip slightly higher on my small bun (I often wear my hair with braids flat against the back of my head, but opted for a bun instead which does stick out further from the back of my head.) with the top of the brim angled closer to vertical.
Looking at the overall shape of bonnets, one of the first things I see is the transition line from the tip though the crown to the brim. This should be a gentle transition not a drastic one. See how in this straw the transition has gentle curves? Compare that to this original straw bonnet which has a markedly deeper tip or this lovely original black straw.
As I noted the depth of the tip in the original compared to mine, we can look at that next. Yes, mine could be deeper. I think one or two rows of plait moving into the crown would make the difference. One thing to keep in mind when looking at the tips on straw bonnets is that they were not flat. Instead, they rounded from the back of the tip to the sides. Sometimes this was a small curve, other times it was more ball-like.
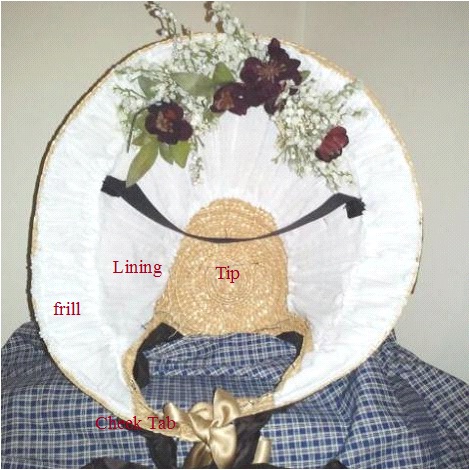 The cheek tabs are an area that was quite the challenge when I started working with straw. At first they were thick and angular. But, as I looked at more bonnets, I saw cheek tabs were more narrow with a nice curve to them. Sometimes they were almost pointy.
Back to the frill. It isn’t frill enough to be a true frill. I would much rather have another layer of stiffer material double box pleated with the raw edges filling the edge of the brim. When thinking frill, think full and three-dimensional. The flowers need to be much fuller too.
The black across the inside is the velvet band that holds the bonnet on my head. I love these. They work wonderfully. Even with the bonnet perched at the odd angle on my head, the rain coming down and repeatedly wacking myself in the bonnet with my umbrella, the bonnet stayed put without feeling like it wanted to move at all thanks to this strip.
I’m sure there is more I can pick apart on this. But, that is all for tonight.
When someone asks for an opinon on a bonnet, it can be difficult to try to explain what is not quite right about a bonnet for a variety of reasons – technology based conversations, trying to be sensitive, not knowing who will take offense, etc. Well, this is the bonnet I made in NM out of what I could find at the local shops in a couple days for an event we never actually made it to. I’m going to go through it this week talking about the shape, materials… basically ‘the good, the bad and the ugly.’
When I saw this over the weekend, I really, really wanted it. But, I couldn’t cover the price. *pout* I’ve wanted to have my own copy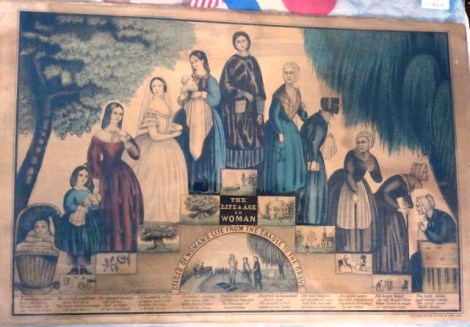
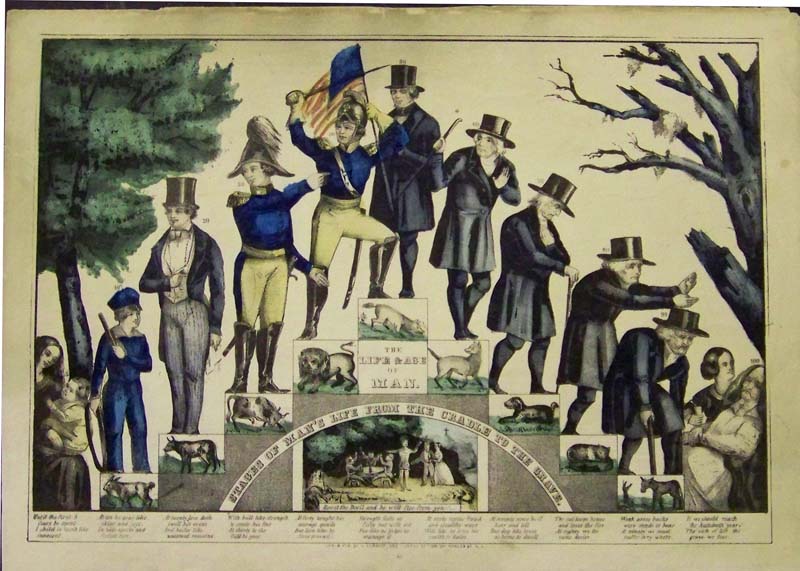
This hand-colored lithograph may be attributable to Kelloggs & Comstock. I say may because there are several similar image that each attributed to a different person or persons between 1848 and 1850. (See below for some variations.) Moving up and down the stairs we see a woman at at each stage of her life. At the left and right we see trees symbolizing youthful vitality and motherly caring. Beneath the women are miniature illustrations of that stage in life.


In the very center of the stairs is the burial plot. Along the bottom we read of each stage of life:


This is a different version attributed to Nathaniel Currier and James Merritt Ives, ca 1848-50. Here is yet another variation attributed to James Baille, ca 1848. This site provides a nice zoom tool for seeing Baille’s version. This version at Harvard, is one I would really like because the top figure is wearing a shawl. Yes, I have an obsession.
A similar look at the life of man was also created as well as a temperance look at alcohol.
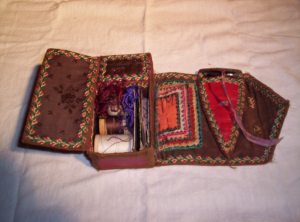
Fanciful Utility: Victorian Sewing Cases & Needle-books
Take a look at the lovely Video Liz has put together…
… there is a special announcement at the end!!!
There is a helpful little file here for developing a better understanding of late 50s & early 60s millinery. Use it alongside browsing museum collections.
https://annaworden.wordpress.com/welcome/pdf-pages/
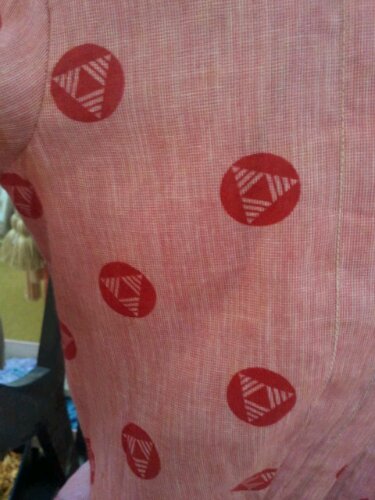
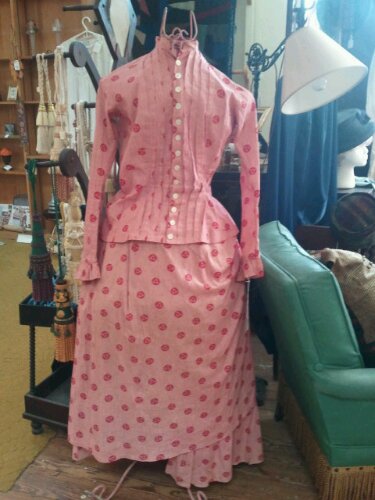
Here are two pretties we saw yesterday. (I’m not yet sure how to rearrange the photos on my phone.) This first is a dress tagged 1880-90s. I thought folks would be interested in the print.
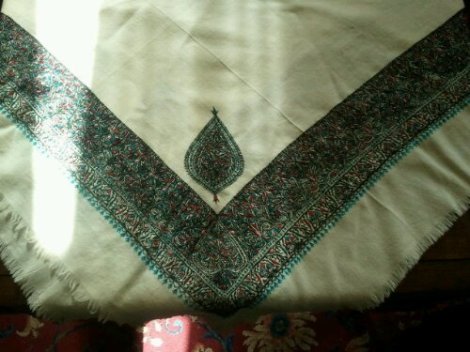
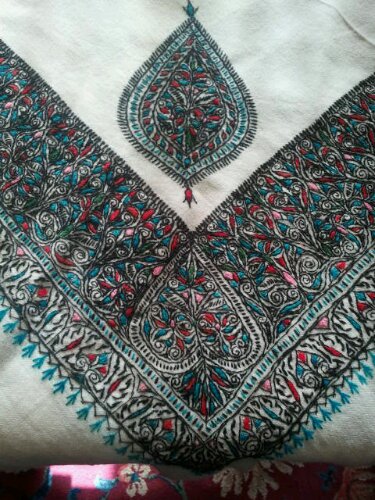
This next is the wool shawl I wanted but had no price on the tag. I have to laugh at the no price bit because that happened to Dad all the time and now seems to happen to me. Based on the size and embroidery, I would say it is 1840s. Somewhere in my image notes for my embroidered shawl project (which I will get back to soon) is a shawl I remember being similar. I’m hoping the seller (this was a co-op store) will call with a nice price.
When looking for tid-bits to accompany my previous post on neckerchiefs, I discovered first a neat description of a carriage bag then what I would call a Must Read Book for anyone who sews any type of reproduction anything from the mid-nineteenth century. This description happens to be in said book:
To Make Up Carriage Bags
Very nice frames are sold for these. They are of a stout calico on the outside, and a nice striped ditto inside, with a handkerchief pocket. The sides are of leather; and the upper of the frame and the handles are the same. The work should be one piece for both sides – the canvas, of cloth edges turned in at the sides, and sewed to the edges of the bag. At the top, the edge of the canvas must be laid under the leather, which is stitched down over it. The handles are merely tacked on. They must be removed for mounting, and afterwards carefully sewed down in the same places over the canvas. Cover all the seams, and the edges of the leather along the top, with a fine silk cord. Observe that the work must be made to fit the frame, not the latter to the work, as frames are made only in certain gradations of size, except to order; and what is call an out size, even if smaller, always more expensive.
I would love to have an illustration of the frame the author writes about. Depending on what that frame really looks like, I can picture a few different versions of this bag coming together.
Now on to this must read book.
If you have not read The Lady’s Dictionary of Needlework; A Complete Guide to all the Signs, Terms, and Contractions Used in Every Sort of Fancy Work with Illustrated Instructions for the Elementary Stitches, hop over to Google Books and download it. I am pretty certain I have stumbled on this book before while compiling shawl information, but I never scrolled cover to cover so to speak. I should have. This book is packed full of useful information – a glossary of material, stitches and oodles of how-tos. This is one I would very much like to see reproduced or at least reprinted so I could pull it from the shelf as needed. Lacking that, I foresee a trip to my printer sometime soon to see about printing up a copy for myself.
I had a request for images to help show how to wear the kerchief style shown in yesterday’s post.
Here is a link to Lily Martin Spencer’s Shake Hands at the Ohio Historical Society. The subject wears a kerchief around the neck crossing in the front. It may or may not be secured with a knot or pin.
http://www.ohiochannel.org/MediaLibrary/Media.aspx?fileId=4053&returnTo=Collection
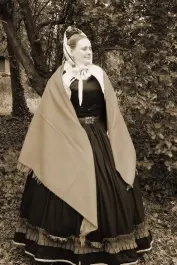
Here are two photos of me wearing a kerchief. In each case a good portion of the kerchief is inside the neckline. Perspiration ends up on the kerchief more so hen the neck of the dress.

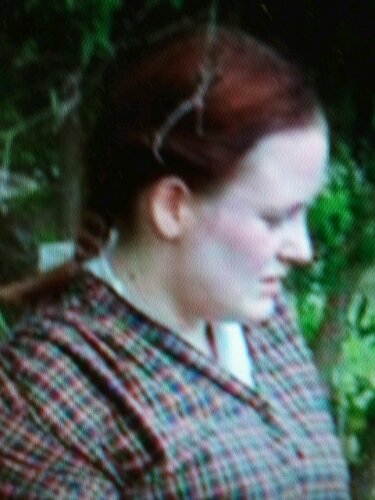
(Yes, my hair is falling down. Building fences is hard work.)
When I recently mentioned the possibility of writing out and publishing my fashionable fichu pattern, a friend and reader asked me about a neckerchief style fichu. It took me a few more weeks to get that information to her than I initially planned due to the wild fun of work and husband sewing. But, finally I did. Now, here that information is for everyone else.
Since I am very fond of V neck dresses, I find a long diamond a very useful and functional form of neckerchief. (Oh, I should say it seems through the first half of the century the word fichu referred to a kerchief that was worn about the neck. Then as we reach the 50s, or the mid-50s, the word fichu is used for a more fashionable accessory still worn about the neck technically, though it was more often pictured draped around the shoulders, high at the neck in the back, then falling gracefully over the bust to the waist or past, sometime crossing in the front. The accessory I am showing here is of the first instance.) Folded lengthwise, the short points nicely tuck inside my dress’s collar following the V in front. Sometimes I will pin the point of the V the kerchief creates, other times I will leave it as is. My use of this diamond shape comes from a discussion on The Sewing Academy some years back. So, I can not take credit for the initial design.
This diamond shape can be seen in several extant kerchiefs including:
To make this version of a kerchief, I cut a diamond as shown in the illustration. The diamond is 40 to 44 inches long and 10 to 15 inches wide from point to point. This size fits nicely across the width of most modern fabric. The fold line should be set on the bias. On the body, this length will drape around the neck, over the inner bust down to about the ribcage. The length should be long enough to sit inside the front of the bodice without pulling out while you work. I prefer less bulk and go with a narrower short width. A wider short width would be helpful if the kerchief is to be used during labor where one expects to perspire more.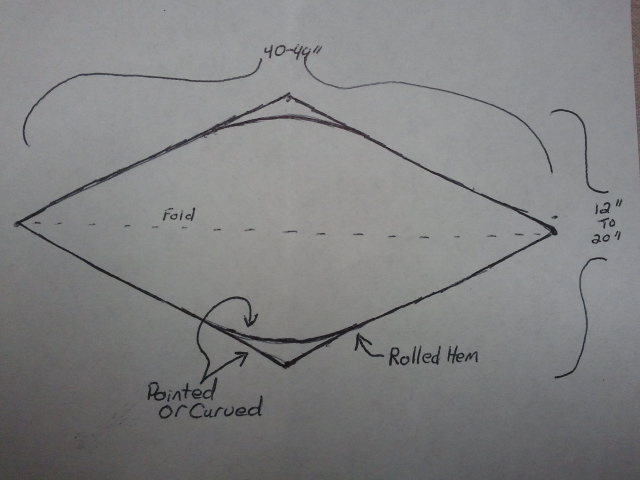
The edges can all be finished simply with a rolled hem. The short points can be rounded off into a nice curve as well. If you are good at fancy needlework, add something decorative as well.
Another type of kerchief is half of this design, as if it was cut and hemmed along the fold line in the illustration. This long triangle is half the fabric, thus half the bulk of the diamond version. This shape appears quite frequently in originals. Without tabulating to be certain, I suspect the triangular version appears more frequently than the diamond version. You can see examples here:
As you can see from each of the examples, a variety of materials were used. This is supported by this passage from The Ladies’ Work-Table Book. The passage mentions different treatments of the edges. It also mentions a curious bit about tapes which will be nice to learn more about.
Neck and Pocket Handkerchiefs – These are made of a great variety of materials, as silk, muslin, cambric, lawn, and net. The neck handkerchiefs are generally a half square, and are hemmed all around. It is a good plan to turn up the extreme corners, as it makes it more strong and durable. A tape is set on, which comes ‘round the waist, and ties in front. Sometimes a broad muslin hem is put on the two straight sides, which looks extremely well. Some ladies work a border to their neck handkerchief, which gives to those made of net the appearance of lace. Pocket handkerchiefs are neatly hemmed, and sometimes have a worked border. Those used by gentlemen are of a larger size than those of ladies. (The Ladies’ Work-Table Book.)




 If I Had My Own Blue Box: