I hang my head. I am much, much delayed in posting the finishing directions for the silk bag.
Remember this channel that was made when we attached the lining and silk? We are simply going to run a silk ribbon or cord through it.
For each side, cut between 12″ and 18″ depending on how long you want your handles to be. (or cut one 24″ to 36″ long piece.)
Run the ribbon or cord from the inside where the bag meets the pasteboard, to the top of the bag’s channel and back to the base on the other side.
I prefer to work a small hole in the base of the lining to access the channel.


Also use a bodkin or stiletto to work a hole in the top of the silk. You may want to do a fine button hole stitch around this hole.
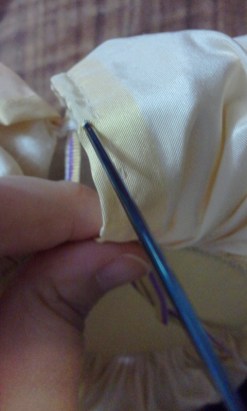
I also use my bodkin to bring the ribbon/cord through the channel.


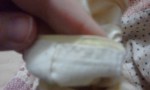
I anchor the ribbon/cord at the base of the channel. This could be done with a knot at each end or folding the end over and stitching down. Since I used a single ribbon, I tied one side and have a flat ribbon on the other side.


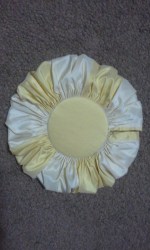
My finished version:


———————————————–
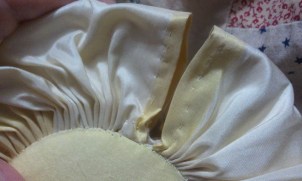
Where that channel is:
Line the fold of the lining up so it is just below the edge of the outer fabric and pasteboard. (1-2mm) Pin as needed to keep everything lined up.
With a blind stitch or whip stitch, attach the lining to the outer fabric and pasteboard.
***As you attach the lining, you are also creating a channel you will use later for the ribbon/cord to go through.


Finished with the lining.


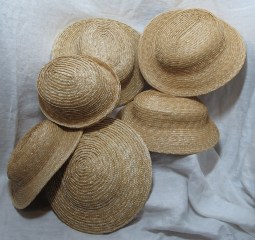
 I just photographed the first millinery pieces of the year. As there currently is discussion in at least one Facebook group about the cost of attire and what historic artisans make, I thought it would be a good idea to revisit the cost of millinery.