Now that school is comfortably underway, I am shifting my attention to planning and preparing for the holiday season.
I will be honest, at the beginning of the year I had one plan, a big millinery holiday season. But, as the year has progressed, I’ve decided to go in a different direction.
I am going to full my Etsy shop with smaller items, items that are heart warming and budget friendly. I will be offering single items and giftsets, which you can leave as a set or split apart to fit your gifting needs.
Among this assortment of items will be some old favorites and some new pieces I hope you will love. I will feature a couple different Straw Miniatures, some FanU Style items, and potentially some Whimsy as well.
I am even going to try a few surprise items.
Okay, that’s the fun part of the plan. Stop reading here if you don’t want to read about the reality behind this.
My hope is people will still be able to buy smaller items this season. Initially, I had figured I would need to make and sell 25 hats and bonnets through the end of the year to make ends meet. Given that I only sold 3 in September, rather than 10, I had become painfully aware that if I am going to pay my bills and eat, I had to come up with a new plan. So, this is the new plan.
These items are ones I find joy in making and sharing with others. Many are the types of things I would make dozens of and give away each year, years ago.
I will still make a few hats/bonnets for the season, for those wanting to give those as gifts.
I anticipate having to stop sewing for the shop a bit earlier than in recent years so I can make gifts for my family and friends. I have some special ideas in mind I hope I can pull off.
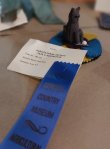
Clara and I are snuggled up on the couch after a day’s adventure to the Agricultural Society Fair at GCVM. The weather is absolutely beautiful for the event. I met sheep dogs with their own salsa and watched geese that seemed to be dancing to the music. Really. And, Clara won ribbons.
Yup.
Clara won ribbons.
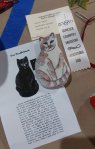
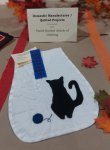
Okay. Not in the traditional sense of Clara going and strutting her stuff. She entered items for the blue ribbon contest…. all cat themed items:
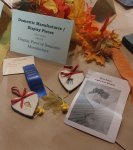
First is the little cat pen wiper made based on several original cat pen wipers. This tiny cat is made of wool with a little ball of yarn to play with.
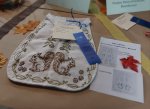
Next is a playful cat needle-book based on directions for a cat needle-book that also had a pocket for a packet of needles. While the original was shown in black and inked, Clara’s version is while wool that was hand inked.
Last is a playful cat themed pocket. The black cat is appliqued on with an embroidered ball of yarn to play with. The asymmetrical pocket is quilted with radiating stripes from behind the cat.
I had several other cat items in mind…. So…. Maybe next year…..
I had two goals this year. One was to feature the items I made at events during the year. This would give regular visitors a chance to see finished items they saw me working in during the year. I specifically told some visitors to come back to see the finished items. Second, was to do some personal challenge items. I only managed to complete one of these, with the other waiting in pieces and the other, other in planning. This was due to my rough start to the school year being accented by straining my wrist. Details or quilting and a wrist brace don’t work well together. 🤔 I guess this means next year’s entries are already started.
The first event project of the year was dressing a doll with one of GCVM’s new reproduction kerchiefs. I made the doll and cut the dress pieces ahead of time. Then, I dress the doll during the event.
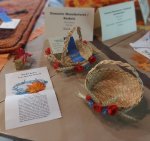
For Chocolate Weekend, I made Bon Bon Baskets. While I previously made two Bon Bon Dolls, I was thrilled to see a nineteenth century article about making bon bon baskets from straw. These baskets are made from the same straw plait I make my bonnets from. They are decorated with cornflowers and poppies as described in the article.
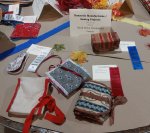
Neighbors Weekend was Pocket Weekend for me. I had been making pockets thought the year for a pocket and pocket contents based interpretation. Among my pocket fascination were two that were entered. First, is my favorite of this year: my Squirrel Pocket. I am super excited with how this came together. The design is an adaption of a 1772 pocket design shared on The Lady’s Magazine (1770-1819): Patterns of Perfection.
The second pocket has a far less cool story in that it is just one of the many I made and happened to fit the category while being easily accessible and not in use. This pocket is pieced diagonal stripes. I like the look of the Vs on pockets. I tend to over engineer my pockets as I want them to last a very long time.
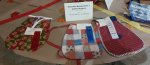
This next entry is complicated, two fold. First, it’s event hasn’t happened yet. In fact, the topic and event haven’t been officially paired up yet. Second, I actually made 3 items as a single entry. In my planning, it was a sample of sewing cases: a silk, a cotton, a linen, each of a different style. I suspect I created a judging nightmare. The top right, bottom right with the brown ribbon, and the linen with red tape are mine. I also must have screwed up somewhere. I had charted out my entries so Clara and I would not be in the same category. (Yes, I really made a spreadsheet.)
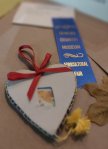
This entry is the one that doesn’t fit either goal/focus. I just thought they were too cute not to enter. And, they kinda made up for what I didn’t get done. These heart frames are copies of an original I found at a local antique shop. The shop was in transition, which could have meant a sad end to this handmade piece. I would love to find their original directions, assuming they had a print sounce rather than unpublished imagination, which is also possible. These frames work up easily with basic Fanciful Utility techniques. They would be very cute as ornaments.
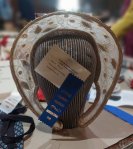
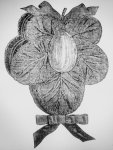
My final entry of this post was the one that took nearly the whole year. This was one of my originally planned personal challenge items. I wanted to do a millinery piece using fancy, decorative straw elements of my own. Original bonnets used horsehair as the foundation for such fancy work. Rather than use such a large amount of synthetic horsehair, I opted for similarly fine sinmay for the brim. I was pleased with it as a foundation at first but found as I work that it buckled. In the future, I will use it in narrower strips or mold it longer on the block. I am super pleased with the little straw leaves and straw spirals. This bonnet will get a bavolet and ribbons to be worn in the coming year or be a display brag piece.
As I mentioned above, my incomplete items, including those I didn’t even get past the parts for, are already on my 2023 entries list. I have a millinery piece and a sentimental piece in mind. The latter is one I had intended to pull off years ago but things keep happening.
Then there is the project that got started this morning. Quite impromptu. A certain feline did not understand it was Saturday morning and I desperately needed to sleep in. 😴 I got up and it is entirely possible I was sleep painting……
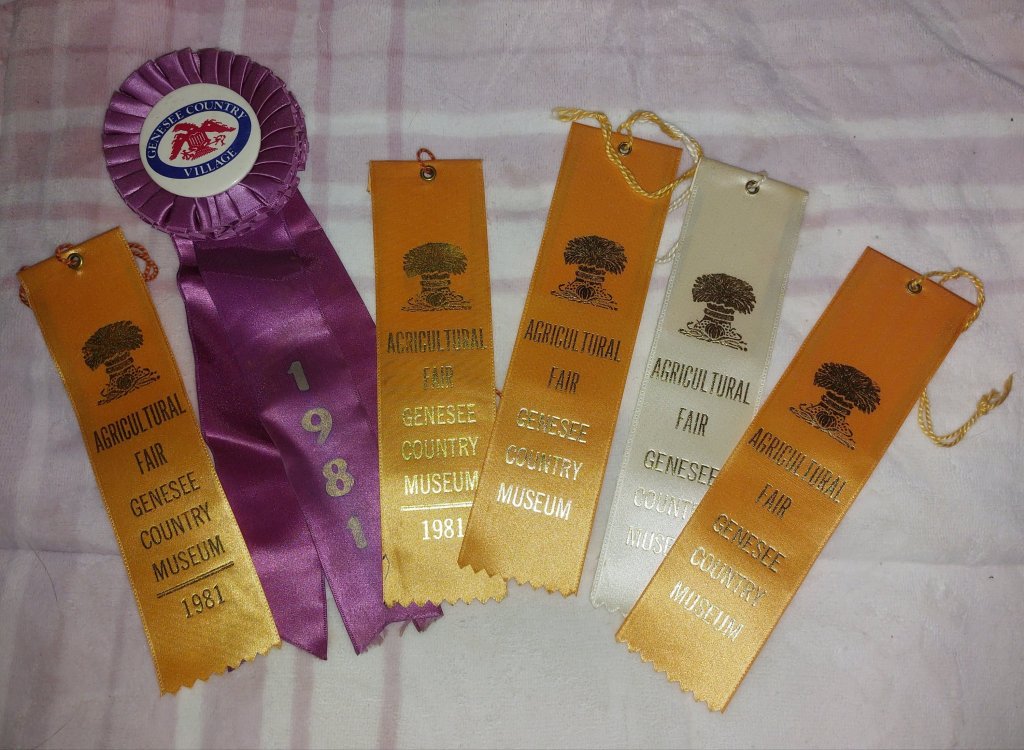
I almost forgot I wanted to include this photo in this post. This summer, I got one of my trunks out of storage. Inside was some of my very first Agricultural Society Fair ribbons. I earned the big one for penmanship when I was 5.
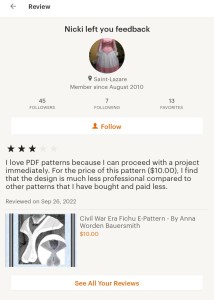
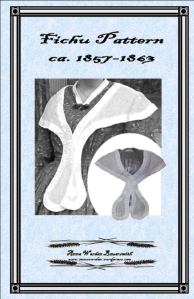
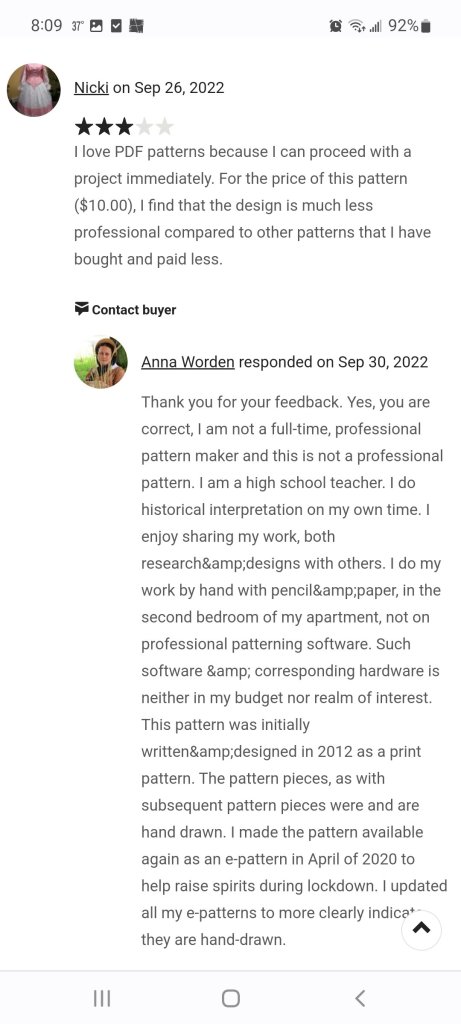
I received this review for my Fichu e-pattern. I would like to reply to this feedback, but I do not see where I can do so in Etsy. So, I will here.
Thank you for your feedback. Yes, you are correct, I am not a full-time, professional pattern maker and this is not a professional pattern. I am a public high school teacher. I do “historical interpretation” on my own time. I enjoy sharing my work,, both research and designs with others. I do my work by hand with pencil and paper, in the second bedroom of my apartment, not on professional patterning software. Such software and corresponding hardware is neither in my budget nor realm of interest.
This pattern was initially written and designed in 2012 as a print pattern. The pattern pieces, as with subsequent pattern pieces were and are hand drawn. I made the pattern available again as an e-pattern in April of 2020 to help raise spirits during lockdown. I updated all my e-patternsto more clearly indicate they are hand-drawn.
Feedback is important. It allows us to reflect and evolve in our art,, craft, and/or work.
Being a decade old, it maybe time to retire my Fichu Pattern as I recently did my first winter hood pattern.
To help me decide, for the month of October my Fichu e-Pattern will be half price. I invite you to take a look and let me know in the comments on this post if I should retire it at the end of the year.
Edit: I found the place to respond in Etsy. I had to edit my response a little to get under the character limit:
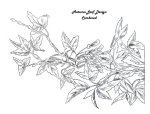
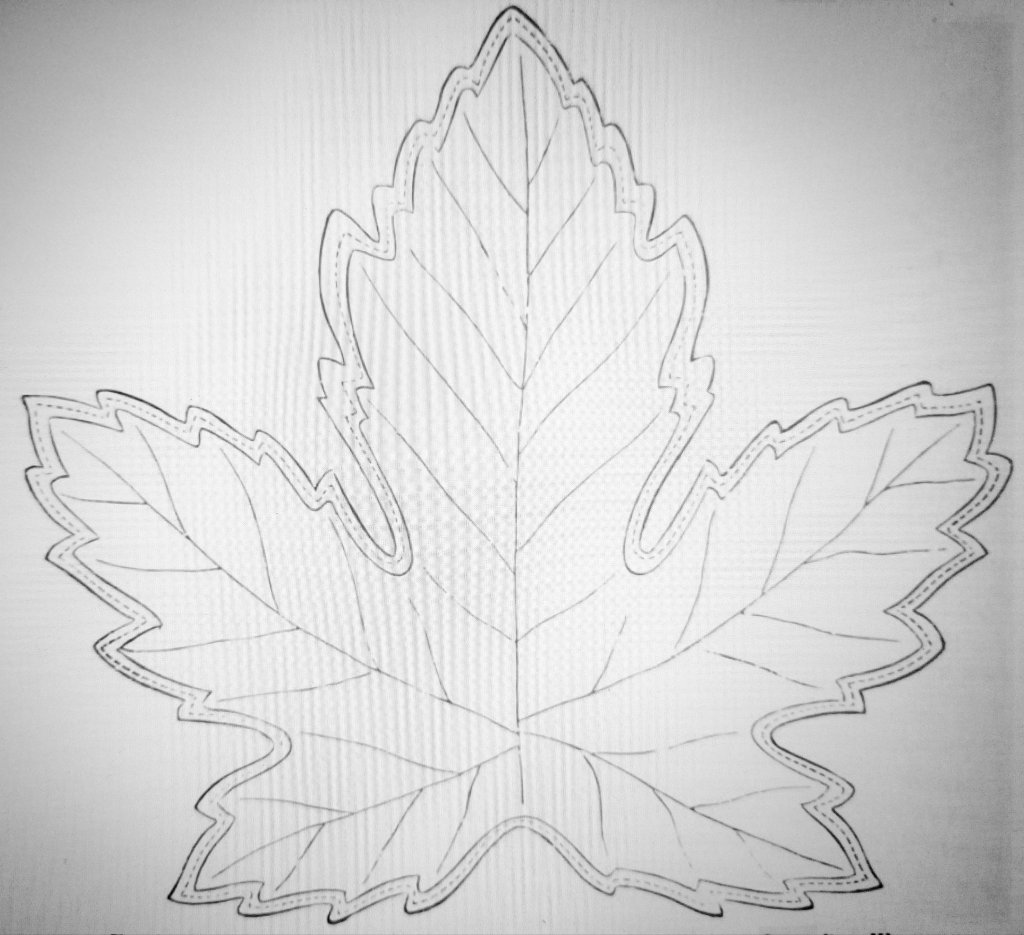
My local meteorologist shared the annual map of fall foliage showing the percentage of change from greens to autumnal colors. As the many shades of yellows, golds, oranges, reds, and burgundy over take the landscape, now is the perfect time to venture out to collect a few leaves for those little sewing projects. The Victorian work-table found many uses for leaves, both found and imagined. Both ladies’ and children’s literature abounded with projects from penwipers to pin keeps to shaving papers to fire screens. As you wander the falling leaves in all their colors, here is a sampling of projects to try. (Don’t worry. If you don’t have leaves to collect, you can use your imagination to create your own.
A Shaving-Paper Case. This is a nice thing to make for papas and grown-up brothers.For a pattern take a grape leaf, lay it down on card-board, draw round its edges with a pencil, and cut the paperin the same shape. Buy half-a-dozen sheets of tissue-paper, red, blue, white, green and yellow; fold them over four or eight times, according to the size, lay your card-board pattern down over them and cut the shape roundwith sharp scissors. It is on these soft sheets of thin paper that the razor is to be wiped clean. Make the cover ofthe same form, in green silk, or cloth, or Japanese canvas. Overcast the edge, or bind it with ribbon and imitatethe veins of the leaf with long stitches of green sewing-silk. The tissue-paper grape leaves are inserted between the outside leaf-covers. There must be a loop of ribbon at the stem end of the leaf to hang it up by. (One Hundred Christmas Presents, and How to Make Them from St. Nicholas’s Magazine, December 1875
Leaf Pen-Wipers. The directions for making a shaving-paper case will enable you also to make a leaf pen-wiper, except that younow require a smaller leaf for your pattern (say an oak or maple leaf), and you put leaves of black cloth instead of tissue-paper between the two outside leaves. These outside leaves should be the color of the leave whose pattern is chosen – red or yellow for maple, and brown for an oak, unless you prefer green. (One Hundred Christmas Presents, and How to Make Them from St. Nicholas’s Magazine, December 1875)
A Leaf Pen-Wiper. Your pattern for this must be a beech-leaf again, – a long one this time, – or you make trace the shape from the illustration. Outline the shape as before, and from the model thus secured cut six leaves in flannel – two green, two brown, and two red, or red, white and blue, or any combination you like. Snip the edge of each leave into very tiny points, and chain-stitch veins upon it with gold-colored floss. Attach these leaves togetherby the upper ends, arranging under them three triply pointed leaves of black broadcloth or silk to receive the ink, and finish the top with a small bow of ribbon. (A Budget of Home-Made Christmas Gifts. St. Nicholas’s Magazine, December 1877)
A Leaf Needle-Book. For this needle-book you will need the following materials: One-eighth of a yard of crimson or greenvelvet, one-eighth of a yard of lining silk to match, one-eighth of a yard of fine white flannel, two skeins of whitesilk floss, a bit of Bristol-board, and a half yard of narrow ribbon. Cut in the Bristol-board a couple of leaf-shaped pieces like the illustration. Cover each with the velvet, turning in the edges neatly, line with the silk, and button-hole both together all round with white glass. Stitchthe veins in the leaves with the floss, held tightly, so as to depress the lines a little. Cut three leaves of flannel inthe same shape, button-hole the edges, lay them between the leaves and fasten all together at the top with a bow of ribbon. A tiny loop and button should be attached to the point to hold the needle-book together. (A Budget of Home-Made Christmas Gifts. St. Nicholas’s Magazine, December 1877)
Household Ornaments – Pen Wiper. Miss Lizzie Holmes, of Des Moines Co., Iowa, sends us the following sketch and description. (The engraver hasmagnified the leaf-veins to an unnatural size, in order to show the stitches. The engraving is a little more thanone-third the size of the article itself.) “A very pretty Pen Wiper may be made as follows: Cut two pieces ofblack, gray, or brown cloth, the shape of the above pattern. Work the veins on one leaf with green silk orworsted, in chain or herring-bone stitch, and on the other with red. Then cut two pieces of black silk of the same shape, and baste on the underside of each leaf as a lining; finish the edge of each in button-hole stitchwith worsted or beads. Cut half a dozen leaves of some soft, black material, and lay between the two covers, fastening at the stem with a bow of narrow ribbon, or covered wire.” (American Agriculturalist, 1868. https://hdl.handle.net/2027/mdp.39015082453773?urlappend=%3Bseq=153%3Bownerid=13510798897170707-159 )
Needle-book. – This we think a very captivating pattern. The five leaves that form one side are covered withgreen silk, gathered in the center and veined with gold beads. Each leaf is bordered with a cross-stitching of corn-colored silk, and edged with chain-stitch. It may be lined with crimson, and the white flannel leaves thathold the needles inside edged with crimson in buttonhole stitch. Over the joining of the leaves is placed the half of an English walnut shell, the perforations necessary for attaching it each covered with a large gold bead. Theribbon bows may be either green or brown. (The Lady’s Friend, 1864 https://hdl.handle.net/2027/umn.31951000753433o?urlappend=%3Bseq=486%3Bownerid=13510798903022 398-512 )
Penwiper. Materials.- Scarlet, black, or green cloth or velvet; black mull muslin; gold beads; green and brown embroidery chenille; silk. Cut out from the cloth or velvet two leaves of the shape and size of the design. Work the edges with thebutton-hole stitch in silk, the acorns with the green chenille, and their cups with gold beads; the veins of the leaves are in gold beads. Make a little branch of wire for the holder, cover it with brown chenille, and work the upper part of the stalk also with brown chenille. Cut four or five inner leaves of the mull for wiping the pens; notch the edges and fasten them between the two worked leaves. (Godey’s Lady’s Book, 1868 https://hdl.handle.net/2027/mdp.39015067908890?urlappend=%3Bseq=171%3Bownerid=135107988870492 83-171
The Leaf Penwiper This can be easily made out of odd pieces of cloth or cashmere. Three leaves each cut four inches and a half long, and two inches and a half wide at the widest part, are to be worked through the center with sik of some slightly papped at the top and fastened with a velvet or ribbon bow. These form the outer part; and the under leaves, which are to be used, can be made of black cloth, cut in one piece in the shape of the outer leaves after they are joined; only a little smaller. (Demorest’s Family Magazine, 1874 https://hdl.handle.net/2027/umn.31951000970016t?urlappend=%3Bseq=929%3Bownerid=1351079890267 0568-953 )
“Leaf Penwiper. “Choose a pretty maple or oak leaf for the pattern of your penwiper, and select cloth of a color that would suggest the leaf, – reddish-brown for an oak, or yellow for a maple. Take a paper pattern of the leaf bylaying it on stif paper, tracing the outline with a pencil, and then cutting it out with a pair of scissors. Cut out two leaves of your brown or yellow cloth, and three inside leaves of chamois-skin or broadcloth. If you like, you can imitate the veins of a leaf by embroidering them with silk in stem-stitch on the upper leaf of the penwiper.” ( The American Girl’s Home Book of Work and Play, 1902.)
“Leaf Pen-Wiper. – Work a leaf in green cloth, with the veins all marked in lighter silk, and black pieces underneath. Any shaped leaf can be taken; a fern will do even, as the pinnules can be worked on it to imitate the shape tolerably.” (Three Hundred Decorative and Fancy Articles for Presents, Fairs, etc. by Lucretia Peabody Hale, 1885.)
A Leaf Pen-Wiper. Your pattern for this must be a beech-leaf again,—a long one this time,—or you may trace the shape from the illustration. Outline the shape as before, and from the model thus secured cut six leaves in flannel—two green, two brown, and two red, or red, white and blue, or any combination you like. Snip the edge of each leaf into very tiny points, and chain-stitch veins upon it with gold-colored floss. Attach these leaves together by the upper ends, arranging under them three triply pointed leaves of black broadcloth or silk to receive the ink, and finish the top with a small bow of ribbon. (St. Nicholas Magazine for Boys and Girls, Vol 5, 1877.)
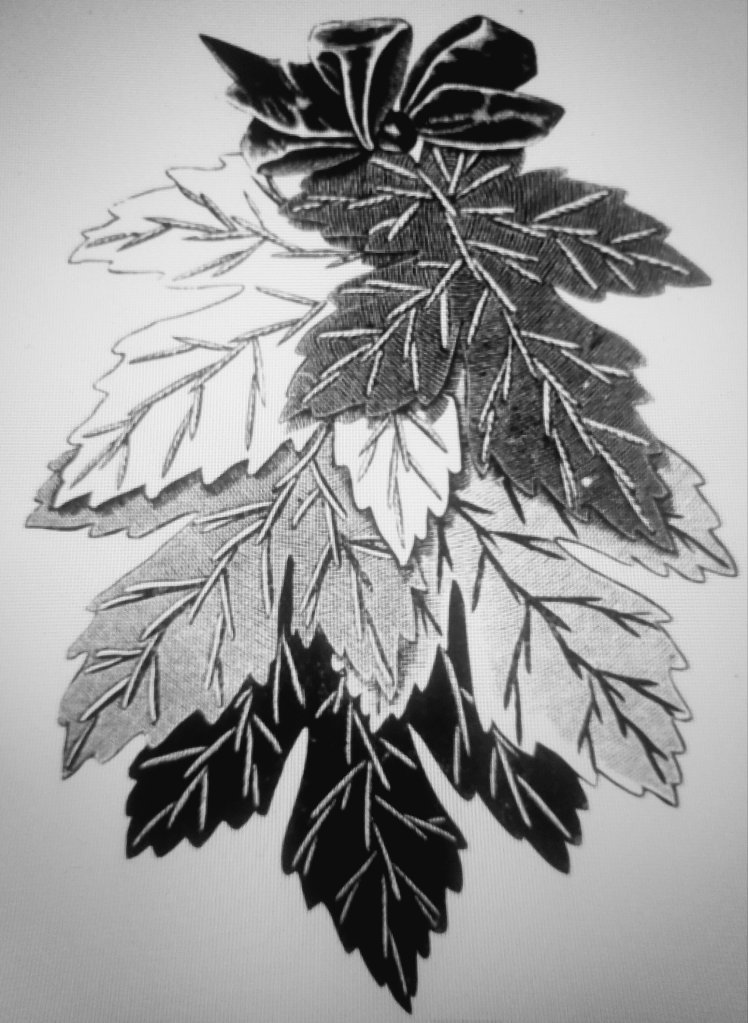
Now, this is where I am going to get a little sloppy. I sprained my wrist at a yardsale. So….. The 1888 edition of Needle and Brush has several projects of leafy goodness including a cluster of wool leaves for a pen wipe and a two page design for embroidery or painting. I did my best to clean up the design and make it printable (in Paint and Publisher with my less dominant hand.) I sized the design in two ways and reversed it. I would love to see it worked up.
Autumn Leaf Pen-Wiper
Do let me know if you make any of these autumn leafinspiredpieces.
Do you enjoy reading my blog? Do you find it helpful? Please consider supporting through Patreon or Sending a Tip.
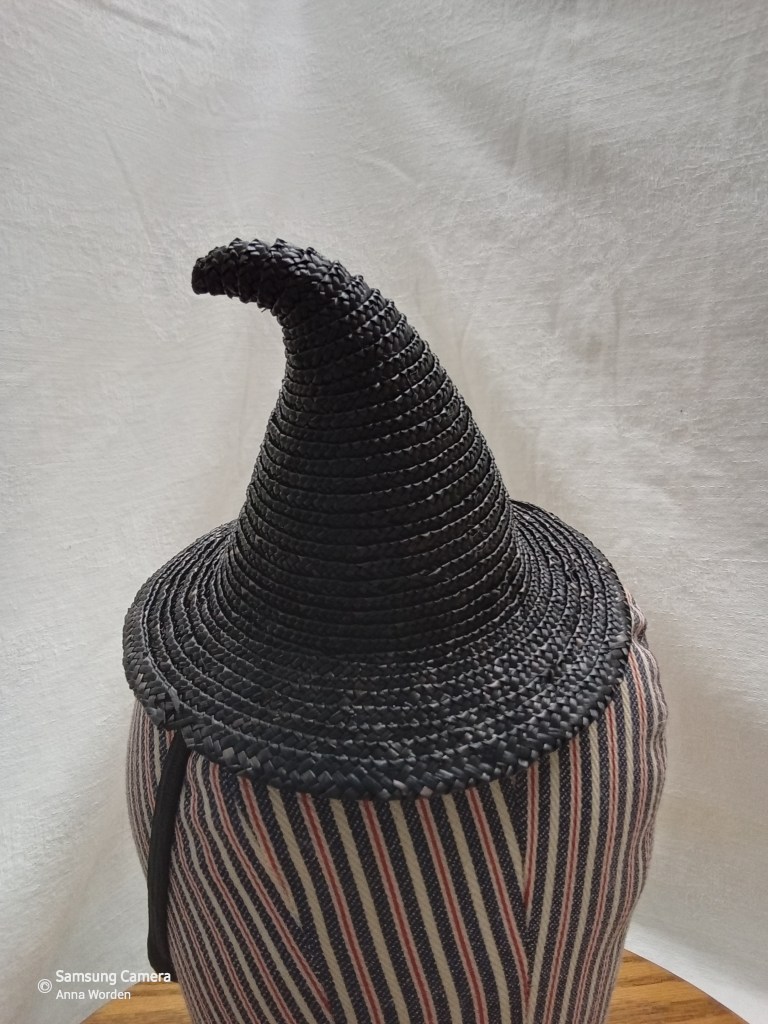
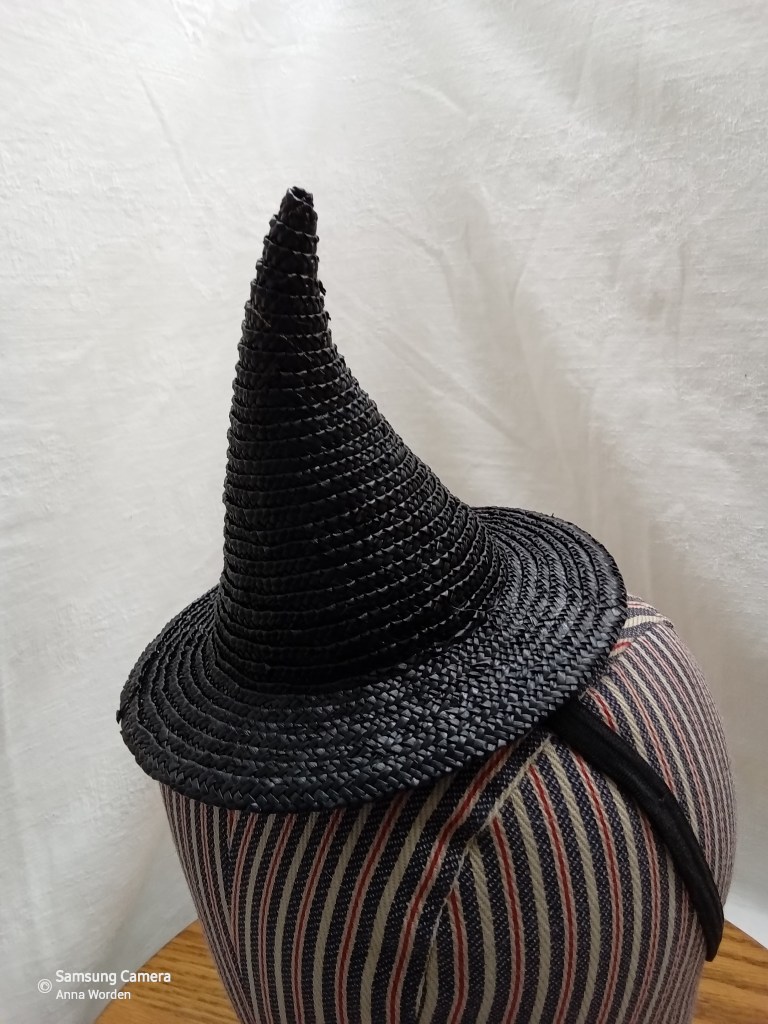
I have two more mini witch hats for you tonight. One, the one marked M6, has a larger headband for a larger head. Actually, I cut the band and set it differently. I likely won’t have a hat for Friday evening because my hand needs to rest tonight.
This year, I am offering my popular Mini Straw Witch Hats as wearable perchers. I set this straw hat on a simple elastic headband so you can wear it.
As with my reproduction hats, my mini witch hats are hand sewn and blocked. Each hat is unique, shaping as the straw desires. Some stand straight, some tall, some curve, developing their own personality.
Here are the first 3 available. The one on the left stands about 5 inches tall with a little curve at top. The center one is a tall, skinny one standing 5.5 inches tall. The one on the right is petite at about 3 inches.
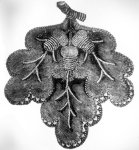
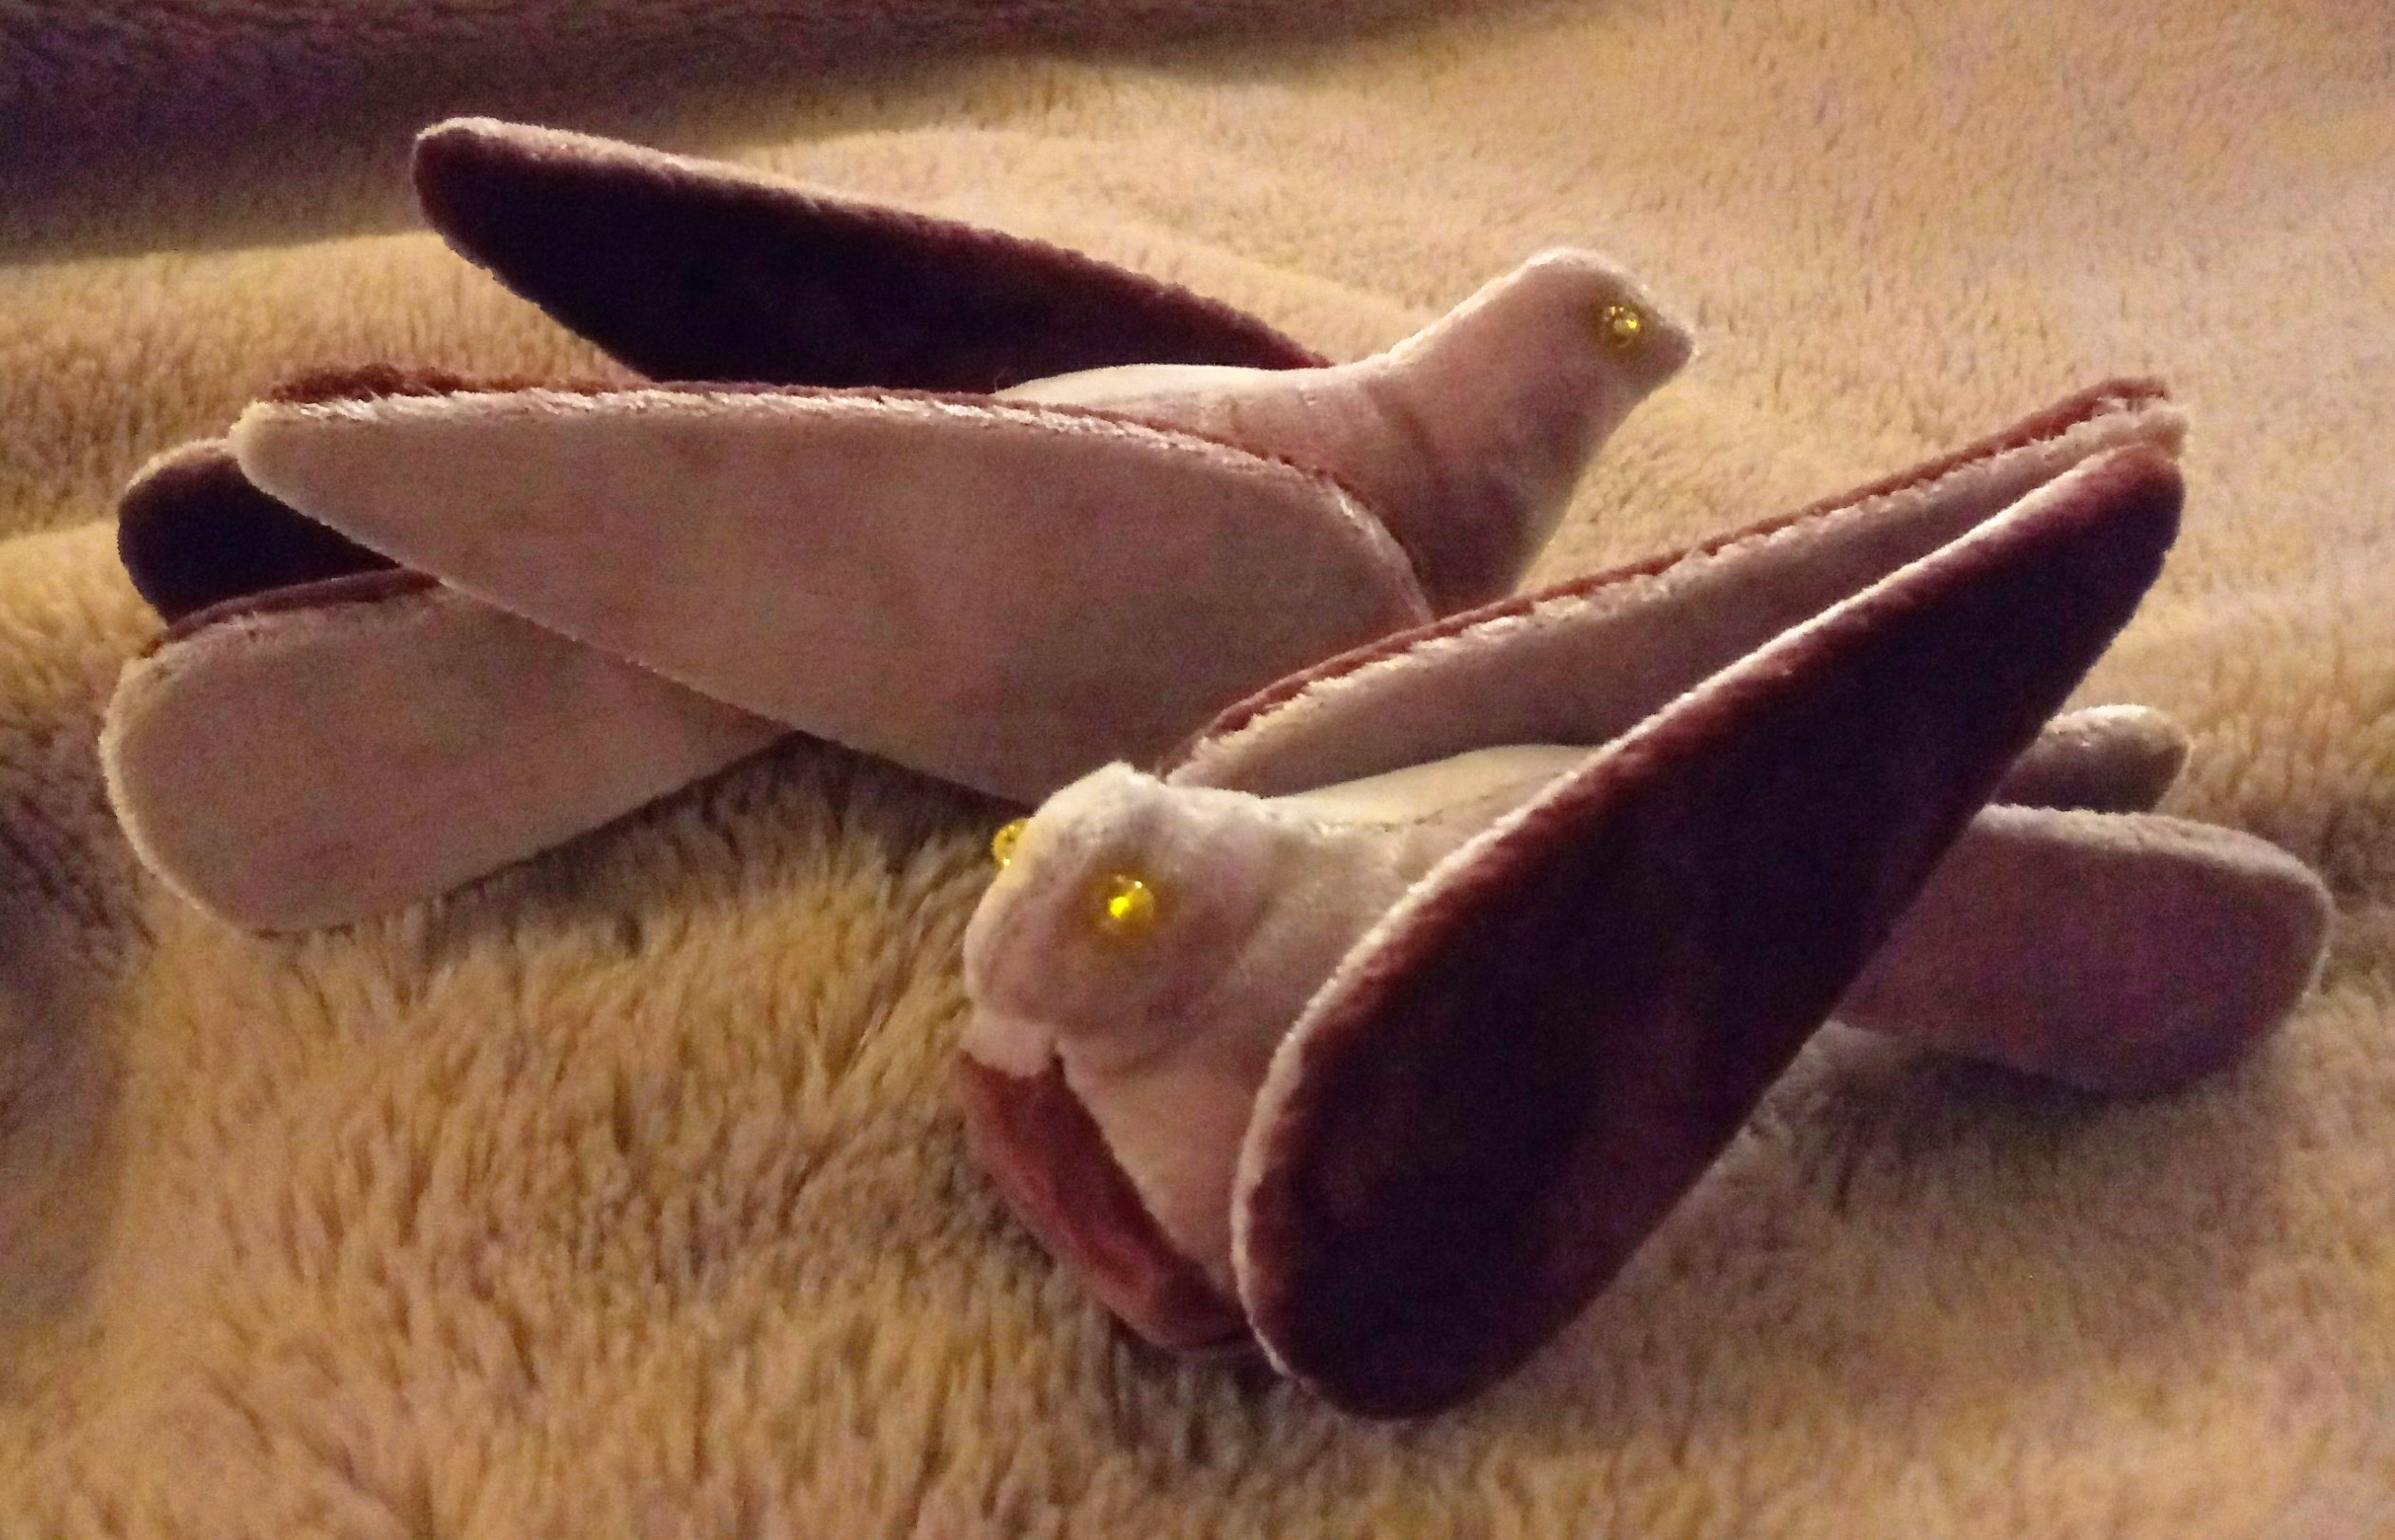
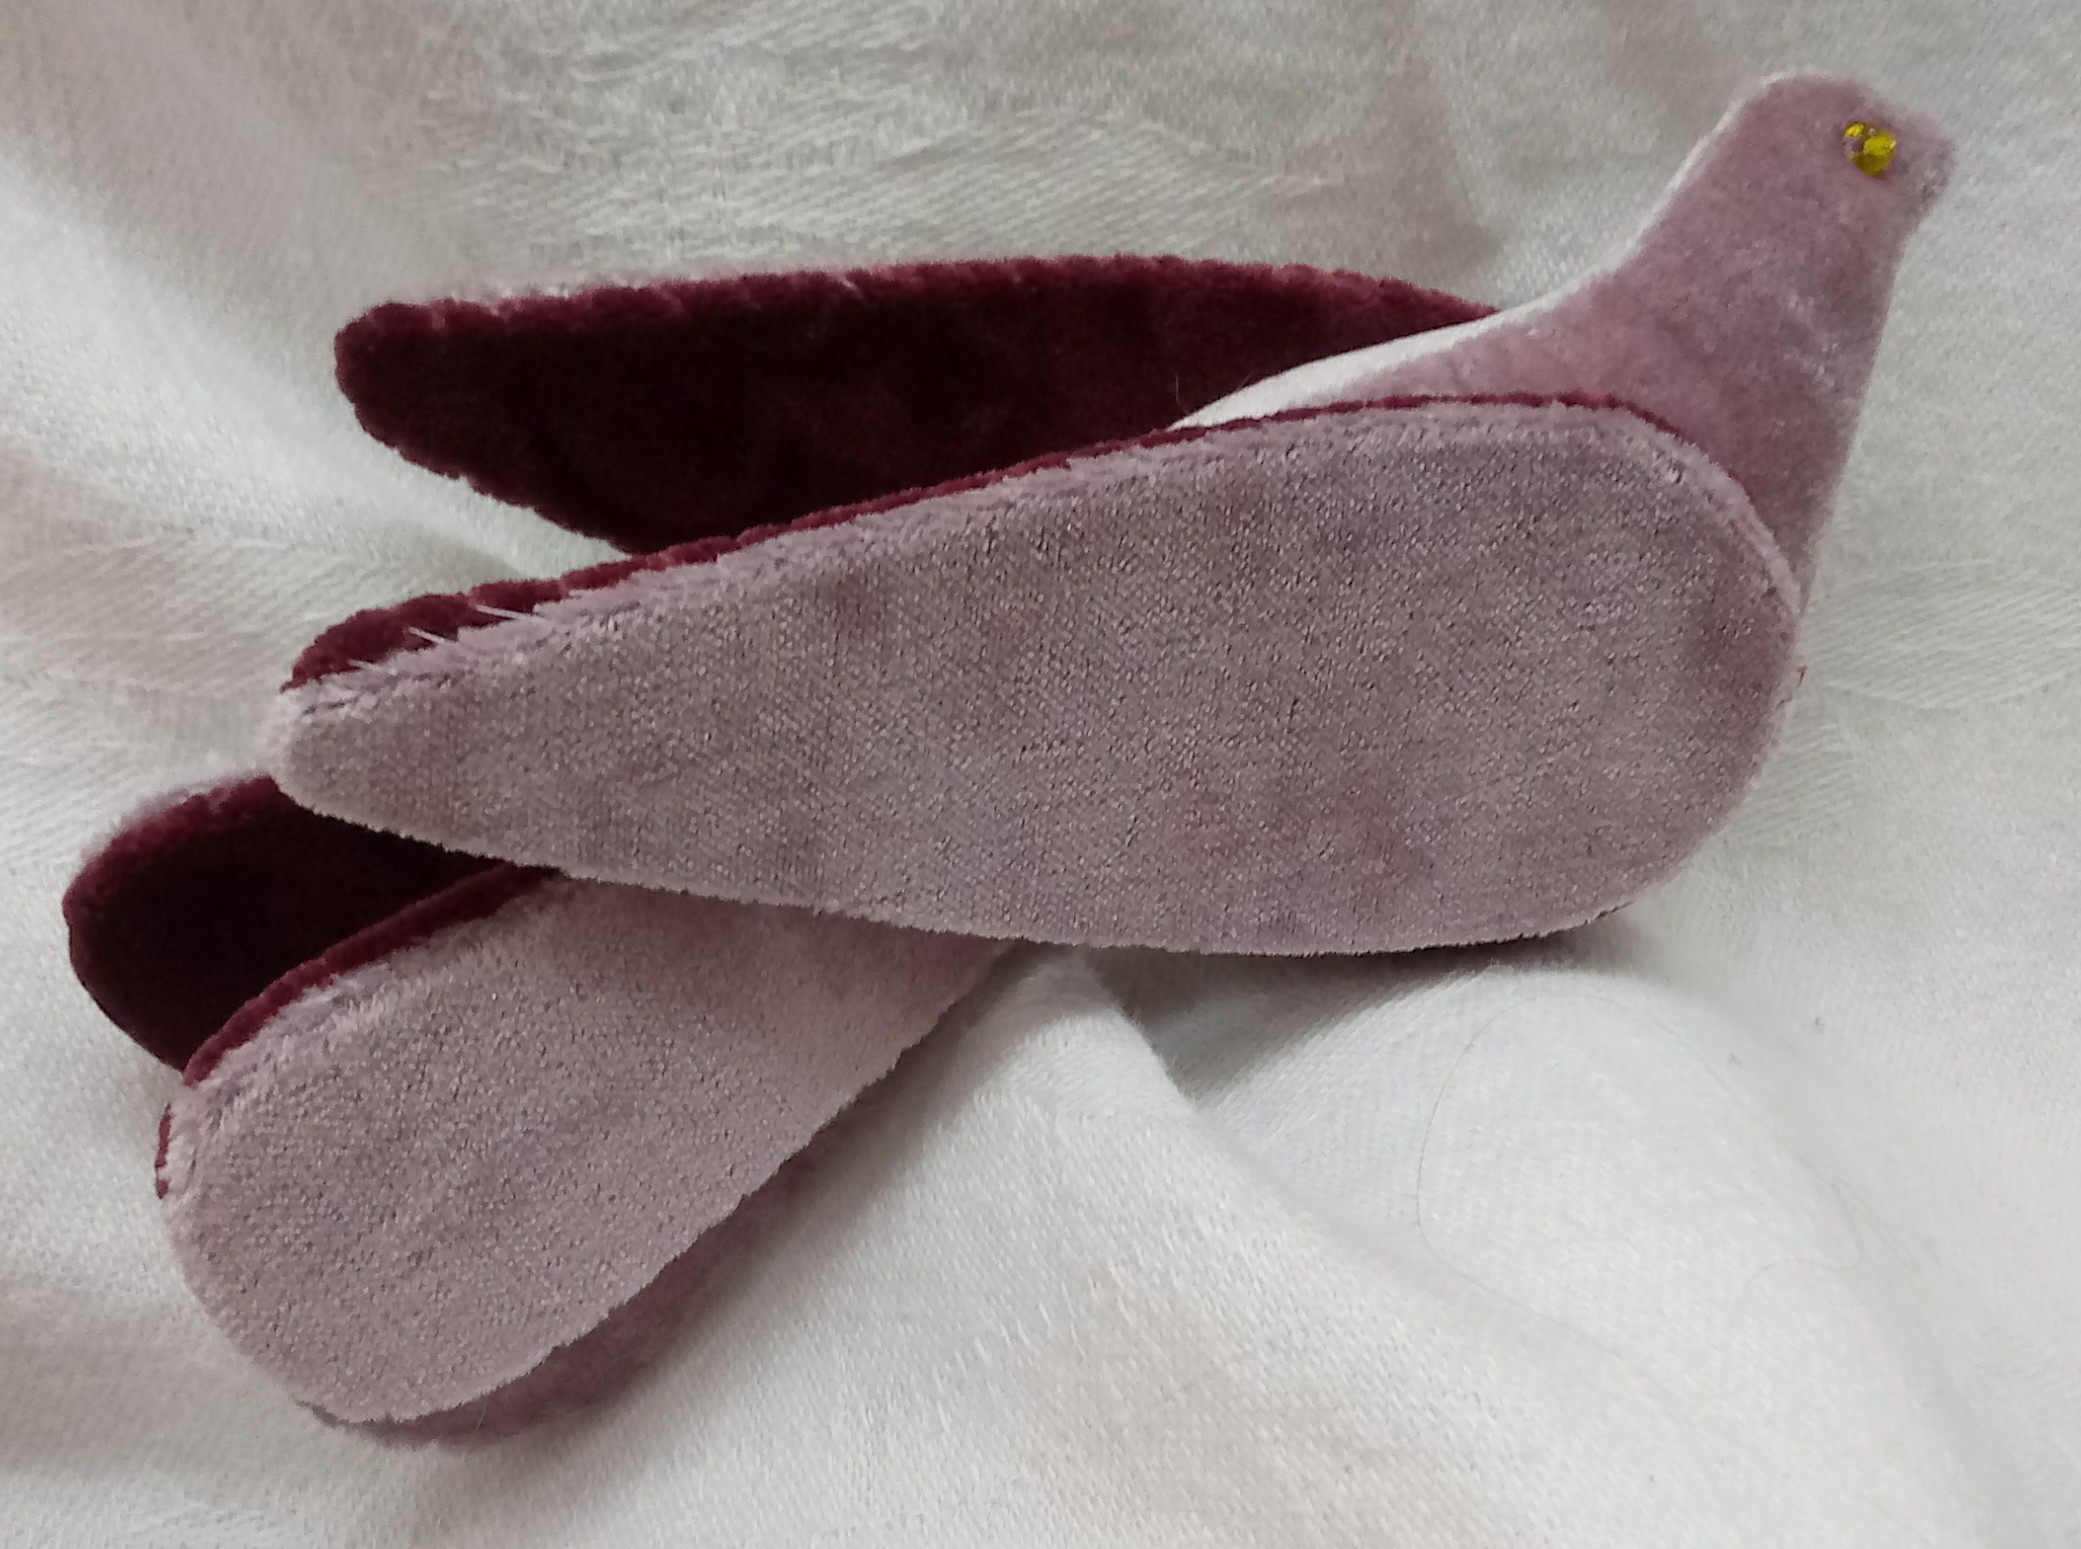
Today’s project is a sweet velvet bird ornament inspired by an original pincushion I saw on Ebay a few years ago that was too far out of my reach. Since then, Gleekruger shared a similar original velvet bird pinkeep on Instagram. This one was made with brown and cream velvets.
Recently, a friend discovered the original directions for this pretty bird in Demorest’s Monthly Magazine, 1876. I was delighted to see I wasn’t far off. The directions called to make this hanging bird in brown and red velvet, filling it with curly hair and wool.
(Video recorded previously)
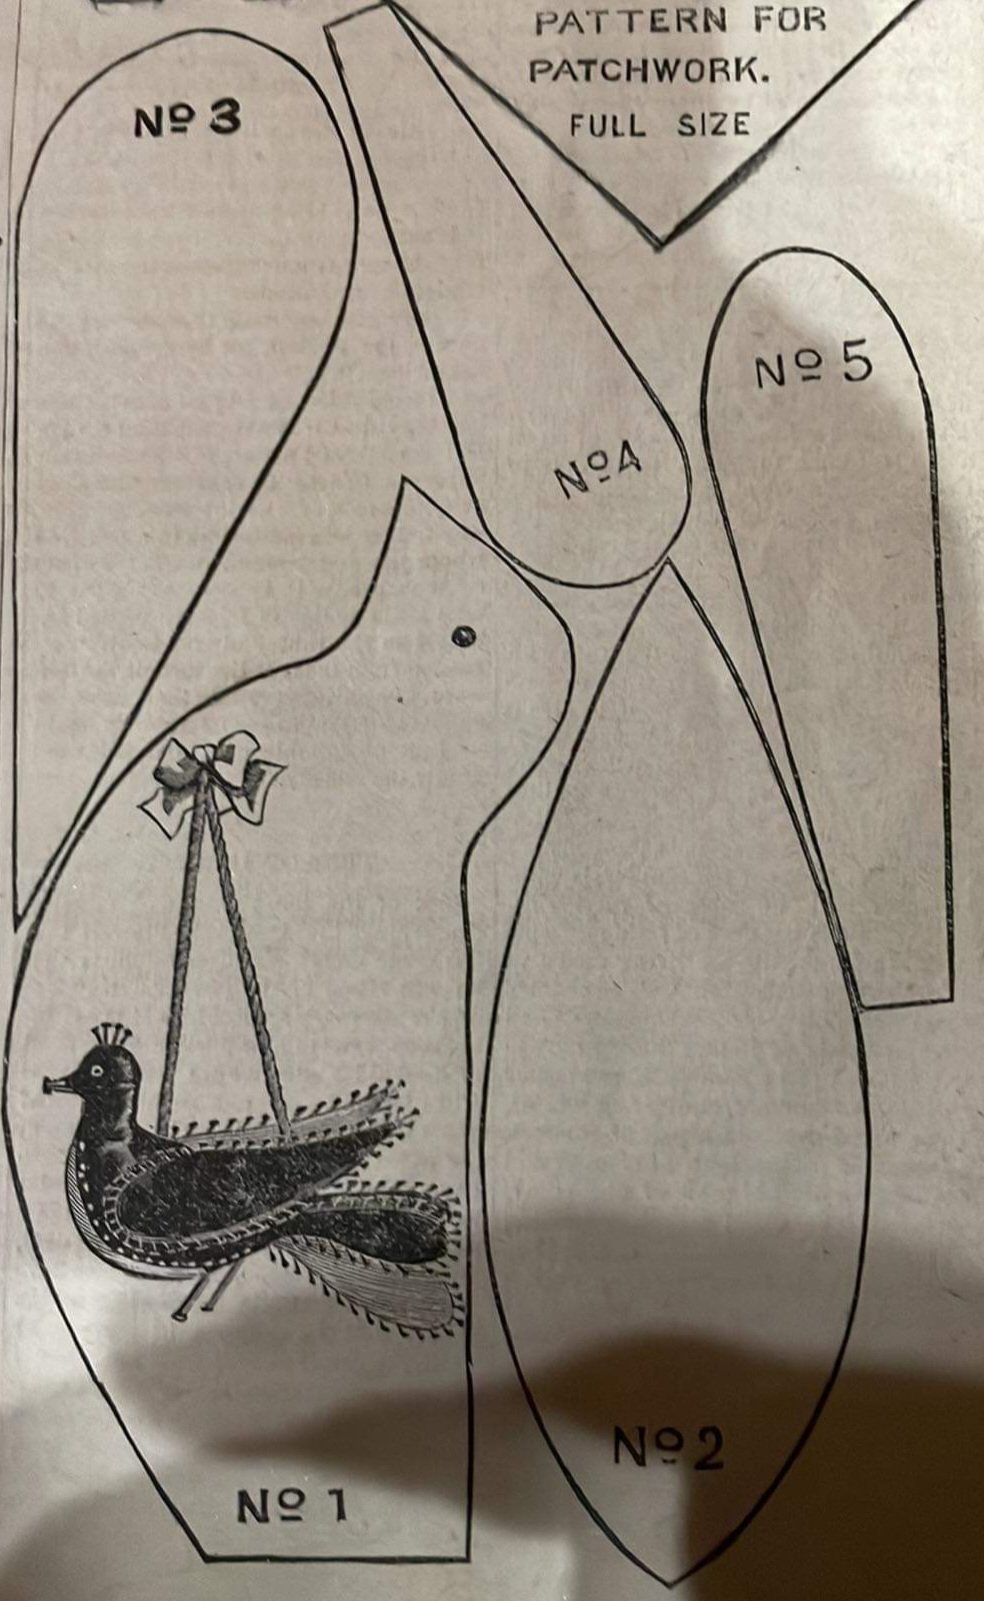
Use this template to make your own bird ornament:
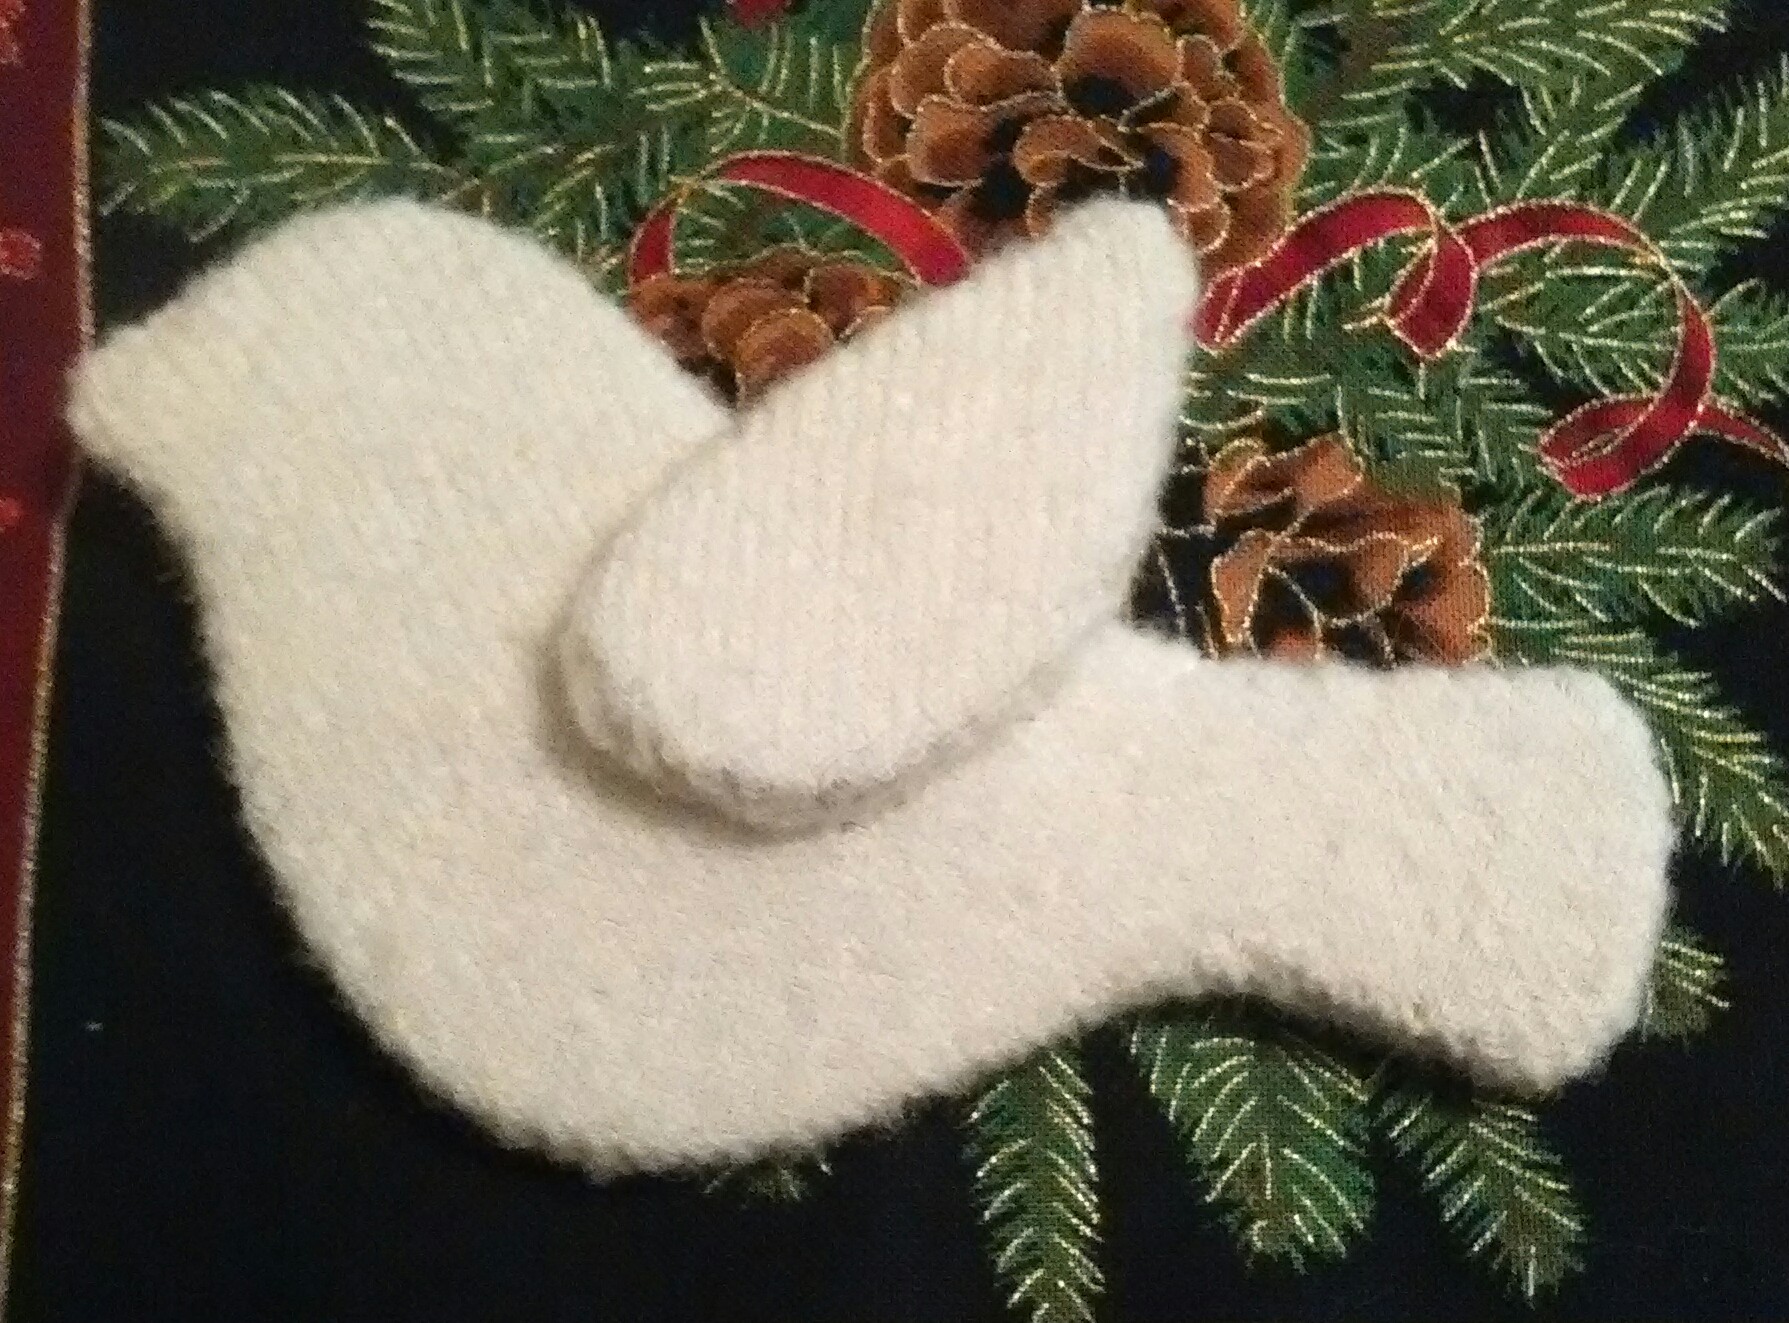
If you enjoy birds or want a simpler project, consider this bird ornament from 2017:
My goal is to share a Fancy Work project each Friday through the fall of 2022. Some will be updates of previous favorites. Some will be now projects.
Continuing my book fascination, today I made a fabric book full of pockets from this oh-so-pretty map print I picked up at Chestnut Bay Quilt Shop. The concept of the book was inspired by a later 19th century sewing kit sometimes called “A Friend In Need.” For more on this book style case, read Dawn […]
This summer I came across a book title Dubious Documents this summer. It is a puzzle book comprised of envelopes each filled with a document clue. As we’ve been working on puzzle boxes at work, the beautiful little book caught my attention and had to come home with me. The construction, envelopes made of decorative […]