
Back in 2009, I wrote what would become one of the favorite posts on my blog. “Fringe Frustration,” later “Fringing Shawls,” walked through my process for turning a length of wool fabric into a mid-nineteenth century appropriate shawl. Since then, I published Paisley, Plaid, & Purled, going far deeper into shawls. Still, making a shawl from a length of wool is one of the easiest and simplest ways of boosting a waredrobe. Here, I offer an updated look at …
Fringing Your Wool Shawl

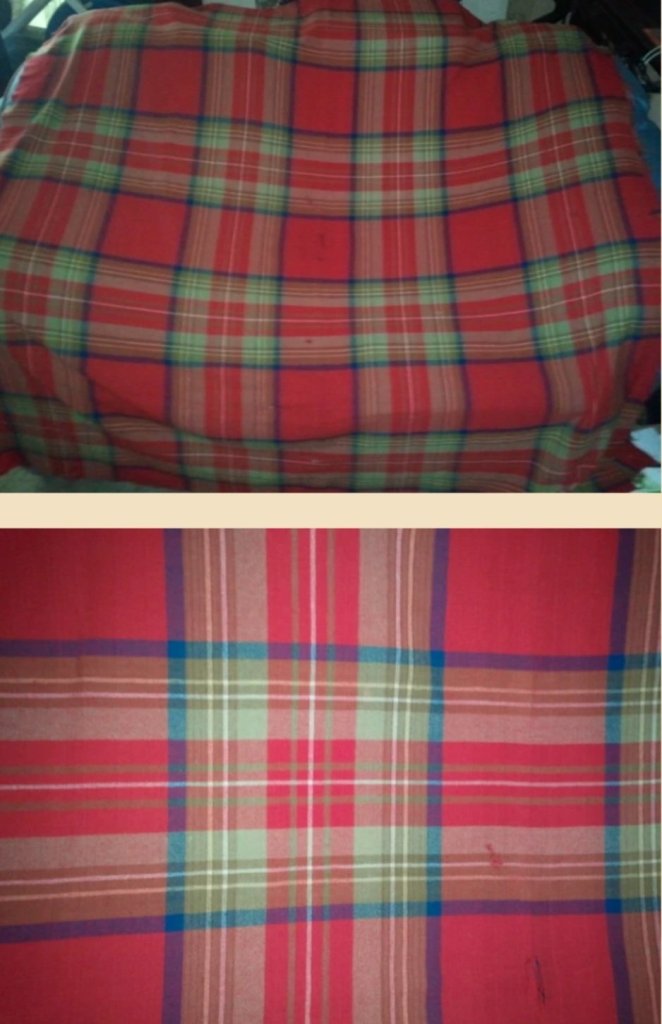
The red wool shawl from my original post was a favorite for many years. It traveled to event after event with me. Eventually, it traveled across the country on my first plane trip, which found me stuck in a wild storm being bounced from flight to flight to flight. By the time I reached my destination, I had scarring blisters on my feet, and my red shawl accidentally found its way into the washer and dryer, where it fulled up on itself. The wool became soft and cuddly, but the shawl was no longer usable as a 19th-century shawl.
The core of my shawl research focuses on the 1840s through 1860s. During this time, most shawls were fringed on two or four sides. This applies to wool, silk, and cotton shawls. As a shawl’s fringe was often made from its warp and weft threads, a squared shawl was fringed on the grain. The shawls I have observed have had fringe ranging from 3 inches to 10 inches in length.
The large, long, scarf shawls of the earlier Regency era tend to be fringed on the short sides. Again, the length of fringe varies.
Helpful hints before starting
- Make sure you purchase plenty of extra length to work with. I often find merchants do not cut along the grain. If your fabric is not cut on the grain, you will lose length on one or both ends.
- Have a lint basket nearby. This works much easier than a bag.
- You might also want a lint brush to clean up with.
- Pick up your favorite movie or audio book from the library. You will need several hours of video or audio.
Purchasing Your Fabric
~ For a long, scarf shawl (1800-1820s), you will need a length of fabric approximately 3 yards long by half width of the wool. This means you may be able to get two shawls from 3 yards of wool.
~ For a square shawl (1830s – 1870s), you will need the width of the fabric, plus twice the length of fringe, plus waste. For example: The fabric width is 60″. You want 5″ fringe on each end. There is approx. 1.5″ waste on each end. You will need 60″+10″+3″= 73 inches.
~ For a long shawl or double square shawl (1850s – 1880s), you will need twice the width of the fabric, plus twice the length of the fringe, plus waste. For example: The fabric is 60″. You want 6″ fringe. There is approx. 1.5″ waste on each end. You will need 120″+12″+3″=135″.
If you are working with a plaid, stripe, or check fabric, you may need additional length in order to have a balanced design. Be sure to lay your fabric out on the cutting counter to double check you measurements.
Squaring your fabric
Sometimes, fabric becomes wabbly or off grain when rolled or stored. If the warp and weft threads of your fabric are not nearly perpendicular (at 90-degree angles), you will want to square your fabric up. This is a good time to get familiar with the warp and weft of your fabric.
You will need a large, flat, traffic free space for this. Double check prior to doing this that your fabric is color fast. Otherwise, you may stain the drying surface.
At each end of your fabric, snip at the selvage and tear the fabric along the weft threads. Do this at each end. This will create a straight edge along the weft. Wet your wool fabric. Do not agitate it as this can cause your wool to shrink. Press out excess water. Lay the fabric out flat using a quilter’s rule to square the edges. Place weight (jars of food work well) on each corner and side. Allow your fabric to dry.
Step 1 – Setting the depth of the fringe
You can create fringe on two opposing or all four sides of your shawl. To fringe the selvage sides, you will need to remove the selvage edge either by ripping/cutting it away or unpicking it.
At one cut end of the fabric, measure in from the end the desired length of your fringe. Mark your measurements along the width of the fabric. Repeat this at the opposite end of the fabric or all four sides.
Using a seam ripper or embroidery scissors, carefully snip the weft thread that passes through these markings.
With a thick needle or small crochet hook, carefully remove this weft thread. The space created by removing this thread becomes your measurement guide in the next step. If this line is not easy to see, remove a second weft thread in the same way.
Repeat this process at the other cut end of fabric.
Step 2 – Sectioning

It is easier to fringe in sections, removing short pieces of weft rather than long lengths. Make cuts, dividing the width of the fabric into 2 inch sections. To do this – Cut along the warp threads from the cut end of fabric to the removed weft line you created above. Repeat this on the opposite end.
Step 3 – Fringing
Here is the fun part! Put a movie or audio book in the player. Using your fingers, large needle, crochet hook, or anything you think might help, remove the weft threads from each section. I find it easier to alternate from working vertically to working horizontally, removing threads.
Step 4 – Finishing
You can finish your fringe in a few ways; knotting, hand stitching, or working a weft thread back through the fabric.
One of the simplest ways to finish as shawl is to stitch along the fringed edge. Using a matching thread, make a sort-of back-stitch and whip-stich combination along where the fringe meets the fabric. Go forward 5-7 warp threads at the fabric edge, then back three threads and up tree warp threads, catch the stitch, and go forward. This sounds much more complicated than it is. Picture to come.
A method used before taking a shawl off the loom is to work the weft thread back through the edge. This process could be attempted if you can save enough of your weft thread. I have not yet tried this.
For knotting your fringe, I suggest an over-hand knot (as you would knot the end of thread) instead of a square knot (as you would start your shoe laces), because a square knot tends to pull threads together creating a puckered look. If you are going to do multiple layers of knots, creating a nice diamond pattern, I suggest starting with an overhand knot rather than continuing with a square knot for a flat diamond pattern.

Mistakes to Avoid
Wrong weave – Most woven wool shawls were a plain or simple twill weave. For making a shawl this way, a weave that pulls apart fairly easily will be preferable to one that sticks to itself.
Wrong weight – One of the most common mistakes I see is choosing a weight of wool fabric that is too heavy for a shawl. Most original shawls were lighter weight, folded to get warmth though layers. Look for a tropical, light, or medium weight wool. Avoid heavy and coat weight wool.
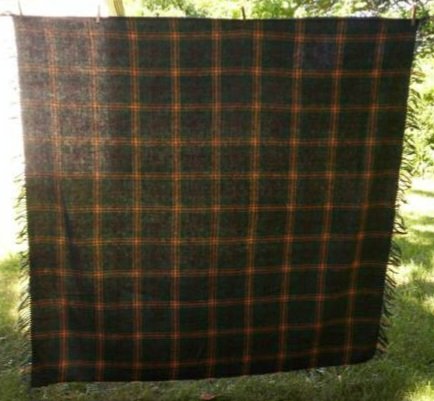
Wrong design – Choose a solid or symmetrical plaid for your shawl as these will beset reflect common shawls of the century. Avoid prints, asymmetrical plaids, and jacquard designs for the vast majority of the century.


Leave a comment