How to Pack – A Trunk

I found this buried in my drafts folder….. From Eliza Leslie’s House Book, (Philadelphia, 1844)

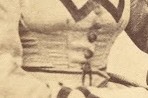
To Fold a Dress for Packing – spread the dress, right side out, on a bed; and, taking it by the hem, make the bottom exactly even all round. Next, double the skirt lengthways in half, then fold it lengthways in four, turn up crossways about one-third of the folded lower part of the skirt; then give the remainder of the skirt a fold backwards, terminating at the gathers at the waist. Next, turn the body backwards, with the front uppermost, and the back resting on the folded skirt beneath. Lastly, spread out the sleeves; vie each of them a fold forward at the shoulders, and a fold backward at the elbows, and lay them across each other evenly on the fore-body.

Fold the pelerine right-side out. First, double it in half, beginning down the middle of the back. Next, give the doubled pelerine a fold backwards, then a fold forwards, and then another fold so as to leave the corners uppermost.

A belt-ribbon, for packing, should be rolled on a block, and fastened with two pins.

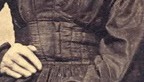
A lady’s travelling dress should be made to fasten at the side or in front, pelisse-fashion; that, during her journey, she may be able to dress herself without assistance.

It may be well to have a camphor-bag sewed to each of her night-gowns, that she may be less liable to attacks from insects when sleeping in such beds as are frequently met with in travelling.

To Pack a Large Trunk – Have all the things laid out ready, the light things divided from the heavy ones; and keep at hand a quire of soft wrapping paper. Spread a clean thick towel over the bottom of the trunk, and place on it the hard flat things, such as portfolios, music-books, a writing desk, boxes, books for reading, &c,; taking care to fit them well together, so as to be even at the top; and filling up the crevices with small articles that will not be injured by compressment, each of them, however, wrapped in paper, to prevent their scraping of defacing the other things. Never use newspaper for packing, as the printing ink will not fail to rub off and soil whatever it touches. You may stick in a pair of shoes here and there, each laid together as flat as possible, and tied round with their own strings. Some persons have shoe bags made of flannel or cloth, and stitched into compartments, each division containing a pair of shoes. Over the layer of hard flat things in the bottom of the trunk, spread a towel; and on this lay your flannels, linen, &c., filling up the interstices with stockings and gloves. Then cover them with another towel, and put your dresses, the muslin ones uppermost; filling in the corners with pocket handkerchiefs. On the top of your dresses lay your pelerines, collars, and caps, (if you have no other way of carrying them,) &c., finishing with a thin towel over the whole.

No trunk should be packed so full as to strain the hinges. If your trunk has a false top, you can fill that with any articles that may be rolled up tightly. Shoes should on no account be packed without covers, as the colour (particularly, if black)will rub off, and disfigure any white things that may be near them. Avoid putting any eatable articles in a trunk of box that contains things which cannot be washed, as they may be much injured by grease or stains. On no consideration, carry ink, even though locked up in a writing desk. You can always at the place which you are going, buy yourself six cent worth of ink in a small square bottle, which will also serve for an inkstand. It is well, however, to take with you a few sheets of good writing paper folded in the form of letters, each with a wafer stuck on one edge, to be ready, in case you have occasion to write before you reach your journey’s end, or immediately after. It is well to have read tapes nailed across the inside of the lid of your trunk, for the purpose of slipping letters and papers between them.

There are traveling trunks with a sort of movable tray fitting in near the top. This tray can be lifted in and out, and is for the purpose of containing pelerines, collars, scarfs, ribbons, laces, &c. Some very large trunks have a partition at one end, to hold a bonnet or other millinery.

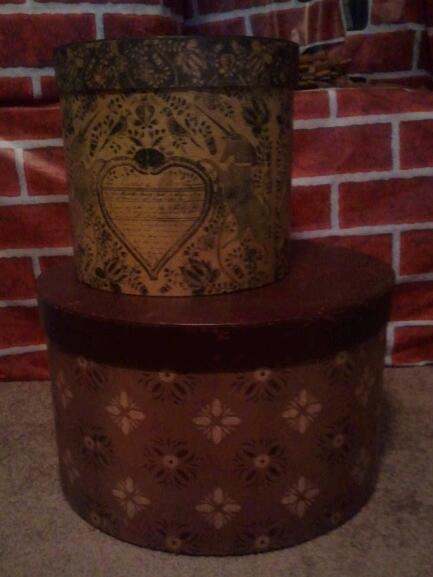
It is best, however, to have a proper bonnet-box, either of painted wood or leather. To keep the bonnet steady, sew to it in convenient places under the trimming, pieces of tape, the other ends of which should be secured with tack-nails to the floor and sides of the box. In the corners, you may lay a few caps, &c., as light as possible.

Leather trunks generally have brass plates on which is engraved the name of the owner. It is now very customary to have the name painted on both ends of the trunk, and also on the bonnet boxes. Besides which, if you are travelling with several articles of baggage, it is well to have them all designated by a piece of red tape or something of the sort tied round the handles of each. A lady, before setting out on a journey, should be provided with a card or paper, on which she has written a list and description of her trunk, box, carpet-bag, &c. Previous to the hour before starting, she should give this list to the gentleman under whose escort she is to travel and it will save him much trouble in finding out and taking care of her baggage.

The best paper for wrapping light articles that are to be packed in trunks, is the thin, soft sheets of light blue, buff, gray, and other colours, that are retailed at six cents per quire. It is well to keep a supply of it always in the house.

For heavier articles, (books, &c.,) the nankeen paper will be preferable to any other, as it is both smooth and strong.

In putting a paper parcel to go any distance over twenty miles, it is better to secure it only with sealing-wax, (putting always a wafer under the seal,) than to tie it round with twine, as in the course of transportation, the twine is very apt to rub and cut through the paper.

When putting up a newspaper or any other printed sheet to go by mail, always leave the cover open at one end.

Recommended Blog

Civil War reenacting friends, if you haven’t discovered it yet, I highly recommend checking out Civilian War Time. This blog transcribes letters and diary/journal entries each day. On the right hand side of the blog is a subscribe space. Enter your email to receive the posts daily.

Published in: on May 20, 2013 at 8:54 am  Leave a Comment  

Don’t Stress the Stress Lines

After a long winter and rainy spring, how many of us are trying on our dresses with hesitation?

Will it fit? Won’t it fit?

Will the bodice hook?

Will a button fly off?

This time of year, how many of us stress over those horizontal wrinkles that show up around the midriff of our bodices? How many of us stress over those stress lines? I have, year after year. Frankly, it is inevitable through the years as our bodies just change, hibernating winter or not.

Deep breath. I say “Don’t stress the stress lines.” Why? Take a look at some of these original images:

Waist 2 Waist 1 waist

A few more of various ages: Link 1 Link 2 Link 3

Now, this isn’t a set of stress lines, but I am curious as to why she chose this particular look. I don’t know that it was a fashion choice. I also don’t promote recreating it. LINK

Published in: on May 17, 2013 at 12:21 pm  Leave a Comment  

Reproduction Gutta Percha Belt Buckle

I have long wanted a reproduction* gutta percha belt buckle. Guess what surprised me in my mailbox today.
A most beautiful buckle from Aldridge Clothiers. This, the  “Forget Me Not Buckle” is one of several buckles they offer along with earrings and broaches.

image

I am very impessed with the detail. I hope you can see it in this photo. The morning glories are lovely.

image

I grabbed some of my petersham ribbon to compare. I have yet to decide which ribbon to go with. The helpful insert that comes with the buckle suggests velvet ribbon.

image

image

If you are looking for an excellent reproduction piece, please visit Aldridge Clothiers.

Published in: on May 4, 2013 at 6:57 pm  Leave a Comment  

Hat Boxes

For some time we’ve needed a larger hat box for one of Dan’s hats. It didn’t need to be anything fancy, just something to safely store his hats. At first we were certain Joann’s or Tuesday Morning would have something big enough. Wrong. Their boxes all fell short of the 16.5″ minimum diameter. We even looked at Christmas gift boxes. Finally, I found the right box! Bevin suggested Dogwood Trading Company in Dansville, NY. Please see their contact information below. They had just the right assortment of band boxes. Large. Small. Tall. Wide. Round. Oval. Square. Each one is nicely sturdy. The designs range with many reflecting the look of paper. The prices are very nice too. The bottom box, the one for Dan’s hat, is 17″ across. It is taller than the 8″ his one hat needed. So, I foresee this box holding more than one of his hats. This was only $18.99. The store has at least 4 other prints in this size. They do have a larger one in a beautiful print that looks like a woven blue blanket. Love it! I just haven’t a clue where it would go right now. At the very affordable price on it, I may have to go back for it. There are others this size too.

image

The top box isn’t a size or shape I was actively looking for. But, it looks like it will nicely hold a mid-century bonnet or hood. Plus, look at that paper. It had to come home. An alternative thought process was that while I previously/currently store my bonnets in totes, there isn’t as much tote storage space in this apartment. (Confession – at one point, I had a tower of bonnet totes in my front closet.) It may be time to go back to hat and band boxes for millinery. They look great and are great storage. If you need strong boxes for storage, do give Dogwood Trading Company at try. The staff were extremely nice & helpful.

image

Brrrrr…. Its Getting Cold Out There

I think by now we are all feeling the chill of the changed season. Sadly, some of us are dealing with a shockingly bad version of this seasonal transition.

This is a link heavy post, filled with seasonal favorites for you to puruse. You will find hints for keeping warm as well as contemporary readings for Christmas. You will also find a fun project.

Let’s start by keeping the body and home warm with “Keeping Warm this Winter” and last year’s “A Practical Look at Winter Clothing.” For an event prep list, check out “Are You Ready.”When thinking about winter clothing, you know I would love you all to make up my Quilted Hood Pattern. *wink* But, if you happen to be focusing on the 1840s, do give the pattern developed by Bevin Lynn for the Genesee Country Village a try.

Do you have gift making in mind? Last year, my series on the 12 Homemade Gifts seemed quite popular. (I’ll be sharing a couple passages from mid-century magazines and books for making more gifts and ornaments in the upcoming weeks.)

A few mid-nineteenth century readings…

The First Christmas Tree , an 1869 publication translated from the French – http://books.google.com/books?id=gcMBAAAAQAAJ&pg=PP6&source=gbs_selected_pages&cad=3#v=onepage&q&f=false

The Christmas Tree: A Story for Young and Old, translated from the German in this 1866 version – http://books.google.com/books?id=C6cDAAAAQAAJ&printsec=frontcover#v=onepage&q&f=false

A Present from Germany: The Christmas Tree, 1840, by E. Perry. http://books.google.com/books?id=TccNAAAAQAAJ&printsec=frontcover#v=onepage&q&f=false

The Christmas Tree and other stories, for the Young, by Mrs. Lovechild, 1863 – http://books.google.com/books?id=m6AXAAAAYAAJ&printsec=frontcover#v=onepage&q&f=false

I would be remiss if I did not include Charles Dickens’ Christmas Books with the well known “Christmas Carol” – http://archive.org/stream/christmasbooks00dickrich#page/n15/mode/2up

Household Words – Christmas Stories: 1851-1858  by Charles Dickens http://books.google.com/books?id=W8xbAAAAQAAJ&printsec=frontcover&source=gbs_ge_summary_r&cad=0#v=onepage&q&f=false

 And to close, a way too fun project:  

Check this out – Christmas village! http://archive.org/details/SantasChristmasVillage

Published in: on November 6, 2012 at 2:16 am  Leave a Comment  
Tags:

Latested Edition

The latested edition of the Citizens and Soldier’s Digest is now available on their website. This edition is filled with several articles of interest.

My husband has positively commented on the article discussing blue pants. He is quite thankful for the information.

Published in: on September 17, 2012 at 1:24 am  Leave a Comment  

Kerchief Images

I had a request for images to help show how to wear the kerchief style shown in yesterday’s post.
Here is a link to Lily Martin Spencer’s Shake Hands at the Ohio Historical Society. The subject wears a kerchief around the neck crossing in the front. It may or may not be secured with a knot or pin.
http://www.ohiochannel.org/MediaLibrary/Media.aspx?fileId=4053&returnTo=Collection

Here are two photos of me wearing a kerchief. In each case a good portion of the kerchief is inside the neckline. Perspiration ends up on the kerchief more so hen the neck of the dress.

image

image

(Yes, my hair is falling down. Building fences is hard work.)

Published in: on May 25, 2012 at 9:10 am  Leave a Comment  

Kerchief

When I recently mentioned the possibility of writing out and publishing my fashionable fichu pattern, a friend and reader asked me about a neckerchief style fichu. It took me a few more weeks to get that information to her than I initially planned due to the wild fun of work and husband sewing. But, finally I did. Now, here that information is for everyone else.

Since I am very fond of V neck dresses, I find a long diamond a very useful and functional form of neckerchief. (Oh, I should say it seems through the first half of the century the word fichu referred to a kerchief that was worn about the neck. Then as we reach the 50s, or the mid-50s, the word fichu is used for a more fashionable accessory still worn about the neck technically, though it was more often pictured draped around the shoulders, high at the neck in the back, then falling gracefully over the bust to the waist or past, sometime crossing in the front. The accessory I am showing here is of the first instance.) Folded lengthwise, the short points nicely tuck inside my dress’s collar following the V in front. Sometimes I will pin the point of the V the kerchief creates, other times I will leave it as is. My use of this diamond shape comes from a discussion on The Sewing Academy some years back. So, I can not take credit for the initial design.

This diamond shape can be seen in several extant kerchiefs including:

To make this version of a kerchief, I cut a diamond as shown in the illustration. The diamond is 40 to 44 inches long and 10 to 15 inches wide from point to point. This size fits nicely across the width of most modern fabric. The fold line should be set on the bias. On the body, this length will drape around the neck, over the inner bust down to about the ribcage. The length should be long enough to sit inside the front of the bodice without pulling out while you work. I prefer less bulk and go with a narrower short width. A wider short width would be helpful if the kerchief is to be used during labor where one expects to perspire more.

The edges can all be finished simply with a rolled hem. The short points can be rounded off into a nice curve as well. If you are good at fancy needlework, add something decorative as well.

Another type of kerchief is half of this design, as if it was cut and hemmed along the fold line in the illustration. This long triangle is half the fabric, thus half the bulk of the diamond version. This shape appears quite frequently in originals. Without tabulating to be certain, I suspect the triangular version appears more frequently than the diamond version.  You can see examples here:

As you can see from each of the examples, a variety of materials were used. This is supported by this passage from The Ladies’ Work-Table Book. The passage mentions different treatments of the edges. It also mentions a curious bit about tapes which will be nice to learn more about.

 Neck and Pocket Handkerchiefs – These are made of a great variety of materials, as silk, muslin, cambric, lawn, and net. The neck handkerchiefs are generally a half square, and are hemmed all around. It is a good plan to turn up the extreme corners, as it makes it more strong and durable. A tape is set on, which comes ‘round the waist, and ties in front. Sometimes a broad muslin hem is put on the two straight sides, which looks extremely well. Some ladies work a border to their neck handkerchief, which gives to those made of net the appearance of lace. Pocket handkerchiefs are neatly hemmed, and sometimes have a worked border. Those used by gentlemen are of a larger size than those of ladies. (The Ladies’ Work-Table Book.)

Published in: on May 24, 2012 at 5:23 pm  Comments (6)  

A Good Read

Just a quick post sharing another person’s blog post. Take a look at

Elaine Kessinger’s Blog.

Published in: on February 29, 2012 at 10:32 am  Leave a Comment