With busy schedules, taking on a project, particularly a new project, can seem overwhelming. Even after years of making winter hoods, I find switching from my rhythmic sewing for straw to construction sewing for winter hoods to be a big shift.
I find I need to break each hood into steps I can do after work. These steps give me an achievable goal and a sense of completion.
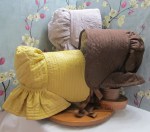
Here is my recommendation for working through my Quilted Winter Hood Workbook. Each of these is meant to be achievable in an evening. This pace completes hoods A & C in two weeks, while hood B will take a few more days for quilting.
- Read Part 1
- Read Part 2
- Print pattern pages. Tape together and cut out the pieces you need.
- Layout and cut fabrics & batting
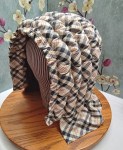
- Mark quilting lines. Make bias and piping.
- Start quilting the brim.
- Continue quilting the brim.
- Finish quilting the brim.
- Quilt the crown.
- Assemble & quilt the bavolet.
- Bind or pipe the brim (varies by style)
- Attach the crown.
- Attach the bavolet.
- Finish interior and add ties.
For many, a quilted winter hood can be made in a weekend of handsewing. I would recommend reading in advance. Do steps 3, 4, & 5 on Friday evening. Start Saturday morning with quilting steps 6 to 10, accompanied by a good audiobook. Sunday, commence binding or piping, and assemble the hood through the finish.
Keep in mind that everyone works at a different pace. You may find you have limited time and need to do each step over a couple of days. Or, you may be able to do more than one step in a sitting.
A similar breakdown can be used for my Wadded Hood Workbook.
- Read Part 1.
- Read Part 2.
- Print & cut the pattern pieces you need.
- Layout and cut fabrics.
- Assemble the brim. (x2 evenings)
- Layer & quilt the crown.
- Layer & quilt the bavolet.
- Wadded the brim. (x2 evenings)
- Attach crown & brim.
- Attach bavolet.
- Finish interior and add ties.


Leave a comment