Pork Pie Hats

IMG_7297IMG_7298
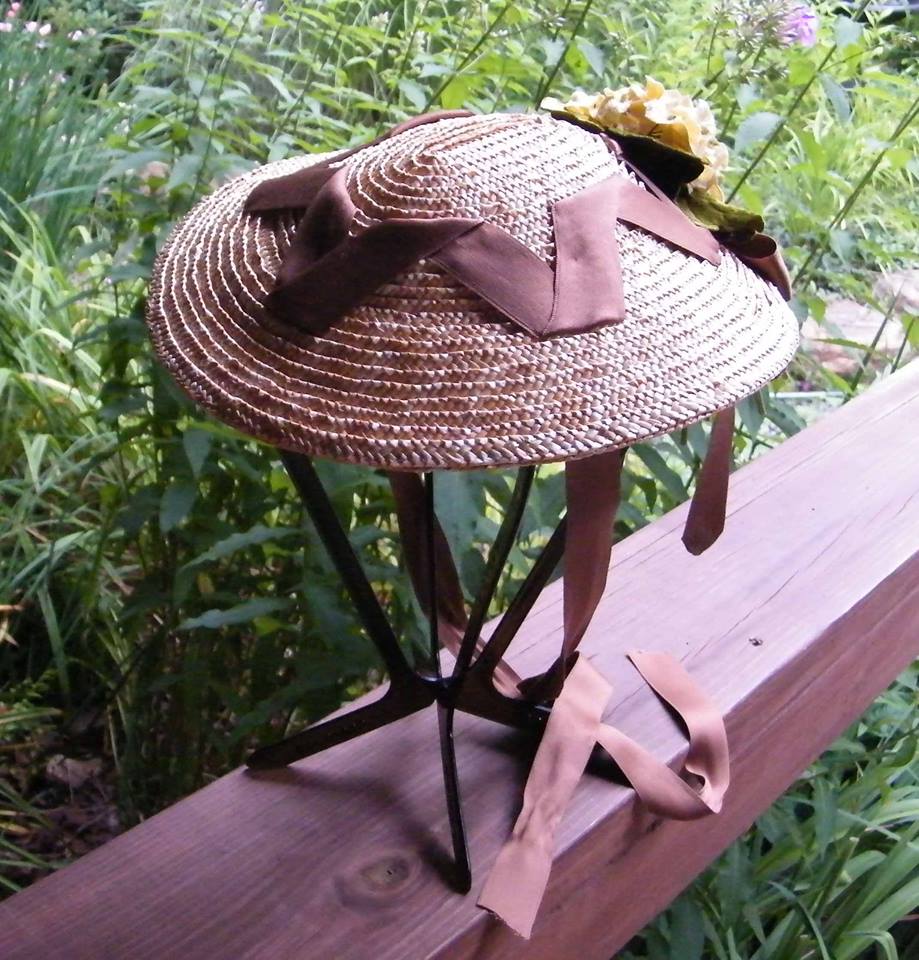
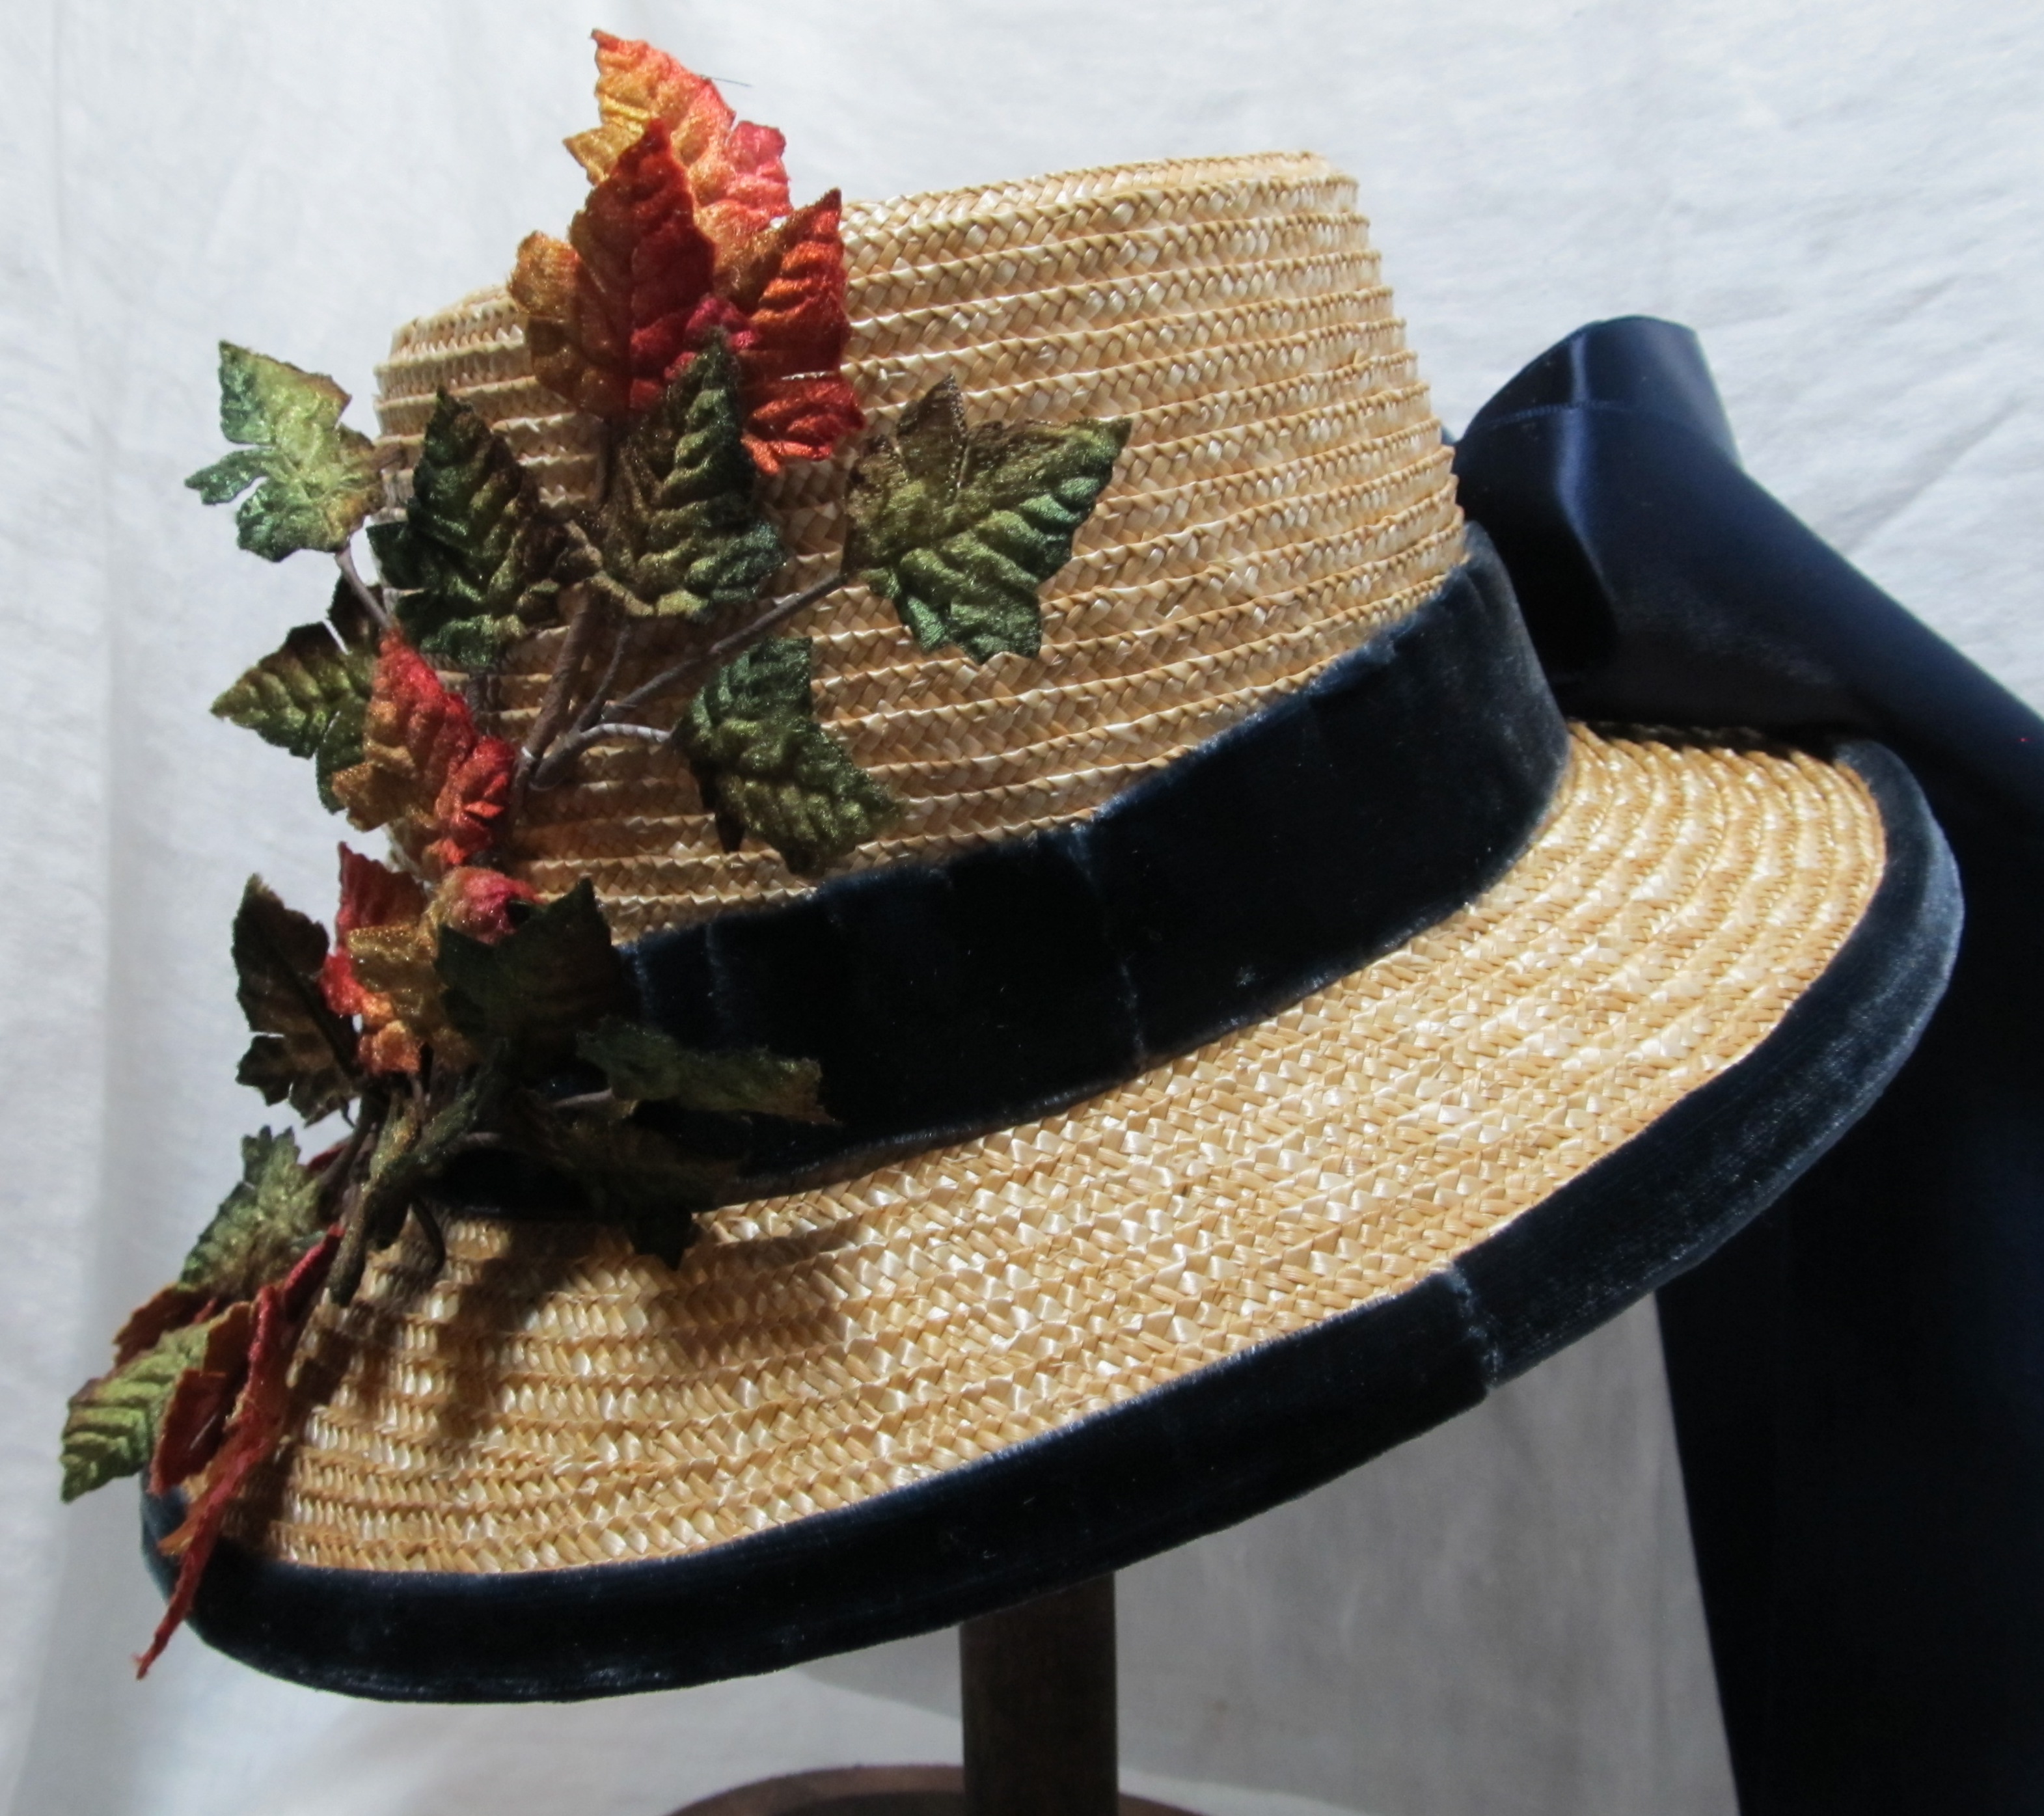
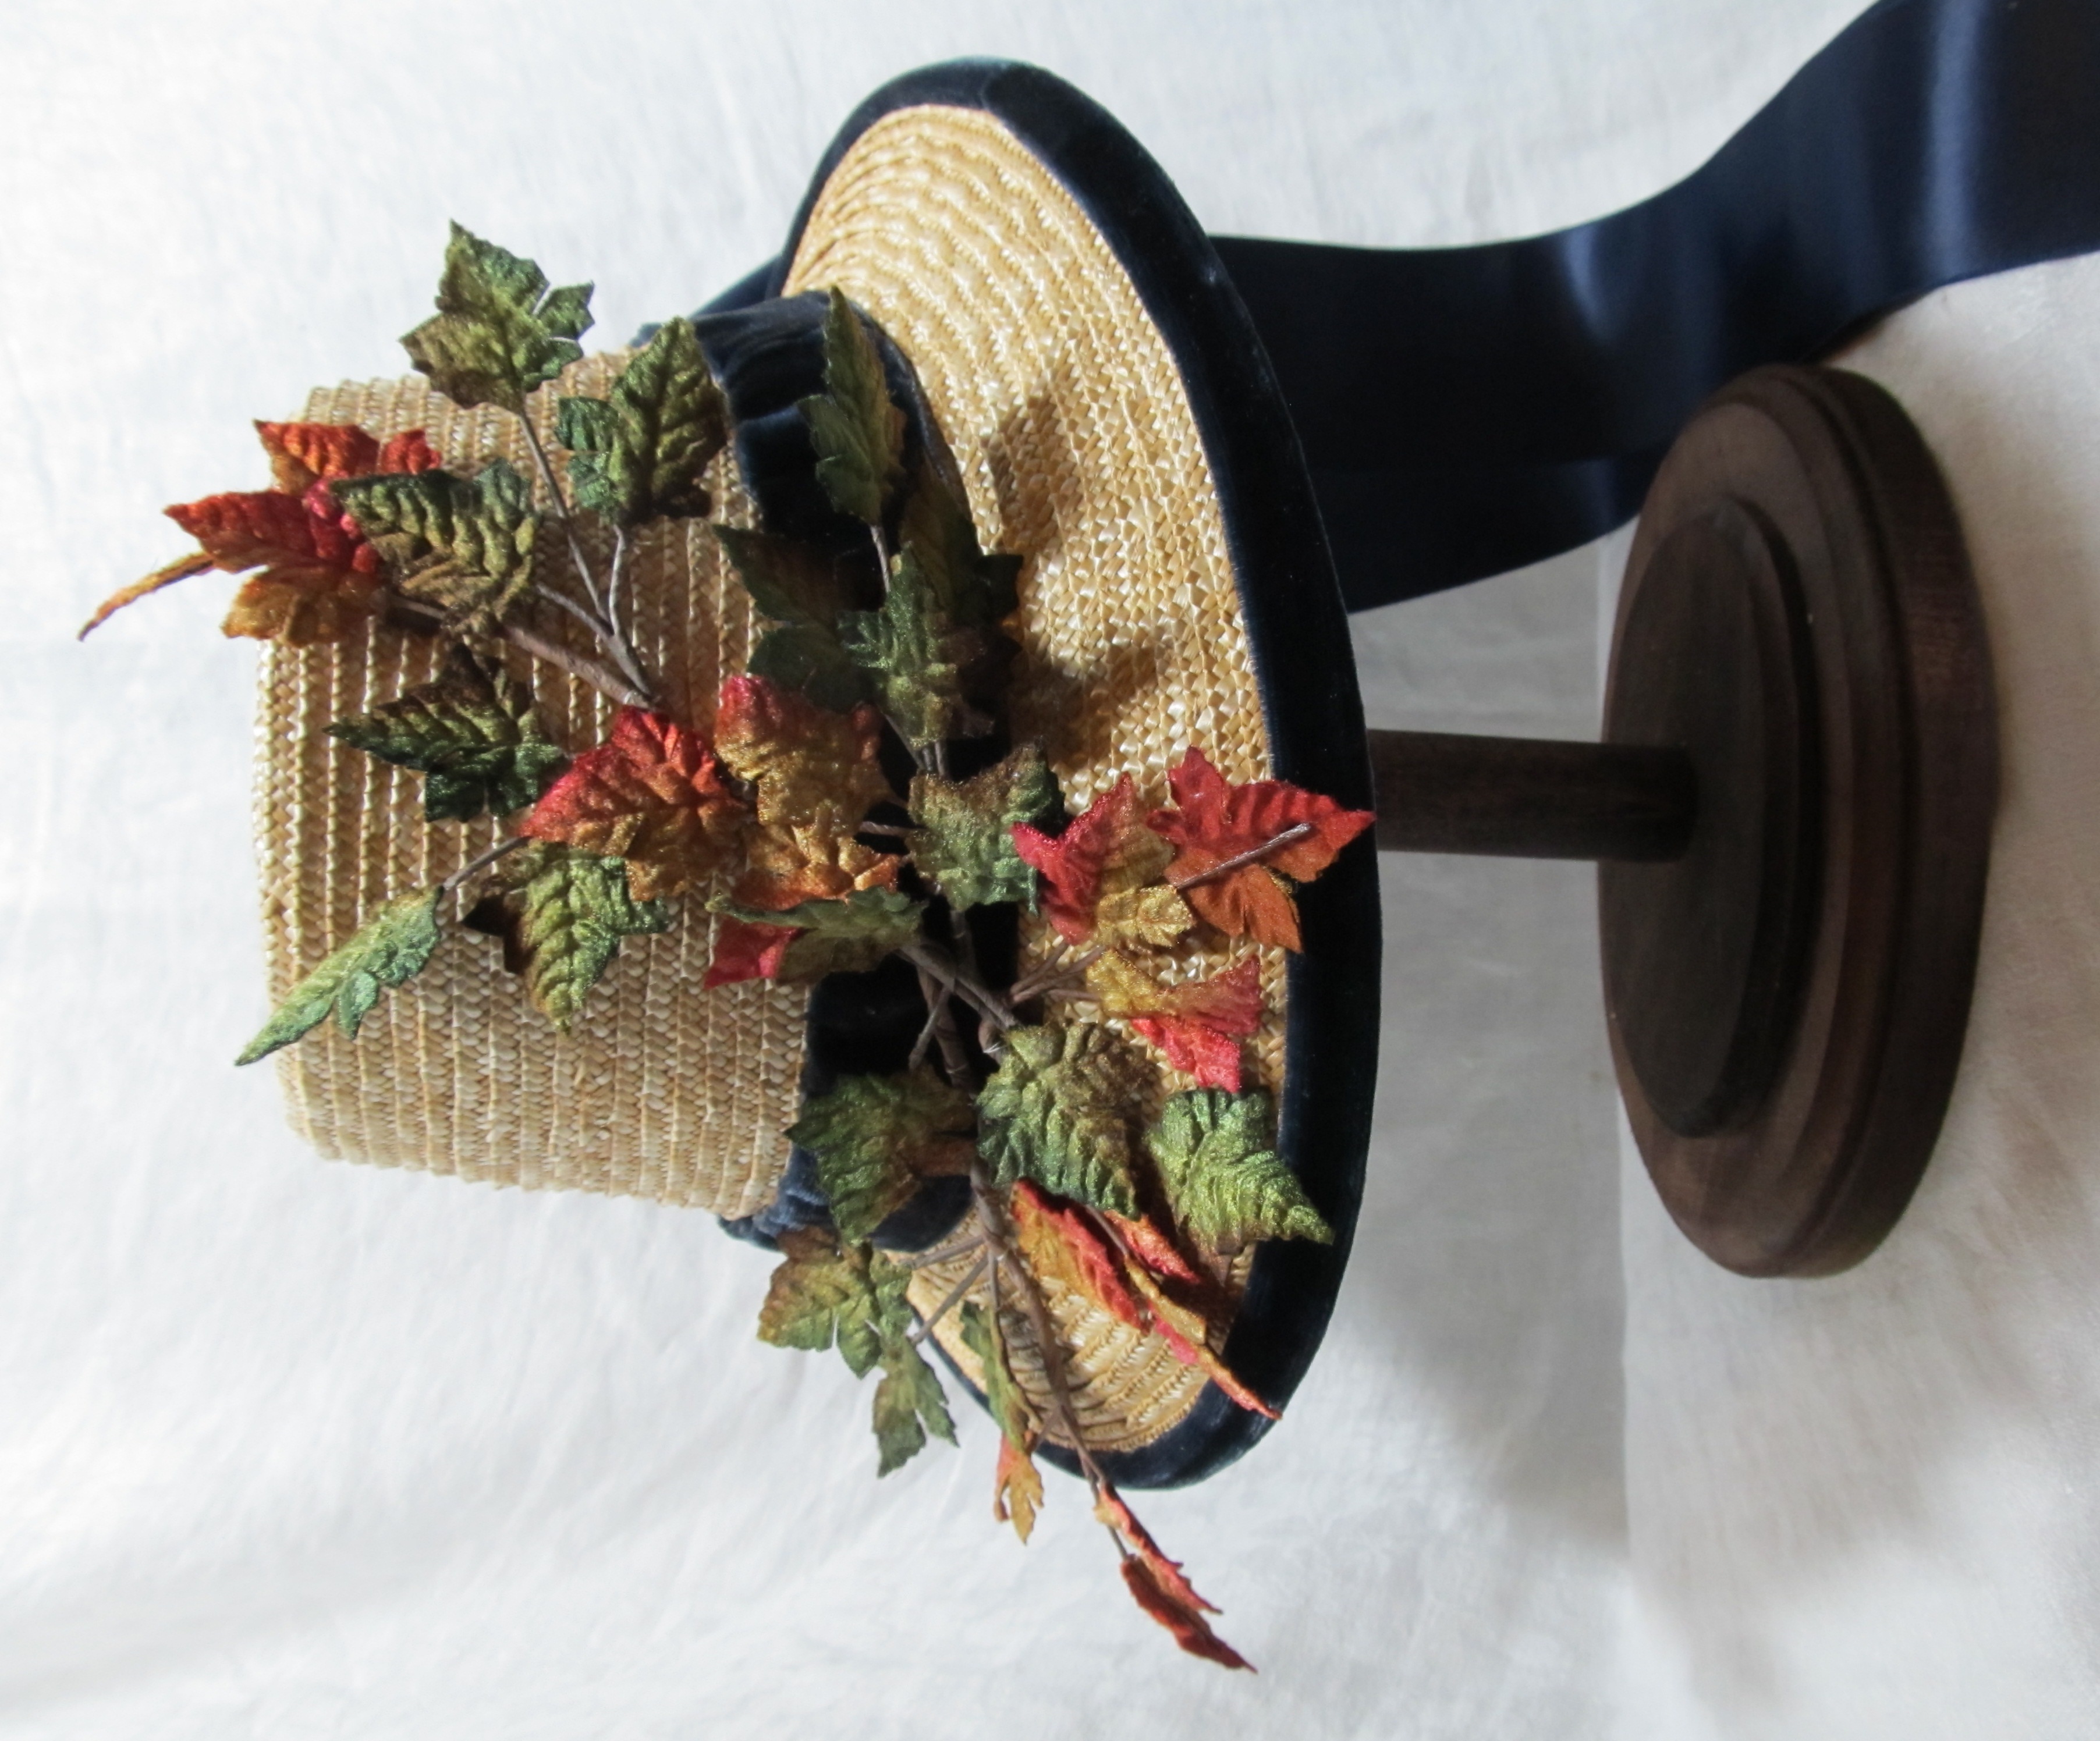
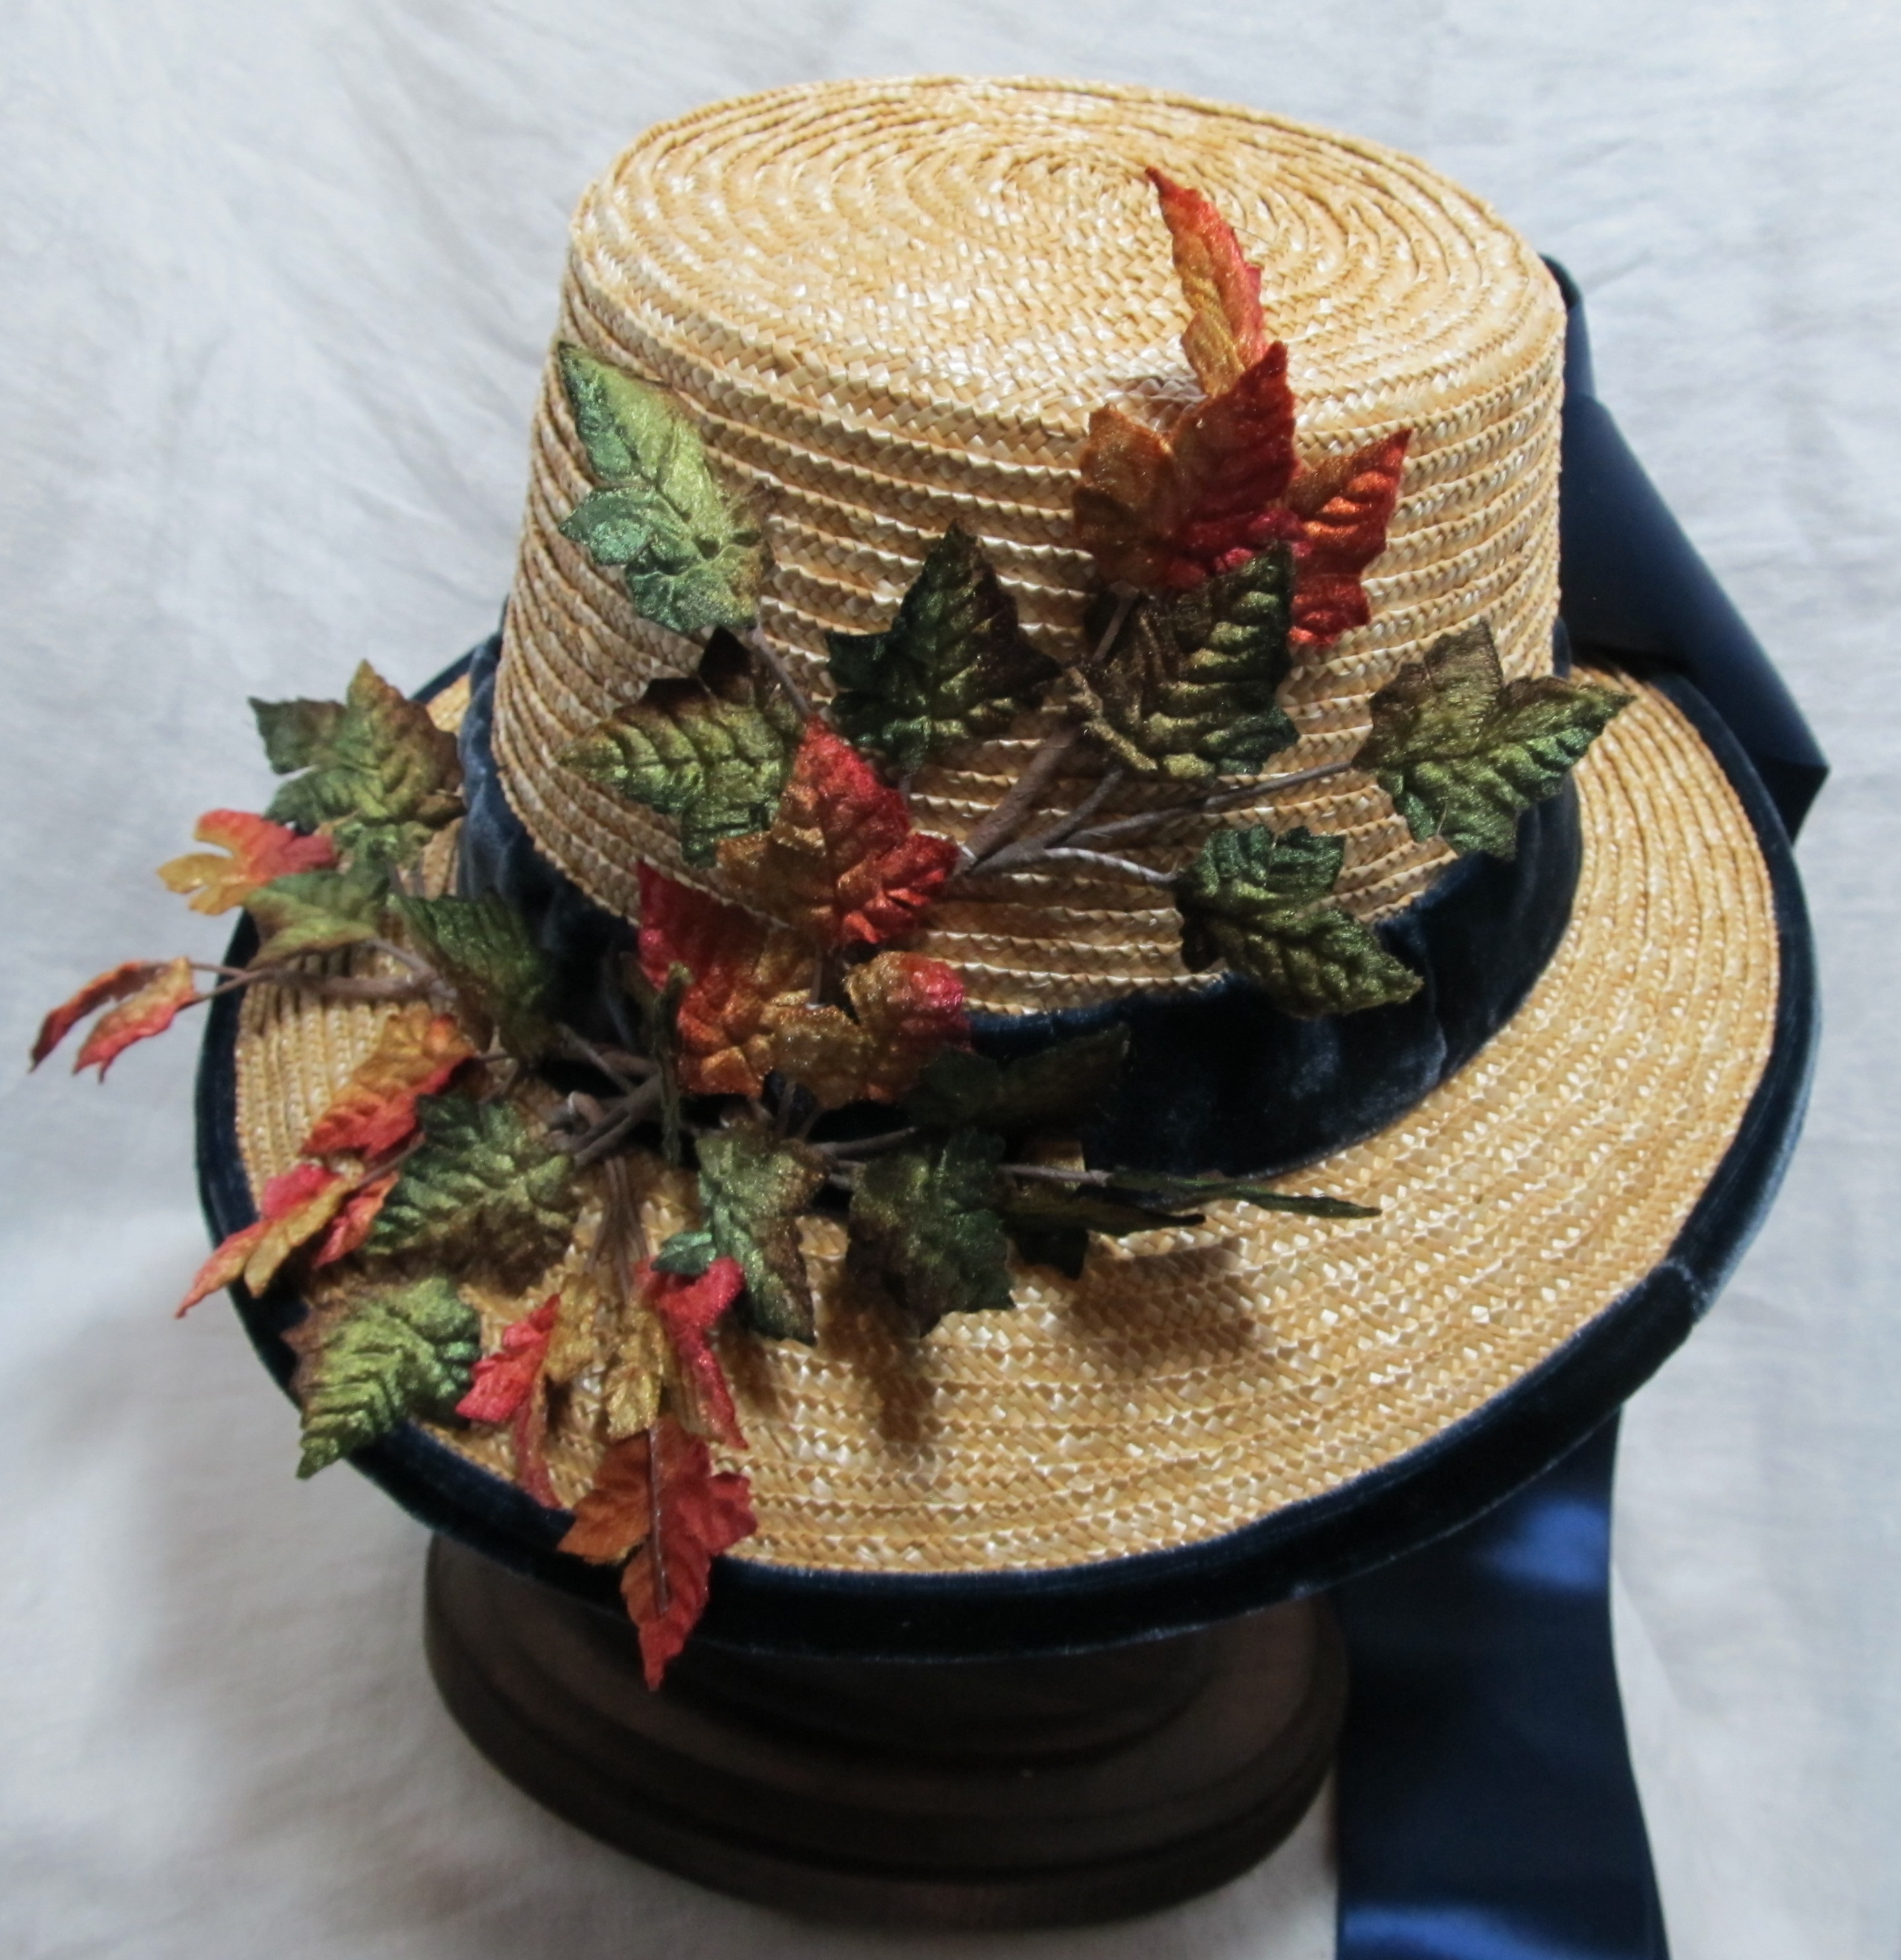
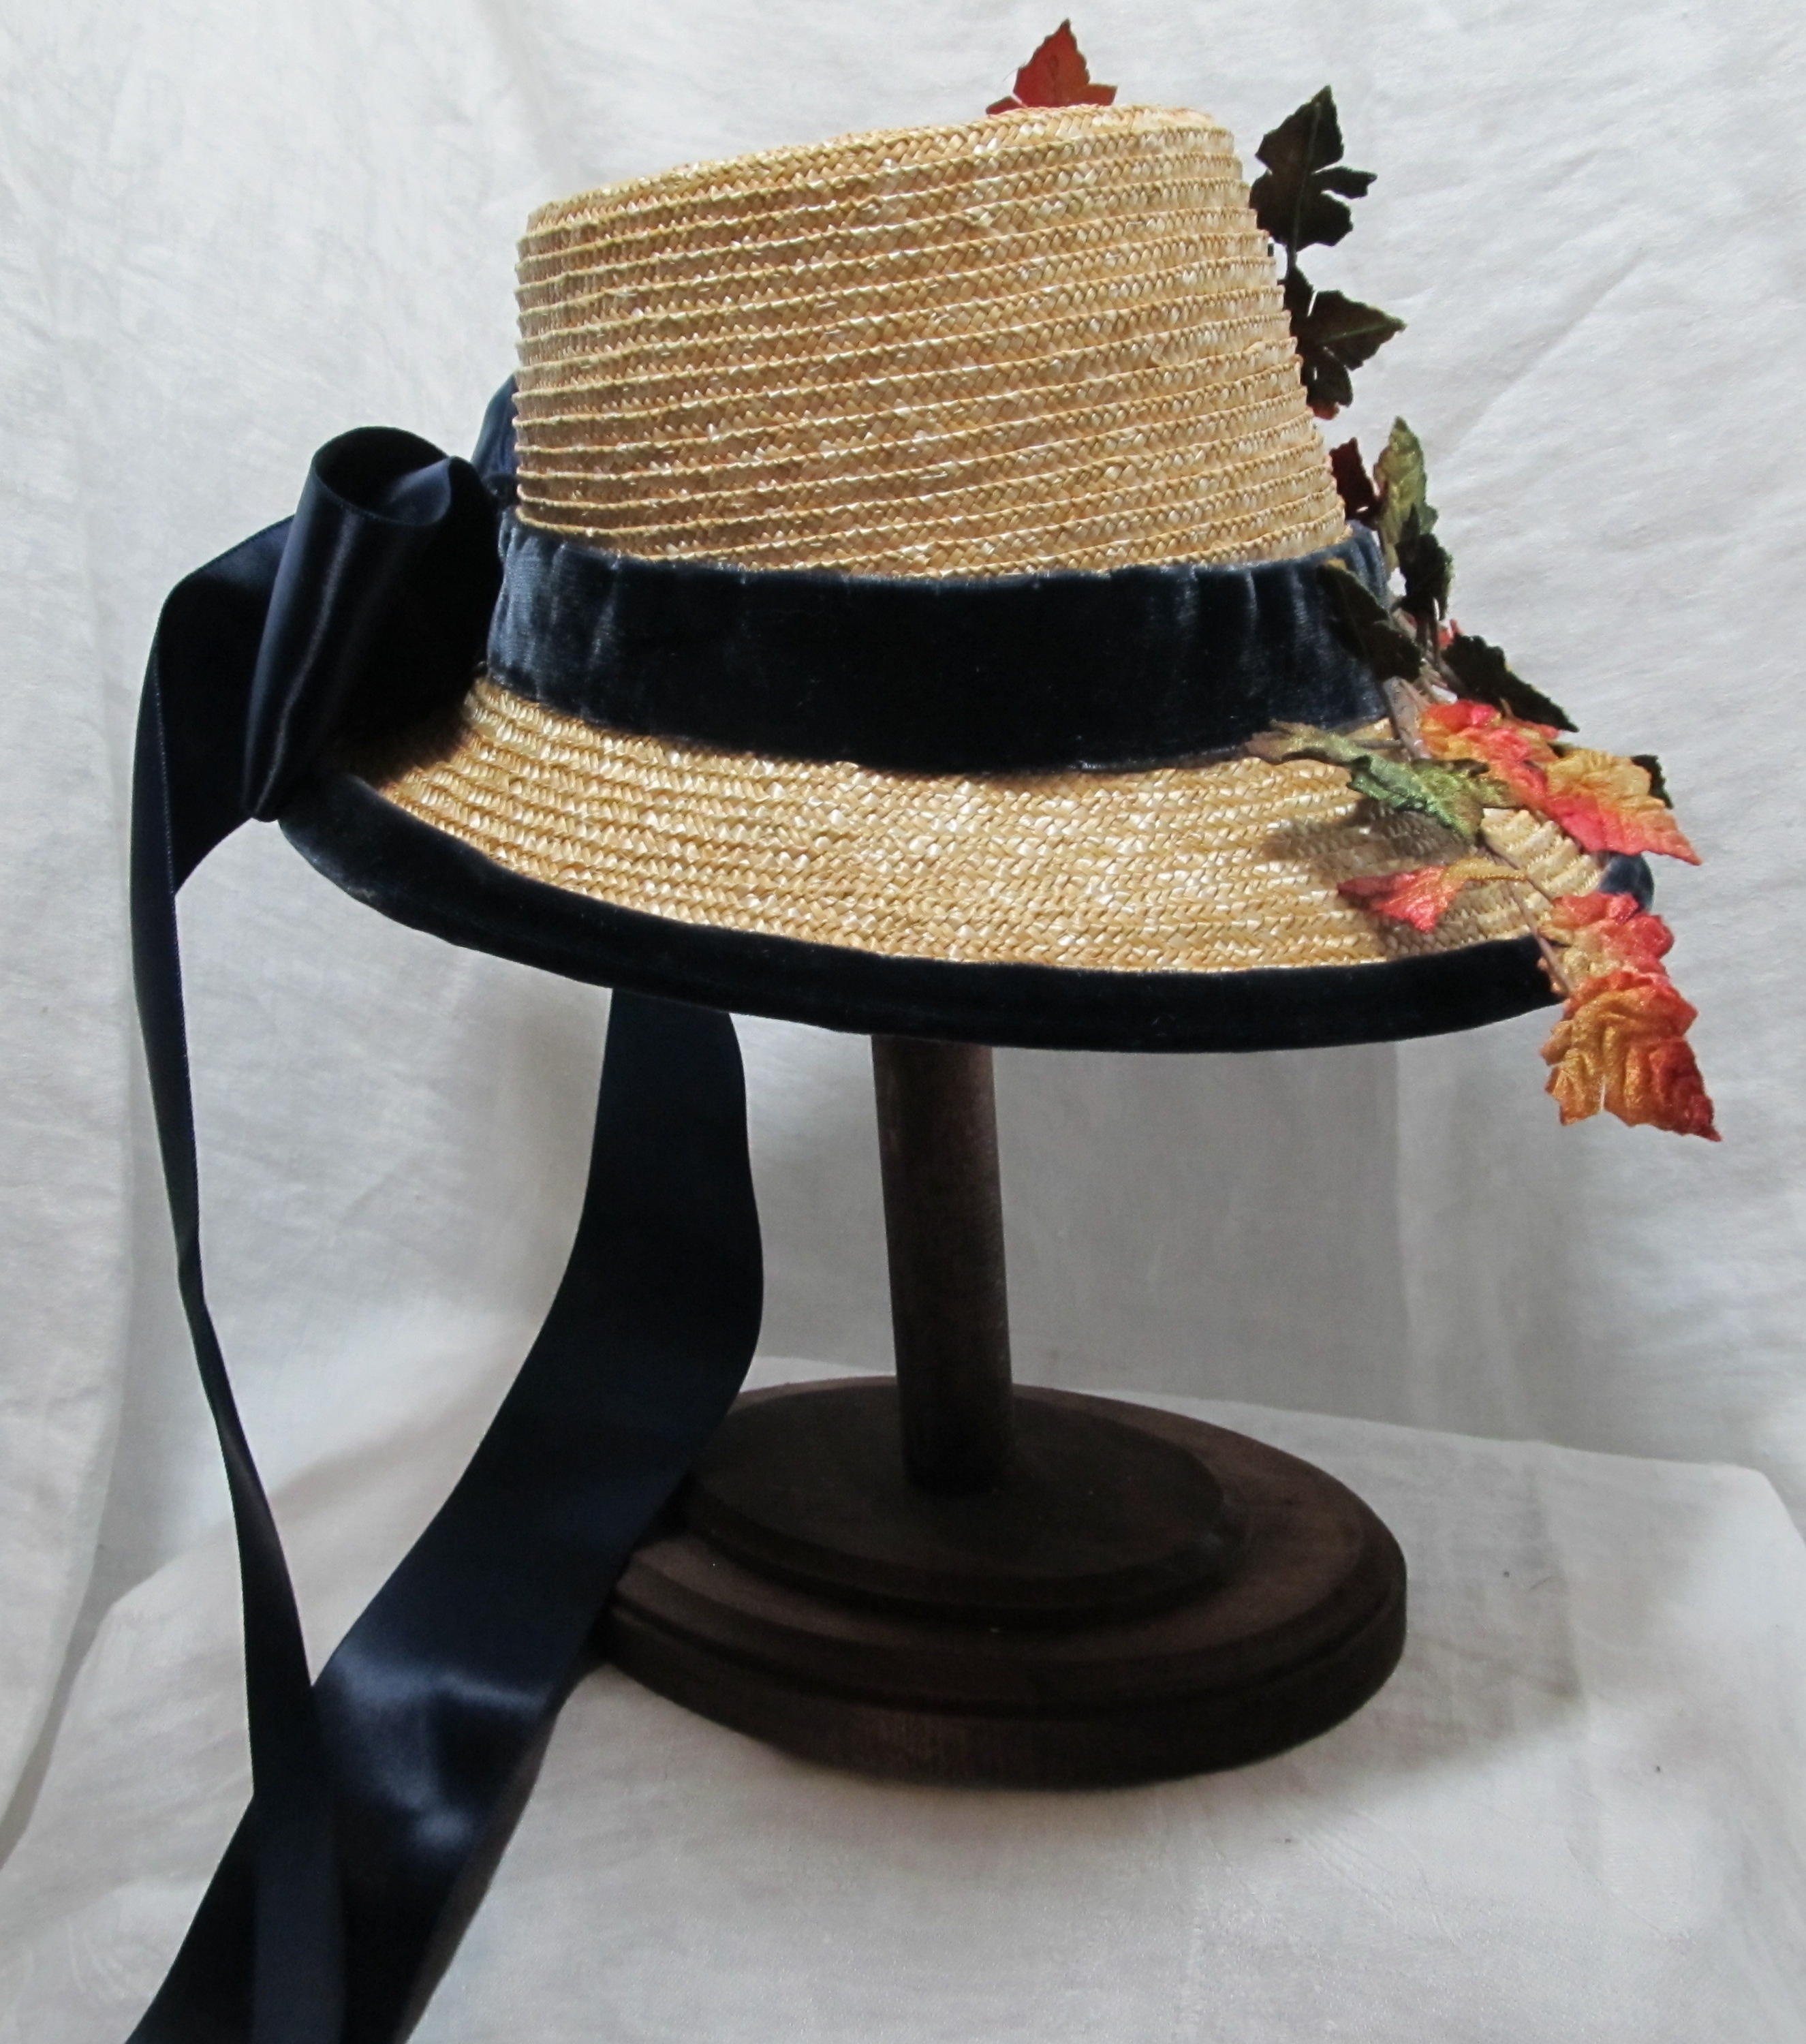
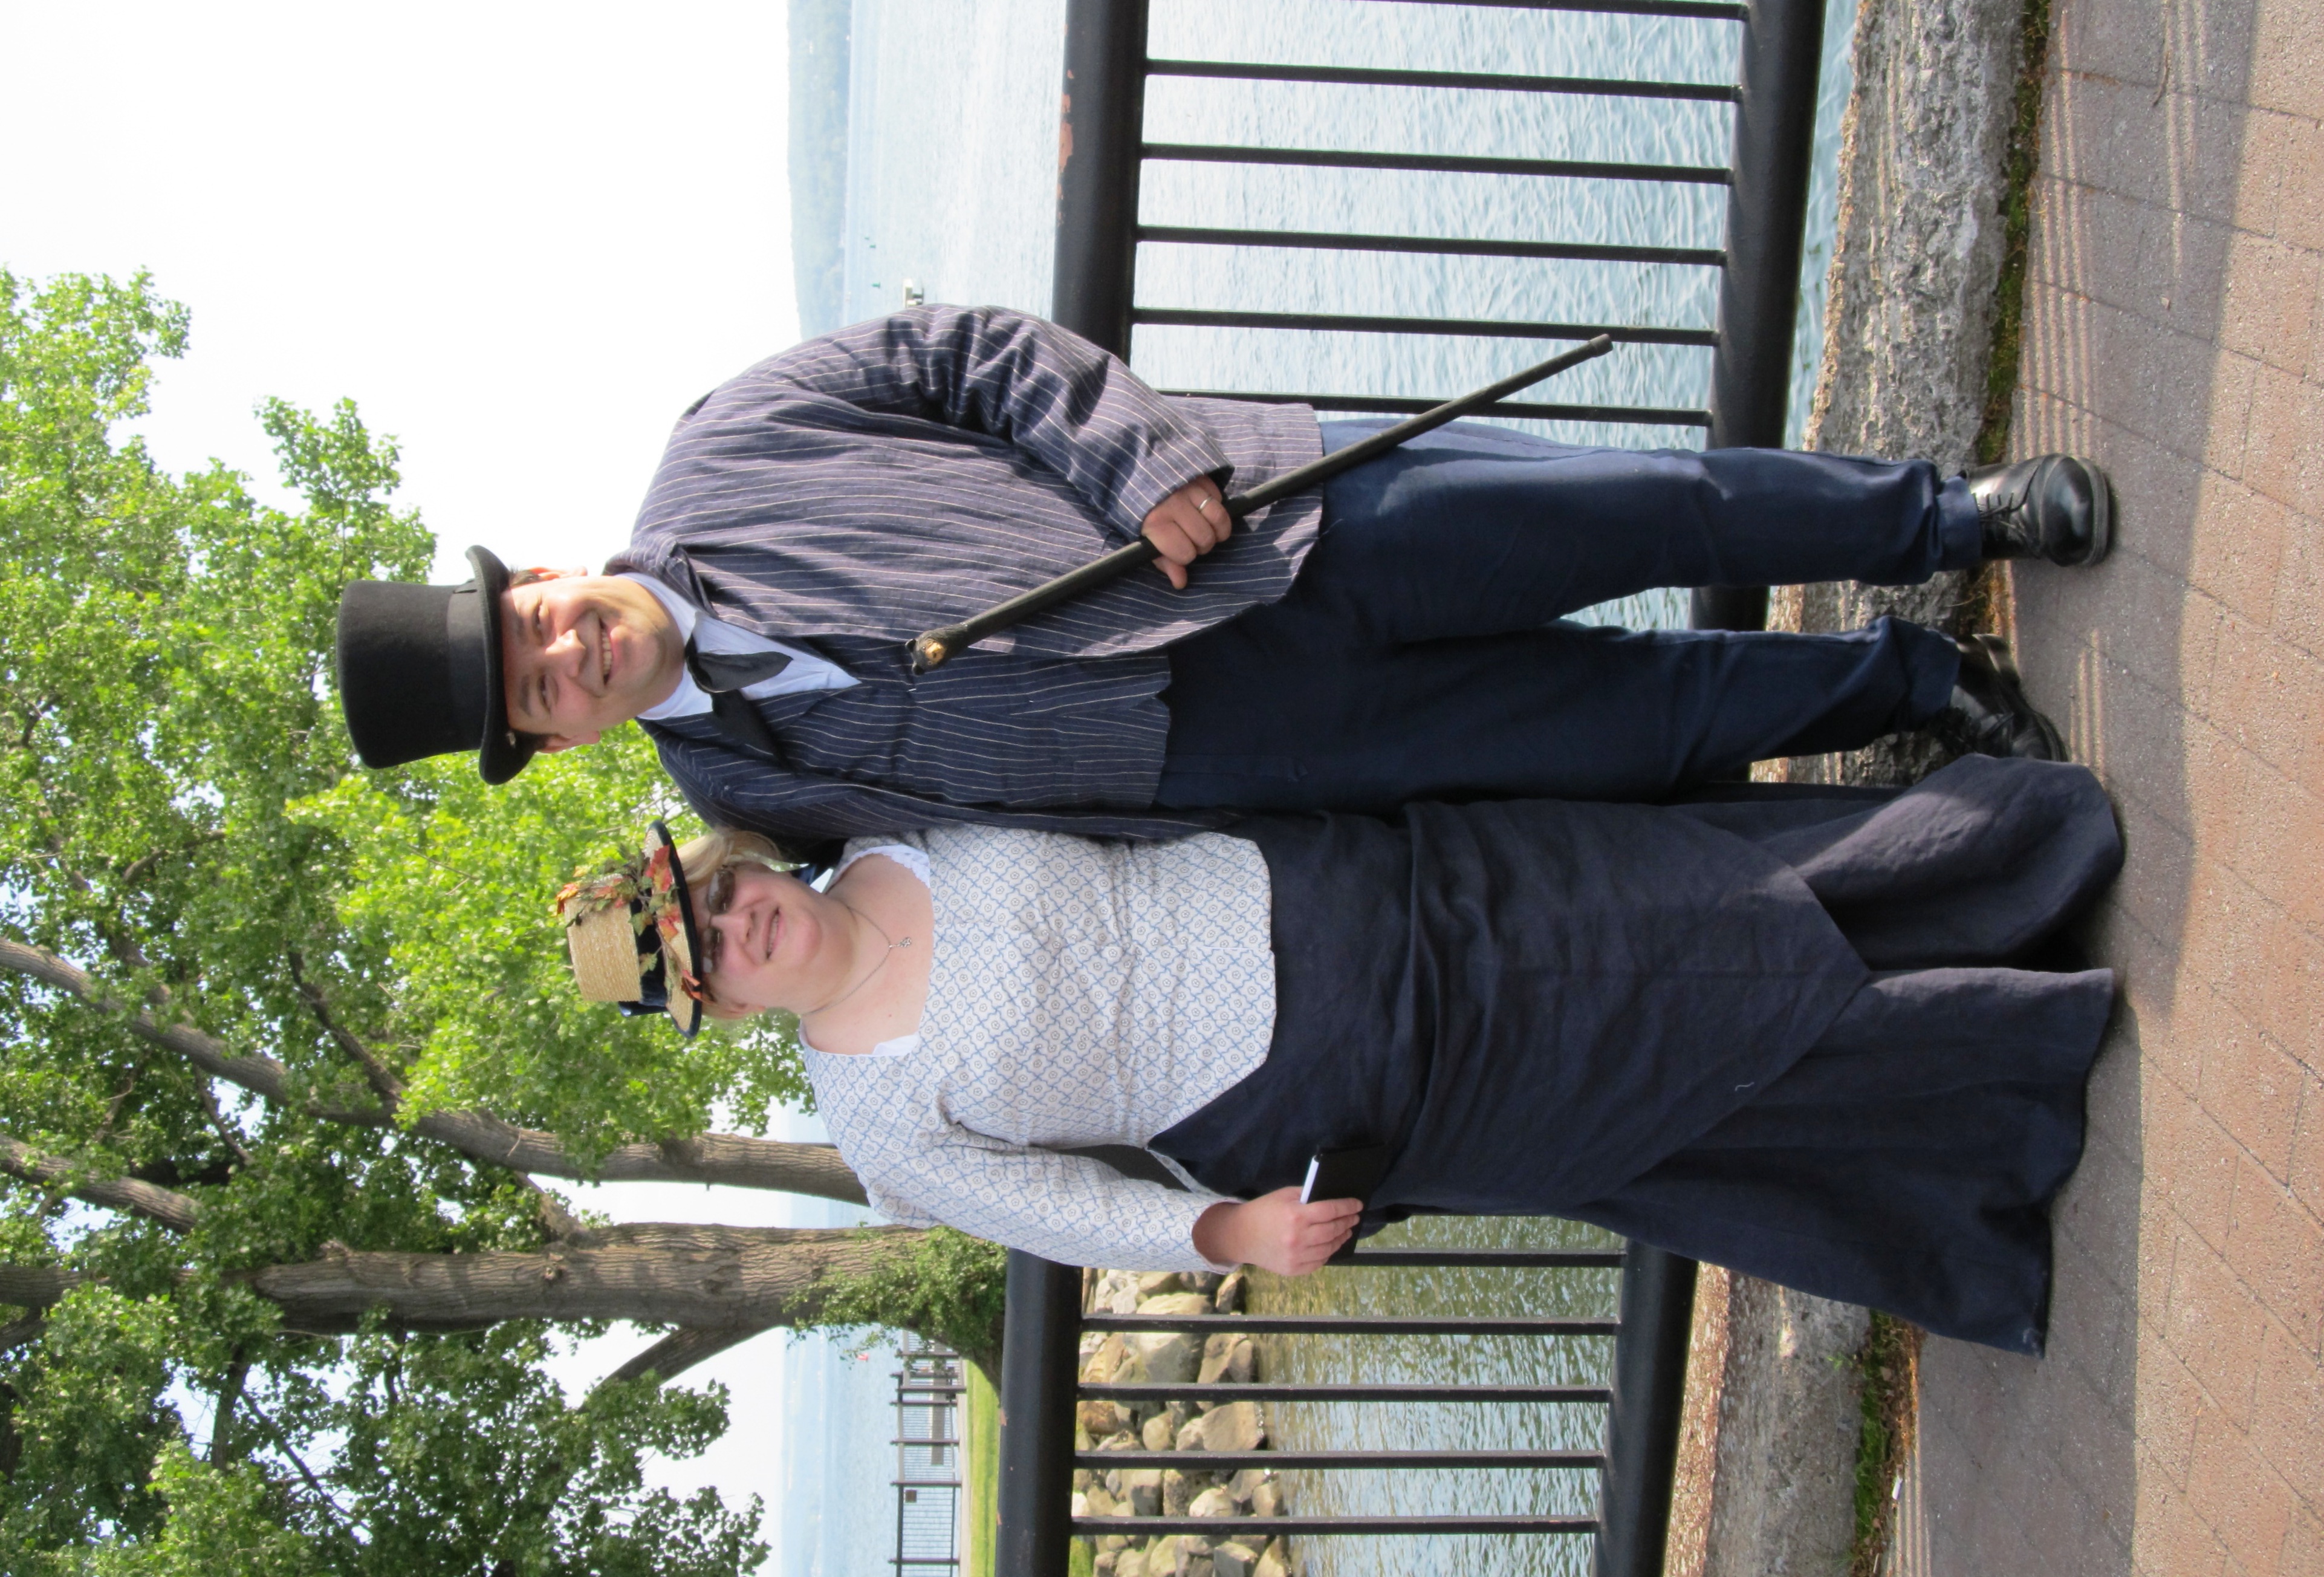
This weekend at the museum I ran short on straw. So, I opted to change direction on the hat I was working on and make a pork pie hat. I had just the right amount of straw left for that. (I had declared it my first pork pie. But, yesterday, I realized I made a small hat last month that technically is also a pork pie.)

My pork pie hat is 18.5″ around the interior crown. I find this wants to perch on my head that is 22.5″ today. (I am convinced it changes between 21.5″ and 22.5″ depending on the day and hair.) It feels higher than the hats of the same size crown with wider brim. I find that interesting. It is a very different feel than the other hats I’ve made.

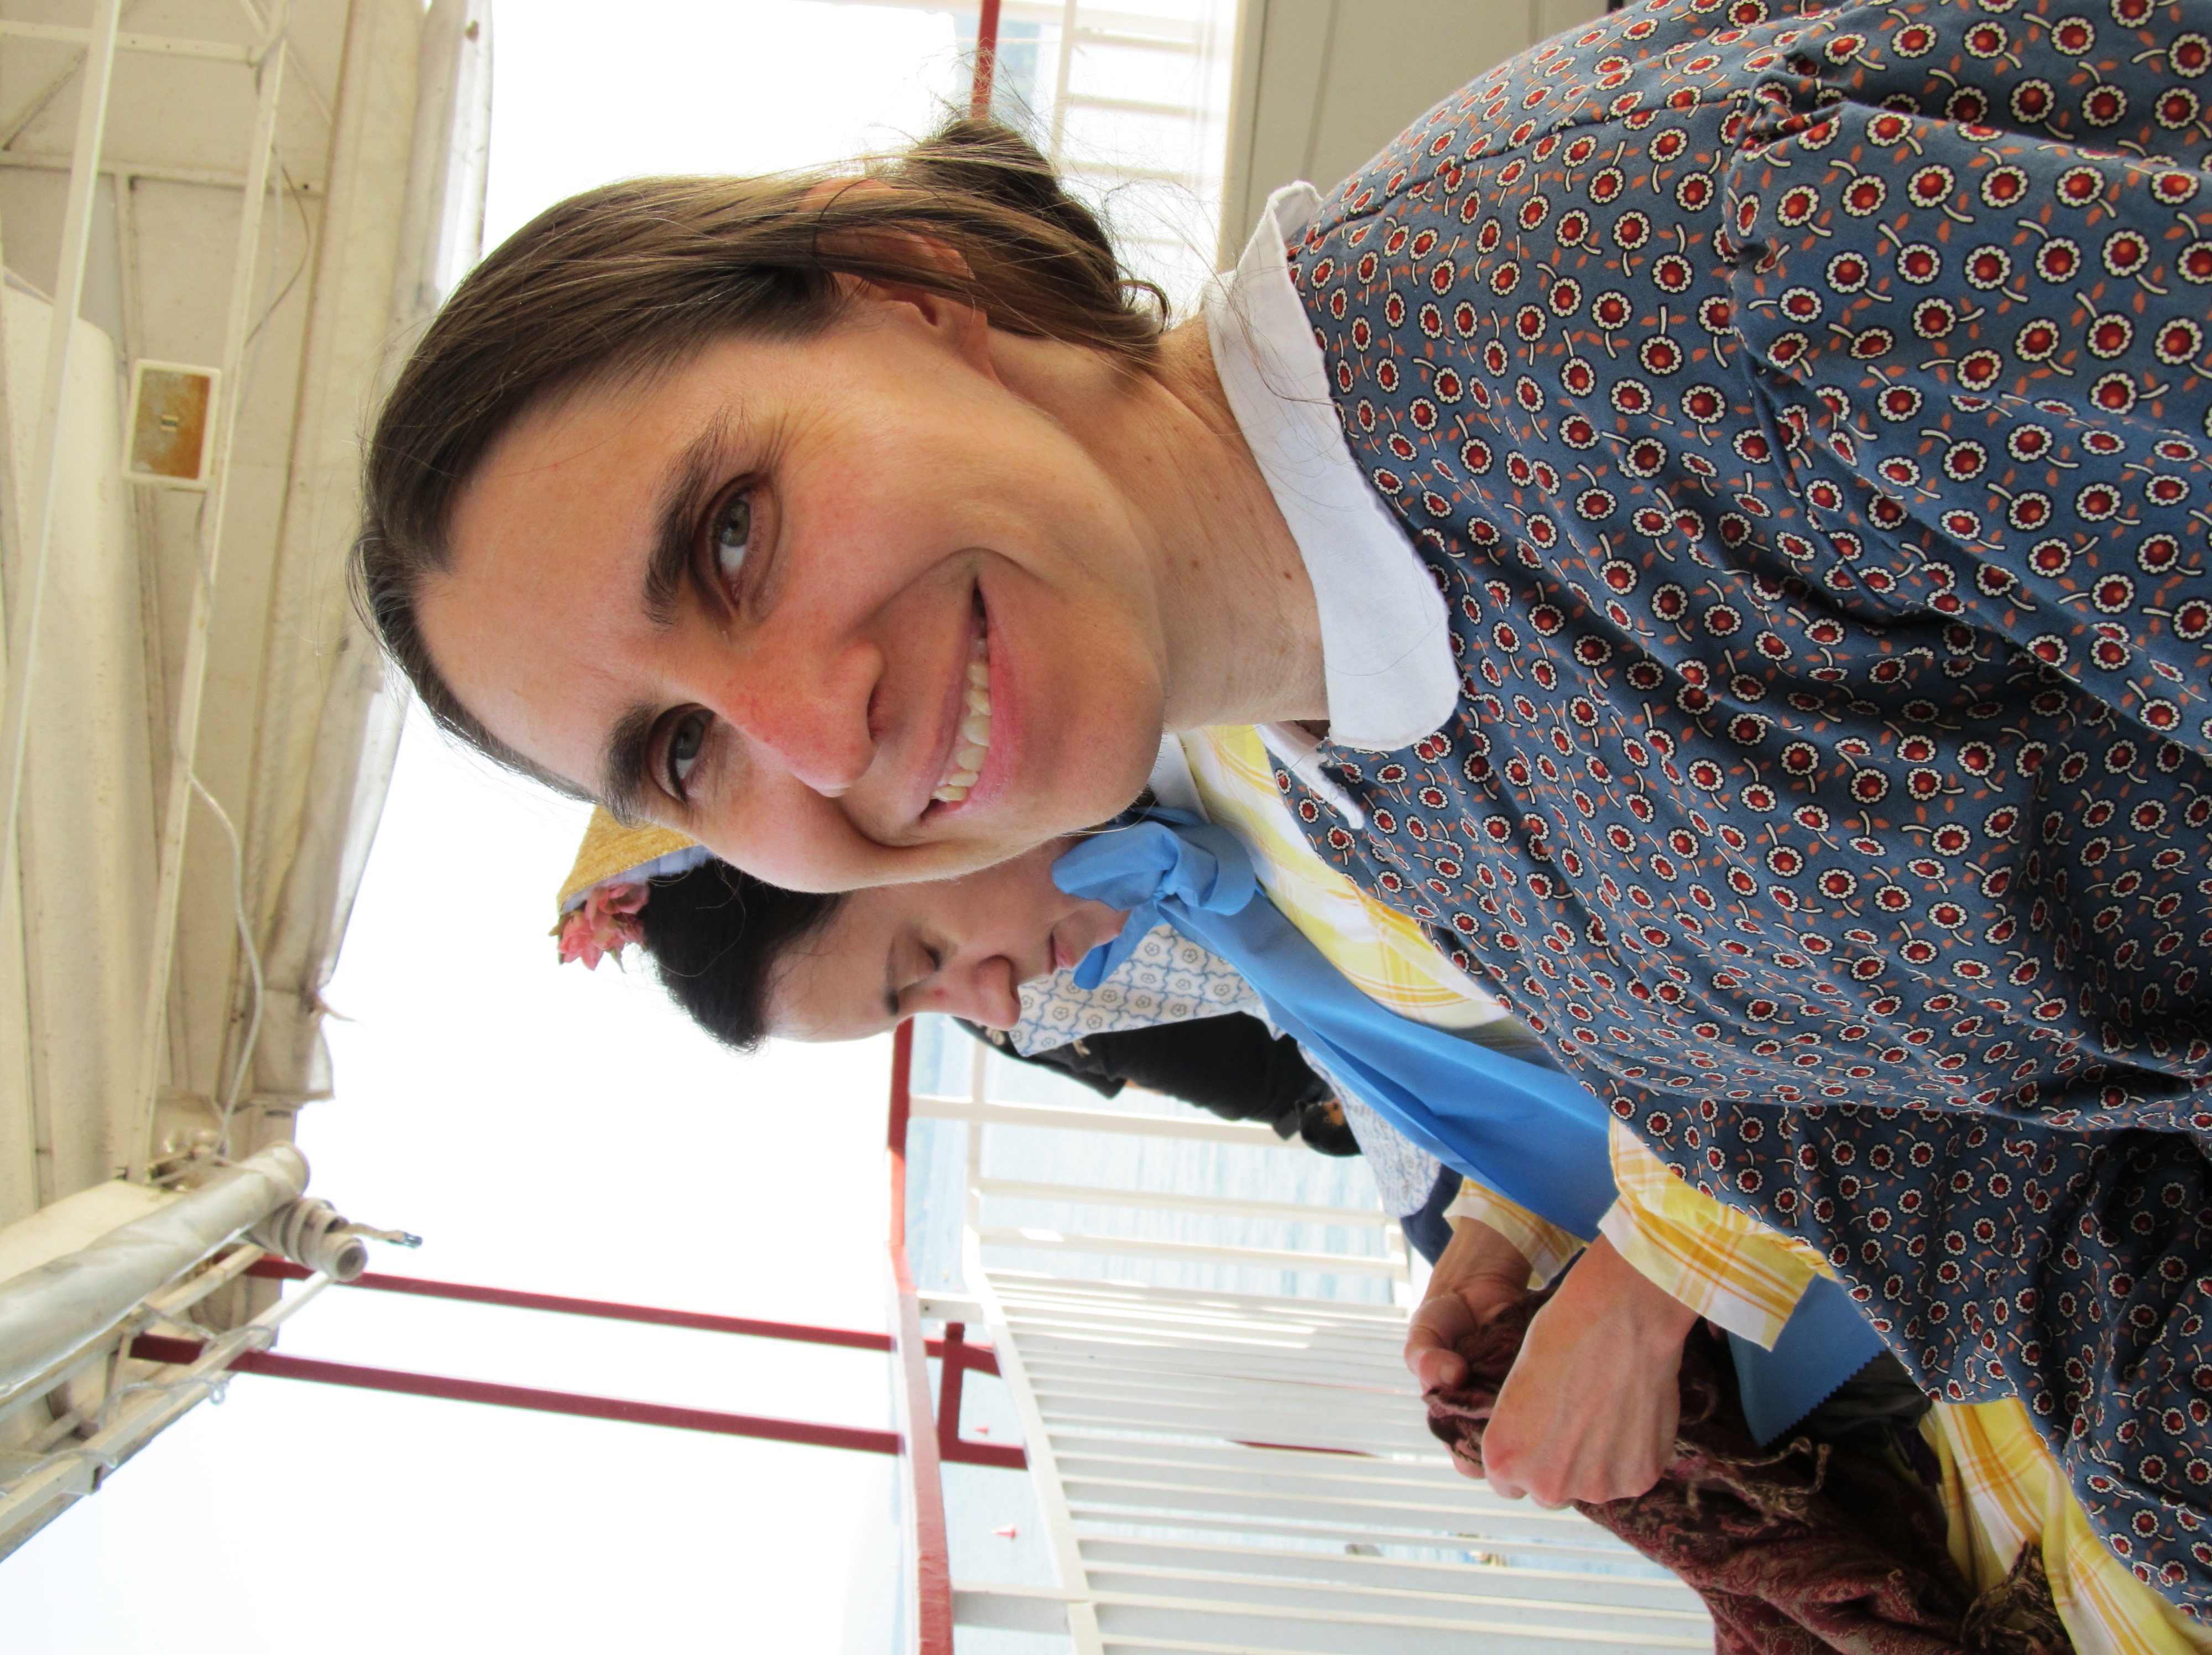
There was a lot of discussion of pork pie hats in Civil War era discussion groups a year or so ago. Looking at CW era CDVs, I’m noticing most of the small hats I’m seeing being called pork pies are technically Toques as they have no brim. Pork pies have a small curled up brim.This later 1860s image shows a nice pork pie hat.  Several images show hats with wider curved up brims, the curve having a band of over an inch, ( this cdv. is a good example.) I don’t know whether these would technically be pork pies or not.

Here are some Pork Pie Hats from 1860 through 1890 (I do not think all of the dating on these is correct). The hats are cited as women’s, girl’s and boy’s hats. You’ll notice a variety of ways of decorating them. Binding the curved up brim edge seems to be fairly common through all three decades. Examples below show both velvet and lace being used. Sadly, measurements are not given in each case.

Listed as a boy’s hat in the LACMA collection.

pork pie hat in cdv - Copy

From the MET collection – 1870s

From the MET collection – Listed as 1880s

From the MET collection – Listed as 1868

Published in: on July 21, 2015 at 1:07 pm  Leave a Comment  

That Which Sucks

Today is day two of the Genesee Country Village’s Civil War reenactment.

And… I am home. Not there. Home.

This in a word, Sucks.

Yesterday started wet, sticky, hot and gross. But, I thought I was doing okay. Sure, I was red. But, I am always red.

I drank water the way I was supposed to. I had a few little pickles the way I was supposed to. I ate light like I was supposed to. I stayed out of the sun like I was supposed to. Really, the only times I was in the sun was from the car to the office, from the office to the Millinery, one run to the bathroom with the umbrella, then from the millinery to the office, then to the car.

Photo: Ruby Foote, July 18, 2015 GCV.

Photo: Ruby Foote, July 18, 2015 GCV.

Long, TMI story cut short – Sometime late morning I caught myself looking out the window jealously at those who could walk in the sun without issue. Then I started noticing I was seeing floaties. Then I started getting just a bit of that twang in the side of my head. I ignored it. Told myself I was fine. Put on a smile and kept drinking water. I think that is roughly when Ruby took this photo (right.)

I think this was the start of my downward slope though I didn’t really realize it. By the time the battle came, let’s just say the stomach was displeased and I was too stubborn to say anything.

Drink, breath, smile. Drink, breath, smile.

It was the walk out to the car that hit me. Wham. The stomach was saying “screw you”. The head was saying I only had minute to get home.

At home, the clothes piled on the floor, I went into the shower.

I really wish that was the end of the story. But, no. My body was cooling down. My head was heating up. My face was bright red. My whole head and face felt like it was burning up. It was like I had spent the whole day in the sun and got the lobster sunburn all over again. But, I hadn’t. The only time I didn’t have the parasol or umbrella was first thing in the morning and from the car into the house, which is mostly tree covered.

This is the part that is all a jumble. There was lots of pain. Crying in the bathroom. Crying in the bedroom. Some of it was the pain. I ended up finally falling asleep with my head packed in ice packs.

So, now, here it is mid-morning. I had to call the museum to let them know I’m not coming. That was after about an hour of my clothes in front of me, trying to decide what to do. I knew health wise I shouldn’t go. But, they are counting on me being there. I Hate feeling like I can’t be counted on.  My stuff is all there. Others are expecting me to be there.

I’m editing this last whiny medical bit down to say I’m going to talk to my doctor this week. I figure those who know, know.

Now that I have let my fingers run on and on and on, thank you for listening.

On the upside, I have a new pinking machine thanks to Janet at the Button Baron.

Published in: on July 19, 2015 at 10:08 am  Comments (8)  

2015 Decorated Millinery Gallery

This slideshow requires JavaScript.

Published in: on July 15, 2015 at 11:10 am  Leave a Comment  

This Summer’s Millinery: With a Feather Plume

I finally made a hat for those that love feather plumes. (currently available on Etsy)IMG_7252 IMG_7261 IMG_7262 IMG_7263 IMG_7268 IMG_7270

Published in: on July 15, 2015 at 10:41 am  Leave a Comment  

Guest Post – A New Hat – A Blank Canvas

I was so excited to see that Darline finished her hat as the original I worked from, I asked her to write about her hat for the blog. She did an amazing job replicating the zig-zag ribbon of the original. Thank you, Darline, for taking the time to share with us.

10999409_10207273037933045_8242832397370676610_n

Anna’s fingers had barely left her keyboard after posting a small straw hat, when I snapped it up.  I had been researching straw hats – how, when and where they would be worn in the early 1860s – and now I owned a lovely little replica.

*

*

IMG_6522When it arrived and I was happily trying it on, I thought of the original hat with the brown ribbon in a zig-zag pattern as a strong contender for the inspiration for finishing this hat.  Then, I set it aside and looked at even more images.  In the end, the zig-zag pattern spoke to me: make me.  What I love about it is the simplicity of the design – yet it isn’t just about slapping ribbon on a brim, it has a definite scale to it.  I also liked that, while it stands alone, it could support further embellishment to change the look.

11403435_10207275409512333_3161409465518962941_nI had a “further embellishment” in my sewing room, just waiting for a home.  In the marketplace at the 2015 Civilian Symposium in March, I purchased a bunch of creamy yellow flowers with fabric “stems,” tied with a pale green velvet ribbon.  Holding the bunch at the back of the hat, I decided this would be my first “further embellishment.”

The ribbon on the original hat is taffeta, but I chose to use some lovely double faced silk ribbon from my stash (purchased because I loved the color, also waiting for a home in my 1860s wardrobe).  I began by enlarging and printing the image of the original hat to guide my work.  Observing the symmetry of the zig-zag design, I loosely pinned the ribbon to my hat (pinning on the edge of the ribbon straight down through the hat).  Satisfied that I had the layout correct, I started by securing the front “V” then worked my way down each side, careful to follow the ridges of the straw at the top and bottom of the folds to make the design even.  It was “fiddly” work, hiding the stitches.  I brought the thread up and hid it under the ribbon to the next place it was to be secured.

11742844_10207275407992295_8077854782703727550_nBefore trimming the ribbon ends at the back, I thought about how I would stop it from fraying.  Somewhere, I had seen a treatment on an original piece, where the ribbon end was turned back to a point, and held with a simple embroidery stitch.  I decided to use this technique on my ribbon.  I brought the edge of the ribbon to a point right sides together and stitched, then carefully turned it right side out and pressed it flat, making a nice little point.  I used sewing thread to make five little petal stitches, securing the end of the ribbon.  What I like about it is, it provides a little bit of weight to the end of the ribbon and finishes it unobtrusively.

Anna gave me some guidance on the placement of the ribbons that would tie under my hair.  Done!  I tried it on and loved it.  Now for the further embellishment!

After trying various ribbon loops and placement options, I settled on a plan.  I just wasn’t sure about the stems hanging down.  I like how amazingly real they look and also liked them as a design element.  But I needed some input – lose them, trim them???  So I decided to add the flowers and ribbon, and then post it on a couple of Facebook groups and see what others thought.  The amazing folks on the Civilian Civil War Closet didn’t let me down, and I soon had plenty of guidance!  When Anna chimed in, encouraging me to try trimming the stems, I did so.  As soon as I trimmed the first stem, I could see that was the answer.  I took about three inches off and trimmed them on an angle, since that is how I would cut real flowers.  The scale seemed right, and I’m very happy with my new hat!

Published in: on July 14, 2015 at 11:06 am  Leave a Comment  

This Summer’s Millinery: A Leafy 1880s

I got to play with a mix of whimsy and nature for this hat. When I saw an original 1880s bonnet decorated with leaves, I knew I had to do this hat with leaves. Let me tell you – So Much Fun!

The edge of the brim is bound with a silk/rayon velvet, oh-so-soft velvet. The same borders the base of the crown setting off the angle of the brim. Down the back falls a deep blue double face Hymen Hendler ribbon.

IMG_7054 IMG_7058 IMG_7060 IMG_7065

Published in: on July 13, 2015 at 9:45 am  Comments (1)  

This Summer’s Millinery: Shades of Blue

I found it a little funny that when it finally got truly hot here and my head was screaming at me for it, that I was working on a bonnet whose trims reminded me of blue ice. I don’t know if anyone else sees the icy in the shades of blue or not.

The bonnet has a ribbon with satin, moire and grosgrain weaves – A nice find of the client. It made for a very, very cool bavolet with the diagonal stripes. It was so very full of body, I was tempted not to line it. But, couldn’t let myself do that. Take a look at those awesome deep blue velvet flowers. These are really stunning in person. I love the wild roses.

IMG_7020 IMG_7028 IMG_7029 IMG_7036 IMG_7042

Published in: on July 11, 2015 at 11:26 pm  Comments (2)  

Perfectly Pink Straw Hat with Calla Lilies

IMG_7182
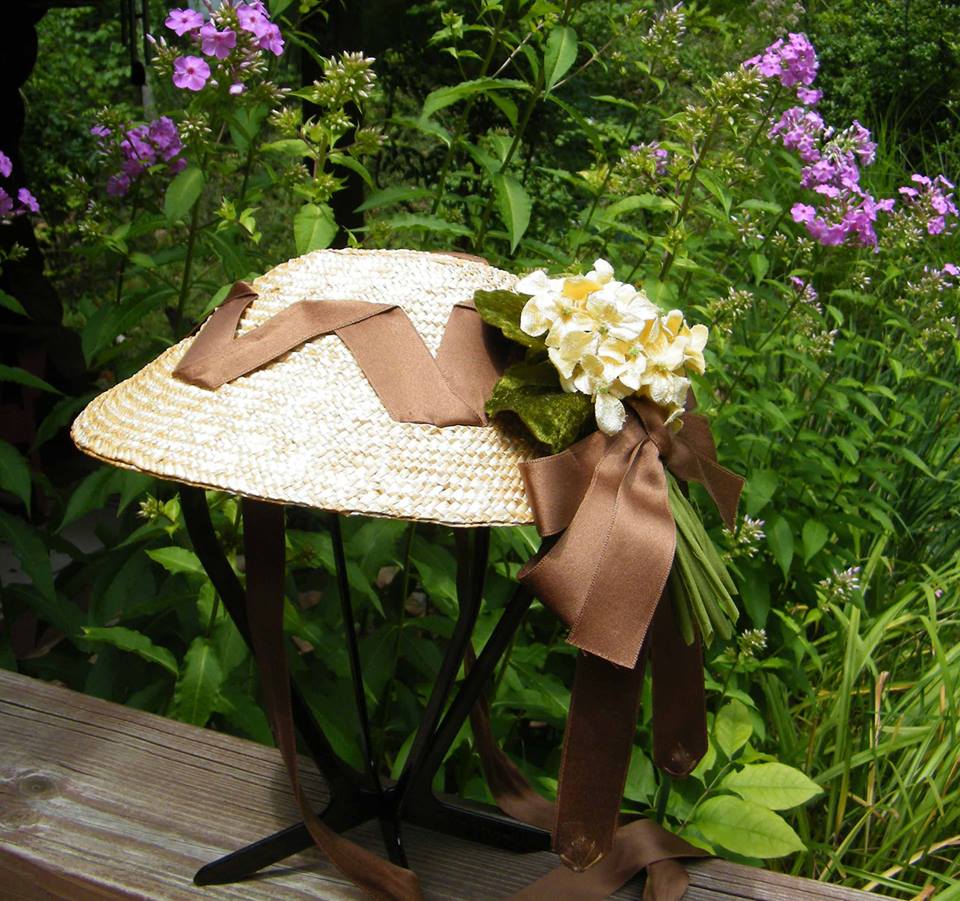
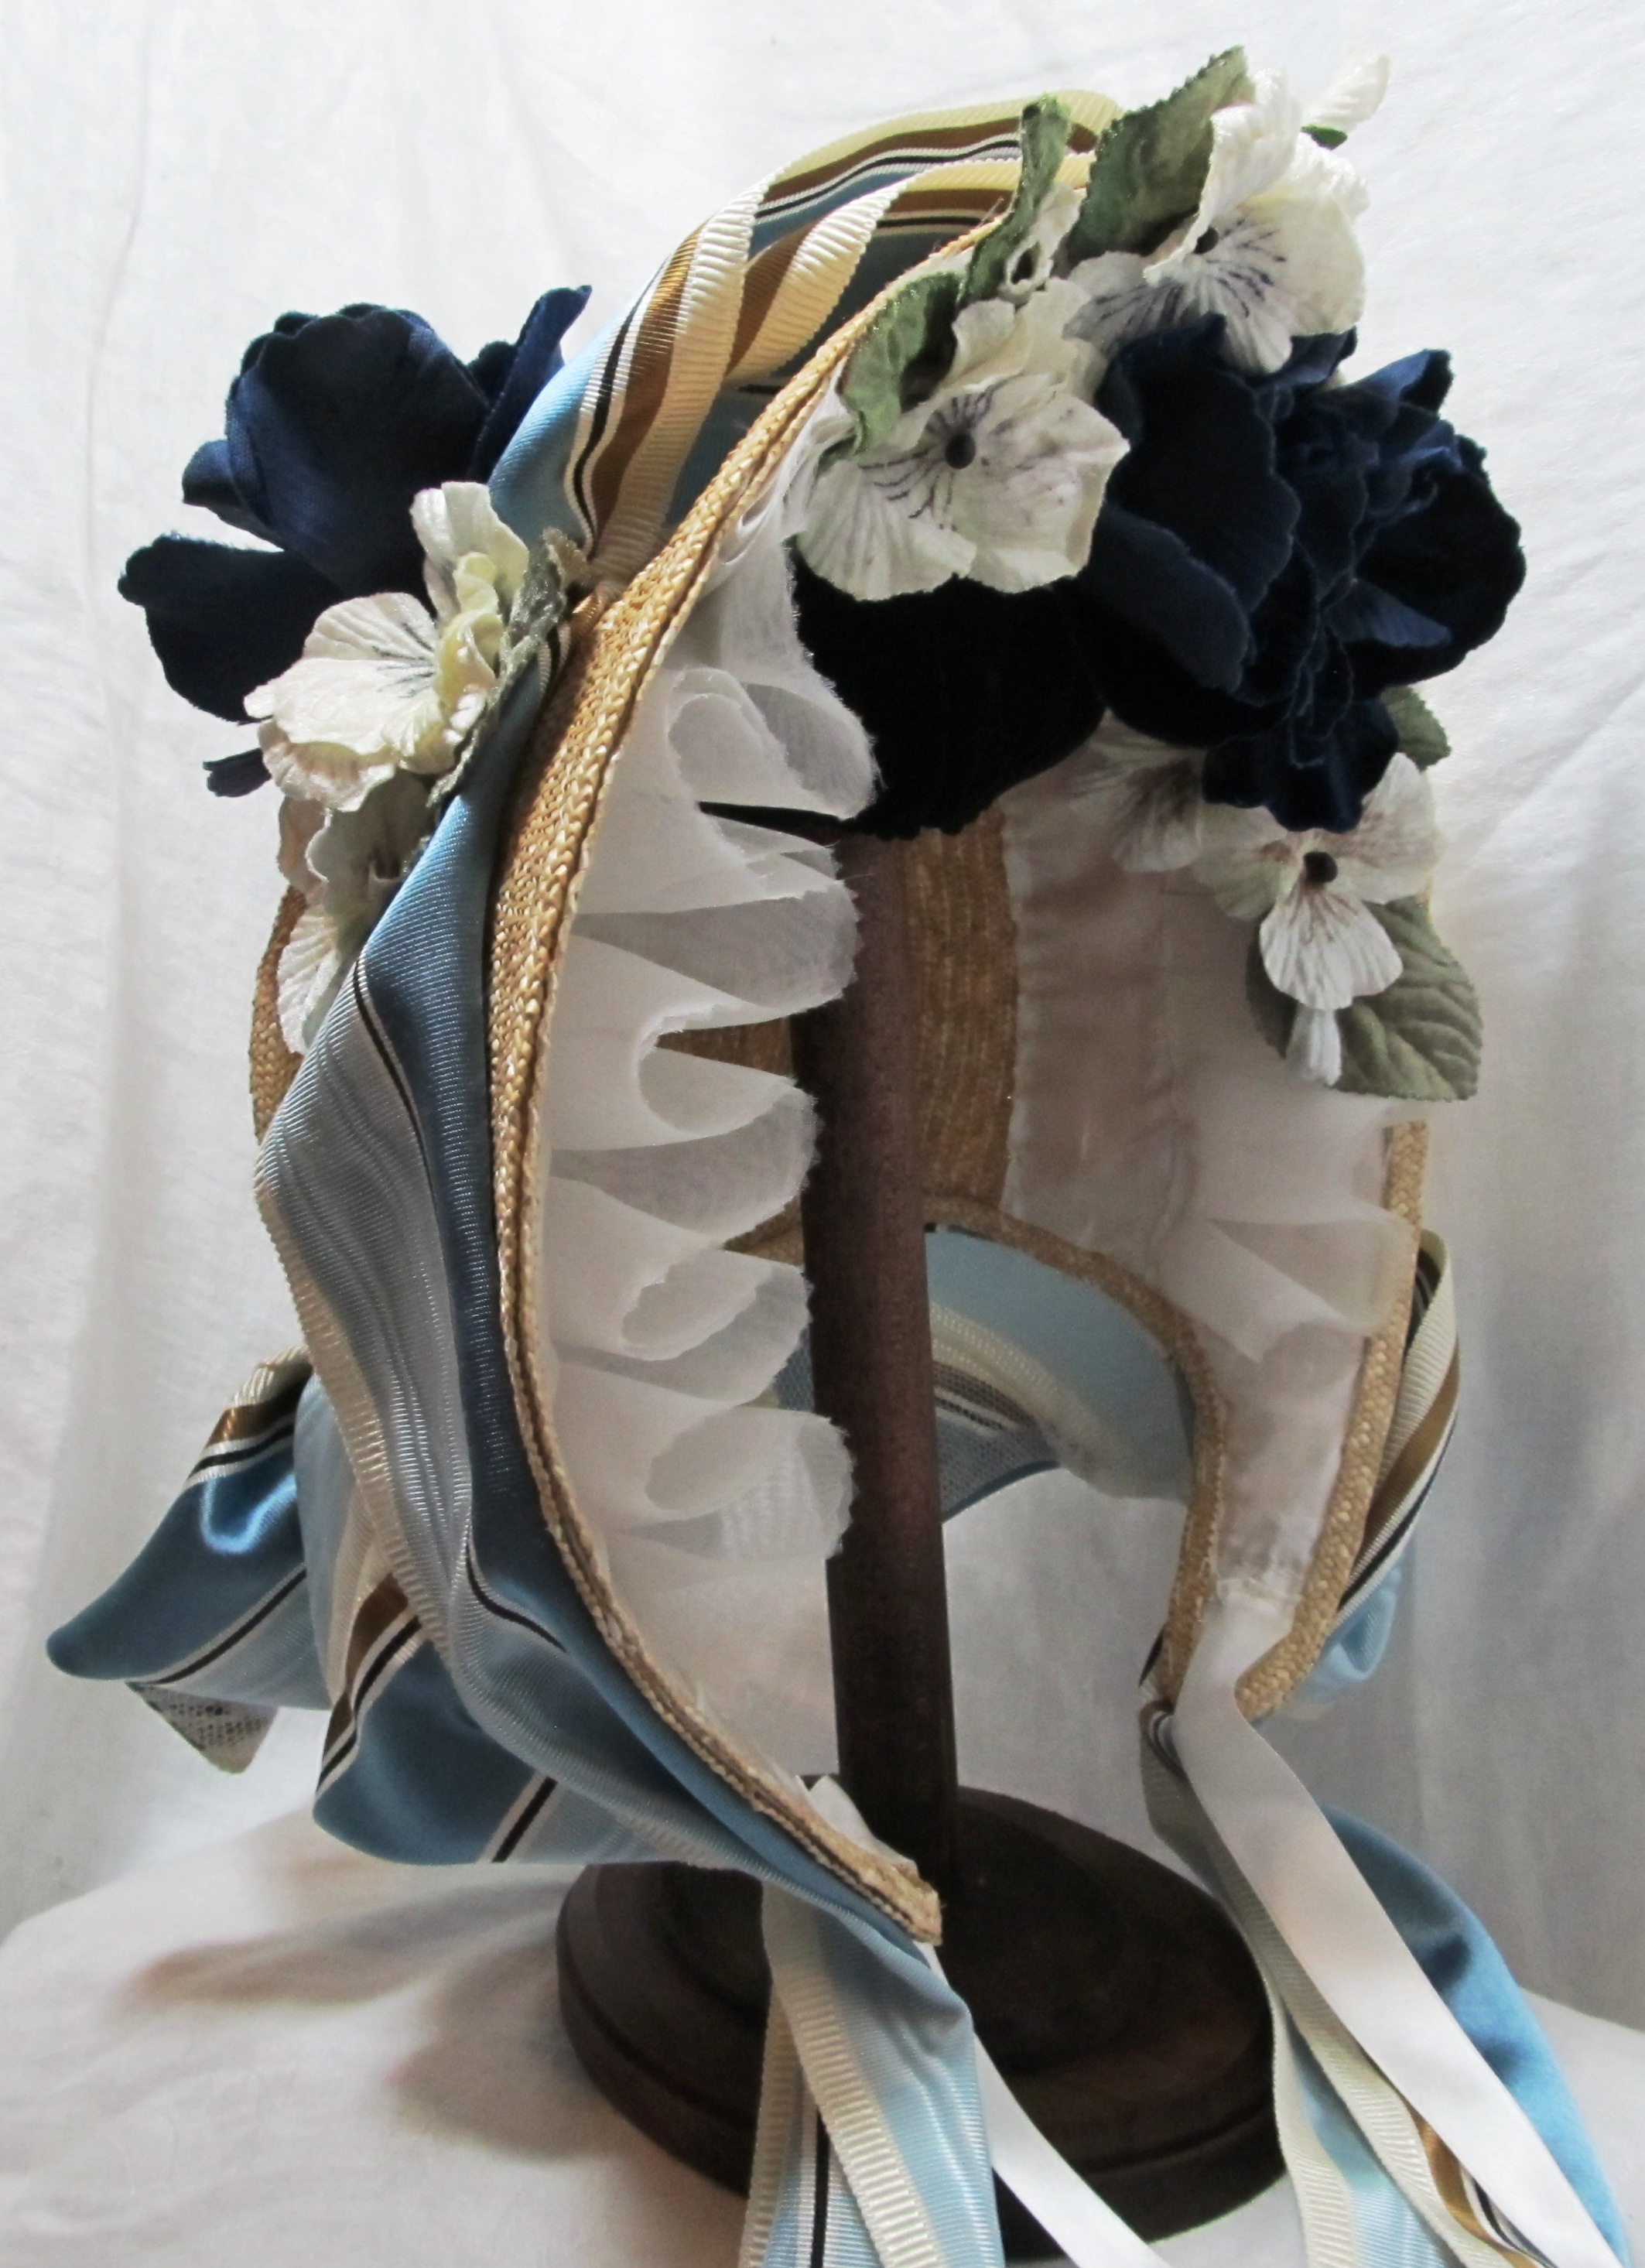
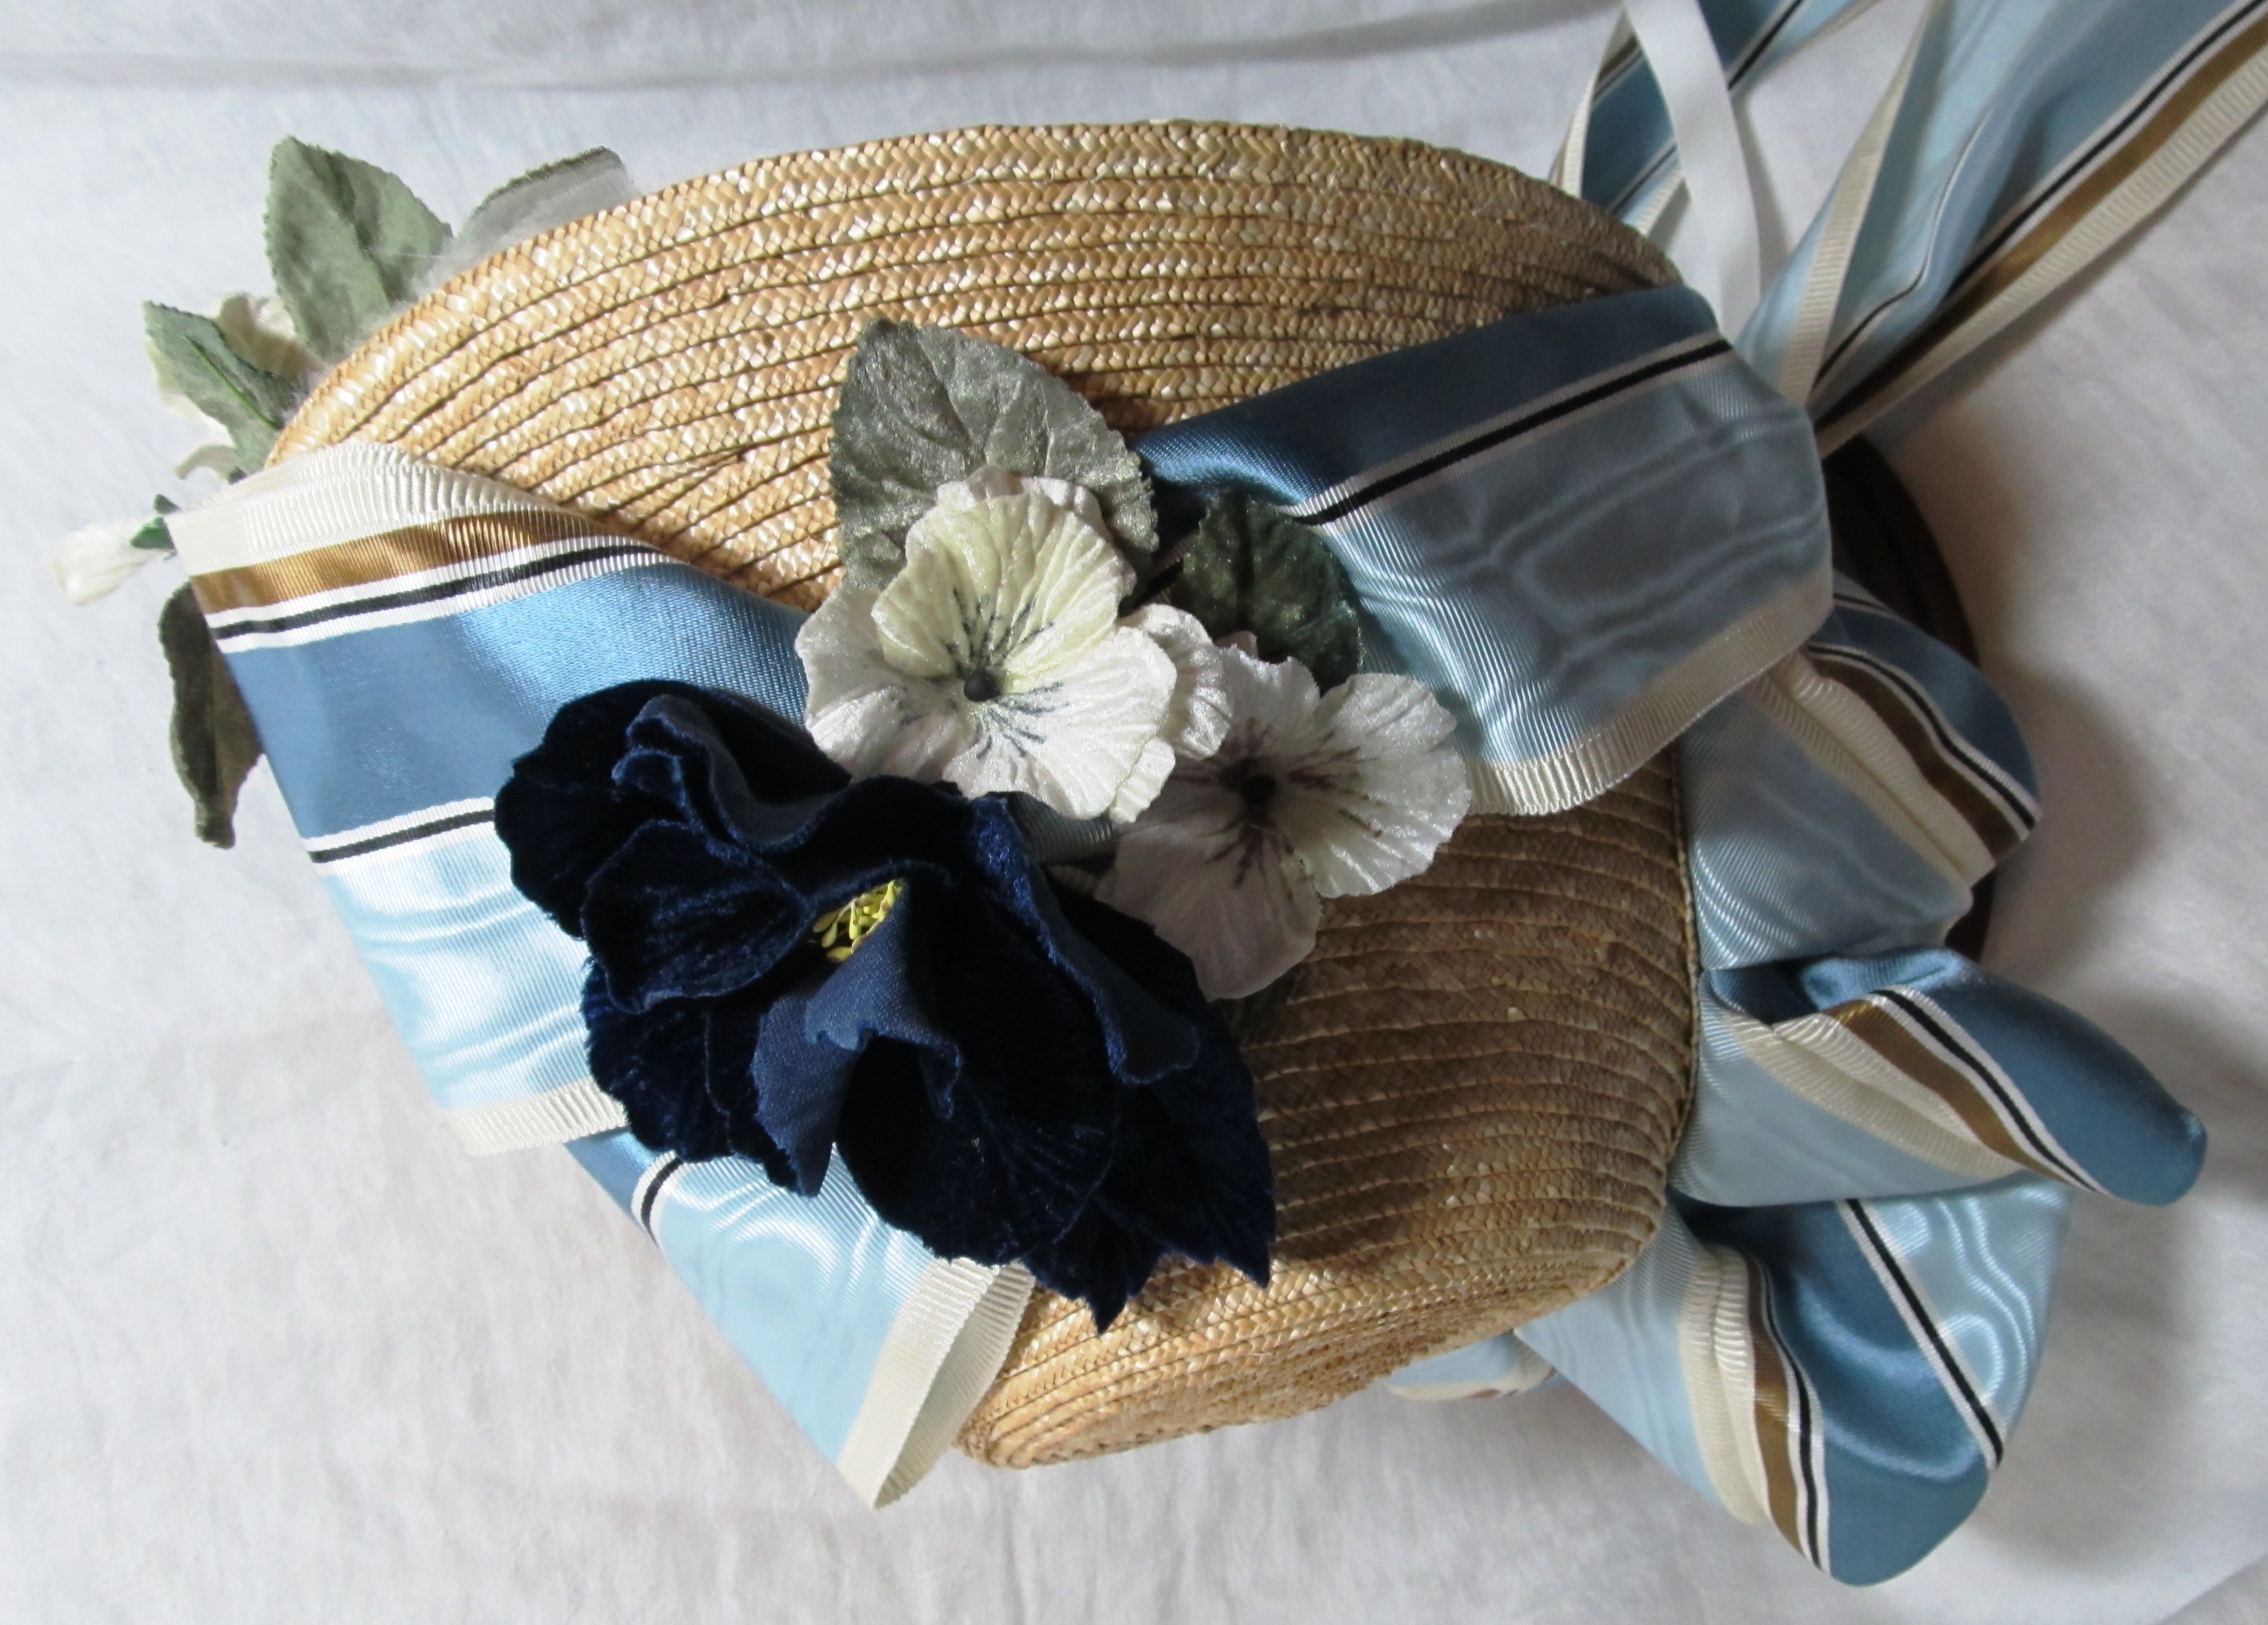
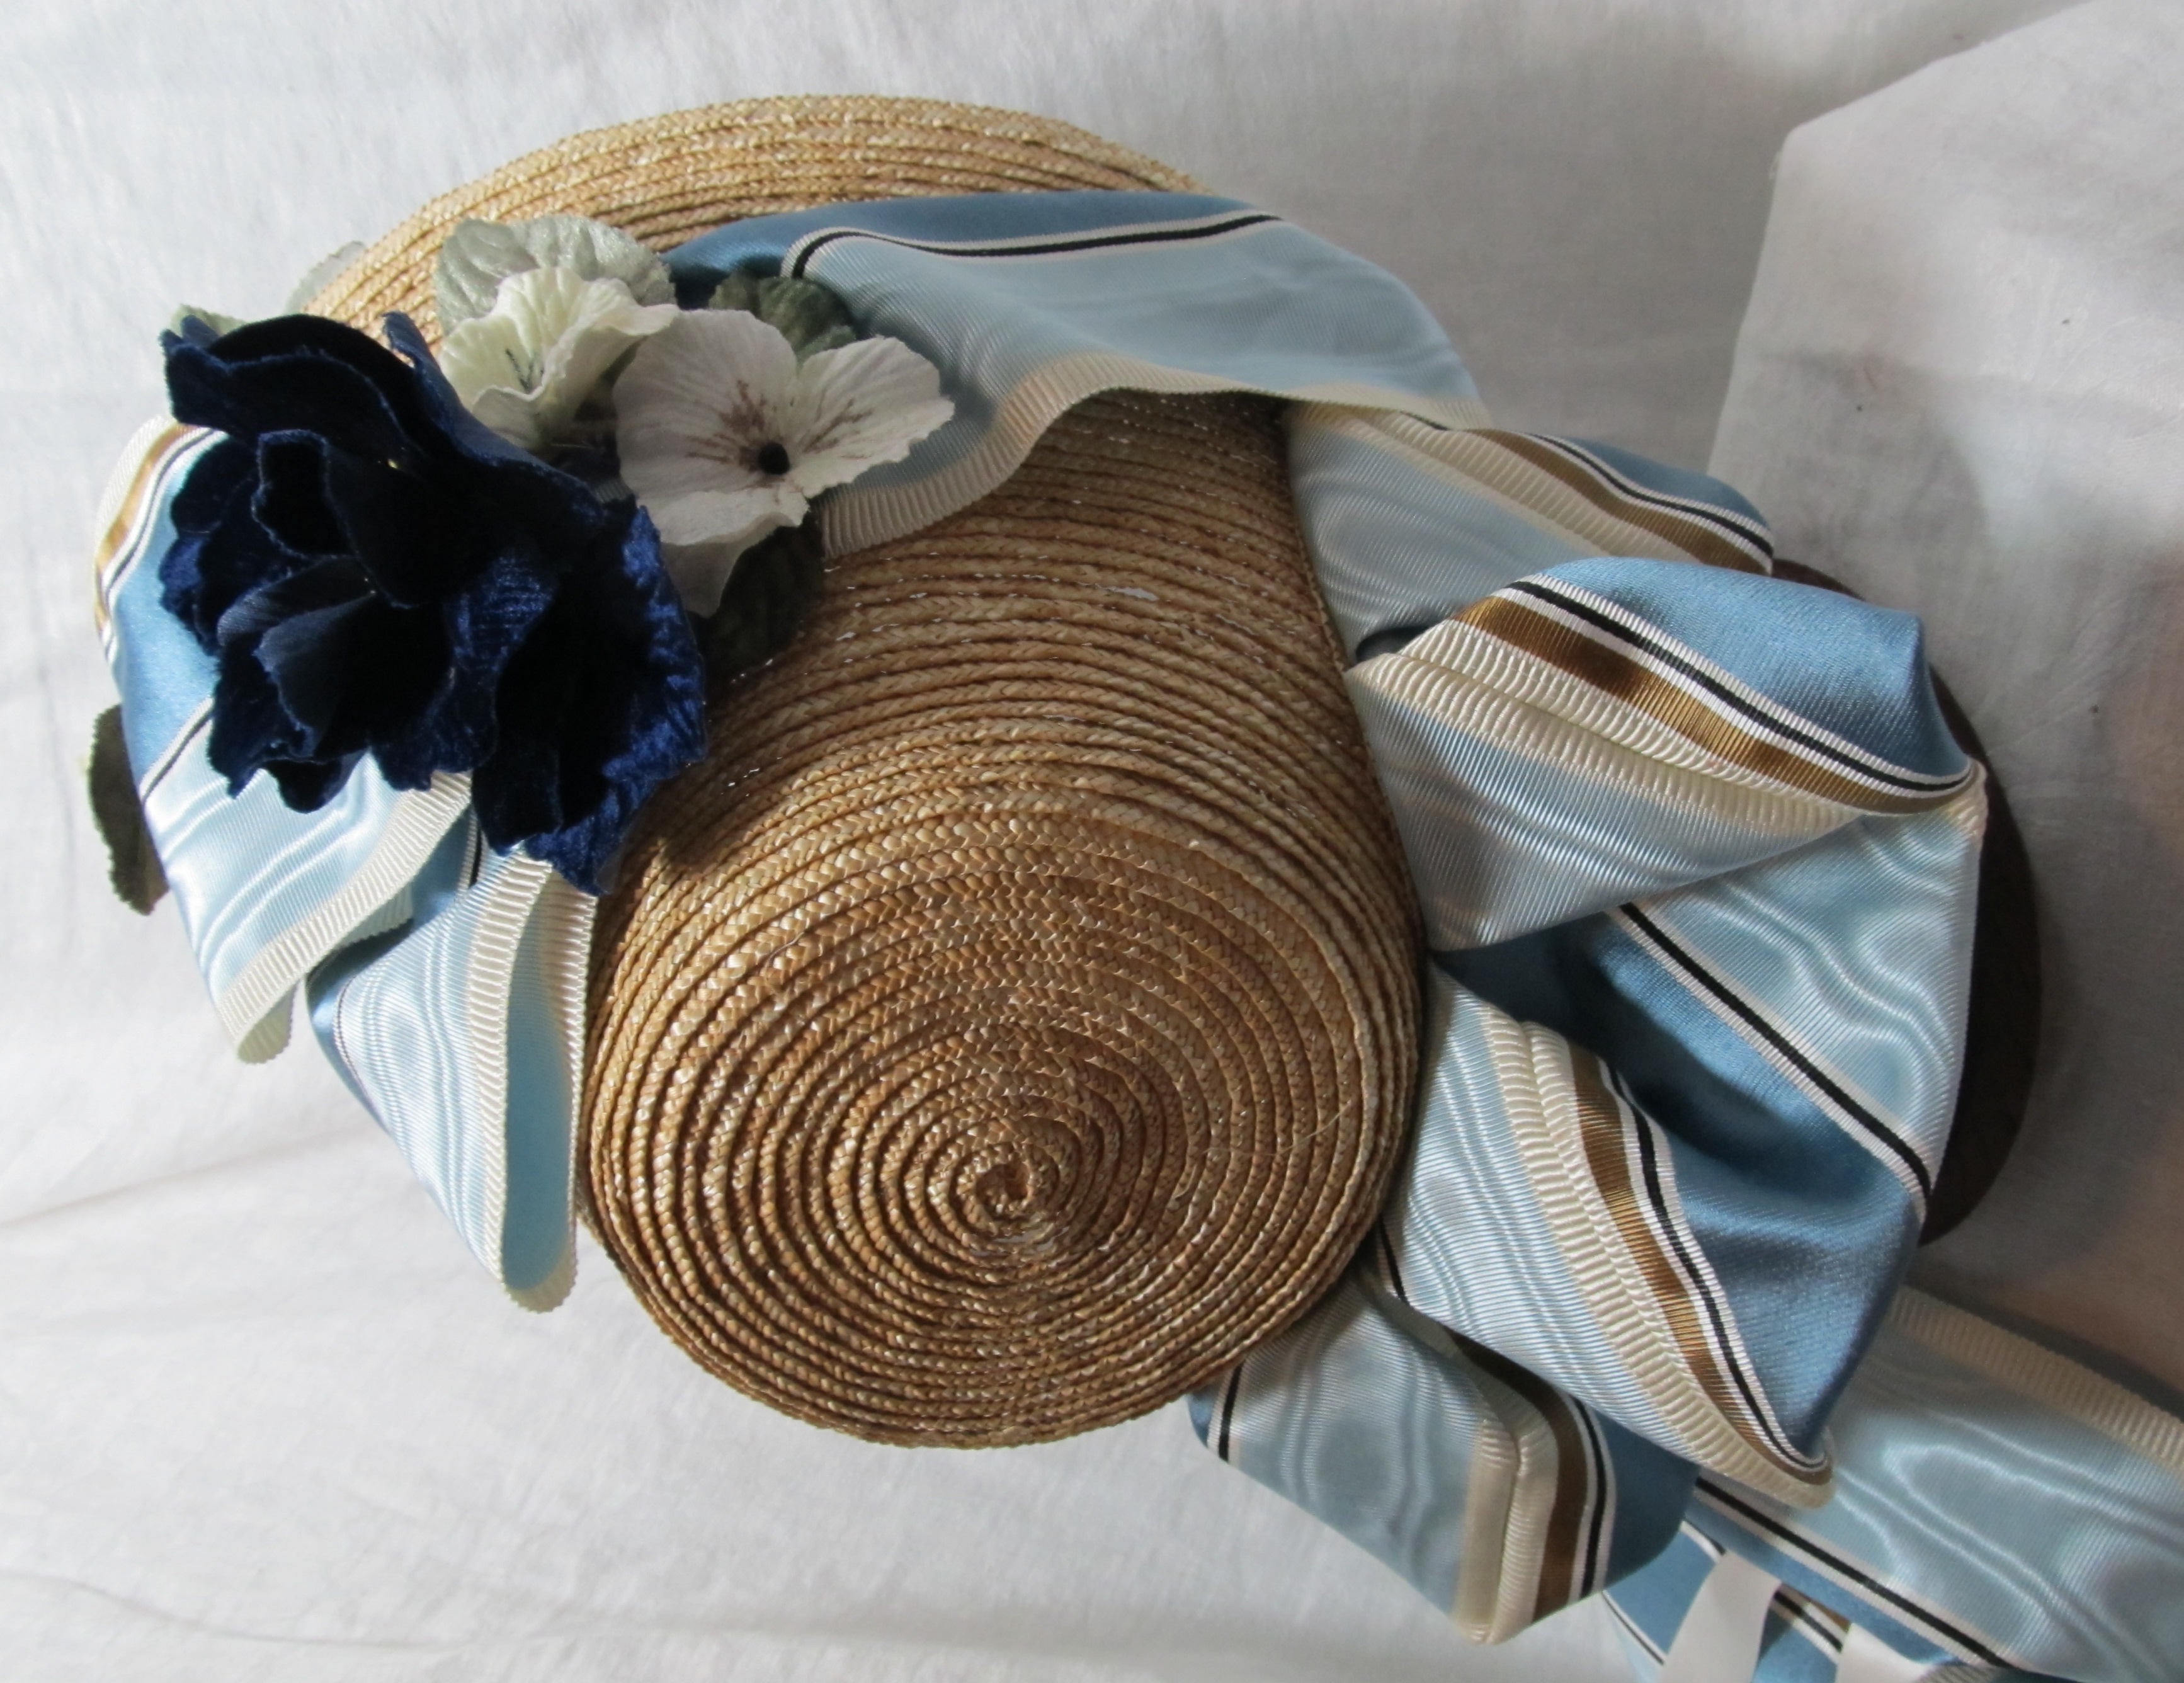
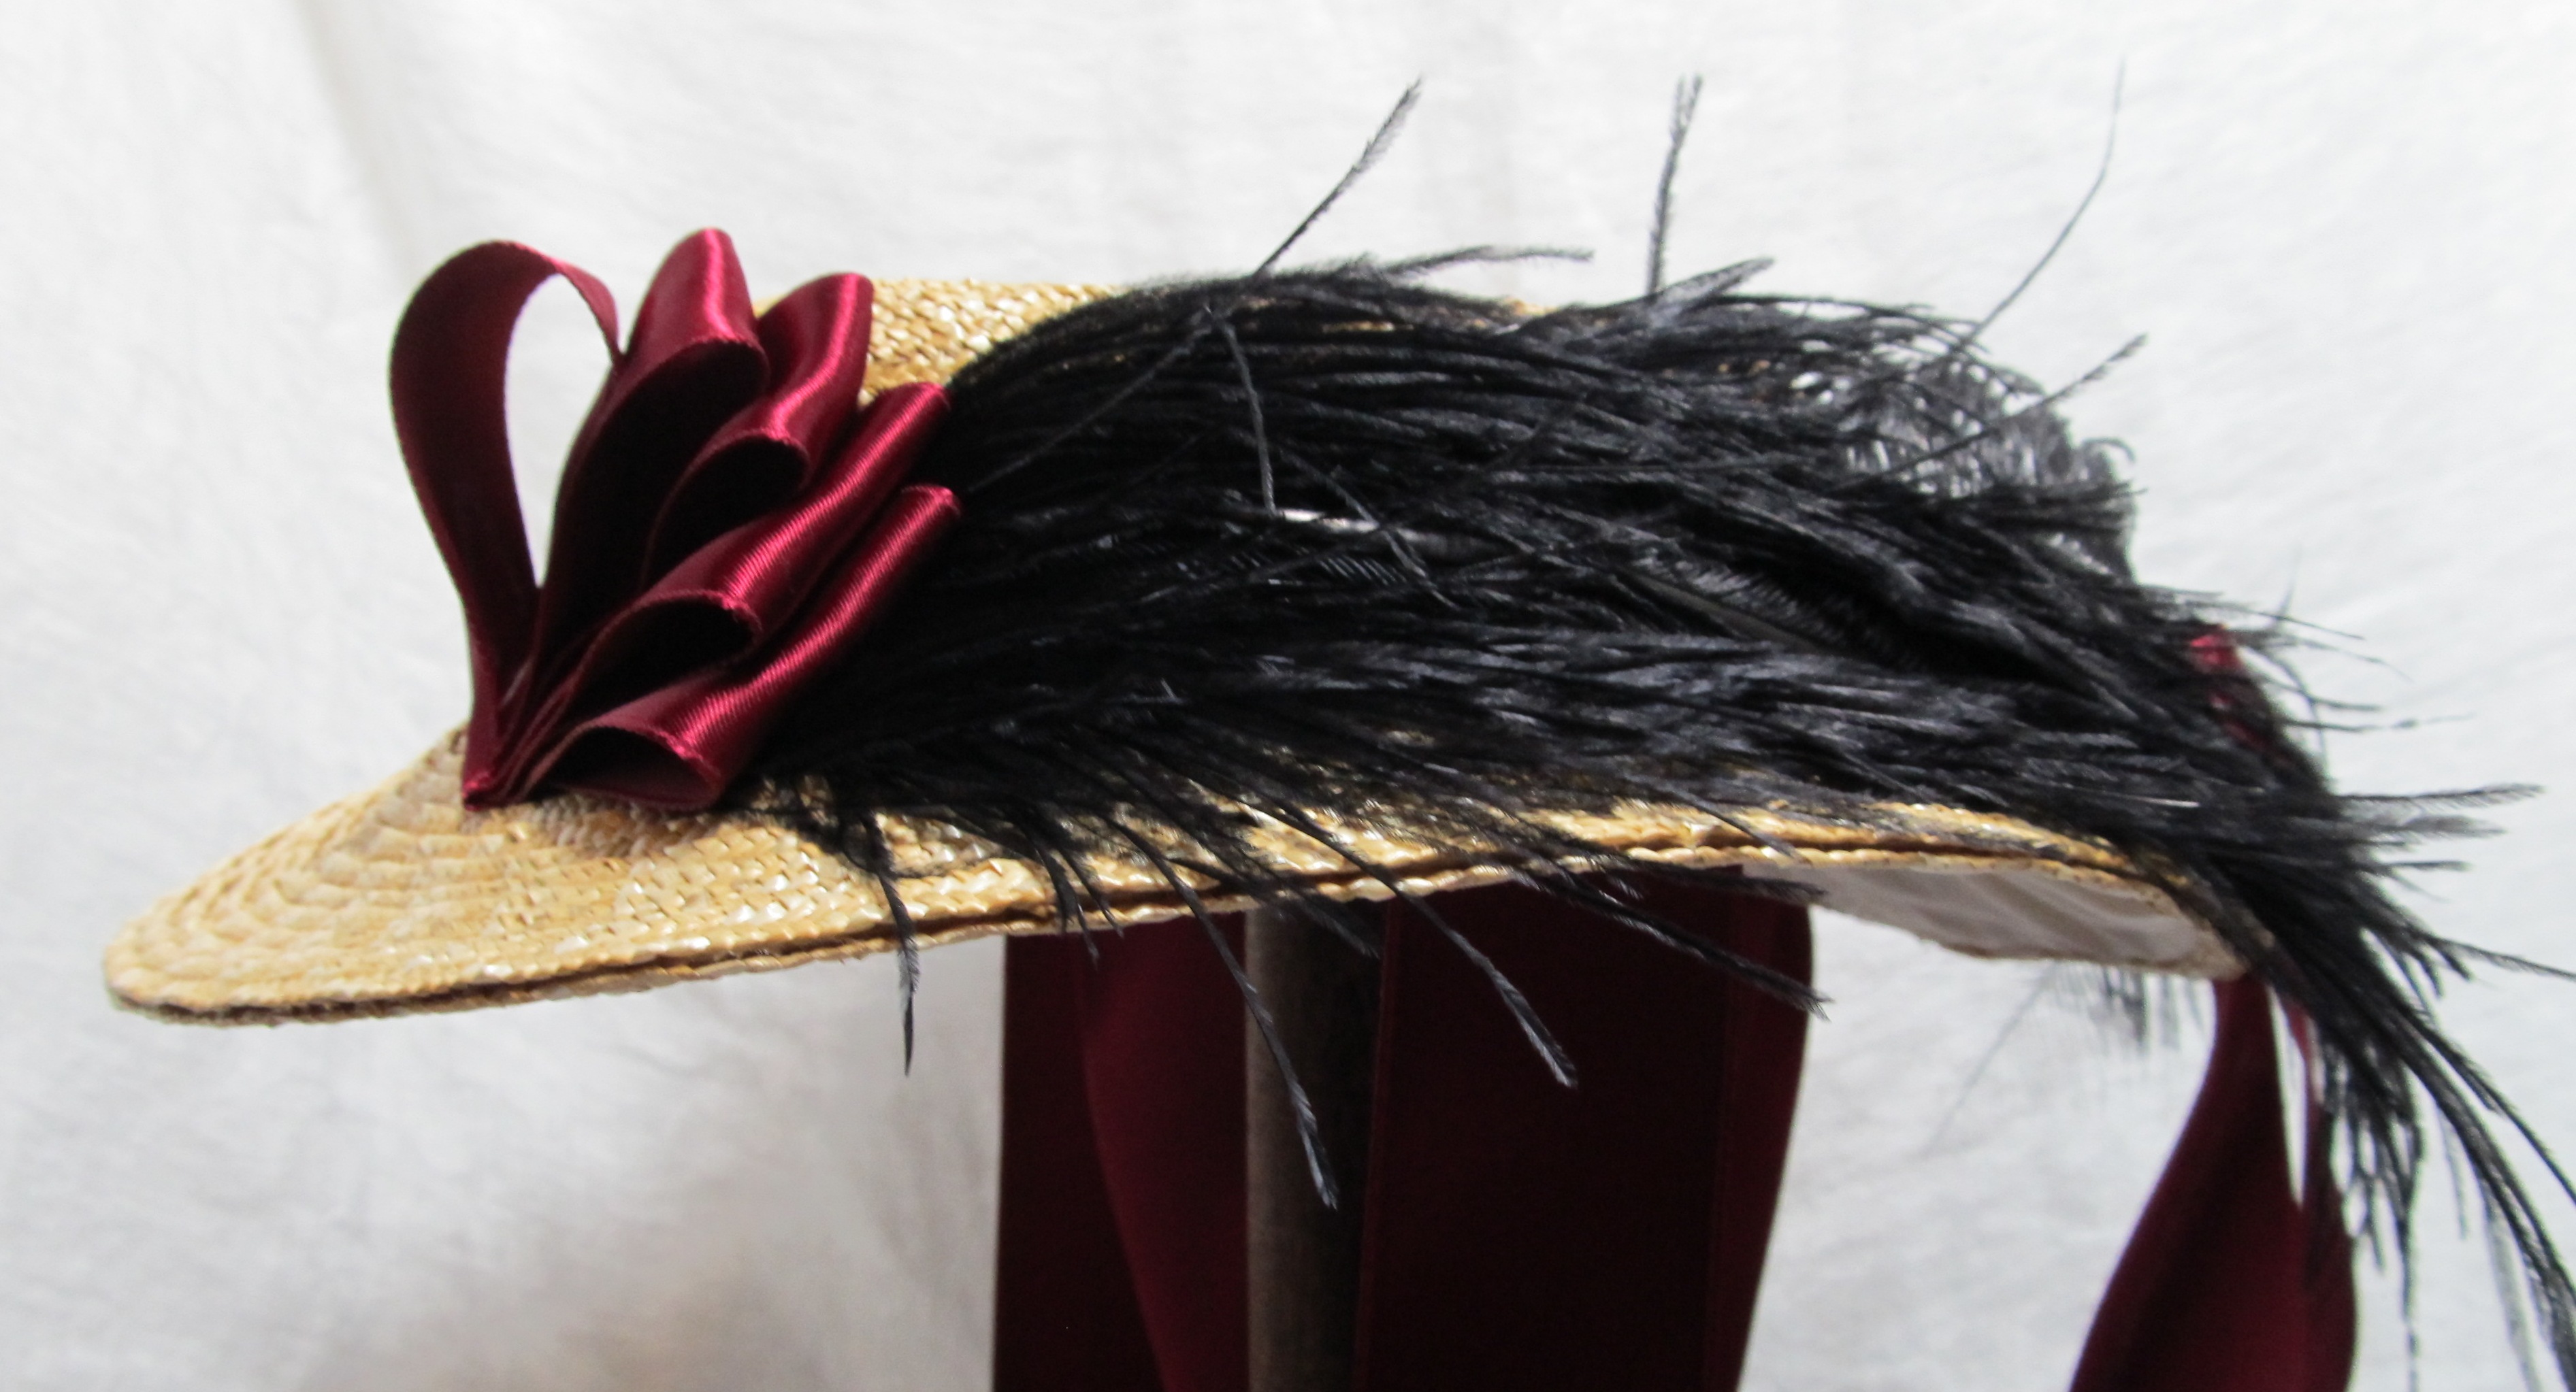
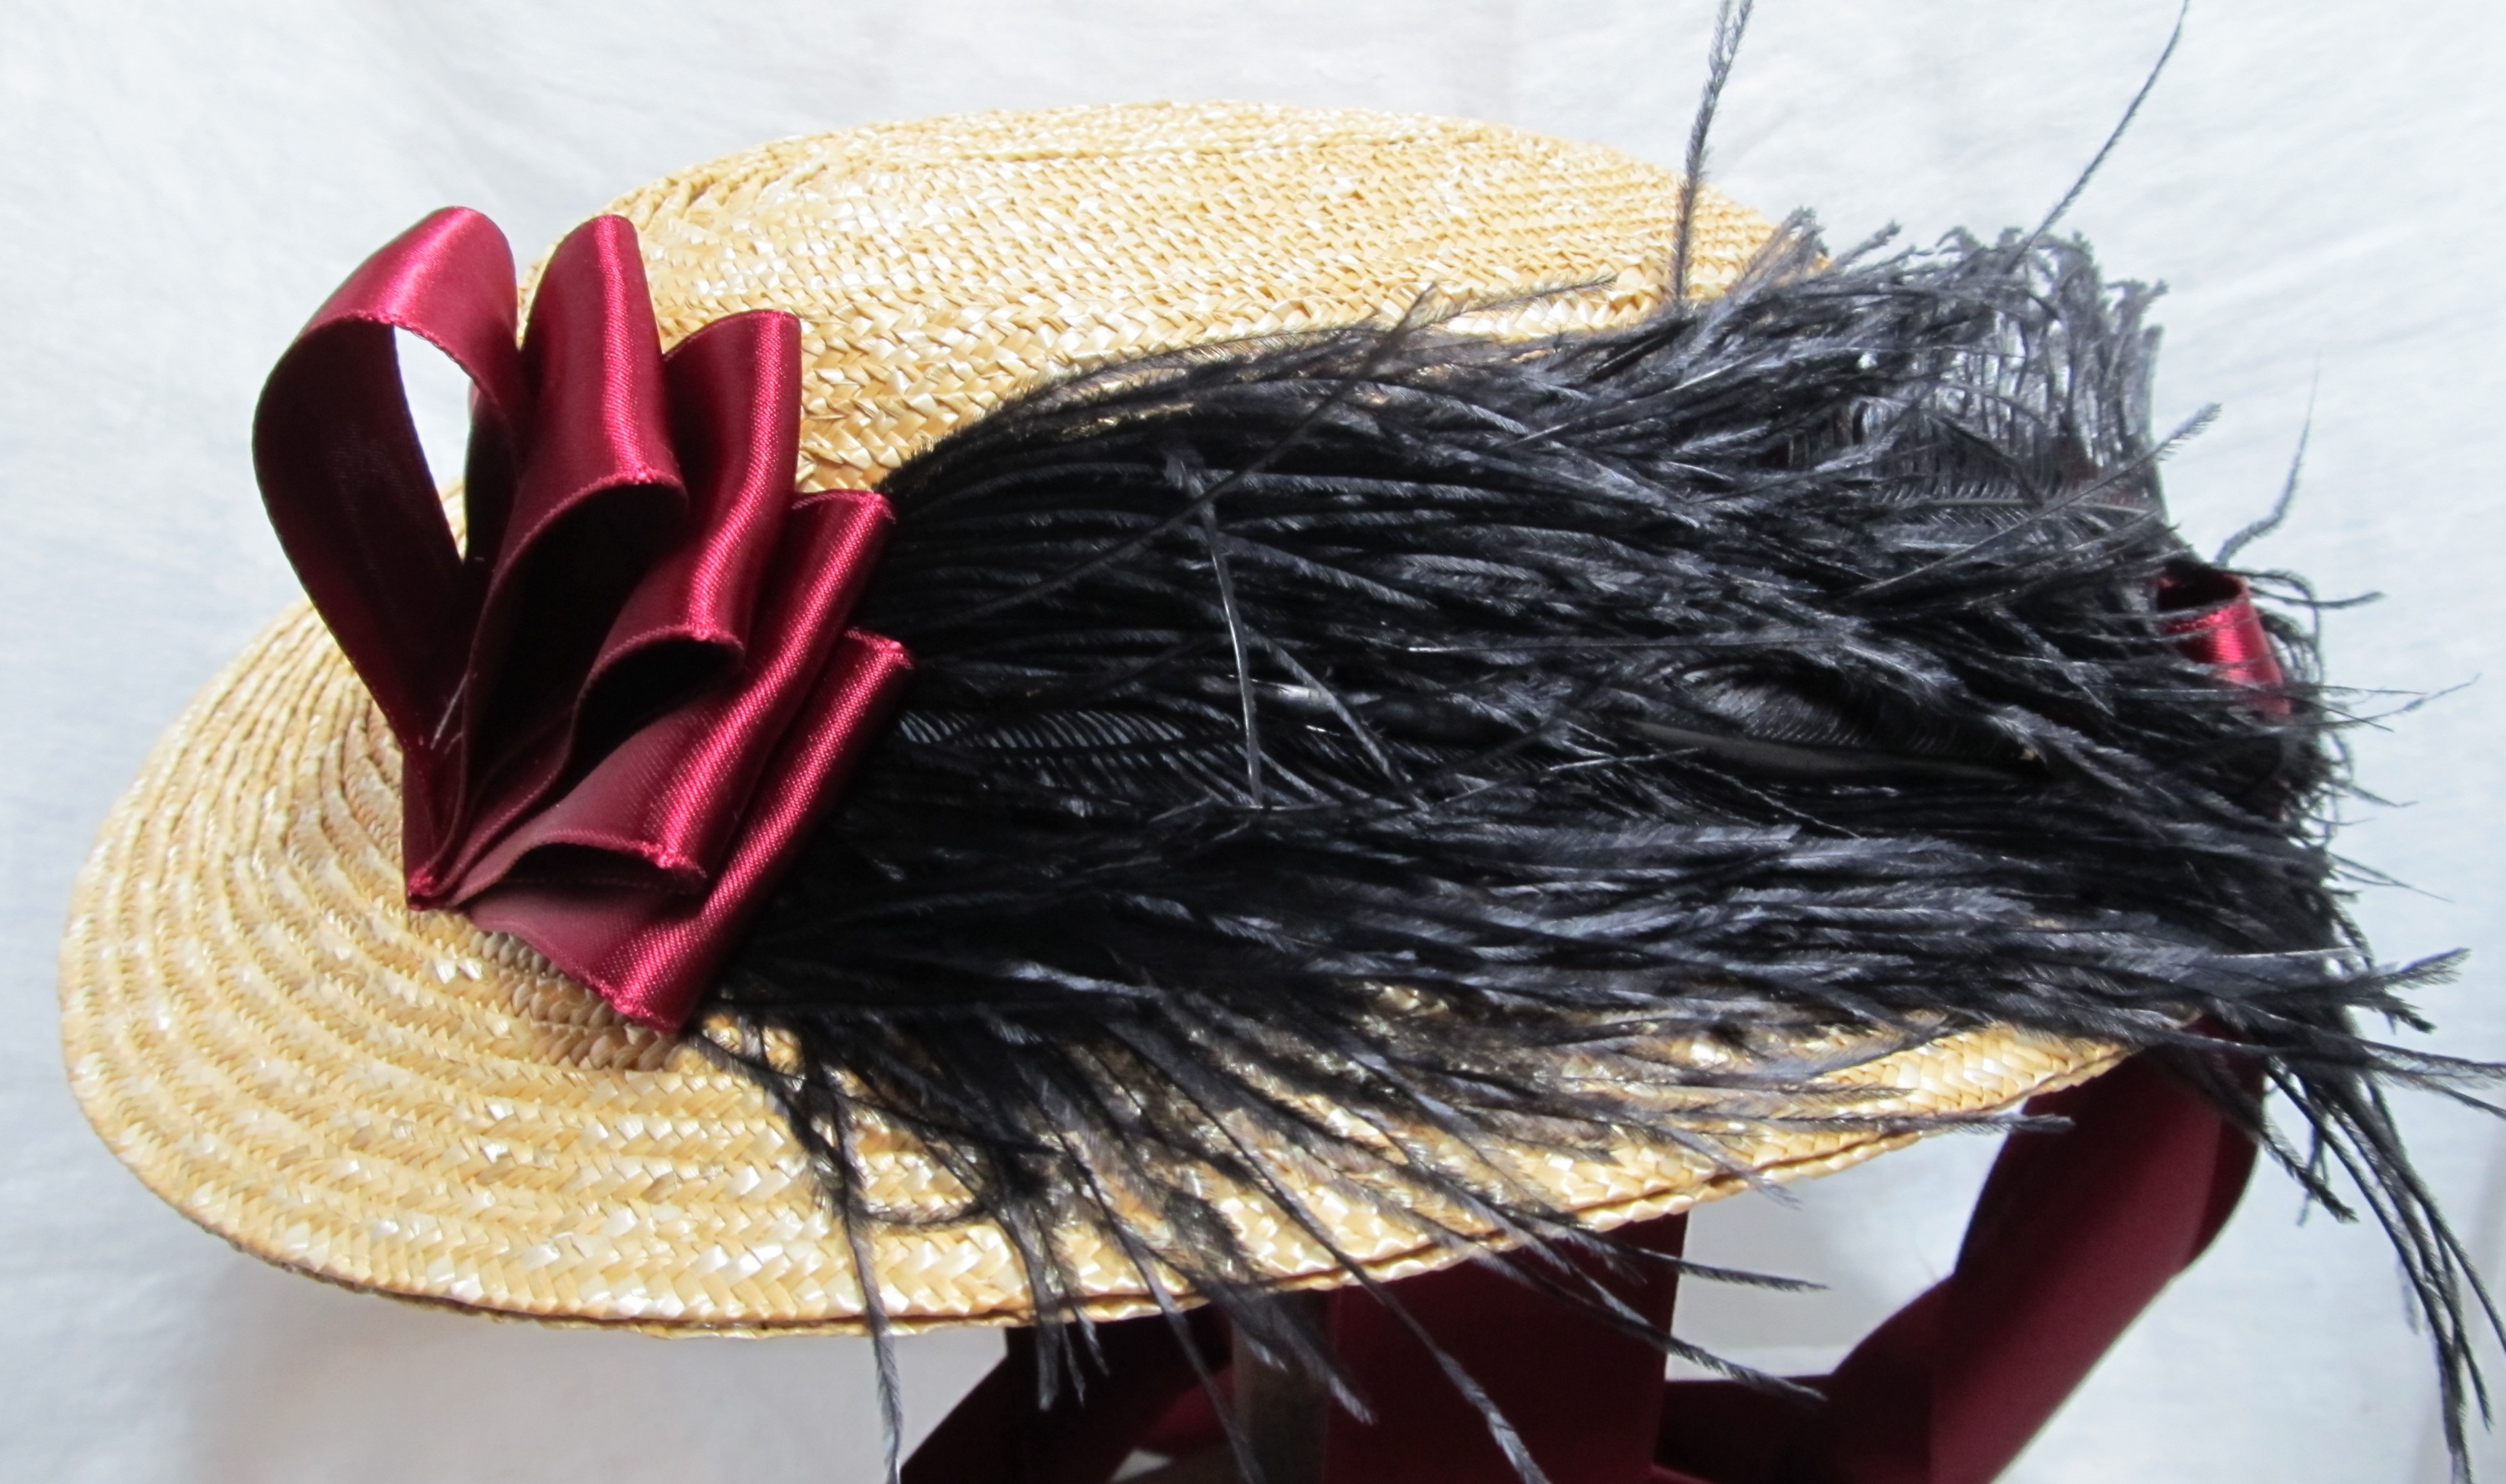
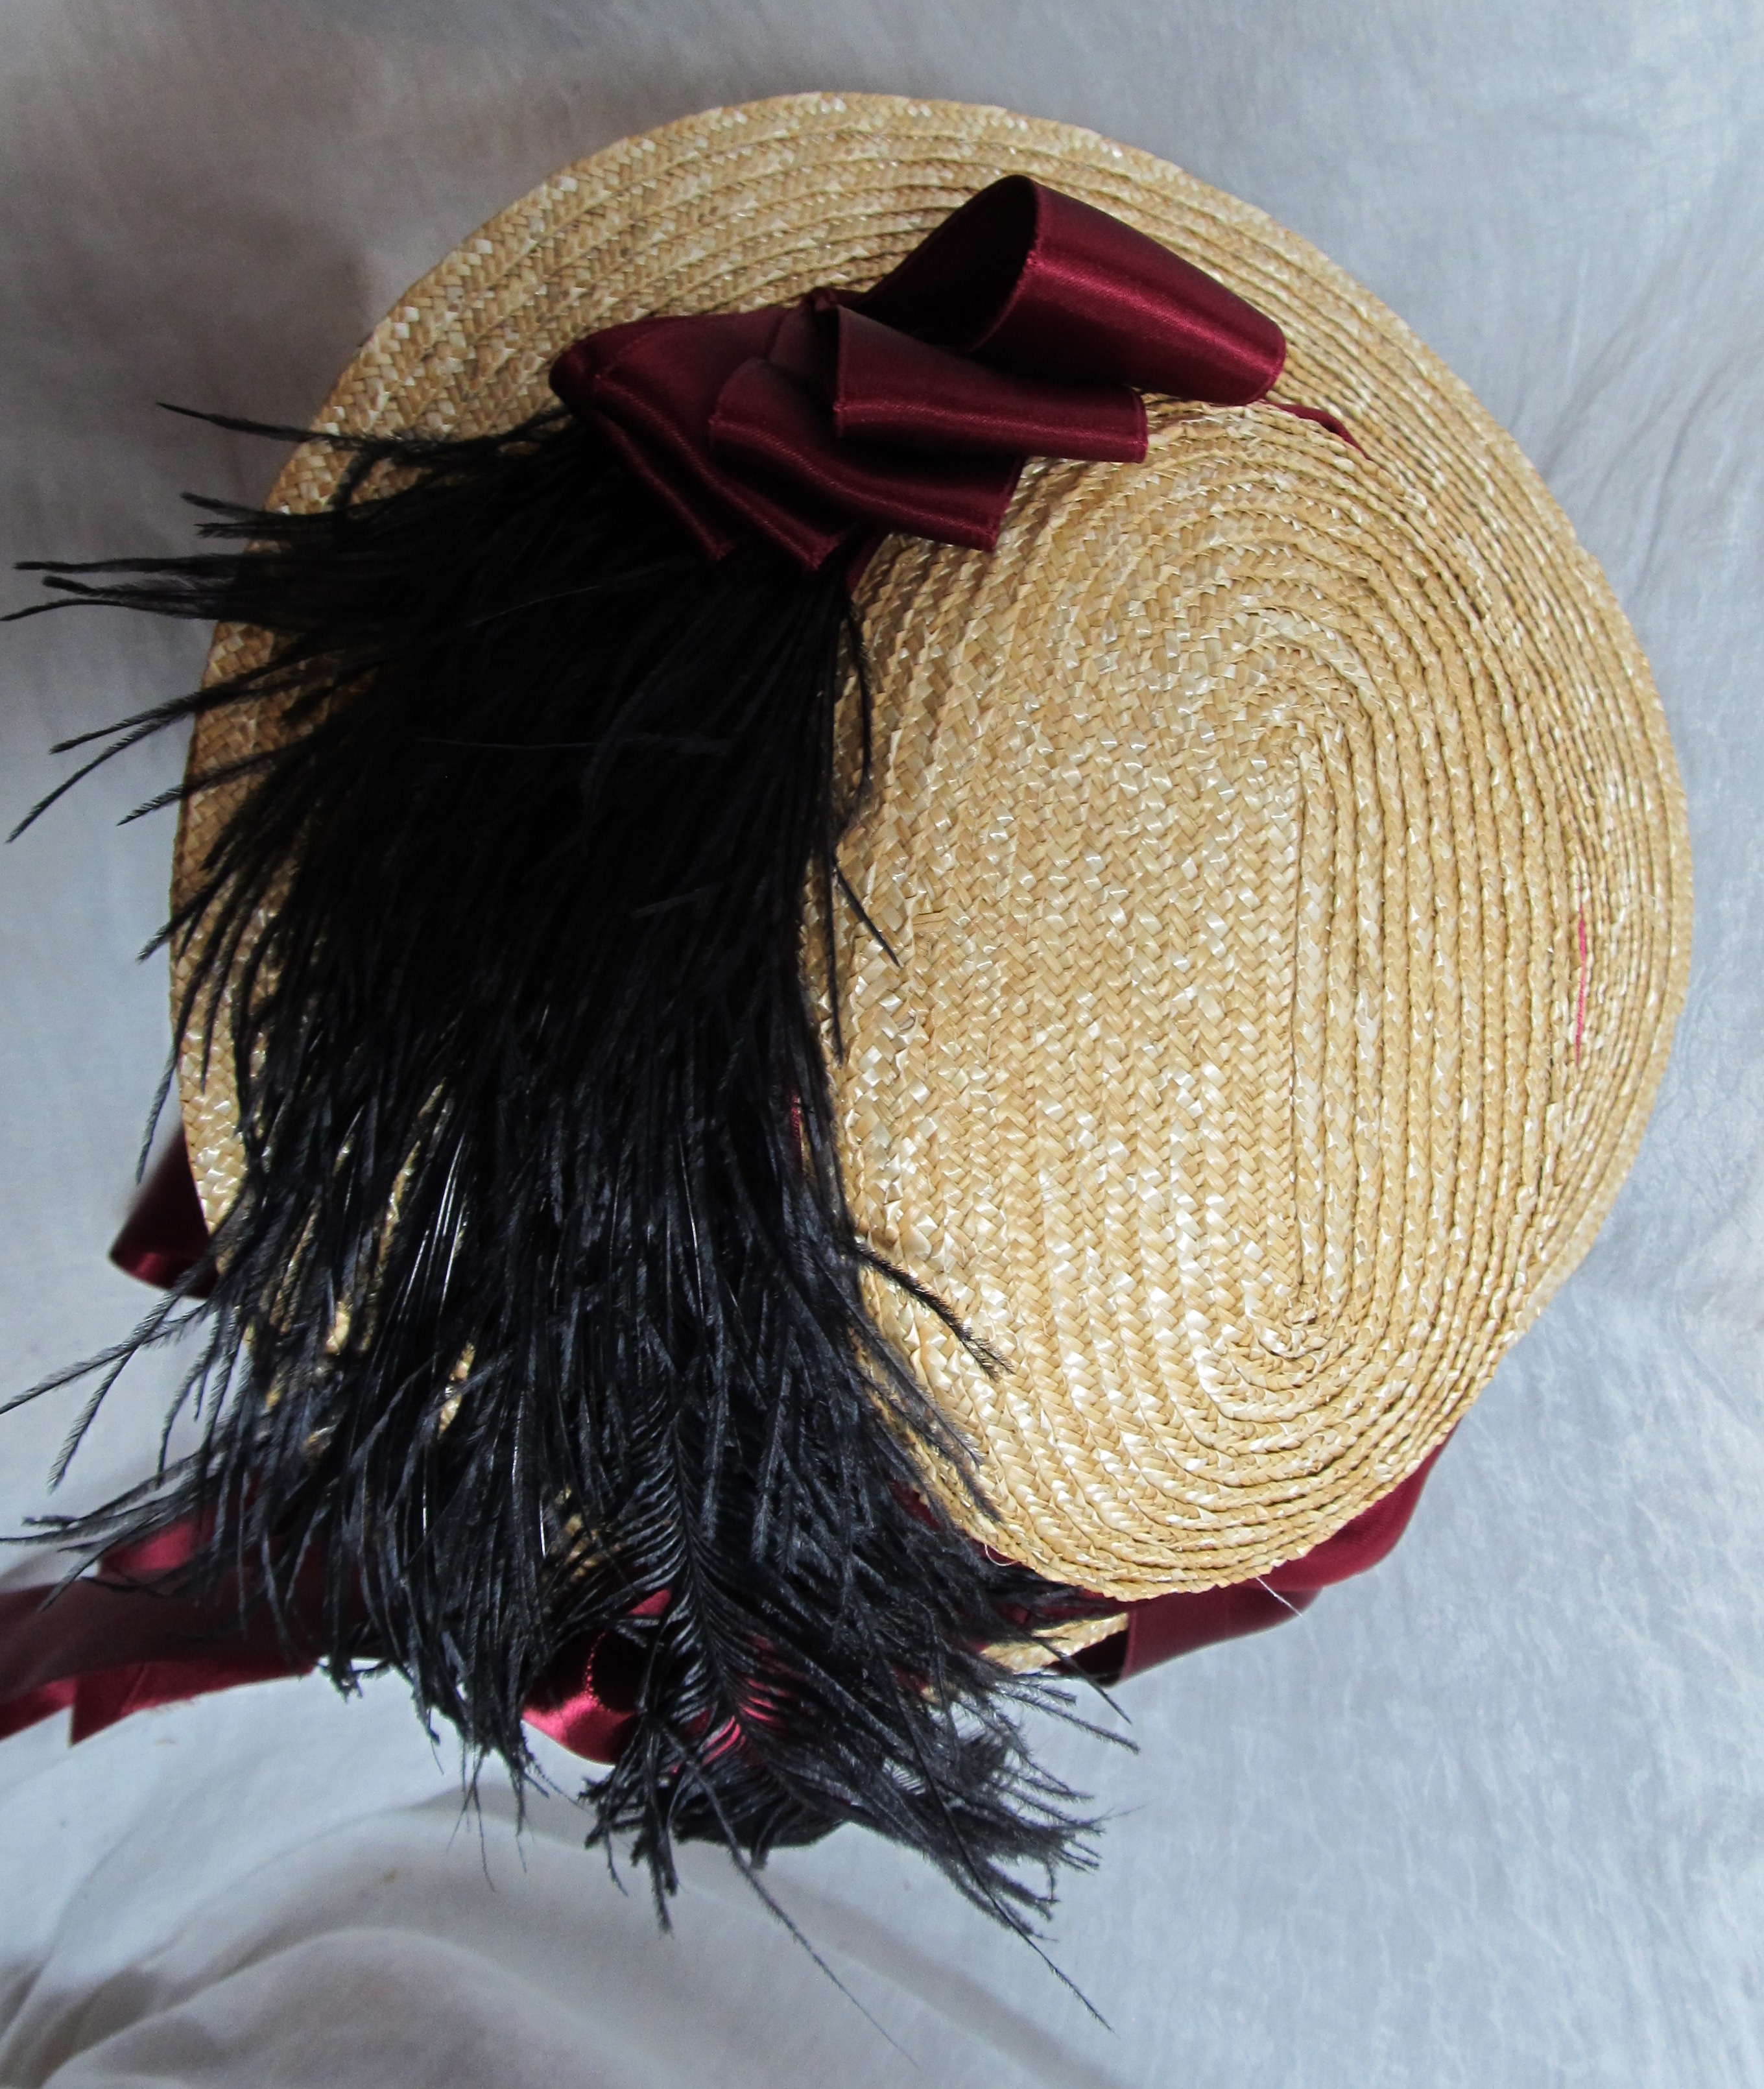
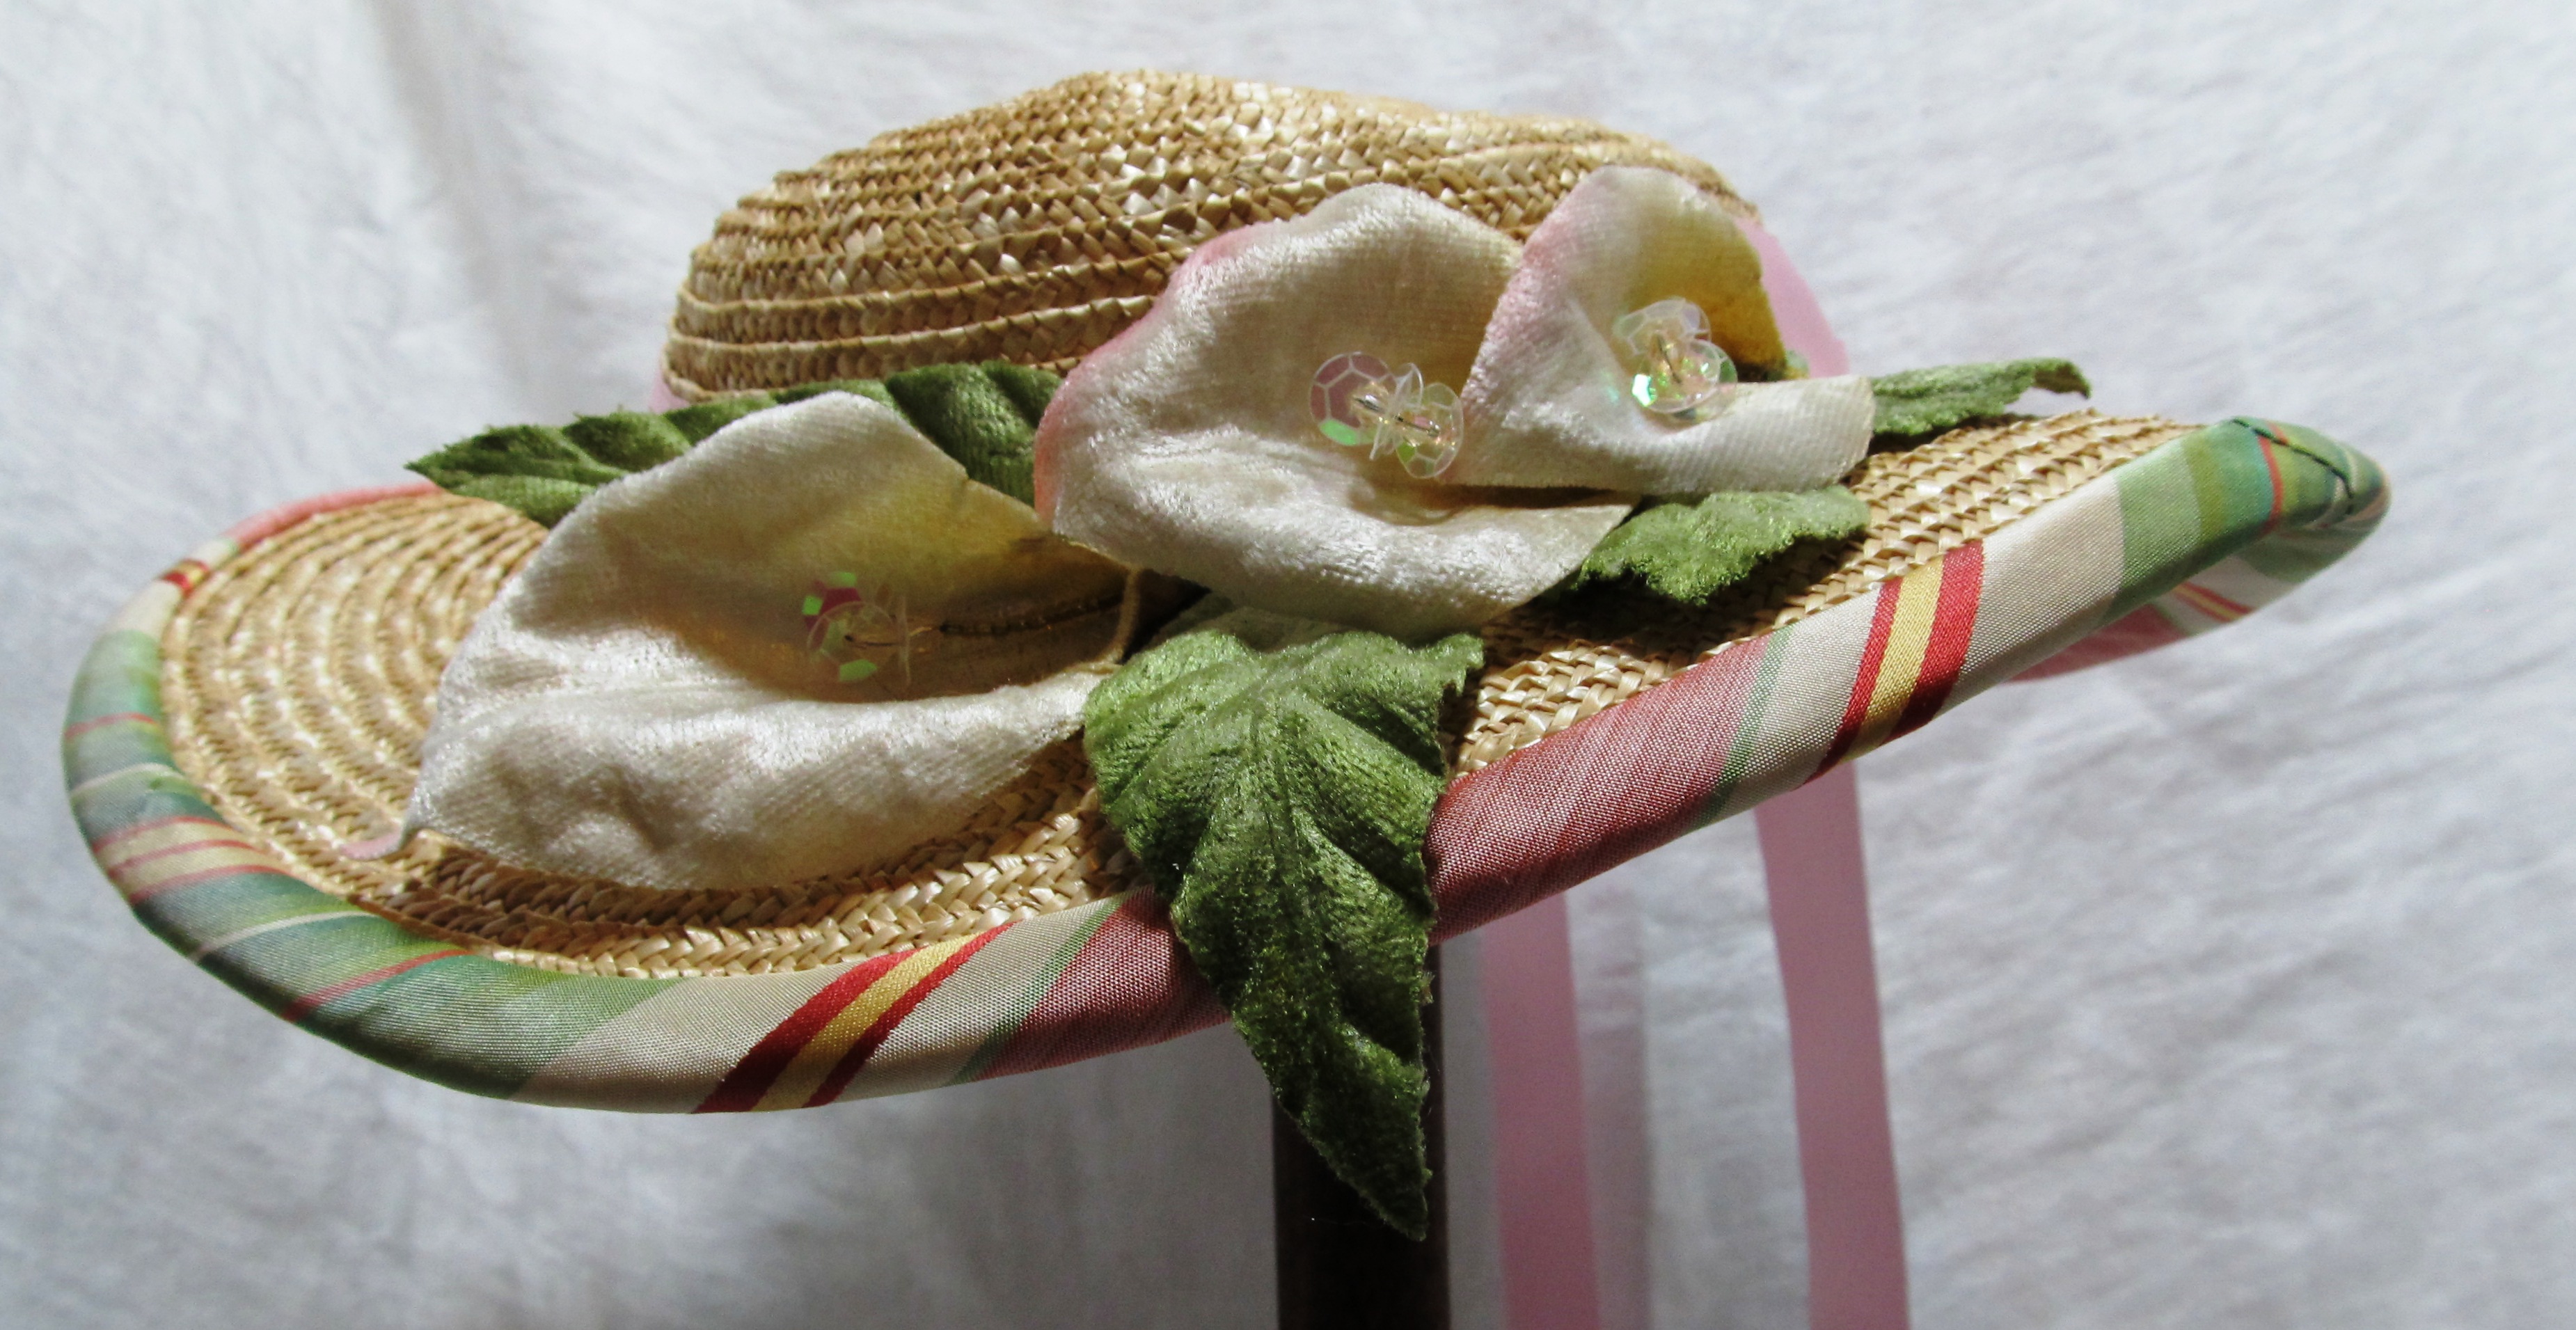
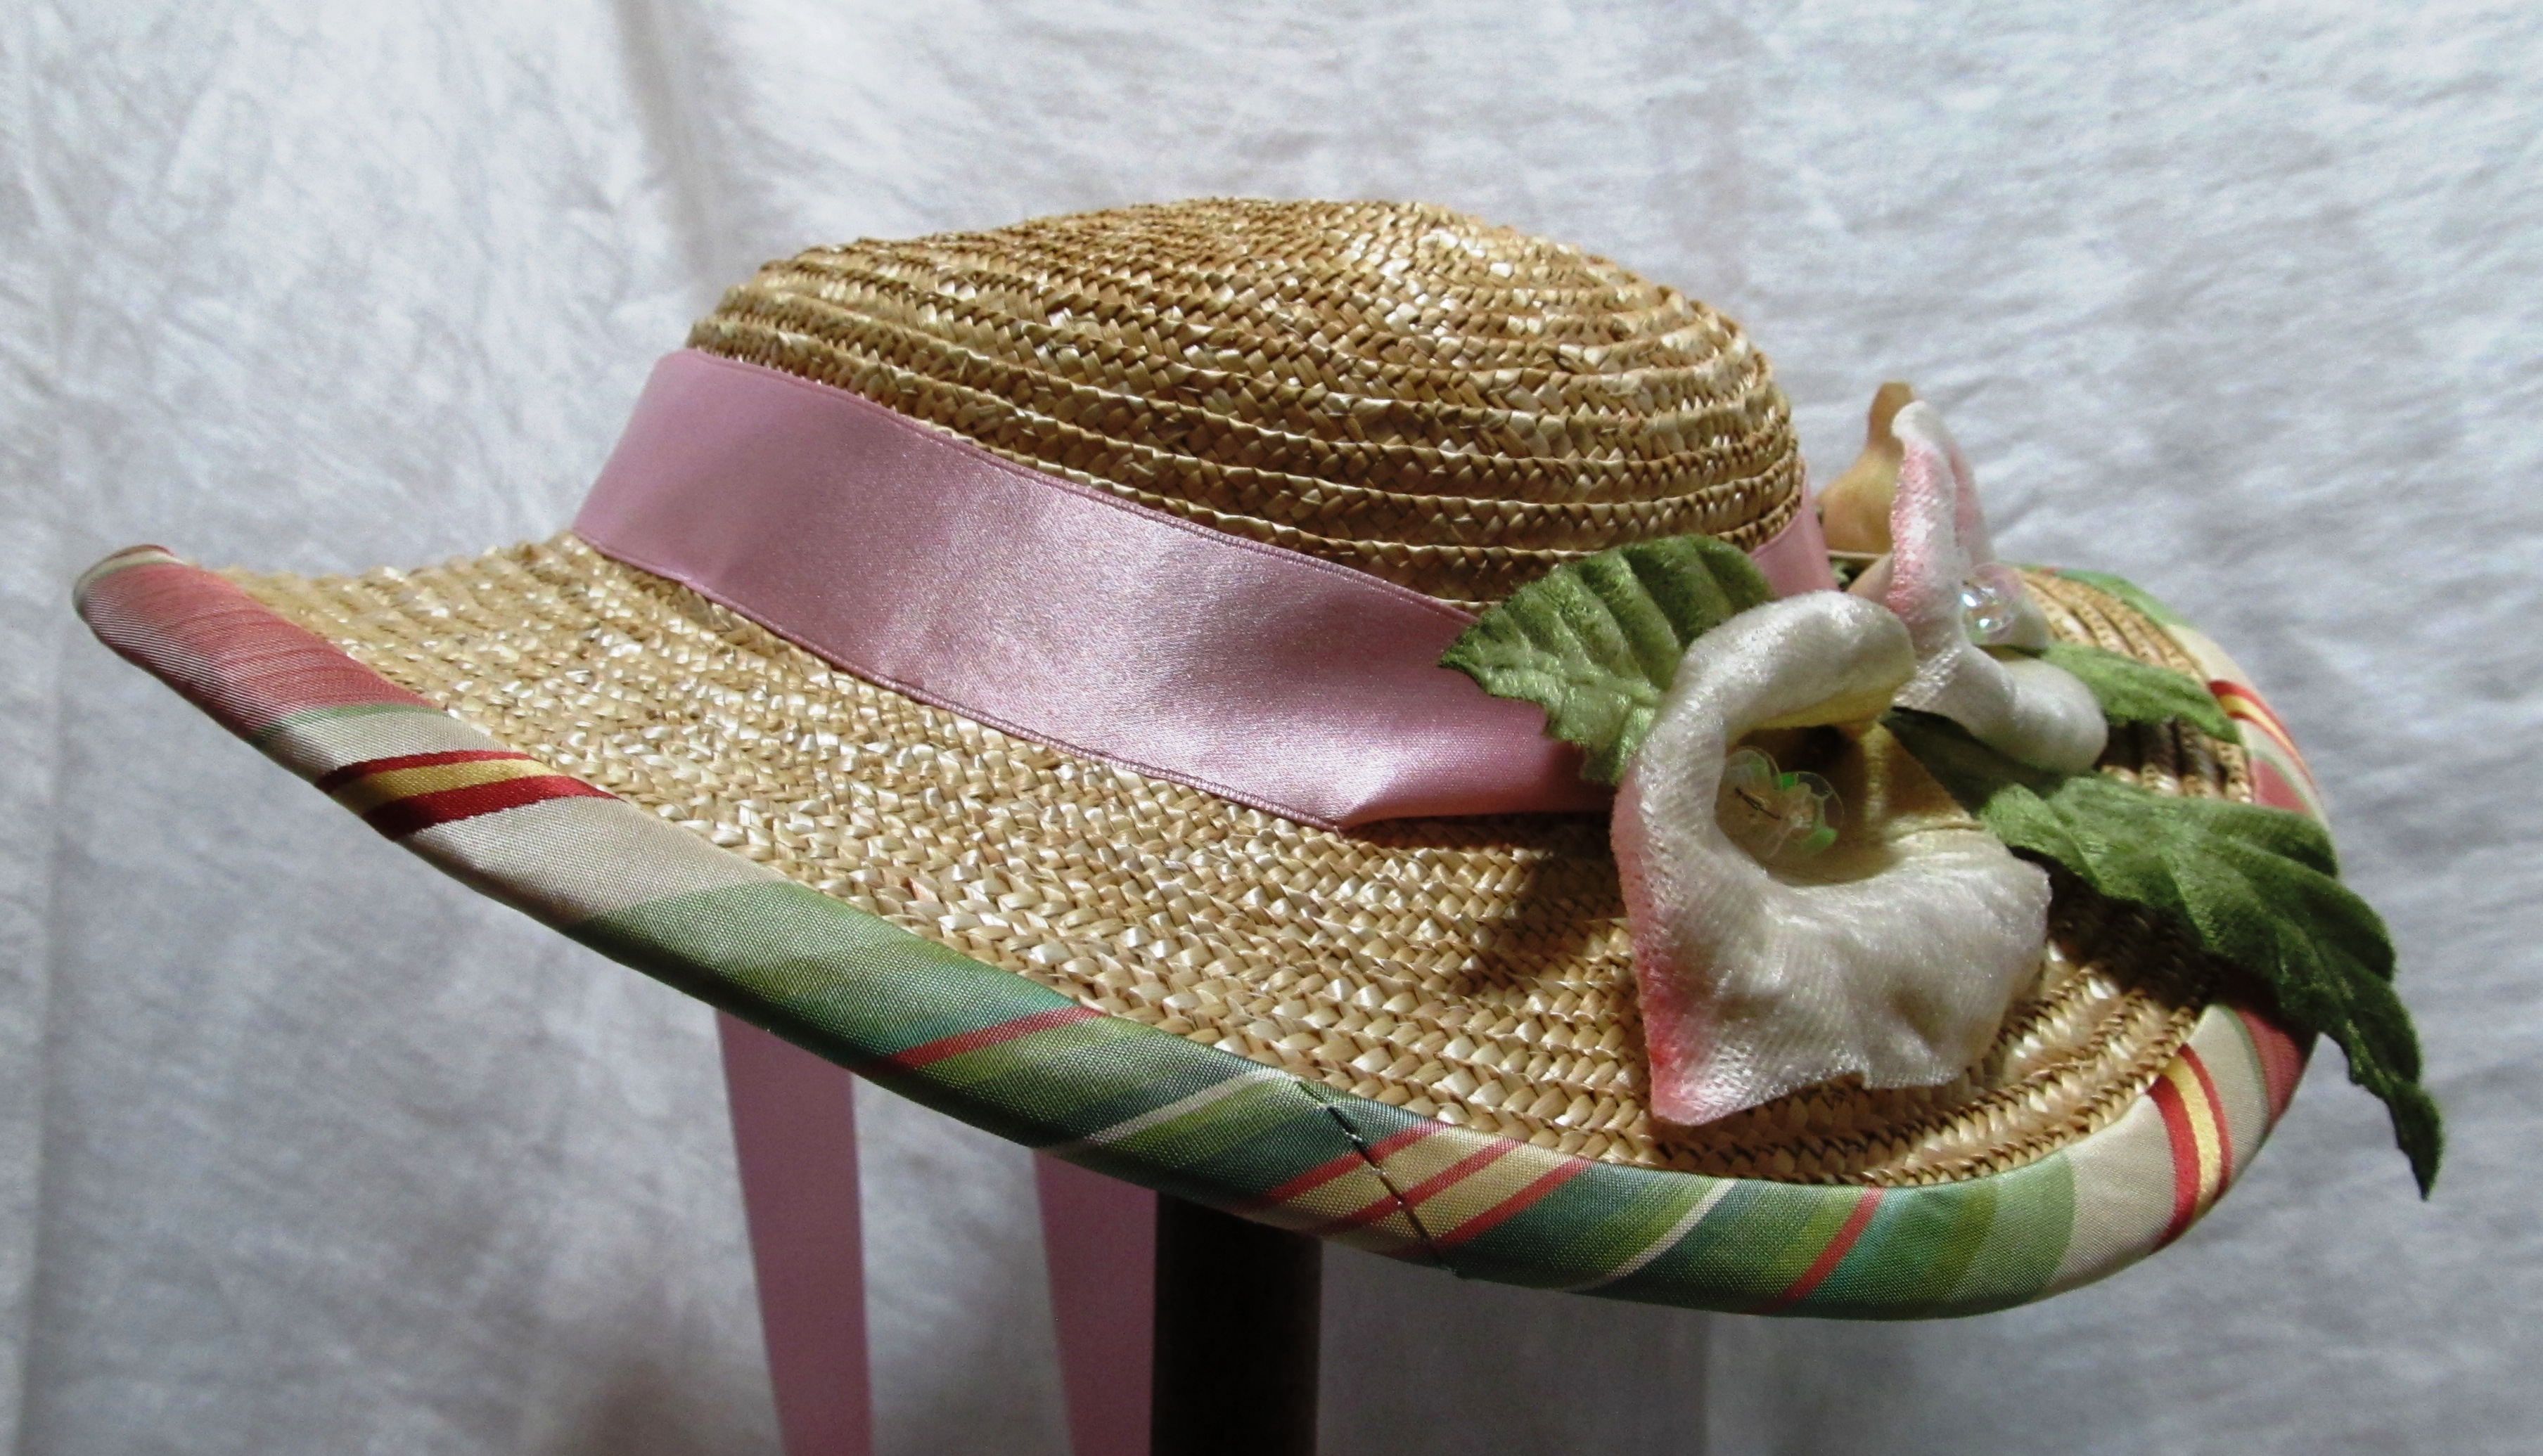
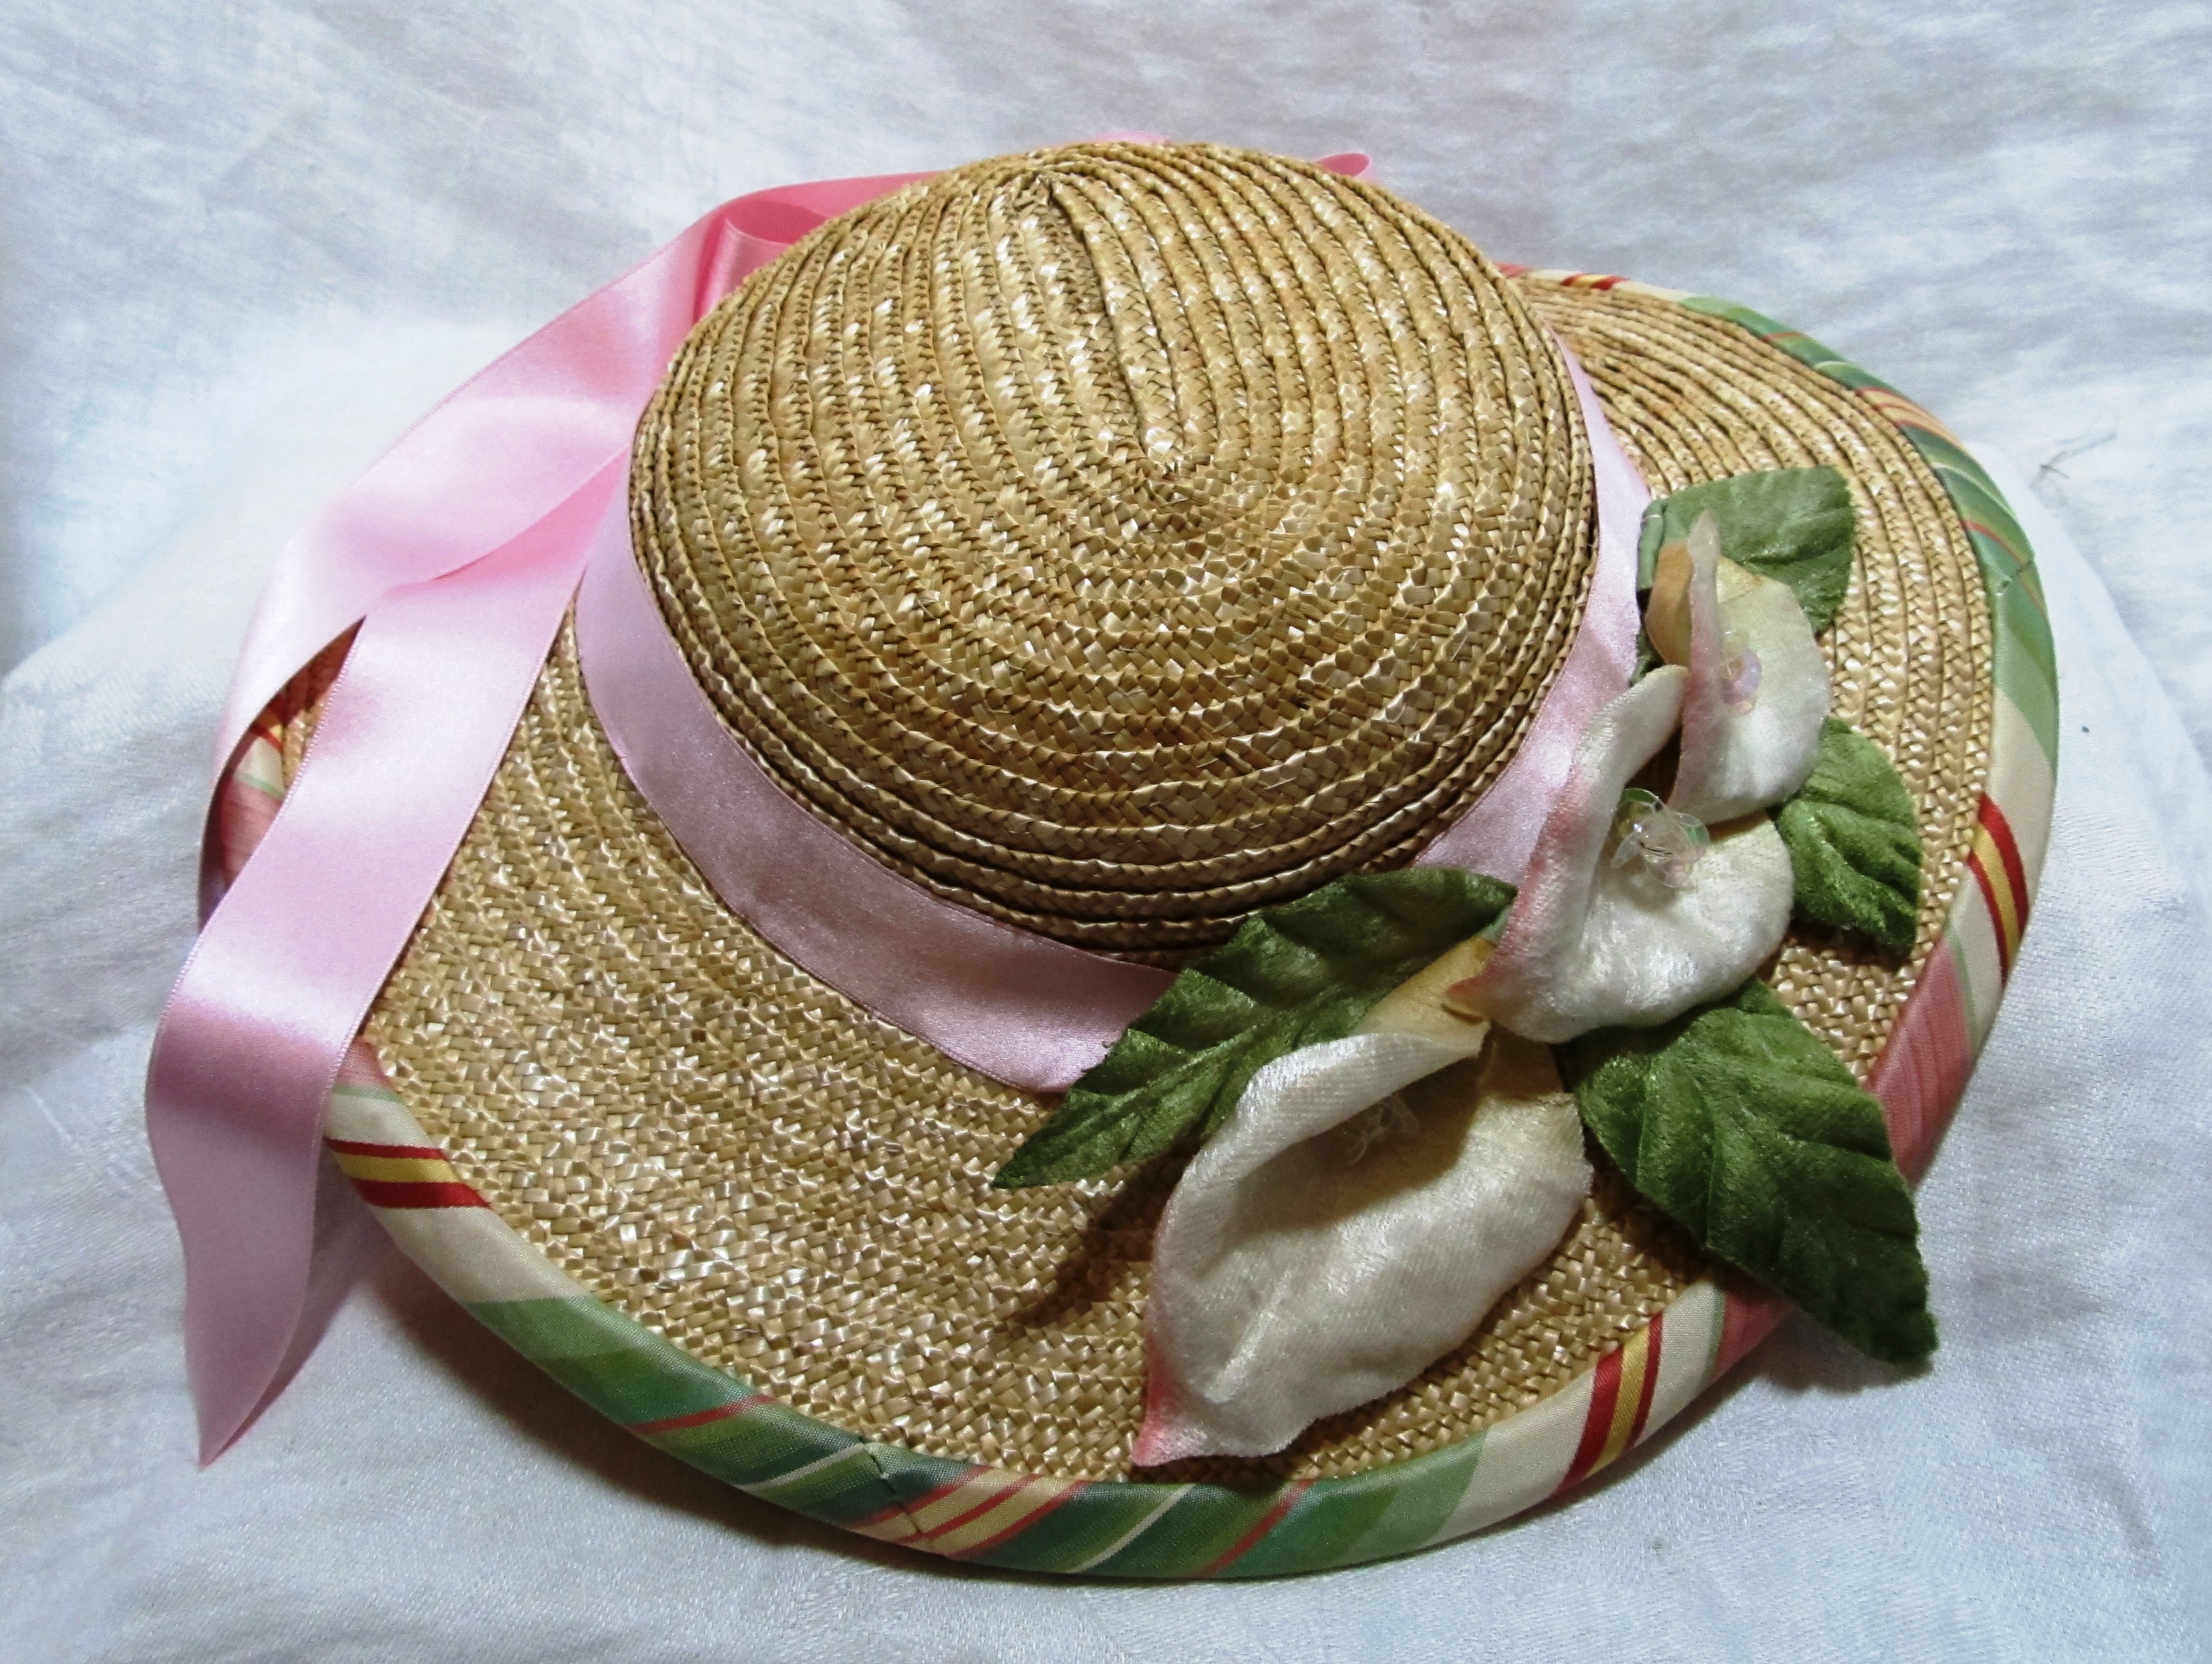
I’ve had a pink and green hat stuck in my head for weeks. I kept putting it off because I thought I was nuts to want to line the underside of the brim with a multi-color silk. Well, I couldn’t shake it. So, here it is.

It is a little sweet, a little spring and a whole lot of pretty.

IMG_7199The pink and green silk taffeta wraps around the brim edge and lines the underside. To be happy, I had to get the stripes as lined up as possible.

There are two pink silk ribbons. The soft, true pink  the crown with a triple bow in back. A second petal pink ribbon is underneith to help tie the hat behind your hair. IMG_7198

A trio of white velvet calla lilies are the it piece. The velvet has just a touch of pink and the centers are beaded. I set the in a row to emphasize the curve of the hat.

This hat is currently available on Etsy.

IMG_7184IMG_7185 IMG_7189 IMG_7190

Published in: on July 11, 2015 at 4:15 pm  Comments (3)  

Canandaigua Lady Excursion

IMG_7085Friday provided the perfect weather for our Canandaigua Lady Excursion. It was in the low 80s, the sky was a beautiful blue decorated with little fluffy clouds and there was just the right amount of breeze. (See a just right breeze IMG_7088 - Copy ) Given how wet it has been so far this summer, we were quite lucky.

IMG_7083We started our afternoon off with a little picnic in the park near the landing. I packed a small repast of Spanish cheeses (very tasty, no clue what their name are at the moment), bread, strawberries, tarts and lemon water. I was quite convinced that Jody, Trish and Max’s picnic basket was bottomless. These ladies put together an amazing repast. There were potatoes, cheeses, sausage, chicken, eggs, berries and tarts. Max made this period cheese recipe with mace and port in it. It was incredibly tasty. (I’m hoping she will share where that recipe is.) Jody did a tasty twist on lemonade with mint and lavender. The lavender really set it off. I will be stealing that idea.

Here we all are as we head over to the landing to board. (Devon is behind the camera.

IMG_7089

IMG_7094 IMG_7095

More photos:

Waiting to board.

Waiting to board.

Leaving dock. (Also another nice picnic spot.)

Leaving dock. (Also another nice picnic spot.)

Devon

Devon

Trish

Trish

Jody

Jody

The paddles

The paddles

Me

Me

Marsha. (I didn't get one of just Nick)

Marsha. (I didn’t get one of just Nick)

Looking towards Bristol.

Looking towards Bristol.

Max

Max

Ann and Devon

Ann and Devon

Devon

Devon

IMG_7179

I hope everyone had a lovely time. I look forward to having more get-togethers like this in the future. IMG_7177 - Copy

Published in: on July 11, 2015 at 10:52 am  Comments (1)  

State of the Summer Update:

~ I am roughly 3/7ths of the way to my summer financial goal. I have a colorful teapot helping me with keeping track of this. Thank you all for your support and requests.
~ I have a trio of pieces waiting for their trims to arrive.
~ I have a handful of requests on the board which I think will take me through July. Two are new to me.
~ I will start to taking August requests. I will also start taking winter millinery requests soon. (I know it is hard to think of the cold. But, with some big Christmas & winter events coming, requesting early is a good idea.)
~ I have greatly lapsed in writing. Blog posts have been mostly photos with little text. My goal of posting a crunchy article each week has flopped. I apologize for that.
~ Likewise, I have not written a single bit for the new patterns. I do hope to get you at least one of those this fall.
~ I do still plan to hold the FanU related event this summer. More on that soon.

~~~ Thank you all for you support and encouragement. I do enjoy making each of your bonnets and hats. It is just a little scary relying on handwork for income even for a few months. I do love hearing your stories when your millinery arrives and wen you get to wear it.

(Here is to hoping there aren’t too many phone typos.)

Published in: on July 9, 2015 at 9:57 am  Comments (1)